1⁄35Painting a Cilvilian Vehicle
6
Comments
Introduction
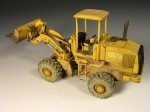
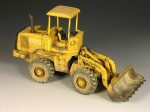
I received an email from a good friend (Jon Greenwood) asking me how to paint a yellow vehicle, for a diorama we is building. He was asking me about my Wheel Loader, the one which I painted a couple years ago for my ex-company Mig productions. I made a nice Step by step of this original vehicle, longer than the one that I show here, but it never was published in any magazine. Fortunately I still had the pictures, so...I can make a small article for Jon and others who may find it useful.Painting a yellow vehicle
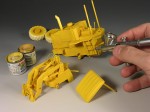
To paint a civilian vehicle is not too different than painting a tank. Except that the base colour is GLOSSY, we can apply the rest of techniques in the same way as a military vehicle. It also works with RED cranes or trucks, BLUE cars or vans, and many more...specially if the vehicle colour is FLAT, with a faded or very worn look. In this case a civilian wheel loader. I wanted it to be based in Iraq or any Middle east scenery, so I painted so that it would look used and abused with plenty of dried mud and dust I painted the base colour with HUMBROL ENAMELS, because this kind of paint is a lot stronger than acrylic when you need to cover a big surface with a light colour, like white or yellow. But you can use acrylics too. Try to paint the different components and panels with different shades of colours. This is very important!!:Weathering
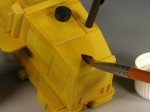
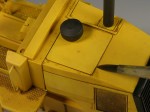
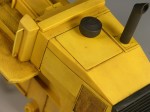
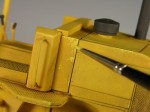
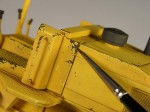
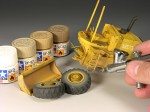
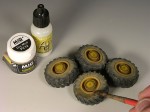
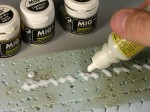
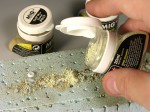
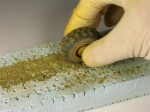
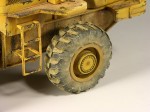
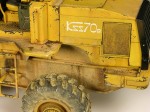
Start the weathering by adding some filters,starting with a kind of dark brown. Apply 2 or 3 coats of different shades of brown or even a kind of grey brown to avoid a over-exposure to the brown look. Now is time for washes. Try to be precise adding pin washes. Use a darker colour for it. Clean the excess of wash colour with a clean brush with a little turpentine, By doing this you create a shadow effect around the parts, which can be seen when comparing the two pictures Use a fine bush to paint the first chips, using an Acrylic light yellow. Then, add over the previous chips, another ones in dark brown colour using the same method to create a highlight to the chip, this will make them look more realistic. Paint the rubber wheels with a dark grey colour. Add a kind of "ring" around the hub using a light colour mix of different tamiya colours as you can see in the picture. Also, paint with the same colour some lower areas in your vehicle body. It will be a kind of pre-dust coat. With a little pigment and FLAT varnish (I use Vallejo model air), we can make some rain marks in a radial way, trying to make soft lines. To paint the special look of the surface of the tire, we will do something different. Put a little matt varnish in a soft surface, like rubber or poly foam mat. Now, add different colours of pigments over the previous coat of varnish. Before it is dry, handle the wheel and move it rolling over the foam impregnated with pigment and varnish: It will create a realistic and random effect just like in real tires. Use the same colours to make mud effects, applying directly the pigments or mixing it with varnish and splashing it over the hull. Finally you can add some drops of oil or fuel. And...this is the final look. Is a very easy process, and not too different than paint tanks. Of course, write your comments if you wish add more information or you have doubts. I hope you like it. See you in the next one!! Mig JimenezComments
Hi Mig,
Thanks for sharing that feature. The weathering on the dozer blade and especially the tires are awesome. On your use of VARNISH -- will any clear gloss / flat do (i.e. Dullcote, Future) do, or is there a specific one that you would recommend?
Cheers,
Tat
JAN 13, 2010 - 02:53 AM
That is a great job as always. Thanks for sharing that with us.
One question, this loader has many flat surface, why didn't you paint highlight to make it more vivid?
JAN 13, 2010 - 06:33 AM
Hi Mig,
I didn't know you sold your company. Now I gust you can build just what you like. It nice to see you back in the community doing your personal project. Thanks for sharing it with us. If by any chance you can show us how to build a nice tree with it leaves in a future post it would very appreciated by me who never made one.
see you around
olivier
JAN 13, 2010 - 02:03 PM
it is good to see someone with the knowledge of all the uses of the products that carry your name show us how it is done. Thank you.
JAN 15, 2010 - 05:44 AM
Hi Mig,
I would like to thank you for sharing with us the great info on your technique used to model this front loader. In the article you mentioned you had taken a lot more photos when you first did this article. Do you have those extra photo someplace you can share with us? I'm interested in seeing more photos of how you did the tires on this model. I'm about to model a stryker and will be doing tires myself so I'm very interested in weathering tires.
Thanks,
Dave
APR 20, 2010 - 04:08 PM
Copyright ©2021 by Mig Jimenez . Images and/or videos also by copyright holder unless otherwise noted. The views and opinions expressed herein are solely the views and opinions of the authors and/or contributors to this Web site and do not necessarily represent the views and/or opinions of Armorama, KitMaker Network, or Silver Star Enterrpises. All rights reserved. Originally published on: 2010-01-13 00:00:00. Unique Reads: 32311


