CMOT
 Editor-in-Chief
England - South West, United Kingdom
Joined: May 14, 2006
KitMaker: 10,954 posts
Armorama: 8,571 posts
Posted: Thursday, July 24, 2008 - 02:44 AM UTC
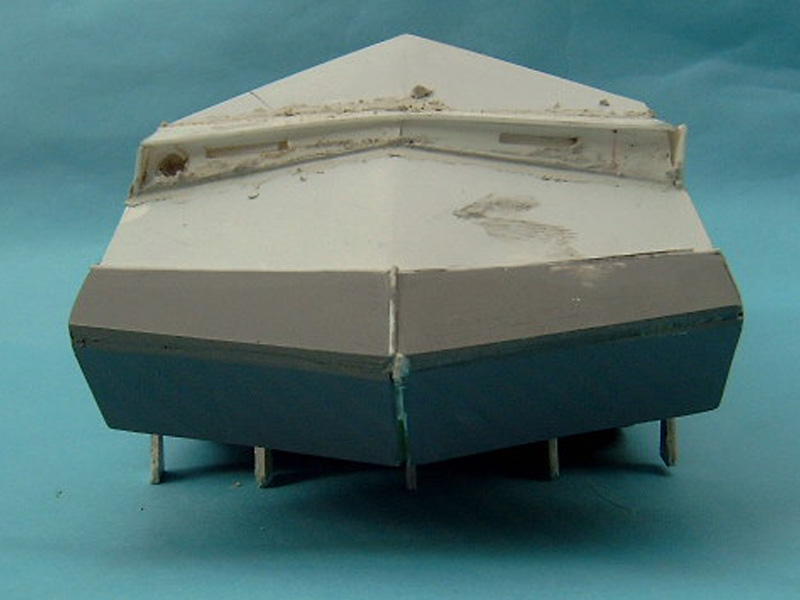
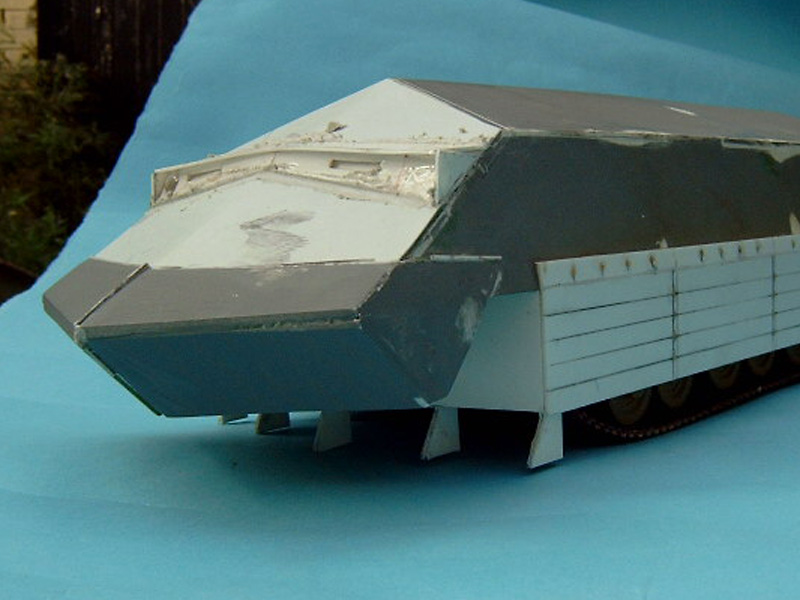
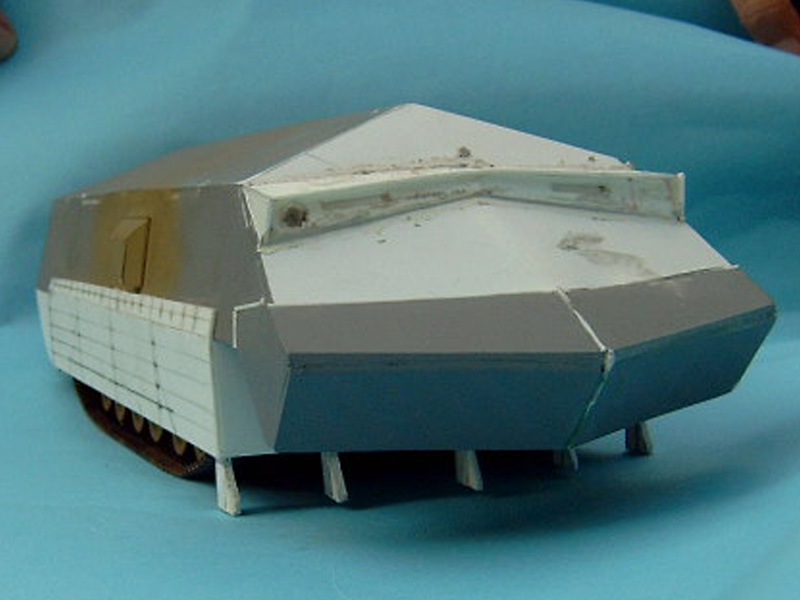
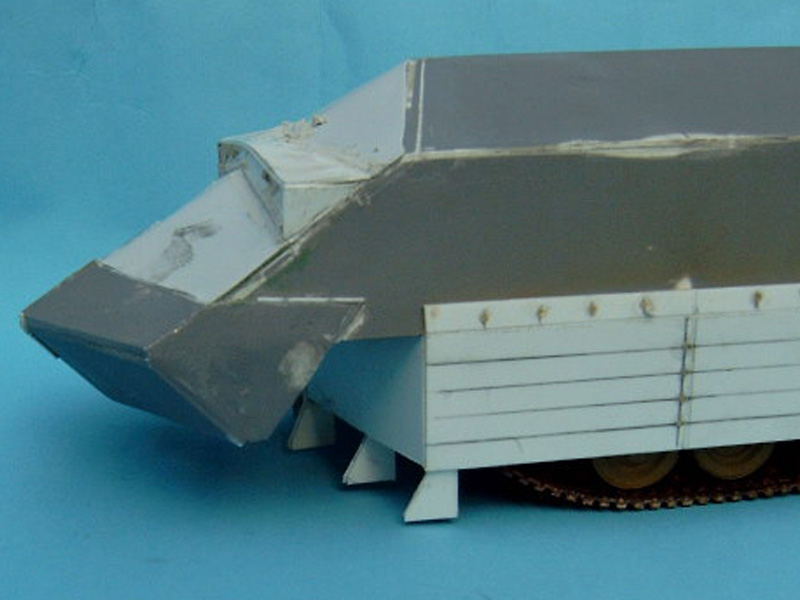
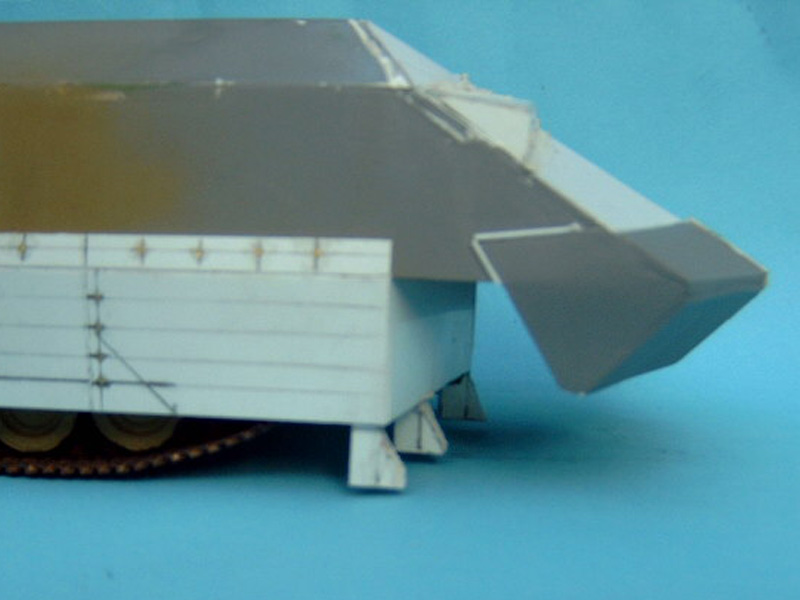
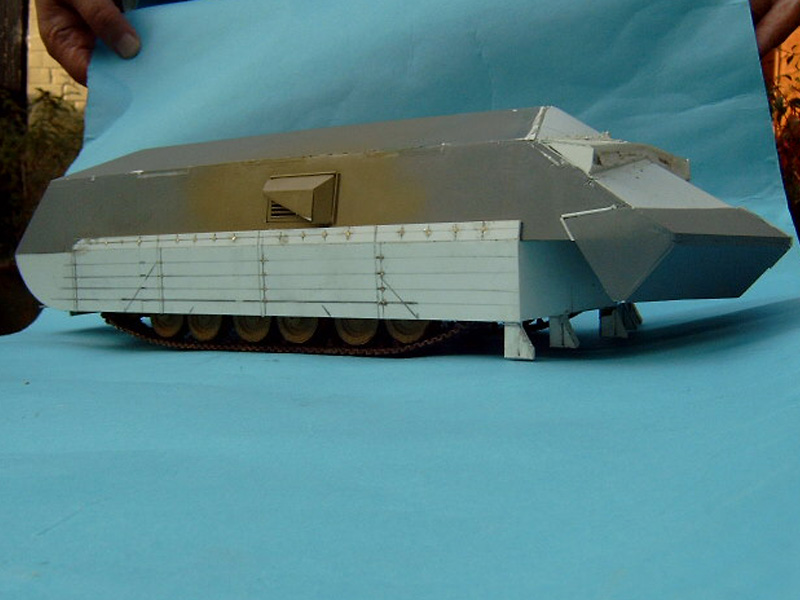
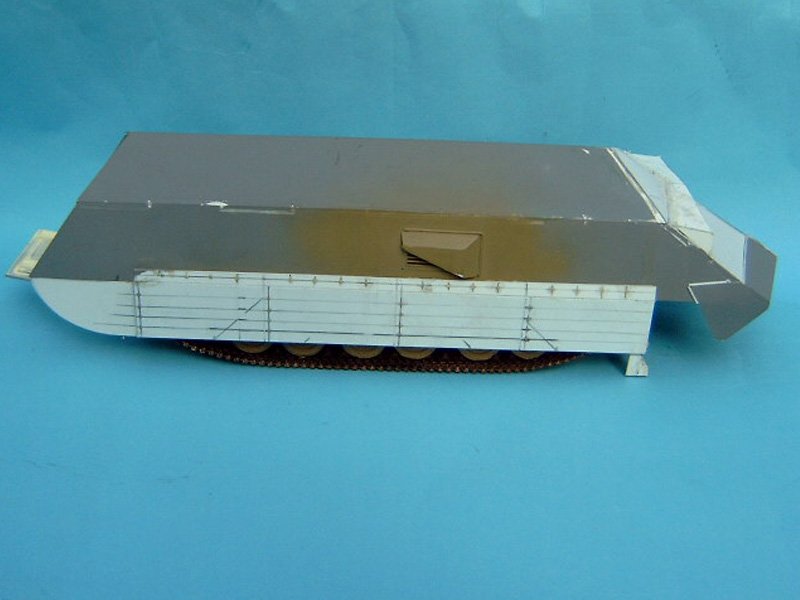
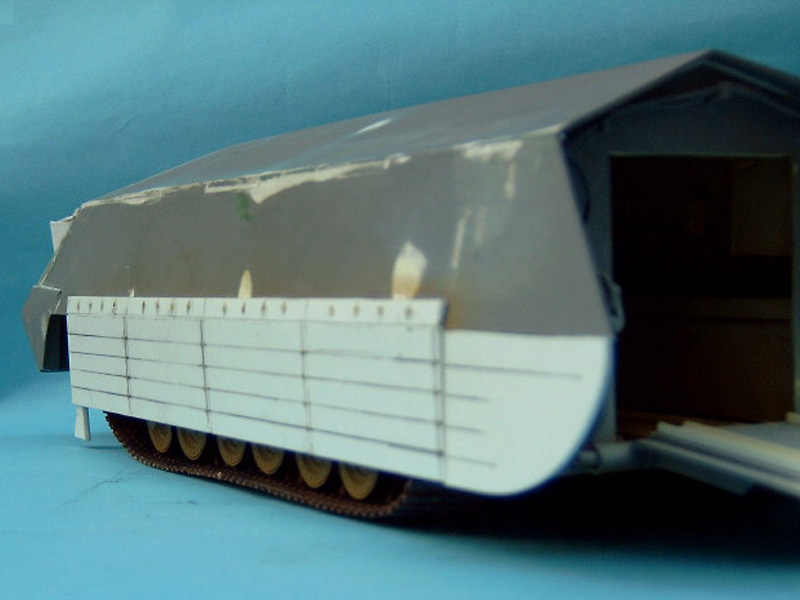
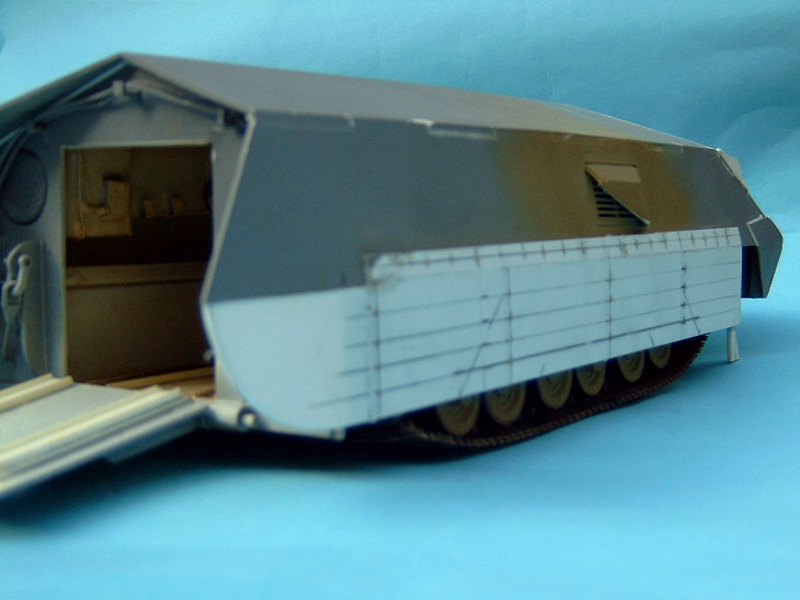
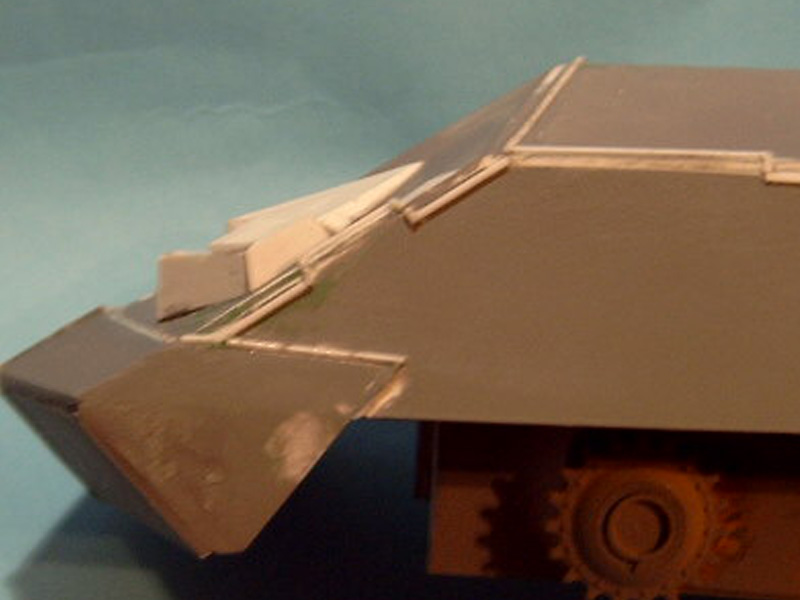
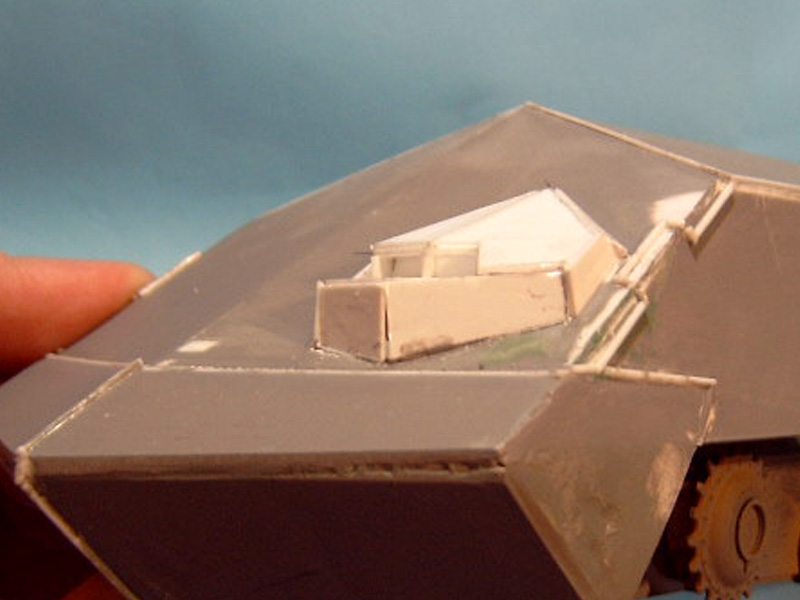
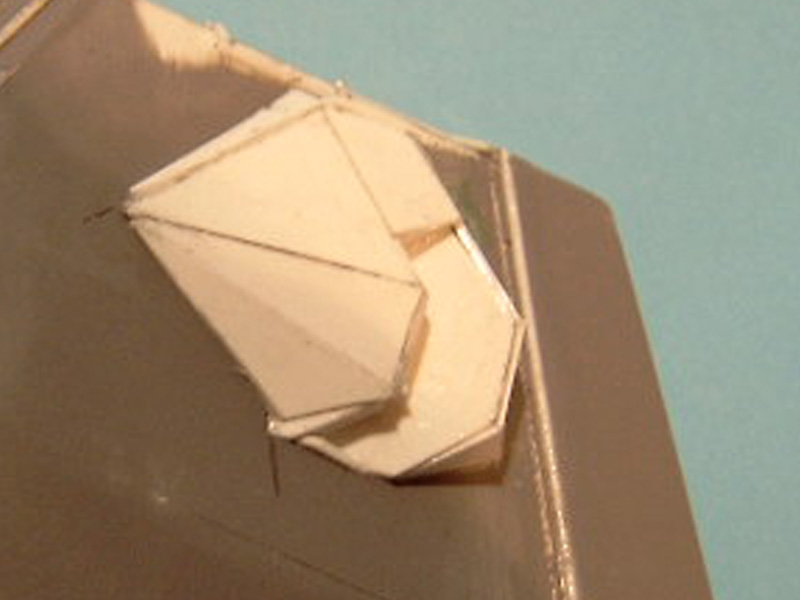
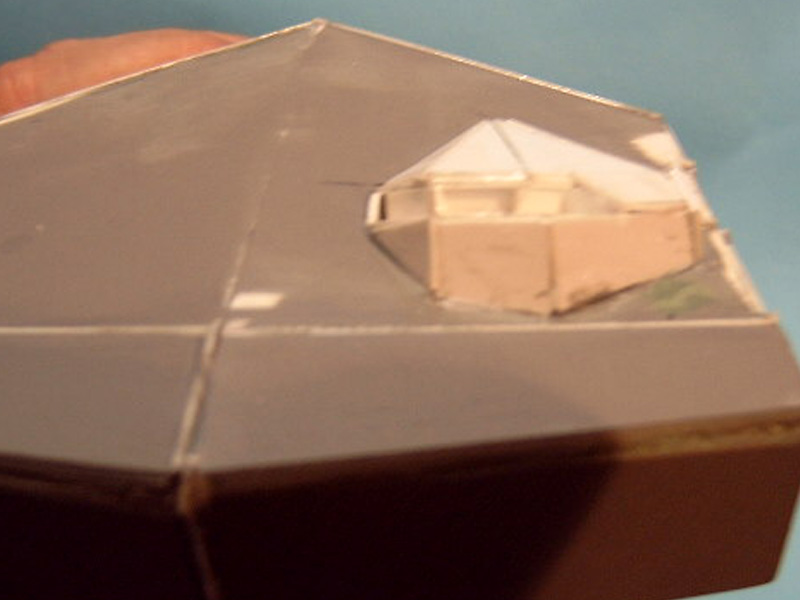
A short update, I've added the drivers vision blocks which was a complete pig regards sorting out all those angles, however I am reasonably happy with the general look and once filled and sanded it should look ok. some of these pictures show the weld beads which are still waiting to be textured and shaped.
Any suggestions on any aspects of this will be gladly recieved as I have never attempted anything quite as involved as this and I am slowly overcoming problems that I had never even considered before, Previously all my builds have been OOB with minimum scratched additions, where as this is almost a complete build.
I hope you are finding this helpfull in some small way as I stumble from one problem to the next and look for solutions to problems of my own making.
Indiana, United States
Joined: May 09, 2008
KitMaker: 1,019 posts
Armorama: 657 posts
Posted: Thursday, July 24, 2008 - 03:31 AM UTC
Question: Would the exhaust guarding on the side potentially snag if the vehicle punctured a wall and entered the structure past it and then had to back out? Or is the assumption that the opening would end up large enough that there would be ample clearance to allow unencumbered withdrawl?
I do like how it's coming along and think down the road I may have to give this one a try myself. Of course by then you folks will have done all the hard stuff...
BTW: Ever seen this one?
http://strangevehicles.greyfalcon.us/RAUMPANZER%20TIGER.htmIf it weren't for law enforcement and physics I would be unstoppable!
CMOT
 Editor-in-Chief
England - South West, United Kingdom
Joined: May 14, 2006
KitMaker: 10,954 posts
Armorama: 8,571 posts
Posted: Thursday, July 24, 2008 - 03:46 AM UTC
Hello Jim, yes I have checked that site as I did a good search for information before I started this build, due to the route and idea behind mine the sites were of limited help but it always pays to broaden your outlook.
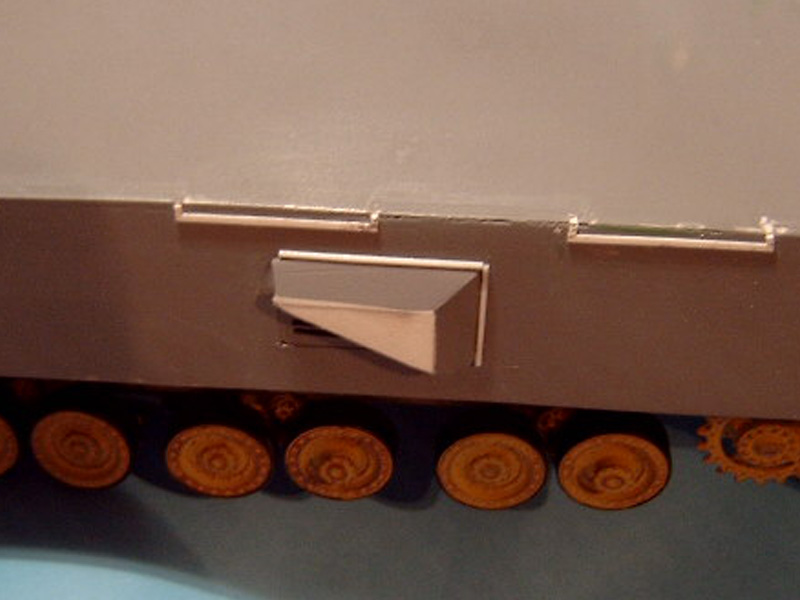
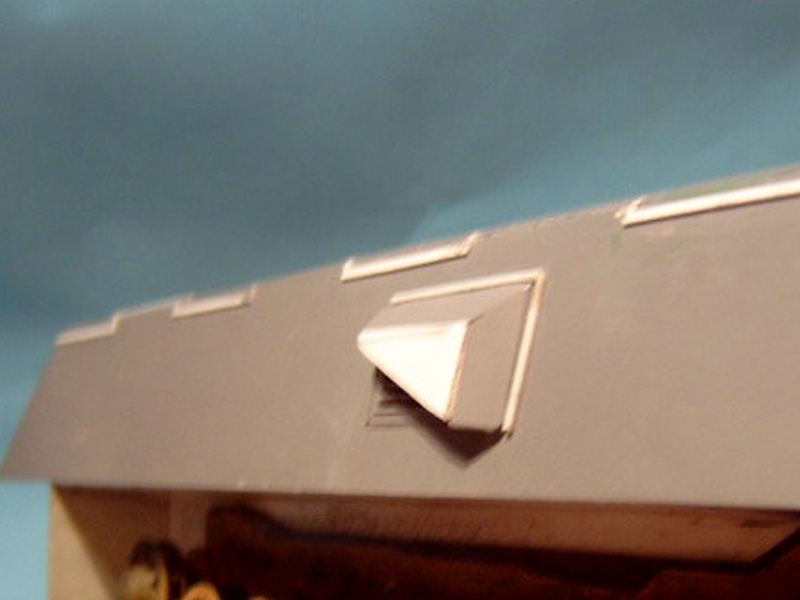
Regarding the exhaust cover you are correct it is a risk and is in part why I have a mesh cover on the inside and not the outside, I thought that even with the guard the exhaust vent was still going to take some hits from falling rubble, however if you look at buildings where a vehicle has gone through a wall the hole is always bigger that the object that made it and worse case scenario it would be ripped off the vehicle.
Virginia, United States
Joined: June 20, 2007
KitMaker: 510 posts
Armorama: 469 posts
Posted: Thursday, July 24, 2008 - 11:09 AM UTC
Great looking model you got there! You are doing some amazing work on that thing. I too share the concern with the exhaust cover however. I think if you fully enclosed it save the bottom with a mesh cover that would solve the issue.
Just my two cents!
-Mike
Workbench:
251/1 Ausf.C. (AFV Club)
M16 Motor Gun Carriage (Tamiya)
M4A3 (76mm) (Dragon)
Firefly Ic Hybrid Hull (Orange Box)
CMOT
 Editor-in-Chief
England - South West, United Kingdom
Joined: May 14, 2006
KitMaker: 10,954 posts
Armorama: 8,571 posts
Posted: Thursday, July 24, 2008 - 11:35 AM UTC
I had considered venting the engine through the sponsons above the track, however I figured that there was a high risk of the outlet being blocked. Your suggestion has merit and will consider it.
California, United States
Joined: October 21, 2007
KitMaker: 3,684 posts
Armorama: 2,938 posts
Posted: Thursday, July 24, 2008 - 02:34 PM UTC
Looking great, Darren. I too had a concern with the exhaust cover in the beginning, but not anymore. The nose appears slightly wider, and even though lower will punch a sufficient hole. Also, as you stated, the breached wall will have a larger opening then the vehicle, especially by the time that section goes through.
My only concern is the angled part on the bottom of the vent cover, that makes for a very weak area and will quickly flatten or get ripped off. IMO angled upward would be stronger, less surface area with the same amount of weld.
Looking forward to more

CMOT
 Editor-in-Chief
England - South West, United Kingdom
Joined: May 14, 2006
KitMaker: 10,954 posts
Armorama: 8,571 posts
Posted: Thursday, July 24, 2008 - 07:18 PM UTC
James don't start getting technical with me (head spinning) I will take these comments on board and look at the possibilities, my problem is I like certain angles, I have dropped the integrated dozer blade which I really liked due to the finished line it gave the vehicle (AFV not a car must remember) and I am now working on a hydraulically deployed blade. I have thought of a way to angle the guard up and still make it look right, more to come.
California, United States
Joined: October 21, 2007
KitMaker: 3,684 posts
Armorama: 2,938 posts
Posted: Saturday, August 02, 2008 - 05:26 PM UTC

C'mon Darren, I'm in withdrawal here

Colorado, United States
Joined: December 25, 2004
KitMaker: 3,770 posts
Armorama: 2,263 posts
Posted: Saturday, August 02, 2008 - 06:05 PM UTC
Same here Darren, what gives??? C'mon, show us something.
Mike

CMOT
 Editor-in-Chief
England - South West, United Kingdom
Joined: May 14, 2006
KitMaker: 10,954 posts
Armorama: 8,571 posts
Posted: Sunday, August 03, 2008 - 03:06 AM UTC
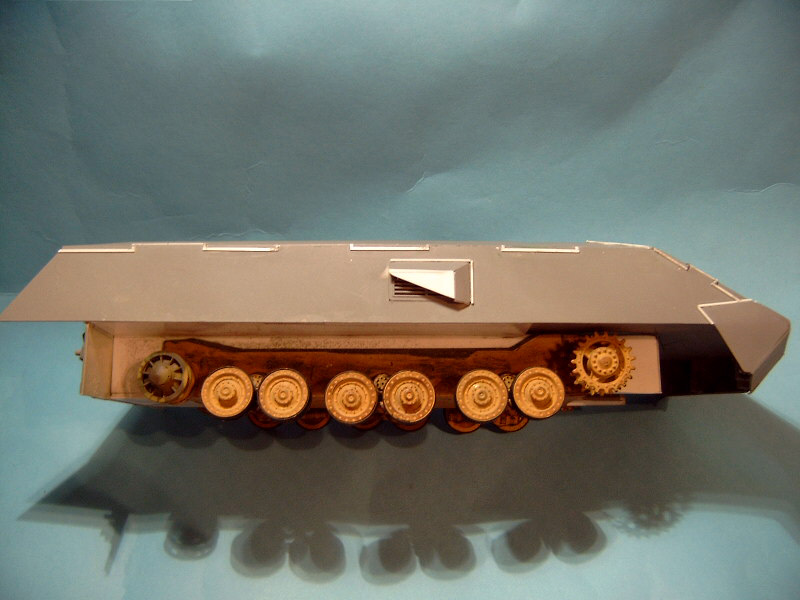
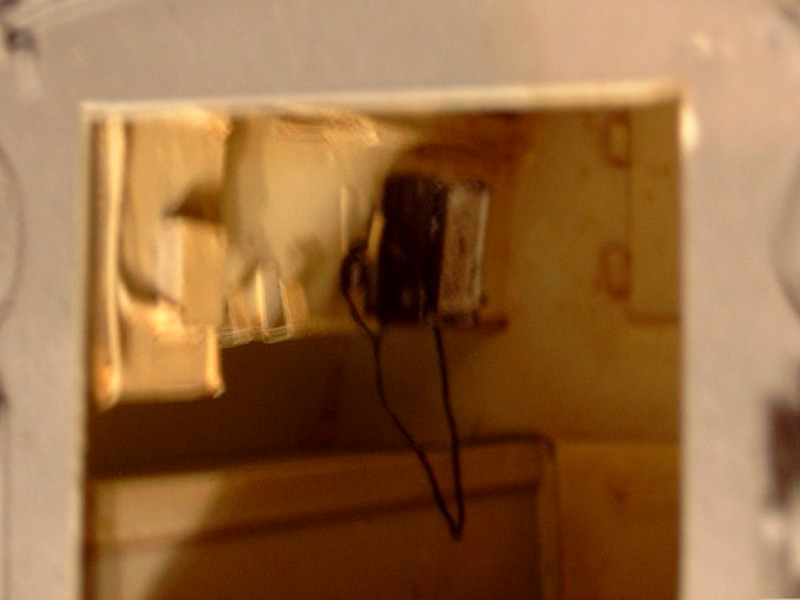
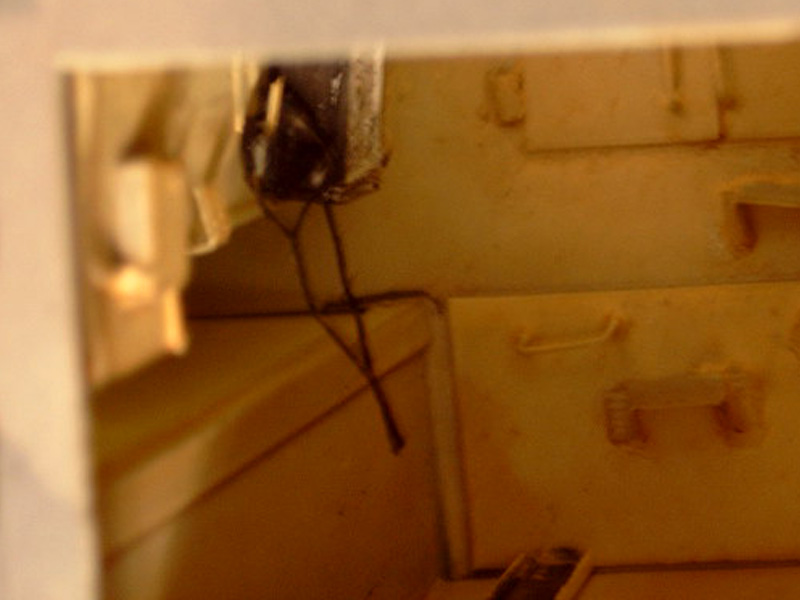
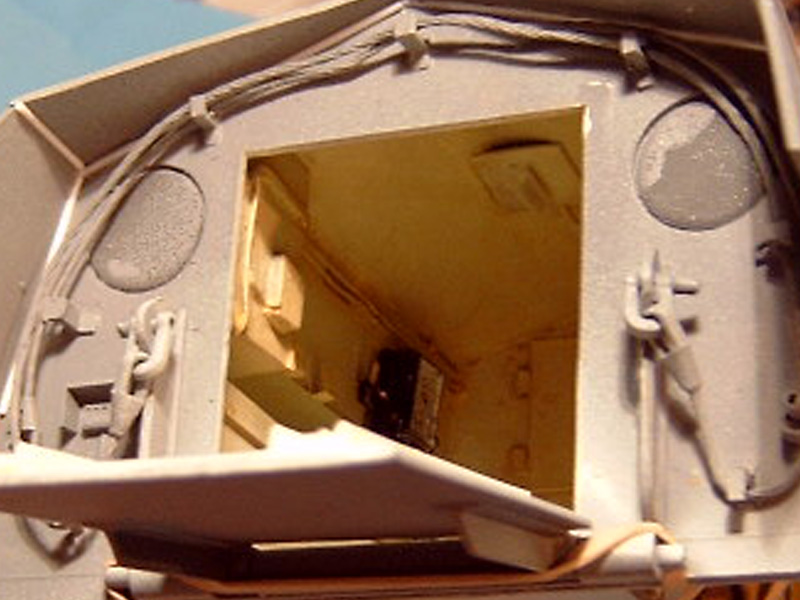
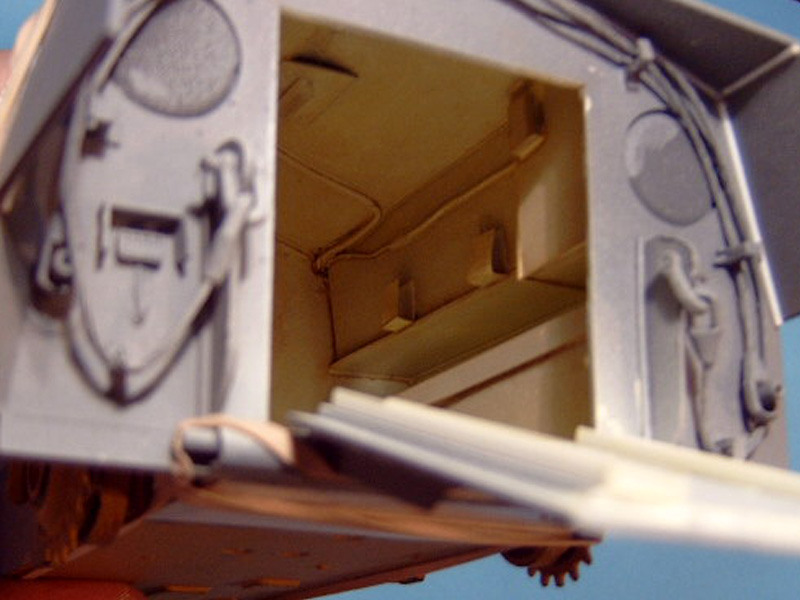
Well I have been on holiday but family took most of that time which I cannot complain about. The upper and lower hull are now joined, the interior is now finished except for the addition of loose fittings. The front drivers area has been removed and a new viewing device is taking shape in my head, all the comments about the side exhaust vent has started to sink in and an altered design is in place (pics of this next weekend as I want to finish it before I show it). All in all this is taking a lot longer than i thought it would, but I am getting there. Here are a few pics of the interior, it looks better in the flesh.
Illinois, United States
Joined: November 25, 2005
KitMaker: 131 posts
Armorama: 88 posts
Posted: Sunday, August 03, 2008 - 06:38 AM UTC
Wow...............Really nice work! You might have sparked the influence to start my own Rammtiger.....Thank you sooo much.......
Indiana, United States
Joined: May 09, 2008
KitMaker: 1,019 posts
Armorama: 657 posts
Posted: Sunday, August 03, 2008 - 09:11 AM UTC
If it weren't for law enforcement and physics I would be unstoppable!
CMOT
 Editor-in-Chief
England - South West, United Kingdom
Joined: May 14, 2006
KitMaker: 10,954 posts
Armorama: 8,571 posts
Posted: Sunday, August 03, 2008 - 10:04 AM UTC
Alex please bare in mind that this is just my view of what a production version of a Ramm Tiger could have looked like, apart from retaining the basic shape in order to comply with the campaign rules it shares very little with the original design. I would suggest you take a look at Moose421’s and TacFireGuru’s builds as they are a lot closer to the original while still utilising some improvements, both of these builds offer food for thought as regards what you can and cannot get away with.
Lastly thanks for the comments on my build so far.
Alabama, United States
Joined: April 19, 2008
KitMaker: 46 posts
Armorama: 36 posts
Posted: Sunday, August 03, 2008 - 10:51 AM UTC
Your rammtiger is looking great. You have taken it at least one step further than I did. Love the interior work and your thought process.
Keep up the great work.
Kim
Illinois, United States
Joined: November 25, 2005
KitMaker: 131 posts
Armorama: 88 posts
Posted: Sunday, August 03, 2008 - 03:08 PM UTC
Quoted Text
Alex please bare in mind that this is just my view of what a production version of a Ramm Tiger could have looked like, apart from retaining the basic shape in order to comply with the campaign rules it shares very little with the original design. I would suggest you take a look at Moose421’s and TacFireGuru’s builds as they are a lot closer to the original while still utilising some improvements, both of these builds offer food for thought as regards what you can and cannot get away with.
See I have tried to build the Rammtiger but both attempts have ended up in failure. But watching you build yours has been very influential in the decision to build my own take on the design and I thank you very much for sparking this fire once again.....
Cheers


CMOT
 Editor-in-Chief
England - South West, United Kingdom
Joined: May 14, 2006
KitMaker: 10,954 posts
Armorama: 8,571 posts
Posted: Monday, August 04, 2008 - 04:08 AM UTC
Alex I am pleased this build has encouraged you to start your build again, if you contact Dub Dubs he may be able to get the plans (read TacFireGuru’s ref resizing the plans) to you, and depending on how long it takes you to build your depiction enter it here for this mini campaign.
This is the very first time I have tried to scratch build anything to this degree, all I have used from the donor kit is the very bottom of the tub, sponson side walls, a grill cover and the wheel assemblies. I have made so many mistakes it isn’t funny, however after the CMOT Mk1 was destroyed the Mk2 has been far easier to build as regards the general shape, all my previous scratch work was minor pieces here and there to add to the overall effect.
I have received a lot of help from the forums here on Armorama. Henk and I spent a lot of time discussing solutions to possible problems my rendition may have regarding size, You may also have noticed new directions posts in this thread have sent me, such as adding this and altering that. I also need to take this moment to thank Malcolm Ireson for giving me the radio and resin tracks for this beast. The biggest problem I have encountered and will most likely never be happy with is the driver and radio operators viewing device.
Most important piece of advice I can give you is never ever let a setback discourage you.
CMOT
 Editor-in-Chief
England - South West, United Kingdom
Joined: May 14, 2006
KitMaker: 10,954 posts
Armorama: 8,571 posts
Posted: Tuesday, August 05, 2008 - 04:34 AM UTC
California, United States
Joined: October 21, 2007
KitMaker: 3,684 posts
Armorama: 2,938 posts
Posted: Tuesday, August 05, 2008 - 11:49 AM UTC
Looks great, my friend, but my goodness we need to get you a better camera

Colorado, United States
Joined: December 25, 2004
KitMaker: 3,770 posts
Armorama: 2,263 posts
Posted: Tuesday, August 05, 2008 - 12:08 PM UTC
Quoted Text
Looks great, my friend, but my goodness we need to get you a better camera 
Okay, I'm with James on that!! Big time.....
All the humor aside, Darren, it really is looking good. Glad you "modified" the exhaust ports...looks slicker'n goose poo now.
I
really like what you did with the plastic strips on the sides/front to "convey" the weld seams. I may have to rethink my build (


) in that sense and do the same. That my friend is a good idea! "Attention to detail....." (hope you don't mind

)
Keep it up and you've got a feature here....it has all the elements - scratch build, kit parts, detail, heavy on
some serious thought, unique....shoot. Can't wait to see some paint.
Mike


CMOT
 Editor-in-Chief
England - South West, United Kingdom
Joined: May 14, 2006
KitMaker: 10,954 posts
Armorama: 8,571 posts
Posted: Tuesday, August 05, 2008 - 04:37 PM UTC
My camera is over 8 years old and was a very good one when I bought it, I’ll admit it is showing its age but then so am I, if you are offering thank you all donations gratefully received, otherwise like me you will have to live with it. Part of the problem was I was trying to give you an update of what was happening in a hurry as I only had 3 hours to get me and my daughter fed and watered, do some cleaning around the house so that my wife didn’t beat me when she got home, and get you impatient buggers an update.
The painting stage is still a long way away, I have to mount the deployable dozer blade, fit the skirts and there mounting plates, and sort out the damn viewing device (I swear I will never be happy with that portion of this build). If I am lucky painting the exterior is about 2 to 3 weeks away so this should be finished in plenty of time.
While we are having a “lets have a dig a CMOT day” when are you going to update your build Mike? Also where are the other RammTiger builds, I believe we only have 3 started 1 of which is finished. Come on boys and girls the last thing you want is to be beaten by me at building a model, I take for ever and then start it again just to make sure. My turn to get the big stick out LOL.
CMOT
 Editor-in-Chief
England - South West, United Kingdom
Joined: May 14, 2006
KitMaker: 10,954 posts
Armorama: 8,571 posts
Posted: Wednesday, August 06, 2008 - 05:01 AM UTC
Mike by all means use this approach as at the end of the day part of the reason we are here is to learn new methods and find alternate routes.
Alabama, United States
Joined: April 19, 2008
KitMaker: 46 posts
Armorama: 36 posts
Posted: Friday, August 08, 2008 - 12:56 PM UTC
Your build it looking great. Sorry adjusting to a new work schedule and planning for a baby has left me from viewing as much as I used to. I would agree with you and Mike. A simple build turned complex by the builder. All of us has their own view as to what this monster would look like. It has been enoyable to hear from others reasoning on this vehicle. Your build is beautiful.
Keep it up!

Noord-Brabant, Netherlands
Joined: March 24, 2008
KitMaker: 1,247 posts
Armorama: 913 posts
Posted: Sunday, August 10, 2008 - 01:47 AM UTC
A fantastic piece of scratschbuilding. Only 1 tip that I had in mind; maybe you can place smaller tracks (PZ III, IV) or somthing like these under the tip of the vehicle. So that it can drive over higher obstacles too.
Lars
CMOT
 Editor-in-Chief
England - South West, United Kingdom
Joined: May 14, 2006
KitMaker: 10,954 posts
Armorama: 8,571 posts
Posted: Sunday, August 10, 2008 - 08:48 AM UTC
Thank you for the comments guys, and Lars plans are afoot and laid out for just such a problem.
CMOT
 Editor-in-Chief
England - South West, United Kingdom
Joined: May 14, 2006
KitMaker: 10,954 posts
Armorama: 8,571 posts
Posted: Tuesday, September 02, 2008 - 06:59 AM UTC


