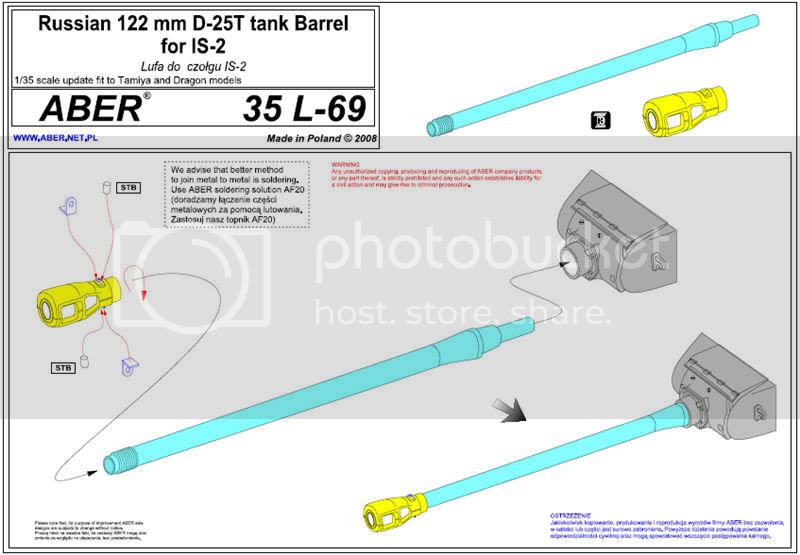
Scott Espin reviews the 1/35 Aber IS-2 D-25T 122mm turned aluminum and cast brass replacement barrel set designed for either the DML or Tamiya IS-2.
Link to Item
If you have comments or questions please post them here.
Thanks!
Яusso-Soviэt Forum
Russian or Soviet vehicles/armor modeling forum.
Hosted by Darren Baker, Jacques Duquette
REVIEW
Aber IS-2 122mm D-25T Barrelwbill76
Texas, United States
Joined: May 02, 2006
KitMaker: 5,425 posts
Armorama: 4,659 posts
Joined: May 02, 2006
KitMaker: 5,425 posts
Armorama: 4,659 posts
Posted: Saturday, August 30, 2008 - 02:36 PM UTC
Spiff
Nevada, United States
Joined: September 07, 2002
KitMaker: 807 posts
Armorama: 671 posts
Joined: September 07, 2002
KitMaker: 807 posts
Armorama: 671 posts
Posted: Monday, September 29, 2008 - 04:30 AM UTC
I'm just about finished with the Aber gun barrel assembly/fabrication. I'm using it on my Tamiya JS-2 Model 1944 ChKZ and have an active build log going here if you're interested. This is a small excerpt of the build log.
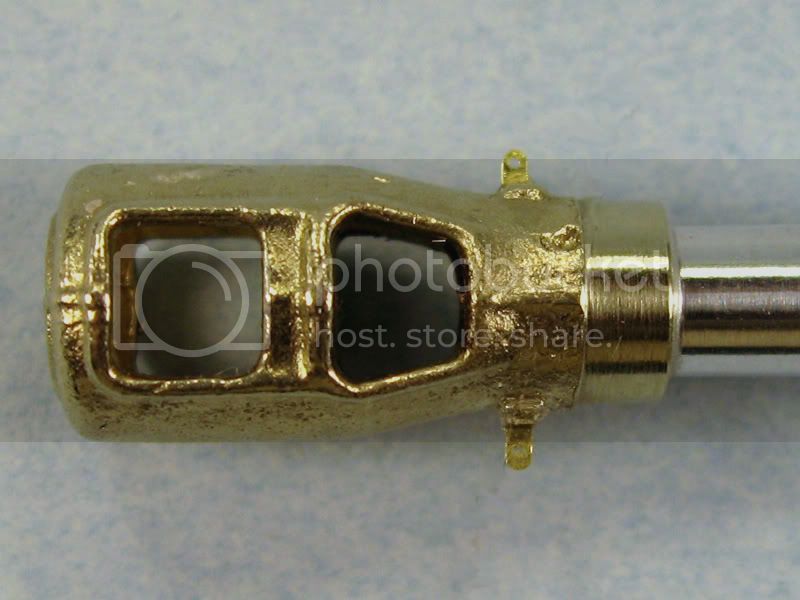
Yesterday I went about the process of attaching the two small photo etch parts to the base of the muzzle break which need to be bent into a 90 degree angle. The parts are very small so they can be a little tricky to handle. It took me a long time because they each wound up on the floor at some point or another. Good thing I was using my mobile work bench (12x12 inch ceramic tile) and was working in the kitchen. I still managed to lose one for good though, so I ended up making one of my own. I cut a small strip from the photo-etch fret, drilled a small hole using the tip of an old airbrush needle, then carefully held the part down with tweezers on the ceramic tile work bench while I filed it down to shape using a flat needle file. I know, crazy, but it actually looks pretty good! Whew!
I still need to fabricate the two little pegs that attach next to the brackets and so far haven't found anything suitable to use. I will probably end up using some stretched sprue chopped to the appropriate length and will deal with that when I get home this evening.