Hello every-one , hope the new year is treating you ok .
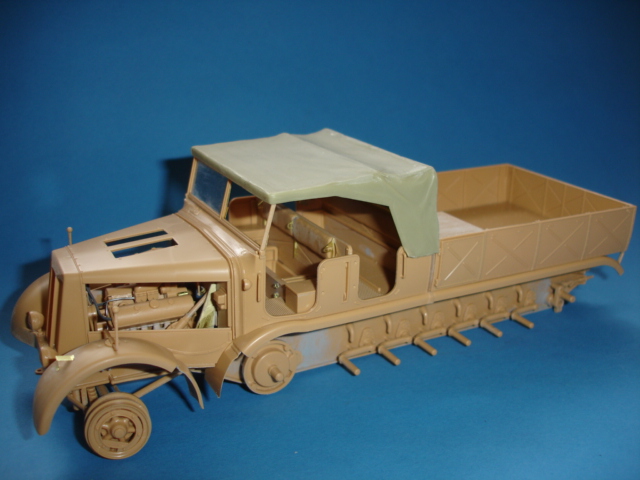
Picked up the Tamiya Famo of flea-bay for alot less than I paid for it when it first came out. Happy with my savings I bought the Aber " basic " set .
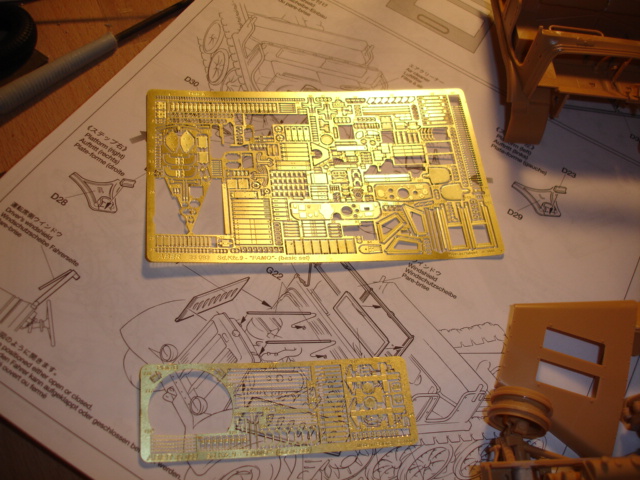
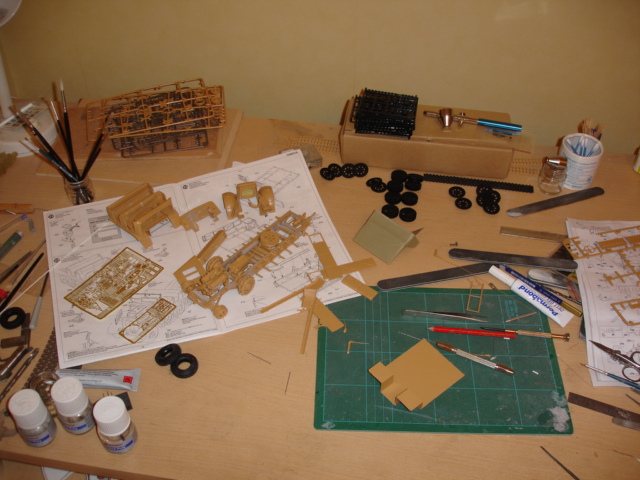
There it is , in all it's "basic" glory , I've all ready used most of the parts that I wanted to use , and there's "basically " still alot left .
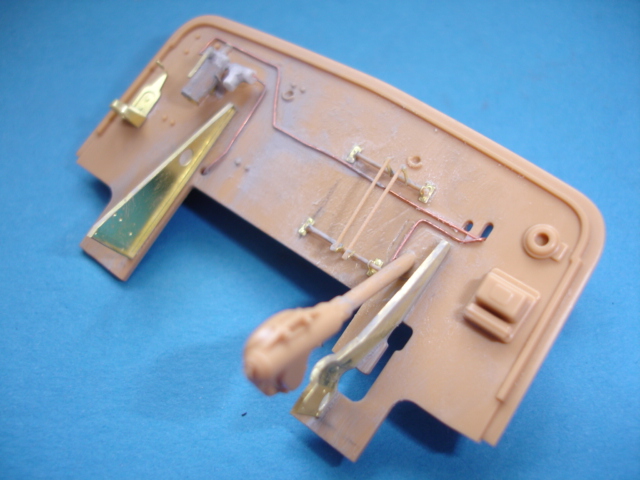
The fire wall....
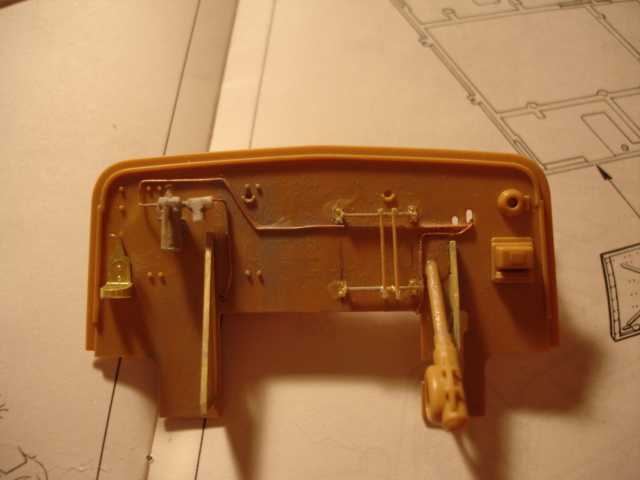
bit sloppy with the glue , will tidy it up before paint
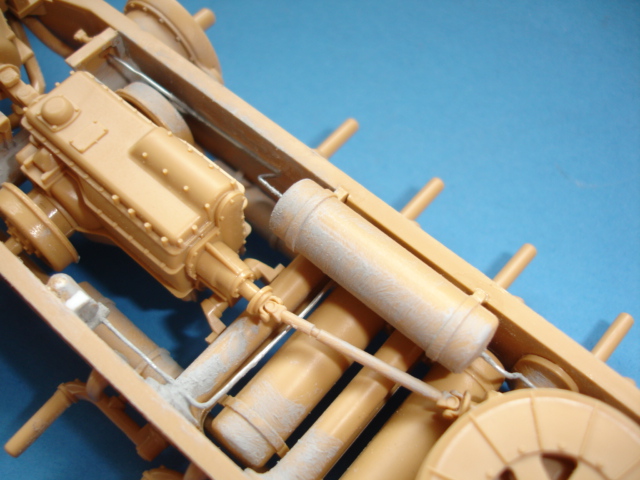
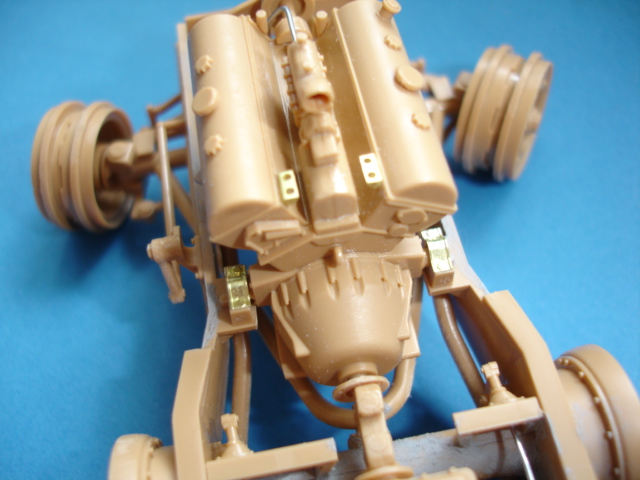
the chassis , put some air line's around...
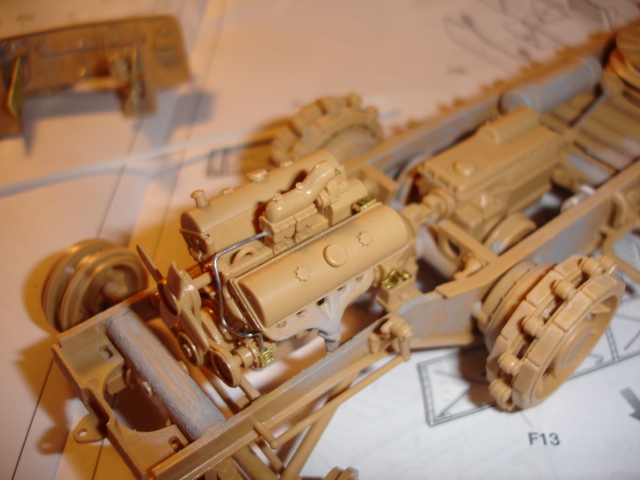
sorry , I meant engine....
All toghether , but comes apart for painting.....
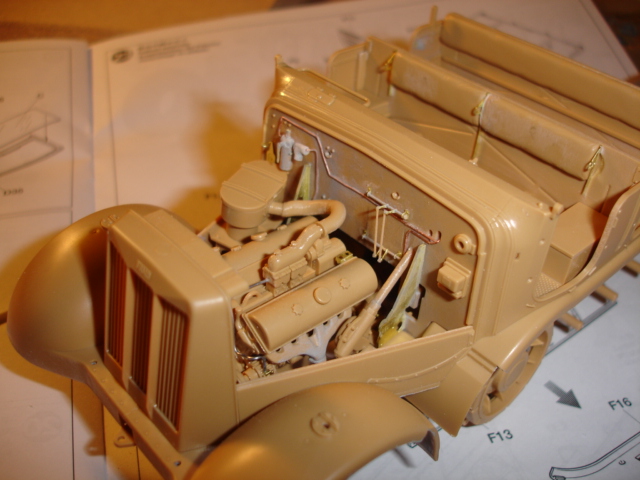
the bench seat with clamps and straps for the shovels
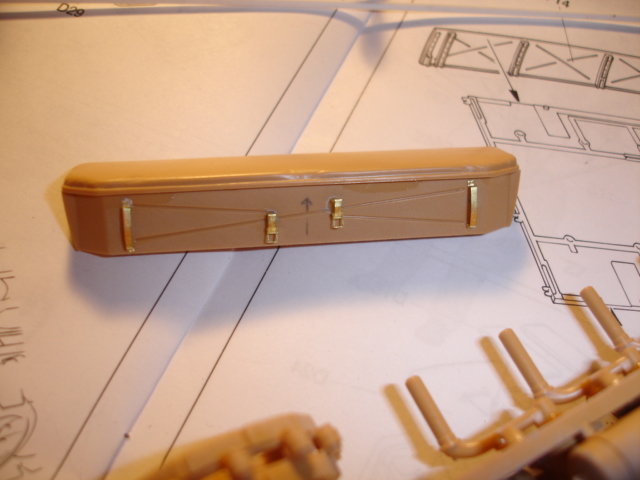
As you can see I'm never to sparring with the glue , but I know it will all be hidden under a layer of under-coat and paint.
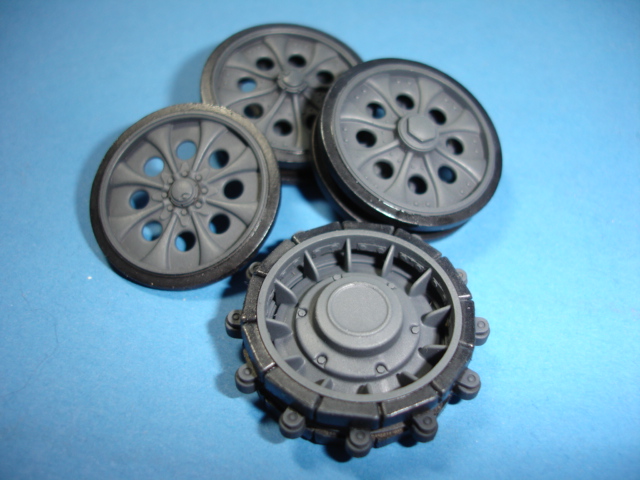
The wheels and tracks are all done , with the wheels being under-coated black all-ready.
Have a look at the state of me work-bench.....
Also got the Cromwell models front tarp for it . The fit of this part is up to Tamiya standards , reconmended . Half-inched some super glue from the building site I'm on at the moment and it really is super.
Any-how , thats all for now , thanks for looking , have to say there has been some fantastic work on this site lately,
John.
Constructive Feedback
For in-progress or completed build photos. Give and get contructive feedback!
Hosted by Darren Baker, Dave O'Meara
F F Famo....
johnlinford
England - South West, United Kingdom
Joined: October 28, 2006
KitMaker: 203 posts
Armorama: 195 posts
Joined: October 28, 2006
KitMaker: 203 posts
Armorama: 195 posts
Posted: Monday, January 19, 2009 - 10:21 AM UTC
TacFireGuru
Colorado, United States
Joined: December 25, 2004
KitMaker: 3,770 posts
Armorama: 2,263 posts
Joined: December 25, 2004
KitMaker: 3,770 posts
Armorama: 2,263 posts
Posted: Monday, January 19, 2009 - 10:39 AM UTC
John,
If you can, some more detailed build pictures? I have this kit in the stash (with trailer) and I'd love to follow along....you know, see the issues and fixes? So, Aber or Eduard....which route to go?
Thanks,
Mike
If you can, some more detailed build pictures? I have this kit in the stash (with trailer) and I'd love to follow along....you know, see the issues and fixes? So, Aber or Eduard....which route to go?
Thanks,
Mike
ivanhoe6
Wisconsin, United States
Joined: April 05, 2007
KitMaker: 2,023 posts
Armorama: 1,234 posts
Joined: April 05, 2007
KitMaker: 2,023 posts
Armorama: 1,234 posts
Posted: Monday, January 19, 2009 - 12:30 PM UTC
Hi John - you have a nice start going. A question, is the motor kit supplied or after market ? For some odd reason I don't have this in my stash. Thank goodness I have built up my stash now that the price of kits has skyrocketed !!!
johnlinford
England - South West, United Kingdom
Joined: October 28, 2006
KitMaker: 203 posts
Armorama: 195 posts
Joined: October 28, 2006
KitMaker: 203 posts
Armorama: 195 posts
Posted: Wednesday, January 21, 2009 - 08:51 AM UTC
Thanks for your posts Mike and Ivan . Mike , I'd say go with the Aber set , only because I have not seen the Eduard one , and nobody does tool clamps like Aber .
Ivan , the motor comes in the kit , and looking at the reference book I have ( nuts and bolts ) it is very good out of the box . The whole kit is really good straight out of the box .
I paid £25 for the kit , so I do not know how much it is now , have not seen it in the model shops for years any-how .
Post more soon , thanks ,
John .
panzer_fan
Ontario, Canada
Joined: March 25, 2003
KitMaker: 427 posts
Armorama: 348 posts
Joined: March 25, 2003
KitMaker: 427 posts
Armorama: 348 posts
Posted: Wednesday, January 21, 2009 - 11:06 AM UTC
Off to a good start already, John. If you could post some more details, would appreciate the effort. Keep us in the loop whenever you have more stuff to show us. FAMO is a very hot subject. I too have the Famo and Famo with the trailer, but haven't built them yet. I have got also the Aber sets for both models, as well as the Friul tracks. If you haven't got the Friul tracks, I strongly suggest them. They just add life to the model, compared to cheap plastic ones. Anyway, congrats for taking such a big project.
Sebastian
Sebastian
Eaglewatch
United Kingdom
Joined: December 19, 2008
KitMaker: 560 posts
Armorama: 352 posts
Joined: December 19, 2008
KitMaker: 560 posts
Armorama: 352 posts
Posted: Wednesday, January 21, 2009 - 01:14 PM UTC
Hi John that Famo is really gonna look the buisness with that Aber P.E. set can't wait to see the finished product i'll be keep an eager eye on this
scratchmod
Massachusetts, United States
Joined: November 07, 2008
KitMaker: 796 posts
Armorama: 763 posts
Joined: November 07, 2008
KitMaker: 796 posts
Armorama: 763 posts
Posted: Wednesday, January 21, 2009 - 03:06 PM UTC
Looking good John.I like all the detailing your putting into your famo. That's alot of brass, can't wait to see it al on the model. I have that nuts and bolts book too and if your going by that book then you will have a winner there.What type of paint scheme are you going with?
Rob
Rob
johnlinford
England - South West, United Kingdom
Joined: October 28, 2006
KitMaker: 203 posts
Armorama: 195 posts
Joined: October 28, 2006
KitMaker: 203 posts
Armorama: 195 posts
Posted: Thursday, January 22, 2009 - 10:19 AM UTC
Hiya Sebastian , I will be using the kit tracks as I think they are more than OK . Only if you are building an early version though , as thats what they are . Fruil do make the late versions which are well worth it .
Rob , I'm going with the early version in over-all grey with dark yellow over-spray . Its one of the colour plates in the book which has the stalking tiger on it . I think it was used in the recovery of a tiger in Tunisia , also have a picture of it towing a tank111 , which would make an interesting model.
All the best ,
John .
johnlinford
England - South West, United Kingdom
Joined: October 28, 2006
KitMaker: 203 posts
Armorama: 195 posts
Joined: October 28, 2006
KitMaker: 203 posts
Armorama: 195 posts
Posted: Sunday, January 25, 2009 - 07:26 AM UTC
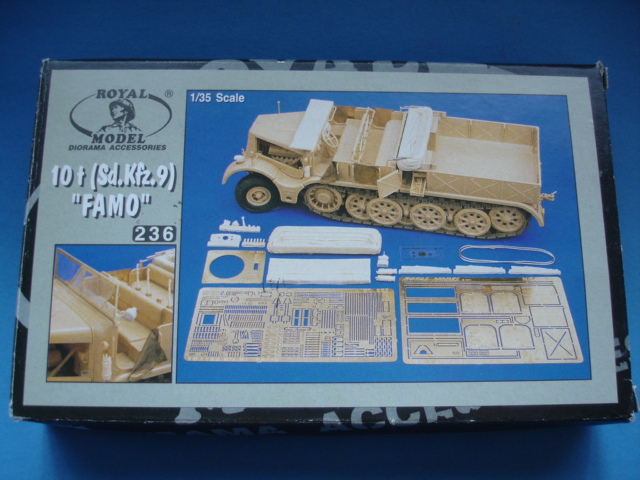
Hello every-one , forgot to mention this set from Royal models which I used on my last Famo which got destroyed in a house move...
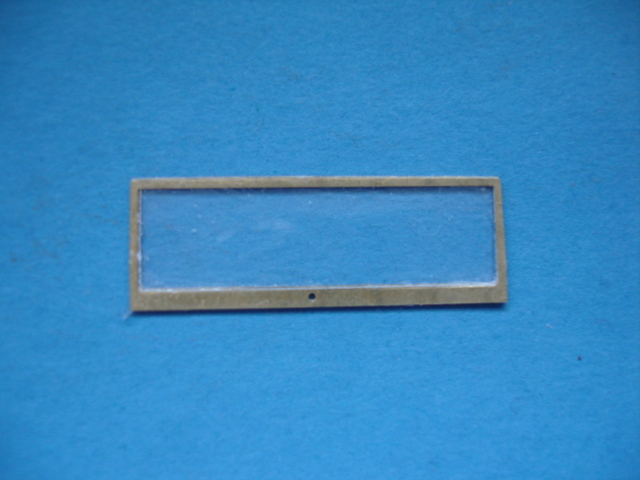
If you can get hold of this set , do so because it's a real good one . It includes the lamp on the wind-shield which is really use-full . Also alot of other good parts .
I used the wind-shield parts on this model which I did not use last time.
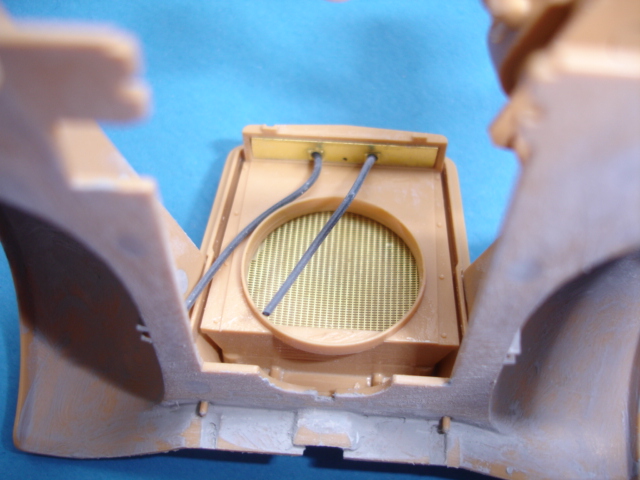
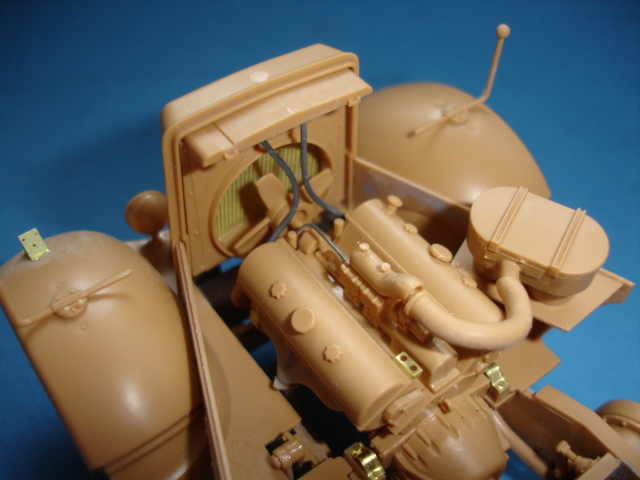
Back to the Aber parts........this is the radiator parts . the hoses are flexable parts I had left over from an Abrams project . Do not quite know where they go after this so I took an educated guess...
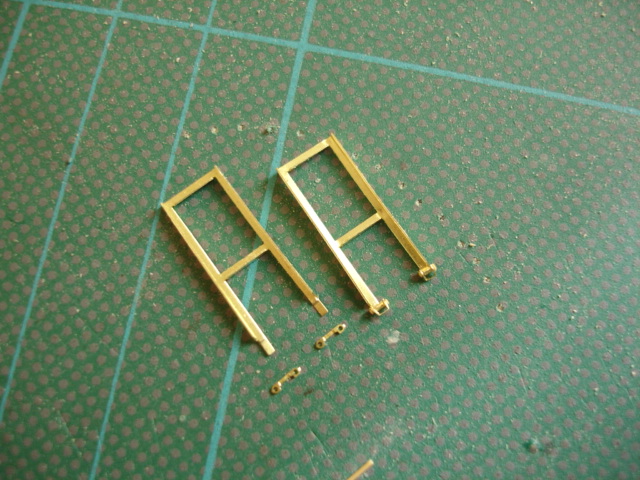
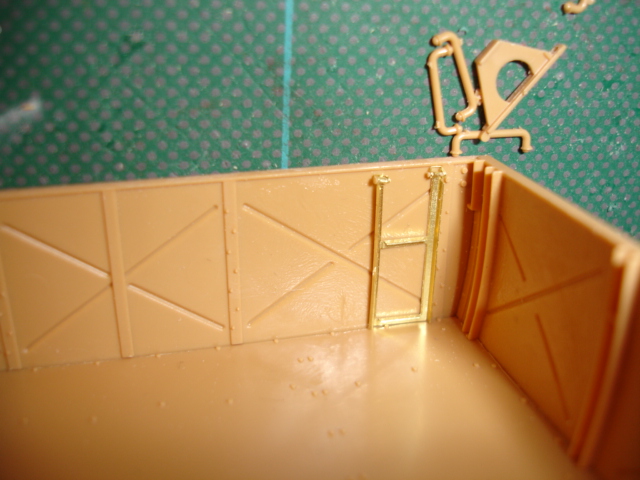
Been working on the crew steps for the rear drop down tail , a must have detail I think as climbing up with-out them might be a problem on a half-track this size
In place , but not stuck down yet.....
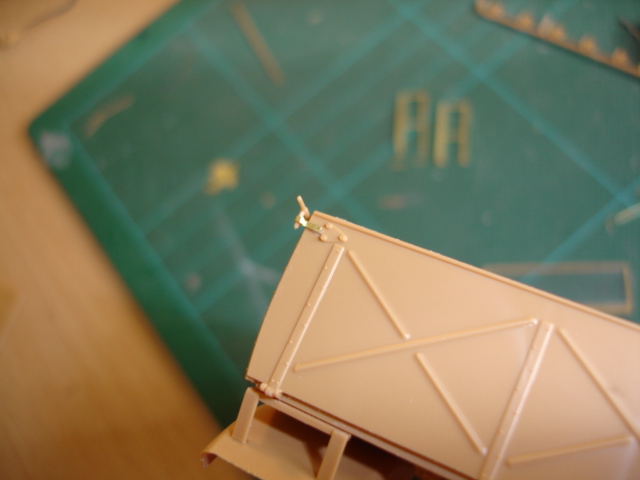
Another nice little detail is the catches , which are included in the Aber set
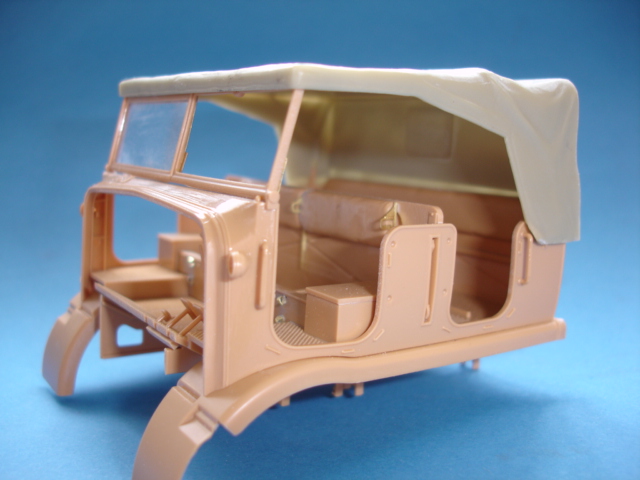
Here is the Cromwell models tarp , which is an amazing cast piece......
Over-all shot just to see how it's all looking together
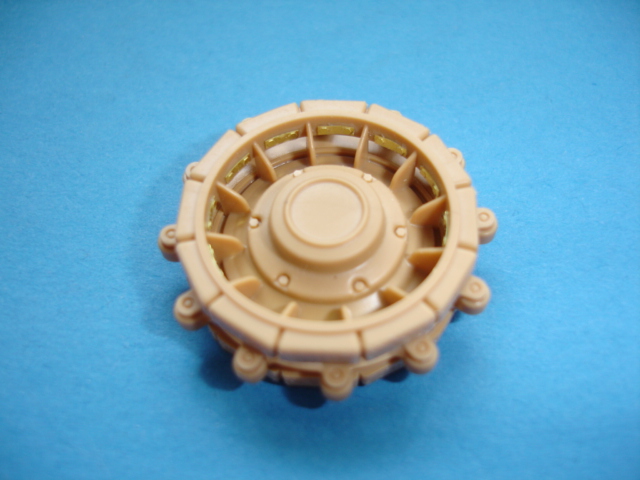
This is the sprocket with the Aber bolt details added...
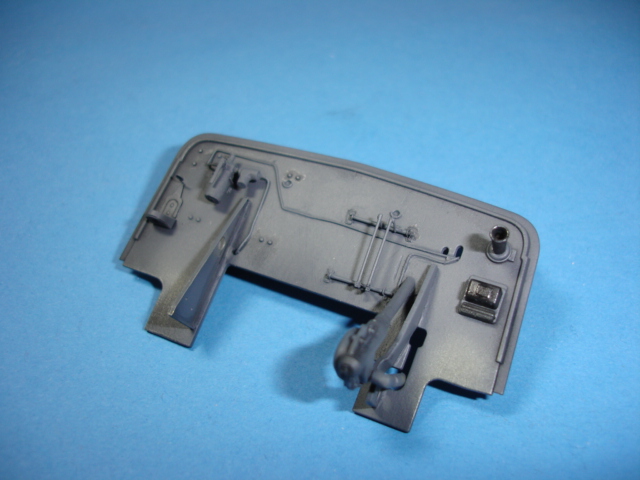
Here is a few more shots of some of the other detail work done , including the fire-wall cleaned up a bit and some of the air-lines away from the air-tank .
Hope this all helps if you are thinking of doing a Famo , again , the base kit from Tamiya really is an absolute gem . I just can't help my-self when it comes to adding detail . Which I think is what makes a model more of your own .
Thanks in advance ,
John.
johnlinford
England - South West, United Kingdom
Joined: October 28, 2006
KitMaker: 203 posts
Armorama: 195 posts
Joined: October 28, 2006
KitMaker: 203 posts
Armorama: 195 posts
Posted: Tuesday, February 10, 2009 - 09:39 AM UTC
I'll keep plugging away..........
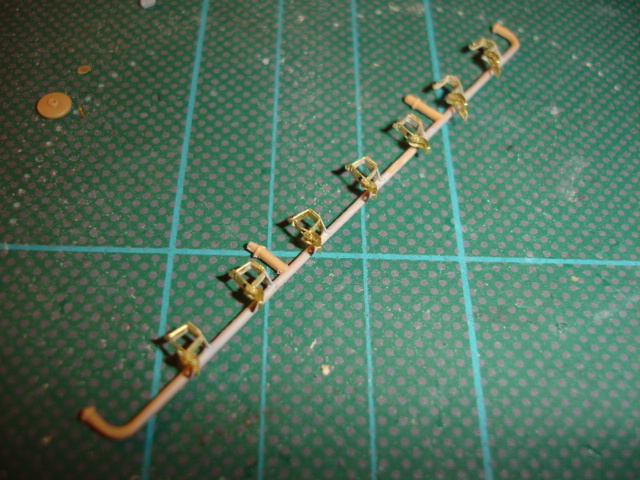
The rifle rack , or the retaining clasps.....from one Tamiya part , to 29 parts in total.....
Thats the last of the time consuming detail jobs , painting soon .
John.
The rifle rack , or the retaining clasps.....from one Tamiya part , to 29 parts in total.....
Thats the last of the time consuming detail jobs , painting soon .
John.
tjkelly
Maryland, United States
Joined: May 04, 2007
KitMaker: 1,132 posts
Armorama: 1,123 posts
Joined: May 04, 2007
KitMaker: 1,132 posts
Armorama: 1,123 posts
Posted: Wednesday, February 11, 2009 - 04:13 AM UTC
Great progress John, like what you've done with it! I hope the rifle rack assembly didn't drive you crazy!
Thanks for sharing, looking forward to some paint!
Cheers -
Tim
Thanks for sharing, looking forward to some paint!
Cheers -
Tim
DT61
Ontario, Canada
Joined: September 18, 2005
KitMaker: 1,226 posts
Armorama: 819 posts
Joined: September 18, 2005
KitMaker: 1,226 posts
Armorama: 819 posts
Posted: Wednesday, February 11, 2009 - 04:36 AM UTC
The rifle rack retaining clips look great!! How fiddly were they to put together?
Darryl
Darryl
trahe
Virginia, United States
Joined: April 03, 2006
KitMaker: 1,158 posts
Armorama: 950 posts
Joined: April 03, 2006
KitMaker: 1,158 posts
Armorama: 950 posts
Posted: Wednesday, February 11, 2009 - 05:14 AM UTC
Looking pretty good! Have this in the stash, looks like I'm going to have to get the PE for it!
johnlinford
England - South West, United Kingdom
Joined: October 28, 2006
KitMaker: 203 posts
Armorama: 195 posts
Joined: October 28, 2006
KitMaker: 203 posts
Armorama: 195 posts
Posted: Wednesday, February 11, 2009 - 09:46 AM UTC
Darryl , bloody fiddly . They actually did work but I decided to glue them up as the painting process would probably make them fall apart . Left two open so I can install rifles at a later date.
Thanks for the comments ,
John.
Thanks for the comments ,
John.
johnlinford
England - South West, United Kingdom
Joined: October 28, 2006
KitMaker: 203 posts
Armorama: 195 posts
Joined: October 28, 2006
KitMaker: 203 posts
Armorama: 195 posts
Posted: Monday, February 23, 2009 - 07:46 AM UTC
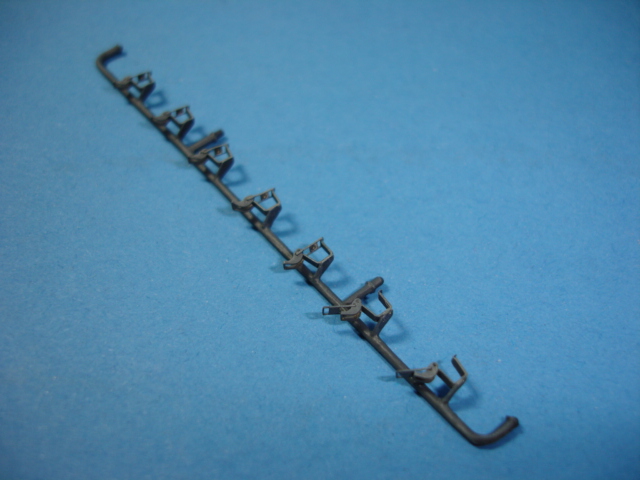
Here is the rifle rack all painted and lightly dry-brushed . Will leave it at that untill it gets installed .
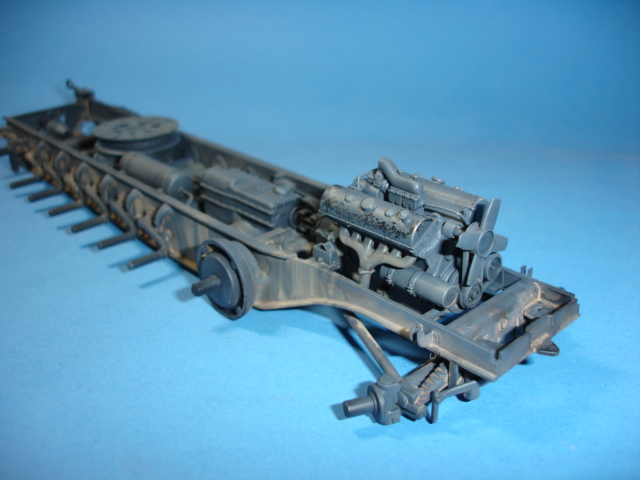
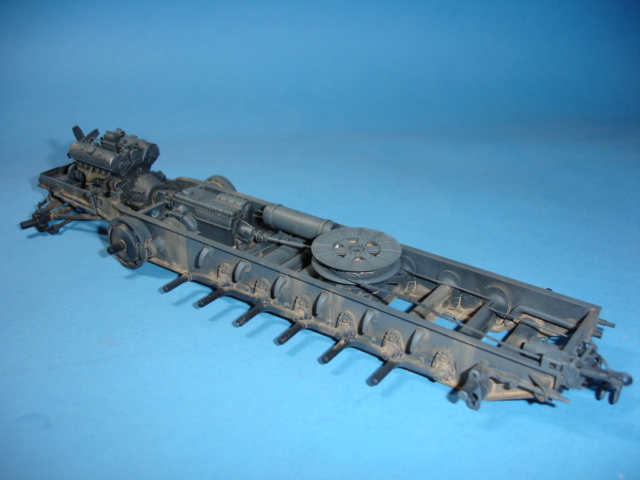
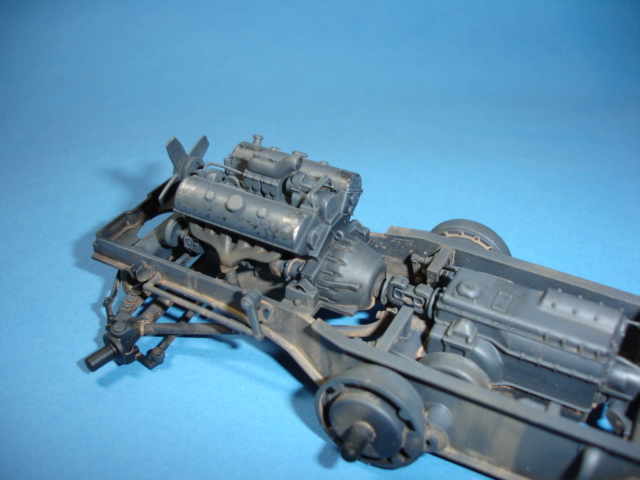
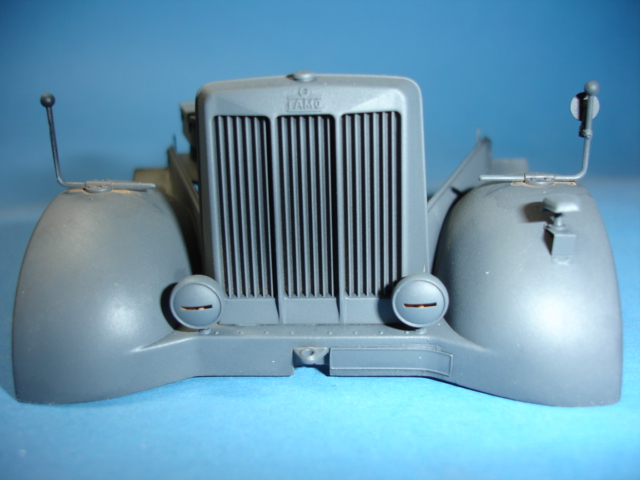
Here is the chassis painted , and lightly weathered in preparation for final assembly .
A close-up of the engine.....
The whole model was under-coated black , then Tamiya German grey , I add a little Tamiya clear which seems to make it spray nicer and give it a slight satin sheen . Then a lighter shade of grey ( base colour with dark yellow added ) .
When fully dry a wash of Mig pigments to the under sides . The engine , transmision and winch were dark washed and dry-brushed , but only very subtlely.
The fire-wall.....
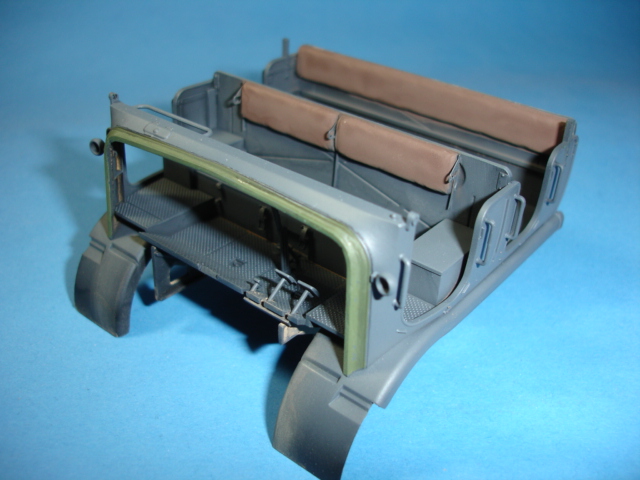
Last of all for the moment is wheel arch area and cab body ,
The seat cusions were masked up and painted red-brown
Forgot about the wheels....
The black looks too glossy and a bit messy around the edges , but will be tidied up with subsequent weathering layers.
Next is adding it all together and spraying the camo colour
Thanks for looking ,
John.
newfish
England - West Midlands, United Kingdom
Joined: June 23, 2008
KitMaker: 2,329 posts
Armorama: 2,110 posts
Joined: June 23, 2008
KitMaker: 2,329 posts
Armorama: 2,110 posts
Posted: Monday, February 23, 2009 - 08:19 AM UTC
Looking good .
I like how you painted the chassis and the weathering.
Tarok
Victoria, Australia
Joined: July 28, 2004
KitMaker: 10,889 posts
Armorama: 3,245 posts
Joined: July 28, 2004
KitMaker: 10,889 posts
Armorama: 3,245 posts
Posted: Monday, February 23, 2009 - 09:32 AM UTC
Hey John,
The Famo's really looking great!
Rudi
The Famo's really looking great!
Rudi
Eaglewatch
United Kingdom
Joined: December 19, 2008
KitMaker: 560 posts
Armorama: 352 posts
Joined: December 19, 2008
KitMaker: 560 posts
Armorama: 352 posts
Posted: Monday, February 23, 2009 - 04:15 PM UTC
Hi John that Famo is really coming along nicely now, keep at it mate
grave_digger
Clare, Ireland
Joined: December 30, 2008
KitMaker: 952 posts
Armorama: 834 posts
Joined: December 30, 2008
KitMaker: 952 posts
Armorama: 834 posts
Posted: Tuesday, February 24, 2009 - 07:17 AM UTC
That is really nice work, John.
Libor
Libor
johnlinford
England - South West, United Kingdom
Joined: October 28, 2006
KitMaker: 203 posts
Armorama: 195 posts
Joined: October 28, 2006
KitMaker: 203 posts
Armorama: 195 posts
Posted: Saturday, February 28, 2009 - 04:53 AM UTC
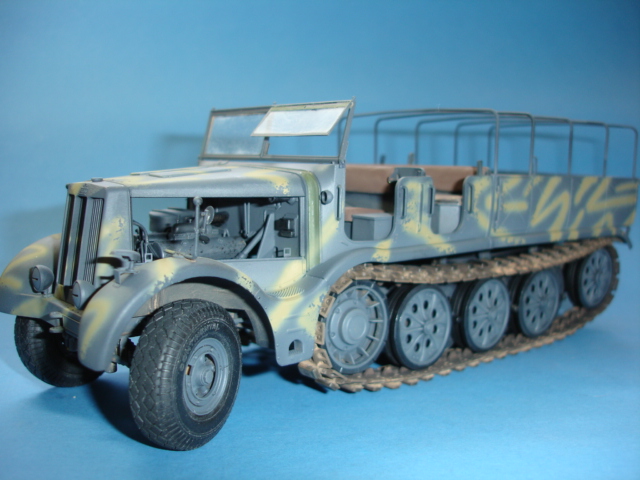
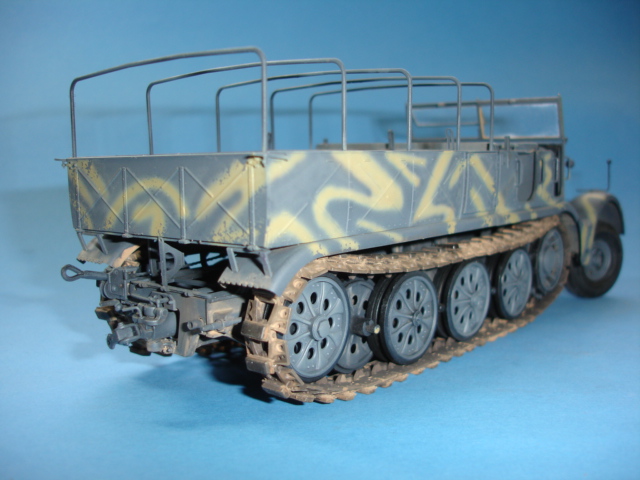
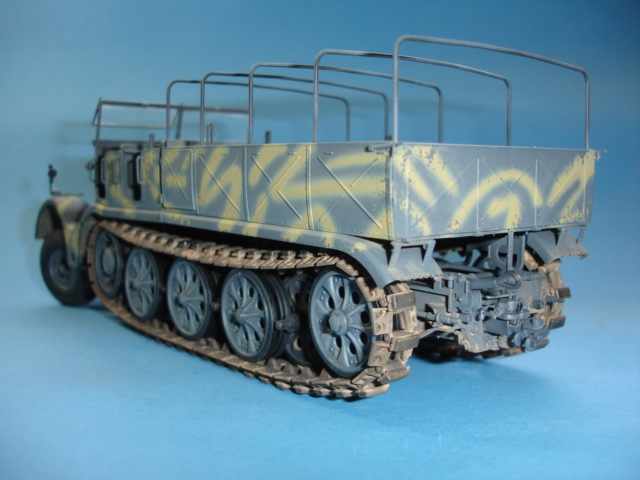
Been painting , and doing final assembly , which was quite stressfull . Trying not to break any-thing off as I wrestled the tracks on .
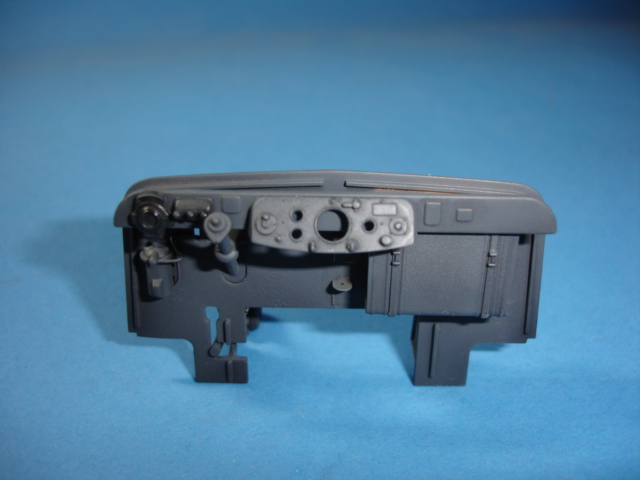
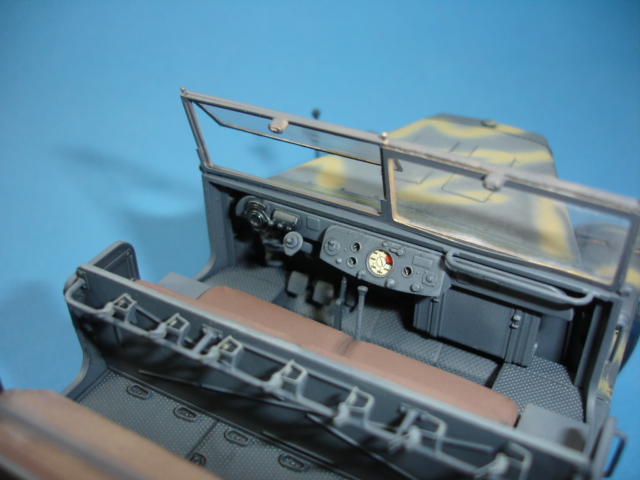
The dash-board , with the Aber dials......
Next is all the weathering , dusty over-sprays and pigments etc , etc ,
thanks for looking,
John.
The dash-board , with the Aber dials......
Next is all the weathering , dusty over-sprays and pigments etc , etc ,
thanks for looking,
John.
Kaz
Nova Scotia, Canada
Joined: July 10, 2003
KitMaker: 40 posts
Armorama: 31 posts
Joined: July 10, 2003
KitMaker: 40 posts
Armorama: 31 posts
Posted: Saturday, February 28, 2009 - 05:35 AM UTC
Super work . I was trying to decide what to build next for over a week now, your blog totaly helped me make up my mind . I'm looking forward to more of your photos , and those by the way are excelent. , great quality . What camera are you using ?
tjkelly
Maryland, United States
Joined: May 04, 2007
KitMaker: 1,132 posts
Armorama: 1,123 posts
Joined: May 04, 2007
KitMaker: 1,132 posts
Armorama: 1,123 posts
Posted: Saturday, February 28, 2009 - 06:47 AM UTC
Superb work John! Love your camo pattern, stunning work all around with this one. Looking forward to seeing some more of your progress!
Thanks for keeping us updated! Cheers -
Tim
Thanks for keeping us updated! Cheers -
Tim
chicane
Dublin, Ireland
Joined: March 25, 2008
KitMaker: 201 posts
Armorama: 161 posts
Joined: March 25, 2008
KitMaker: 201 posts
Armorama: 161 posts
Posted: Friday, March 06, 2009 - 12:37 AM UTC
lovely job the tamiya famo is a great kit your yellow camo over the gray looks brilliant
johnlinford
England - South West, United Kingdom
Joined: October 28, 2006
KitMaker: 203 posts
Armorama: 195 posts
Joined: October 28, 2006
KitMaker: 203 posts
Armorama: 195 posts
Posted: Wednesday, May 13, 2009 - 09:08 AM UTC
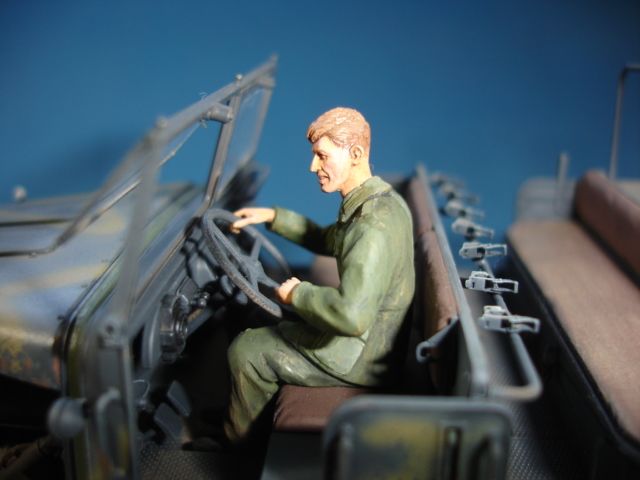
Been a while.......surf's been good....Two figures I'm painting at the moment , mix of Hornet heads,kit parts and spares box arms. Under-coated Tamiya flesh and pin-washed features at the moment.....
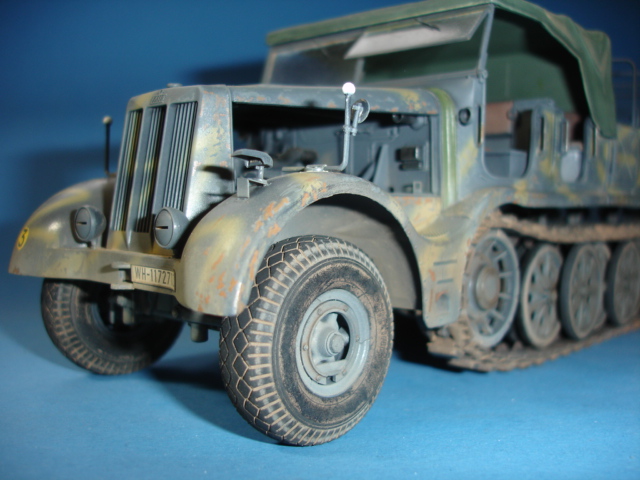
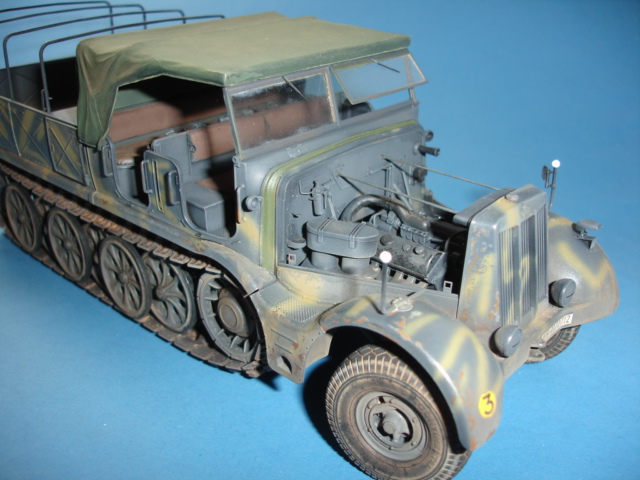
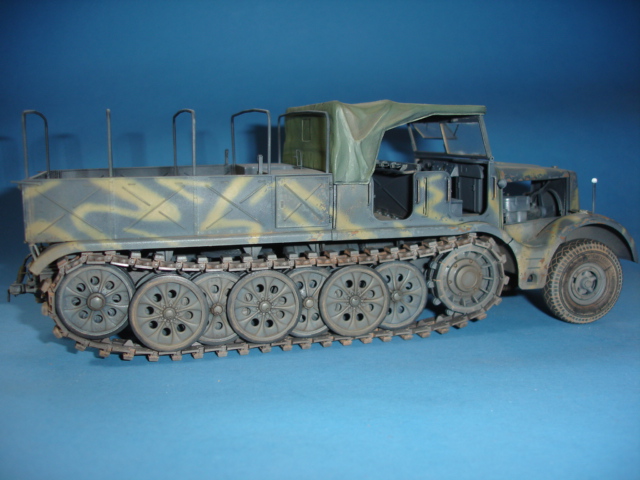
The rest of the model has had dusty over-sprays and pigments added , tried some painted on paint chips.......not entirely happy......live and learn though .
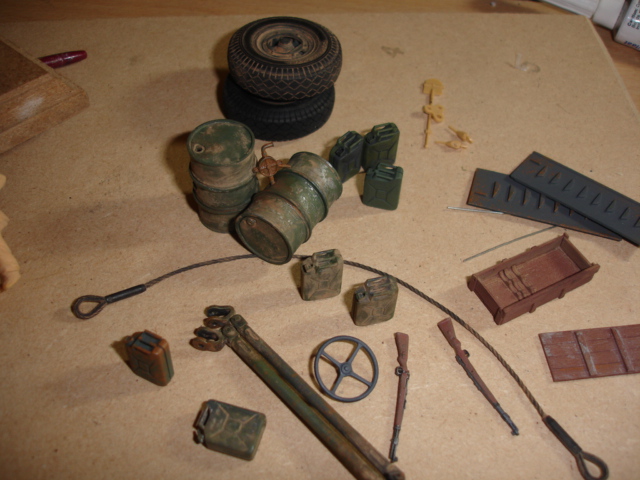
The cargo load.....
Will make up a tarp for the cargo load , maybe some logs and beams and then draw a line under it and make some-thing else , hope you like it.
Thanks , John.
johnlinford
England - South West, United Kingdom
Joined: October 28, 2006
KitMaker: 203 posts
Armorama: 195 posts
Joined: October 28, 2006
KitMaker: 203 posts
Armorama: 195 posts
Posted: Monday, June 01, 2009 - 09:17 AM UTC
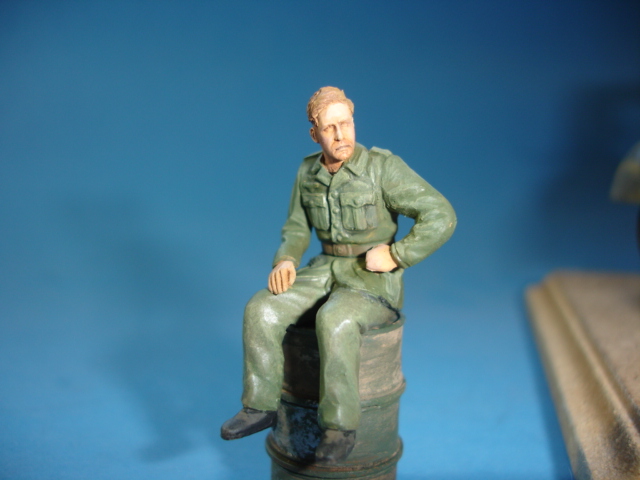
Finished with the figures , wish I spent more time on the faces but wanted to move on....
the commander type , he looks serious.....
Just a bit more painting to do on the cargo load and stick the two figures in and thats it.
Cheers ,
John.
the commander type , he looks serious.....
Just a bit more painting to do on the cargo load and stick the two figures in and thats it.
Cheers ,
John.