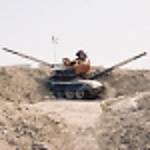
M1A2 Abrams wreck...my first modern tank
England - West Midlands, United Kingdom
Joined: June 23, 2008
KitMaker: 2,329 posts
Armorama: 2,110 posts
Posted: Wednesday, April 22, 2009 - 10:37 AM UTC
Rob immense work mate!, it looks so realistic!, dont apologise for the amount of pictures this build is very educational!
Keep up the stunning work!

Art isn't just pritty pictures. It's an expression of human rage.
Massachusetts, United States
Joined: November 07, 2008
KitMaker: 796 posts
Armorama: 763 posts
Posted: Wednesday, April 22, 2009 - 11:18 AM UTC
Steve, your way to kind. I'm glad to hear you like the demo, next time I will not forget my spray gun and won't be so nervous either.
Jaymes, if you don't mind the pics then here are some test shots of the skirts and turret on the hull.


I used day light lighting this time so the pics are some what better. The remaining weathering will be done towards the end of this build using my usual rust, pigment and pastels.
The wheels will be a challenge for me since they are made out of Aluminum and I've never done a wreck that had this.
Stay tuned for more boy's
Rob
P.S. Sorry that I haven't posted anywhere else, but I do look at what you guys are building and writing. Once I start some thing I'm on a roll and don't like long breaks.
Scratchmod-The Art of Destruction
Texas, United States
Joined: December 08, 2008
KitMaker: 123 posts
Armorama: 72 posts
Posted: Wednesday, April 22, 2009 - 11:32 AM UTC
that is some intense weathering. Great work so far

England - West Midlands, United Kingdom
Joined: June 23, 2008
KitMaker: 2,329 posts
Armorama: 2,110 posts
Posted: Wednesday, April 22, 2009 - 12:16 PM UTC
Rob great work it looks so effective. Thanks for all the pctures I am due to start building an m48 wrecked soon for a campaign i posted a pick earlier in the build!.
keep up the good work!

Art isn't just pritty pictures. It's an expression of human rage.
Paris, France
Joined: August 30, 2005
KitMaker: 2,315 posts
Armorama: 2,158 posts
Posted: Thursday, April 23, 2009 - 06:10 AM UTC
This really awesome Rob
The salt technic is great, sorry my ignorane what is HS technic???
I am waiting for the alu painting stage, since a lot of grey need to be used.
Cheers
Seb
England - West Midlands, United Kingdom
Joined: September 12, 2007
KitMaker: 1,548 posts
Armorama: 1,407 posts
Posted: Thursday, April 23, 2009 - 09:04 AM UTC
Great work Rob,
Seb it is hairspray, same as salt, instead of salt, use hairspray.
Paris, France
Joined: August 30, 2005
KitMaker: 2,315 posts
Armorama: 2,158 posts
Posted: Thursday, April 23, 2009 - 10:44 AM UTC
Thanks Marty
Do you have a tutorial for me ???
Cheers
Seb
Massachusetts, United States
Joined: November 07, 2008
KitMaker: 796 posts
Armorama: 763 posts
Posted: Thursday, April 23, 2009 - 12:04 PM UTC
Thanks guys
Seb here is a link for you.
http://www.migproductionsforums.com/phpBB3/viewtopic.php?f=5&t=3293I found it very helpful, I hope it helps you too.
Rob
Scratchmod-The Art of Destruction
Virginia, United States
Joined: July 17, 2006
KitMaker: 1,558 posts
Armorama: 1,159 posts
Posted: Thursday, April 23, 2009 - 02:13 PM UTC
Wow!! It's looking great--the effects you can achieve look amazing.

Paris, France
Joined: August 30, 2005
KitMaker: 2,315 posts
Armorama: 2,158 posts
Posted: Thursday, April 23, 2009 - 03:58 PM UTC
Thanks for the link Rob
I hope to see the painting job in the aluminum part.
Cheers
Seb
Manitoba, Canada
Joined: August 13, 2006
KitMaker: 1,021 posts
Armorama: 805 posts
Posted: Thursday, April 23, 2009 - 07:41 PM UTC
WWWOOOOOOOOOOWWWW!!!!!!
That's like....crazy sweet man! This is gonna be ridiculous when it's done!
Matt

It seemed she viewed guys on the same level as potatoes.
-Kyon
Manitoba, Canada
Joined: August 13, 2006
KitMaker: 1,021 posts
Armorama: 805 posts
Posted: Thursday, April 23, 2009 - 07:44 PM UTC
Do you have any more pics of "322"? That's something I'd love to tackle....someday.
Matt

It seemed she viewed guys on the same level as potatoes.
-Kyon
England - North, United Kingdom
Joined: May 04, 2006
KitMaker: 89 posts
Armorama: 86 posts
Posted: Thursday, April 23, 2009 - 11:07 PM UTC
Quoted Text
I was with 2nd LAR Bn (Light Armored Recon) during OIF. I tons of pictures of LAVs, destroyed Iraqi Armor and trucks...and also other angles of that exact M1A1. Anybody interested can email me...I'd be more then happy to share.
hi Tony
id love to see those pics mate, did you get my email
mark
England - South East, United Kingdom
Joined: September 20, 2007
KitMaker: 240 posts
Armorama: 233 posts
Posted: Friday, April 24, 2009 - 12:39 AM UTC
Rob,
This is coming along exceptionally well -- you really have captured that burnt effect without overdoing the rust aspect. I know there is still a way to go with this, but I expect the finished result to be quite outstanding!
Cheers,
Ian
Newbury Scale Model Club -- http://www.newburyscalemodelclub.org.uk/
NewMod 2013 -- http://www.newmod.co.uk/
Massachusetts, United States
Joined: November 07, 2008
KitMaker: 796 posts
Armorama: 763 posts
Posted: Friday, April 24, 2009 - 03:08 AM UTC
Scratchmod-The Art of Destruction
Massachusetts, United States
Joined: November 07, 2008
KitMaker: 796 posts
Armorama: 763 posts
Posted: Friday, April 24, 2009 - 03:09 AM UTC
Scratchmod-The Art of Destruction
England - West Midlands, United Kingdom
Joined: September 12, 2007
KitMaker: 1,548 posts
Armorama: 1,407 posts
Posted: Friday, April 24, 2009 - 05:03 AM UTC
HI Rob, nice work.
Why did you say oops?

Massachusetts, United States
Joined: November 07, 2008
KitMaker: 796 posts
Armorama: 763 posts
Posted: Friday, April 24, 2009 - 06:10 AM UTC
Hi Martyn
I hit the post button twice so I deleted the double post.
Rob
Scratchmod-The Art of Destruction
Noord-Brabant, Netherlands
Joined: March 24, 2008
KitMaker: 1,247 posts
Armorama: 913 posts
Posted: Friday, April 24, 2009 - 09:44 PM UTC
It looks very cool Rob! Don't forget to remove the rubber from the spare wheel, as this would melt.
Lars
Bucuresti, Romania
Joined: September 17, 2007
KitMaker: 425 posts
Armorama: 304 posts
Posted: Saturday, April 25, 2009 - 12:50 AM UTC
Very nice!You have some particular strange and awesome skills.
I just love all your work.
On the bench:
1.Late Tiger I 1/35
Bern, Switzerland
Joined: April 17, 2008
KitMaker: 264 posts
Armorama: 156 posts
Posted: Saturday, April 25, 2009 - 09:03 PM UTC
Wow Rob! You really caught the look of a wrecked beast!

I especially like how you did the sideskirts.
California, United States
Joined: February 08, 2003
KitMaker: 776 posts
Armorama: 477 posts
Posted: Thursday, May 07, 2009 - 06:12 AM UTC
This is great, love what your doing, hoping to see it when its complete.
"Our job is not to forgive them, thats gods job. Our job is only to arrange the meeting." General Norman. Scharwzkopf
Massachusetts, United States
Joined: November 07, 2008
KitMaker: 796 posts
Armorama: 763 posts
Posted: Friday, May 08, 2009 - 12:04 PM UTC
Sorry for not up dating this one. Glad you guys are still looking. Paul this won't be as good as your awesome m1, it's my first, thanks for the compliment.
Rob
Scratchmod-The Art of Destruction
Massachusetts, United States
Joined: November 07, 2008
KitMaker: 796 posts
Armorama: 763 posts
Posted: Tuesday, May 19, 2009 - 01:30 PM UTC
OK guys I started back on the Abrams wreck last night and did some work today. I worked on the tracks and glued the hull onto a simple base. I just have a few things to do and then it's finally done.
The pics are not the greatest, I'll use a better camara and lighting for the completed pics.
Here is how she looks so far.


I should wrap up this build some time tomorrow, then I will be able to concentrate on the T55's
Rob
Scratchmod-The Art of Destruction
England - West Midlands, United Kingdom
Joined: September 12, 2007
KitMaker: 1,548 posts
Armorama: 1,407 posts
Posted: Friday, May 22, 2009 - 10:55 AM UTC
Nice work Rob, great work on the Abrams.


 I especially like how you did the sideskirts.


