Hi guys,
I have just uploaded a new video to the ScaleModelMedic youtube channel dealing with an easy method for making tarps and stowage.
The video can be found here
Modelling Stowage on Tanks and AFV's
and the channel can be found here
ScaleModelMedic
Hope that you enjoy the video
Cheers
Jon
Armor/AFV
For discussions on tanks, artillery, jeeps, etc.
For discussions on tanks, artillery, jeeps, etc.
Hosted by Darren Baker, Mario Matijasic
New Video - Modelling stowage and tarps
BigJon

Joined: July 12, 2005
KitMaker: 757 posts
Armorama: 609 posts

Posted: Thursday, July 30, 2009 - 10:42 PM UTC
BigJon

Joined: July 12, 2005
KitMaker: 757 posts
Armorama: 609 posts

Posted: Thursday, July 30, 2009 - 11:41 PM UTC
As per usual I've forgotten to include the preview image of what the video deals with
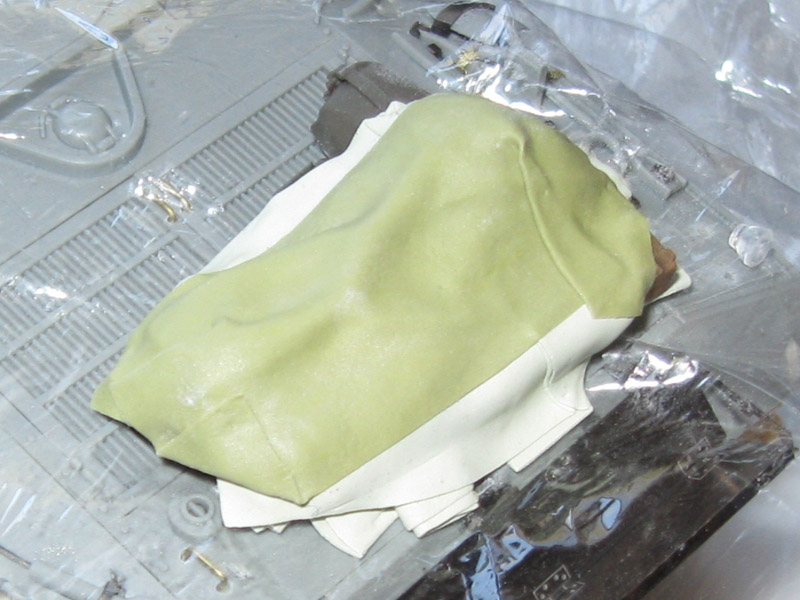
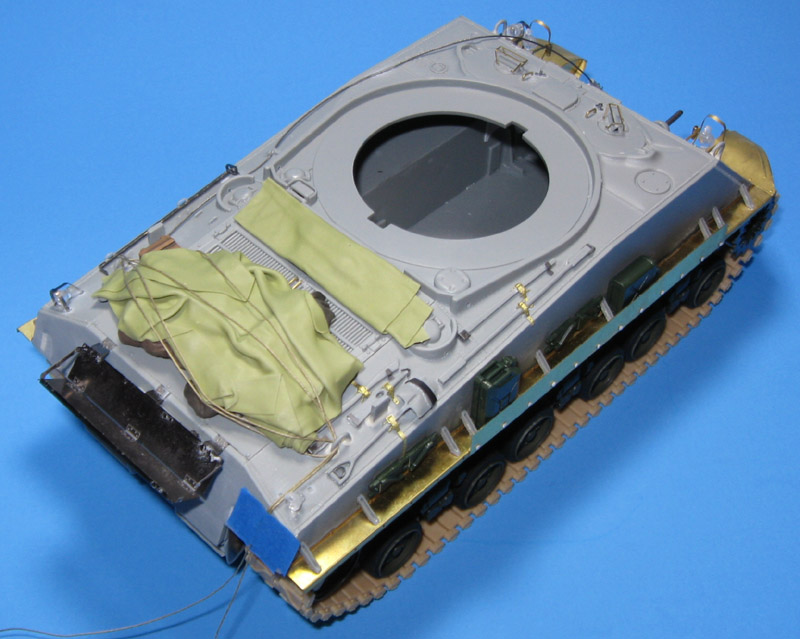
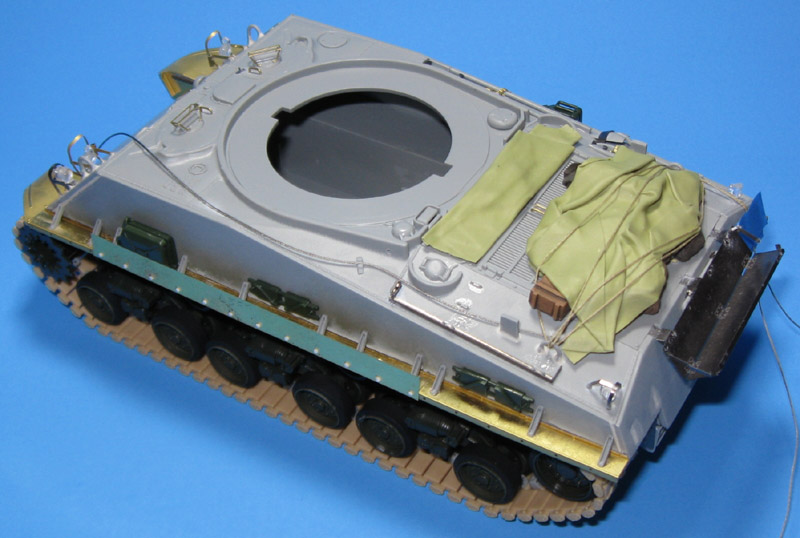
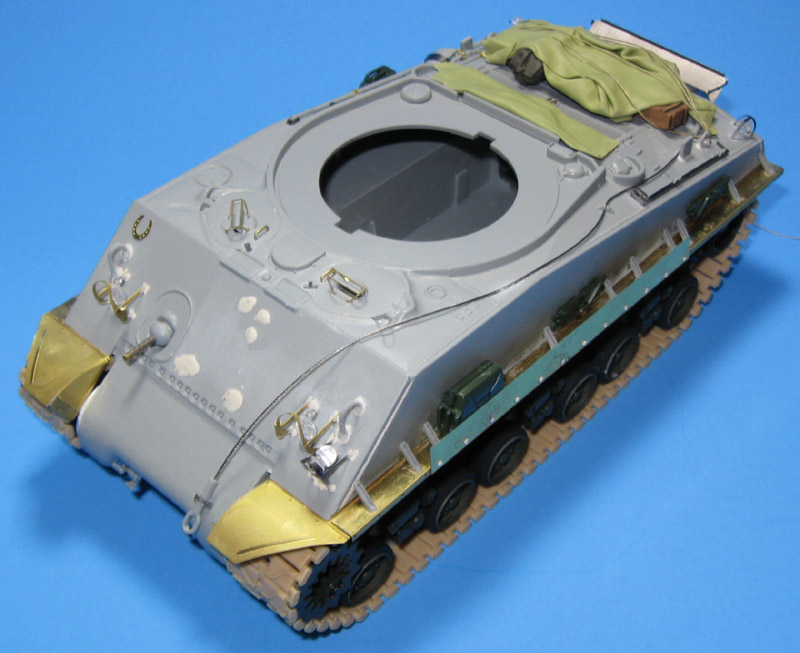
in the video I have run through how I made the stowage on the M4A1 below

cheers
Jon
in the video I have run through how I made the stowage on the M4A1 below

cheers
Jon
seanski

Joined: February 06, 2006
KitMaker: 57 posts
Armorama: 56 posts

Posted: Friday, July 31, 2009 - 03:54 AM UTC
Great video. Thanks for posting the links!
I heard of this technique, but never saw it "in action". I think that after watching this video I might actually try it . Thanks again.
I heard of this technique, but never saw it "in action". I think that after watching this video I might actually try it
 . Thanks again.
milvehfan

Joined: June 26, 2007
KitMaker: 2,116 posts
Armorama: 1,080 posts

Posted: Friday, July 31, 2009 - 04:56 AM UTC
I Learn somthing new almost everyday, Thanks for shareing this VERY COOL VIDEO . milvehfan
JackBlock

Joined: April 13, 2007
KitMaker: 144 posts
Armorama: 128 posts

Posted: Friday, July 31, 2009 - 05:37 AM UTC
Jon,
Thank you for posting the video. Seeing the technique in "action" helped me see how it's done. Now to try it.
Cheers
Dave
Thank you for posting the video. Seeing the technique in "action" helped me see how it's done. Now to try it.
Cheers

Dave
KAYELL

Joined: February 16, 2008
KitMaker: 107 posts
Armorama: 81 posts

Posted: Friday, July 31, 2009 - 08:49 PM UTC
An excellent tutorial, thanks for posting John.
I think it is amazing what effects can be achieved using the high tech 'cocktail stick, cotton bud and fine brush tools'.
Another one for my learning curve.
Cheers
Keith
I think it is amazing what effects can be achieved using the high tech 'cocktail stick, cotton bud and fine brush tools'.
Another one for my learning curve.
Cheers
Keith
BigJon

Joined: July 12, 2005
KitMaker: 757 posts
Armorama: 609 posts

Posted: Saturday, August 01, 2009 - 08:36 AM UTC
Thanks guys
glad that you enjoyed the video!
More to come in future... never thought the whole thing would be so popular!
Cheers
Jon
glad that you enjoyed the video!
More to come in future... never thought the whole thing would be so popular!
Cheers
Jon

Damraska

Joined: October 06, 2006
KitMaker: 580 posts
Armorama: 499 posts

Posted: Tuesday, August 04, 2009 - 11:02 AM UTC
Hi Jon,
Thank you very much for posting that video (and the others as well). All my attempts to make blankets, bedrolls, and sacks with putty failed for one reason or another. Even with a pasta machine I could not get it right. Your explanation demystified the matter but I waited to respond until I could try it myself.

The photo above shows my first attempt at stowage using your system. I obviously need to practice, but this still represents a massive step forward. I have some thoughts and observations based on my first attempt:
1) I used both medium (green) and fine (silver gray) grade Milliput. The fine grade tends to crack more easily when folded and fray more easily when cut. The medium grade "drapes" better.
2) When loaded up with talc the putty losses almost all stickiness, making it difficult to attach one putty roll to another. However, if you roll up some extra putty, and put it to the side, you can use it to bond the talc coated pieces. I also found it useful to stick a thin mat or normal putty down and build the stowage on top of it. This keeps everything in place during the initial stages of construction. You can also use the extra putty to build up the hidden portion of tarps and rolls.
3) Use a sharp knife to cut the putty. A dull knife will catch and fray the edge. Making downward instead of crosswise cuts helps prevent edge fraying.
4) Use a brush, not a toothpick, to burnish the putty rolls. A toothpick exerts too much pressure and leaves unrealistic dents and pits in the putty. A toothpick is useful for pushing pieces together under the final blanket and lifting layers as shown in the video.
5) If your top blanket does not look that great, make another and throw it over the top.
6) Think very carefully about how you are going to stage the items under the top tarp. Consider the dimensions of the top tarp and make sure items underneath stick out far enough for the desired effect. (My items were too closely packed.)
7) String "rope" will cut into the putty and create unrealistic cuts if you are not careful. The tape straps Jon uses in the video work much better than the string I used.
8) Fragile parts may break during the process. (I had some trouble with this.)
9) Jon makes it look very easy. Do not expect perfect perfect results the first time.
Again, thank you. That is a beautiful model, by the way.
-Doug
Thank you very much for posting that video (and the others as well). All my attempts to make blankets, bedrolls, and sacks with putty failed for one reason or another. Even with a pasta machine I could not get it right. Your explanation demystified the matter but I waited to respond until I could try it myself.

The photo above shows my first attempt at stowage using your system. I obviously need to practice, but this still represents a massive step forward. I have some thoughts and observations based on my first attempt:
1) I used both medium (green) and fine (silver gray) grade Milliput. The fine grade tends to crack more easily when folded and fray more easily when cut. The medium grade "drapes" better.
2) When loaded up with talc the putty losses almost all stickiness, making it difficult to attach one putty roll to another. However, if you roll up some extra putty, and put it to the side, you can use it to bond the talc coated pieces. I also found it useful to stick a thin mat or normal putty down and build the stowage on top of it. This keeps everything in place during the initial stages of construction. You can also use the extra putty to build up the hidden portion of tarps and rolls.
3) Use a sharp knife to cut the putty. A dull knife will catch and fray the edge. Making downward instead of crosswise cuts helps prevent edge fraying.
4) Use a brush, not a toothpick, to burnish the putty rolls. A toothpick exerts too much pressure and leaves unrealistic dents and pits in the putty. A toothpick is useful for pushing pieces together under the final blanket and lifting layers as shown in the video.
5) If your top blanket does not look that great, make another and throw it over the top.
6) Think very carefully about how you are going to stage the items under the top tarp. Consider the dimensions of the top tarp and make sure items underneath stick out far enough for the desired effect. (My items were too closely packed.)
7) String "rope" will cut into the putty and create unrealistic cuts if you are not careful. The tape straps Jon uses in the video work much better than the string I used.
8) Fragile parts may break during the process. (I had some trouble with this.)
9) Jon makes it look very easy.
 Do not expect perfect perfect results the first time.
Again, thank you. That is a beautiful model, by the way.
-Doug
Posted: Tuesday, August 04, 2009 - 11:24 AM UTC
Jon the putty you used, what is the drying/working time of this product? I ask as I noted that you made you tarp before using PVA to secure your stowage over which the trap lays, and said that you wait untill the PVA is mostly dry.
BigJon

Joined: July 12, 2005
KitMaker: 757 posts
Armorama: 609 posts

Posted: Wednesday, August 05, 2009 - 02:57 AM UTC
Hi guys,
this is great !! this is the first time one of my videos has sparked a discussion which includes pictures! I am really happy to see others taking what's on show and giving it a go.
In response to whats been said so far... I have never used milliput for tarps so I'm afraid I can't offer much in the way of feedback regarding the product. I have seen great results with the stuff so I assume it's much the same. I have experienced the same cracking in the past with Magic Sculp, so I can only guess that this occurs when the product is just ever so slightly too dry/hard and lacks flexibility. Maybe try the same again but wait 5-10 minutes less than normal before attempting the creases.
When loading out with talc you instantly lose the sticky effect of the putty - for me this was a plus because I didn't need it to stick really - others might not agree. When using Magic Sculp it's water based chemistry means I could just wash the talc off with a brush and "activate" some of the putty underneath to get a sticky surface again. I didn't need to do this in the video, but it's always an option with that product.
Adding creases with a toothpick worked for me because the putty was at just the right point in it's drying time that it didn't "Dent" so easily, but rather curved when pressed. The best thing to do is watch the video, have a go yourself and run with whats best for you.
Darren - working time with magic sculp does vary depending on the mix you use and the conditions you work in. It's hard to remember exactly but when I did the video I think I waited about 15 minutes after rolling before actually applying the tarp. The white glue as you could see was only dry on the outside and still white in the middle. Once it had a grip I didn't worry about waiting for it to fully cure, it could carry on doing that under the tarp.
On average the Magic Sculp will be rock hard within an hour when I mix it up.
Please keep those pics coming ! Oh and Doug - don't forget to wash your pasta machine I once accidentally ingested milliput and it doesn't taste as good as it models !
cheers
Jon
this is great !! this is the first time one of my videos has sparked a discussion which includes pictures! I am really happy to see others taking what's on show and giving it a go.
In response to whats been said so far... I have never used milliput for tarps so I'm afraid I can't offer much in the way of feedback regarding the product. I have seen great results with the stuff so I assume it's much the same. I have experienced the same cracking in the past with Magic Sculp, so I can only guess that this occurs when the product is just ever so slightly too dry/hard and lacks flexibility. Maybe try the same again but wait 5-10 minutes less than normal before attempting the creases.
When loading out with talc you instantly lose the sticky effect of the putty - for me this was a plus because I didn't need it to stick really - others might not agree. When using Magic Sculp it's water based chemistry means I could just wash the talc off with a brush and "activate" some of the putty underneath to get a sticky surface again. I didn't need to do this in the video, but it's always an option with that product.
Adding creases with a toothpick worked for me because the putty was at just the right point in it's drying time that it didn't "Dent" so easily, but rather curved when pressed. The best thing to do is watch the video, have a go yourself and run with whats best for you.
Darren - working time with magic sculp does vary depending on the mix you use and the conditions you work in. It's hard to remember exactly but when I did the video I think I waited about 15 minutes after rolling before actually applying the tarp. The white glue as you could see was only dry on the outside and still white in the middle. Once it had a grip I didn't worry about waiting for it to fully cure, it could carry on doing that under the tarp.
On average the Magic Sculp will be rock hard within an hour when I mix it up.
Please keep those pics coming ! Oh and Doug - don't forget to wash your pasta machine
 I once accidentally ingested milliput and it doesn't taste as good as it models !
cheers
Jon

Damraska

Joined: October 06, 2006
KitMaker: 580 posts
Armorama: 499 posts

Posted: Wednesday, August 05, 2009 - 08:22 AM UTC
Hi Jon,
Based on what I have read, Milliput and Magic Sculpt are basically the same thing. Silver-Gray is much harder than Green Milliput which explains the cracking. Green Milliput will also crack when too dry, as you describe, but it takes a while to reach that hardness.
So, my second foray into the wonderful world of stowage:


This time the tarp has much more character and I will use it. My thoughts this time around:
1) I watched the video again right before starting work and followed the directions more closely. Less improvisation = Better results.
2) I did mix up some extra putty as before. I laid down a thin bed and then built my stowage on top of it. The sticky putty held everything together, much like the tape. In Jon's video, he builds stowage on a perfectly flat M4A1 engine deck. My M4A3 deck had many more obstructions. The thin putty base conformed over these.
3) This time I used a much larger putty blanket for the top layer. This provided much more blanket to bunch up, crease, and fold.
4) I tried very hard to avoid touching a toothpick to the top of the blanket. The longer you give the putty to set up, the less of a problem this is.
5) White glue works way better than super glue for keeping the stowage together. My first attempt at stowage, made with super glue, fell apart easily. The second attempt, made with white glue, stuck together.
6) I made an extra blanket in case I messed up the first one. The first one turned out so well the second became an extra tarp.
7) I was much more thoughtful about staging the items under the blanket and considering how to make certain items, like the wood box, stick out. Most of the stowage items end up completely hidden. If you have stowage items in the spares box that don't look so great, they make great filling for the center of the bundle.
The whole process is a lot of fun and pretty easy. I was able to recover all stowage items from my first attempt and reuse them for the second.
Roger that. I have yet to find a modeling compound that actually tastes good.
-Doug
Based on what I have read, Milliput and Magic Sculpt are basically the same thing. Silver-Gray is much harder than Green Milliput which explains the cracking. Green Milliput will also crack when too dry, as you describe, but it takes a while to reach that hardness.
So, my second foray into the wonderful world of stowage:


This time the tarp has much more character and I will use it. My thoughts this time around:
1) I watched the video again right before starting work and followed the directions more closely. Less improvisation = Better results.
2) I did mix up some extra putty as before. I laid down a thin bed and then built my stowage on top of it. The sticky putty held everything together, much like the tape. In Jon's video, he builds stowage on a perfectly flat M4A1 engine deck. My M4A3 deck had many more obstructions. The thin putty base conformed over these.
3) This time I used a much larger putty blanket for the top layer. This provided much more blanket to bunch up, crease, and fold.
4) I tried very hard to avoid touching a toothpick to the top of the blanket. The longer you give the putty to set up, the less of a problem this is.
5) White glue works way better than super glue for keeping the stowage together. My first attempt at stowage, made with super glue, fell apart easily. The second attempt, made with white glue, stuck together.
6) I made an extra blanket in case I messed up the first one. The first one turned out so well the second became an extra tarp.
7) I was much more thoughtful about staging the items under the blanket and considering how to make certain items, like the wood box, stick out. Most of the stowage items end up completely hidden. If you have stowage items in the spares box that don't look so great, they make great filling for the center of the bundle.
The whole process is a lot of fun and pretty easy. I was able to recover all stowage items from my first attempt and reuse them for the second.
Quoted Text
Oh and Doug - don't forget to wash your pasta machine I once accidentally ingested milliput and it doesn't taste as good as it models !
Roger that.
 I have yet to find a modeling compound that actually tastes good.
-Doug
BigJon

Joined: July 12, 2005
KitMaker: 757 posts
Armorama: 609 posts

Posted: Wednesday, August 05, 2009 - 09:03 PM UTC
Hi Doug - that second attempt looks great, that one is a keeper for sure ! Job well done.
The white glue holding the stowage together is also better than superglue because if it turns out that you don't like the look of the stowage you can always peel or cut the stuff and get your stowage items back. Me and superglue don't always get on so well
Cheers
Jon
The white glue holding the stowage together is also better than superglue because if it turns out that you don't like the look of the stowage you can always peel or cut the stuff and get your stowage items back. Me and superglue don't always get on so well

Cheers
Jon
 |


