_GOTOBOTTOM
Constructive Feedback
For in-progress or completed build photos. Give and get contructive feedback!
The Tiger/Zimmerit - Late WIP
AlxUSMC
Visit this Community
Armed Forces Europe, United States
Joined: December 04, 2008
KitMaker: 216 posts
Armorama: 132 posts
Posted: Thursday, October 01, 2009 - 12:09 PM UTC
*THIS IS MY FIRST TIGER*

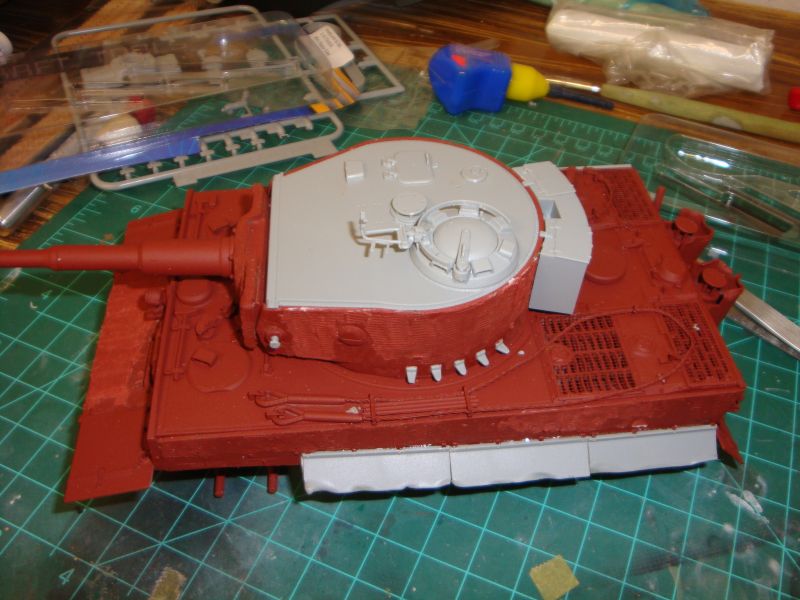
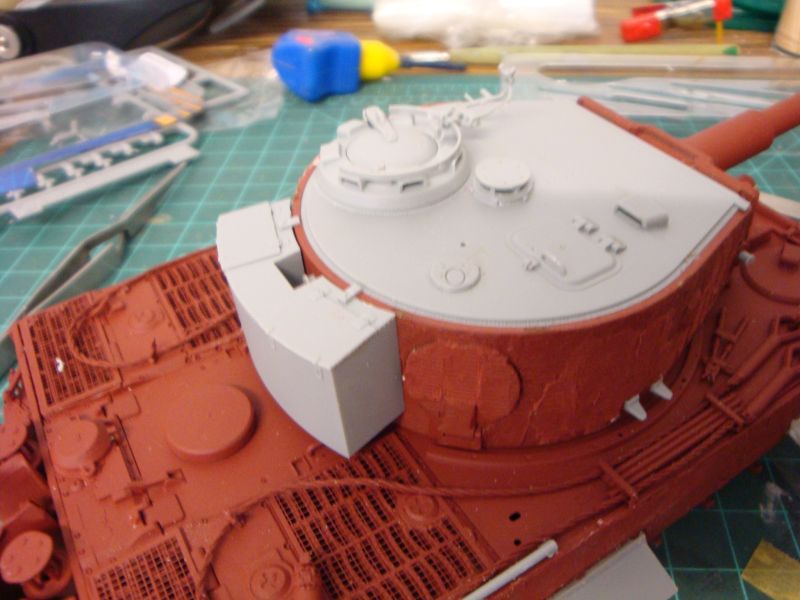
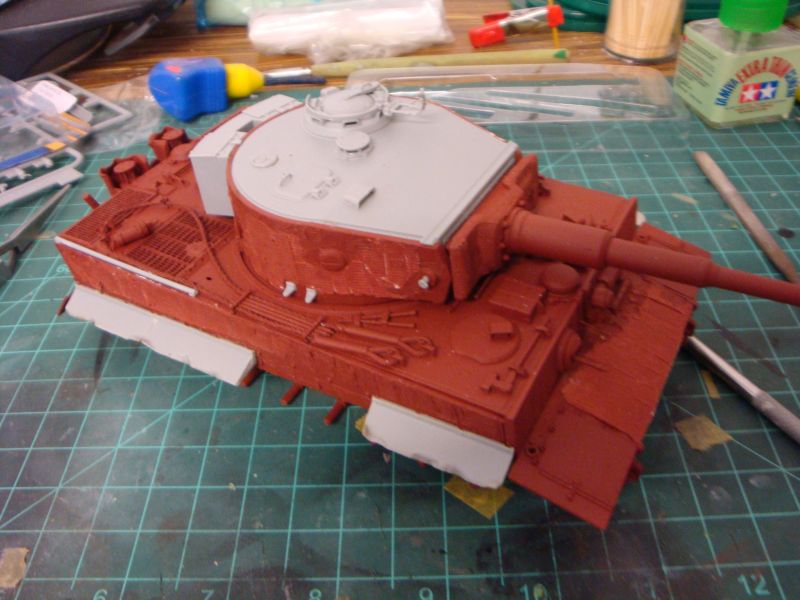
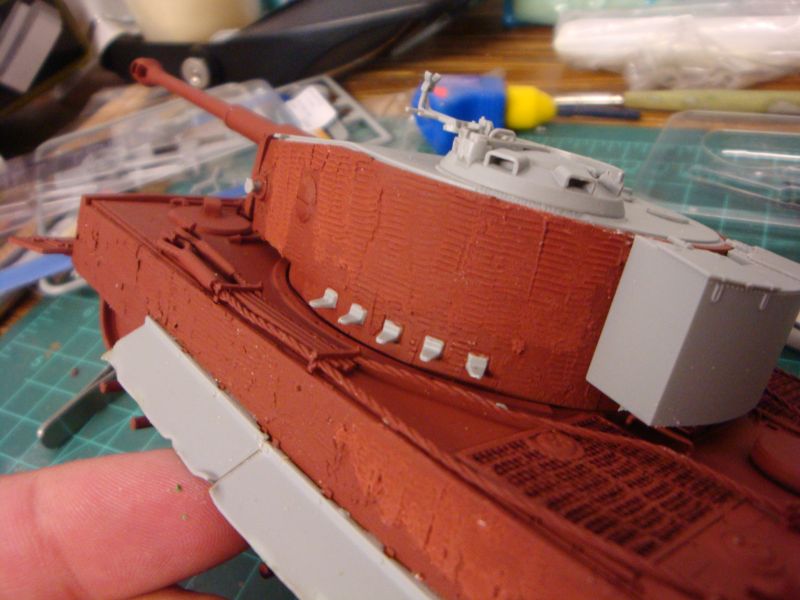
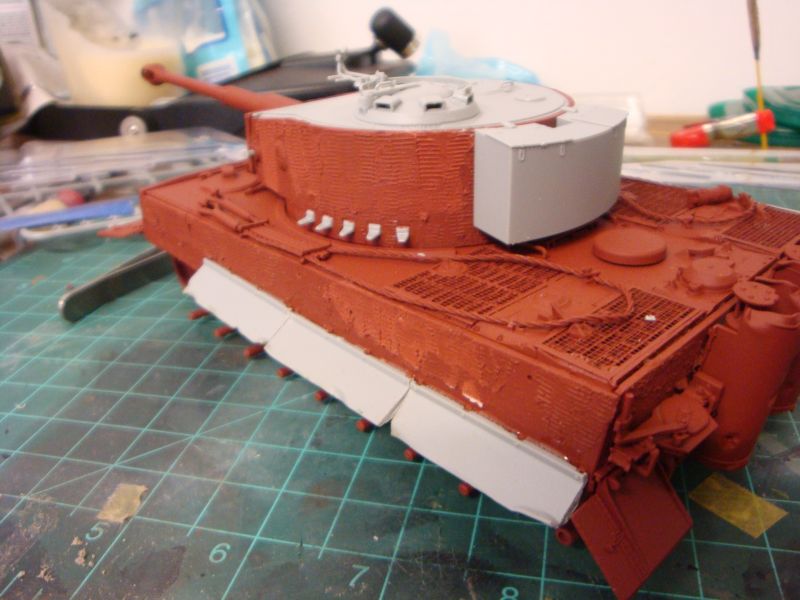
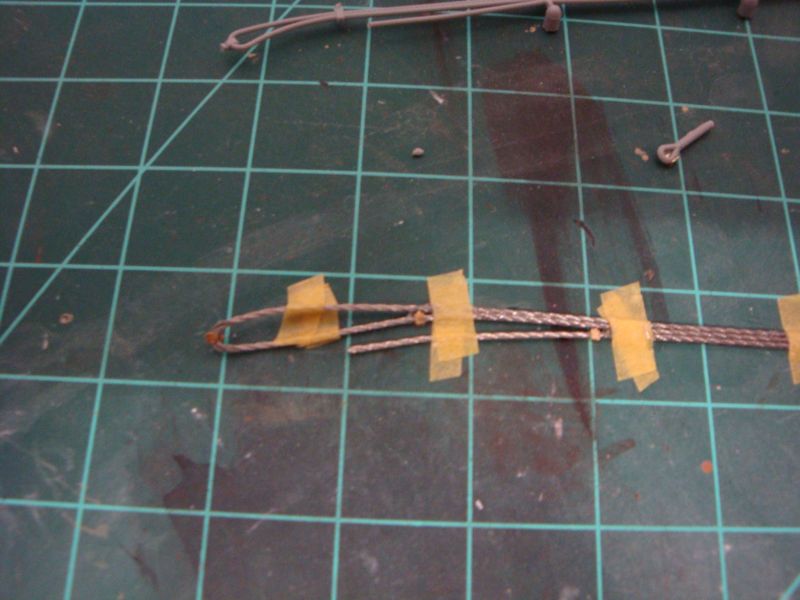
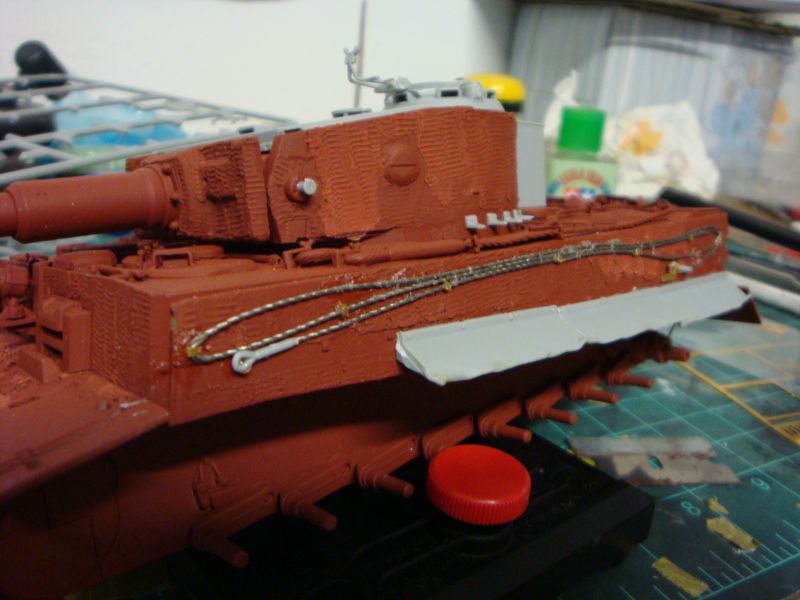
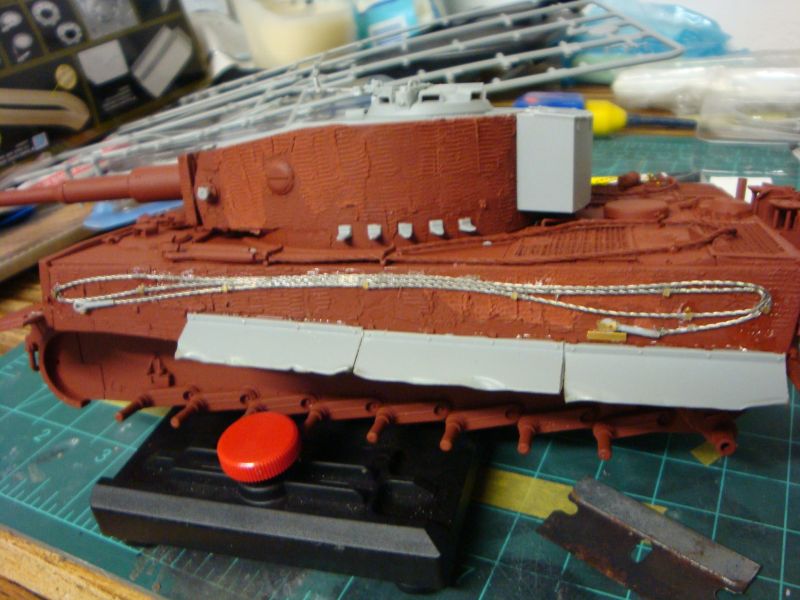
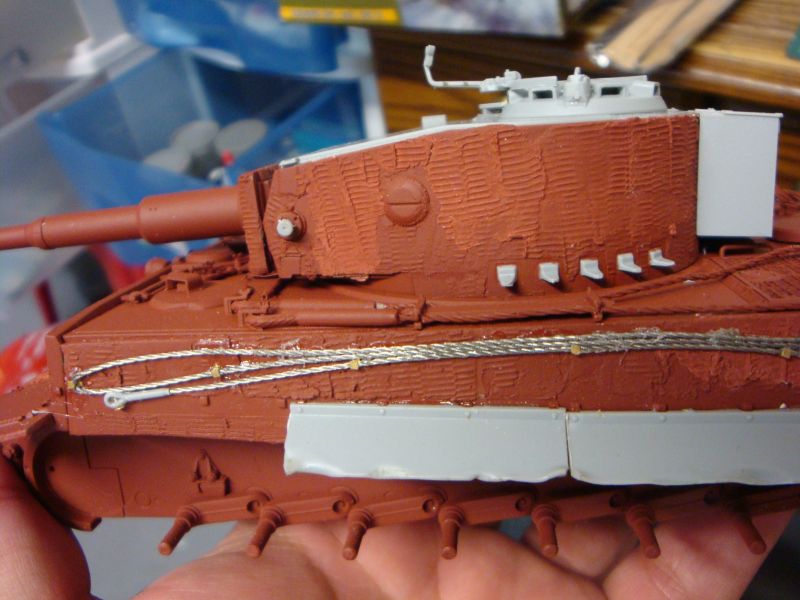
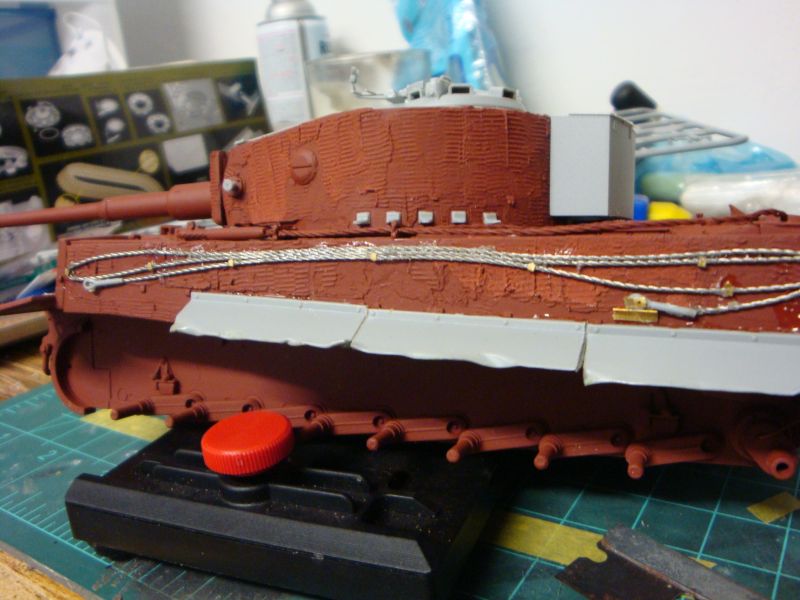
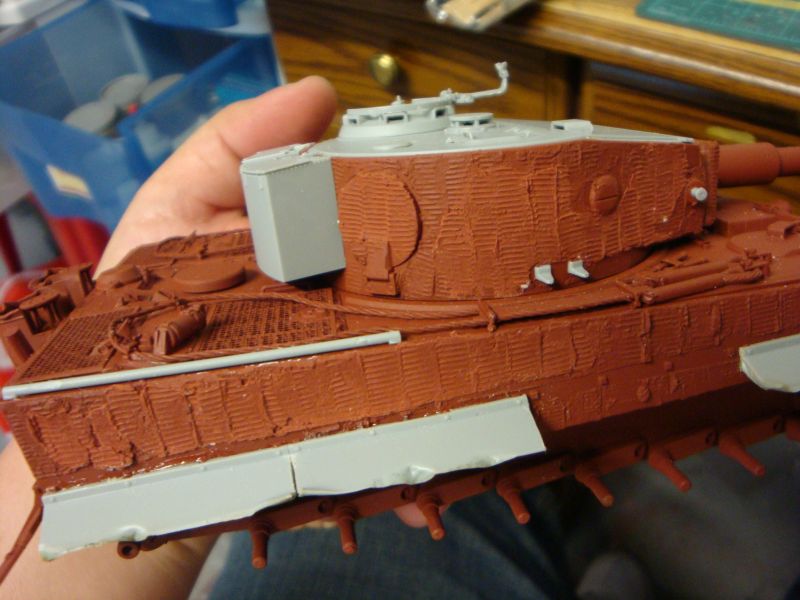
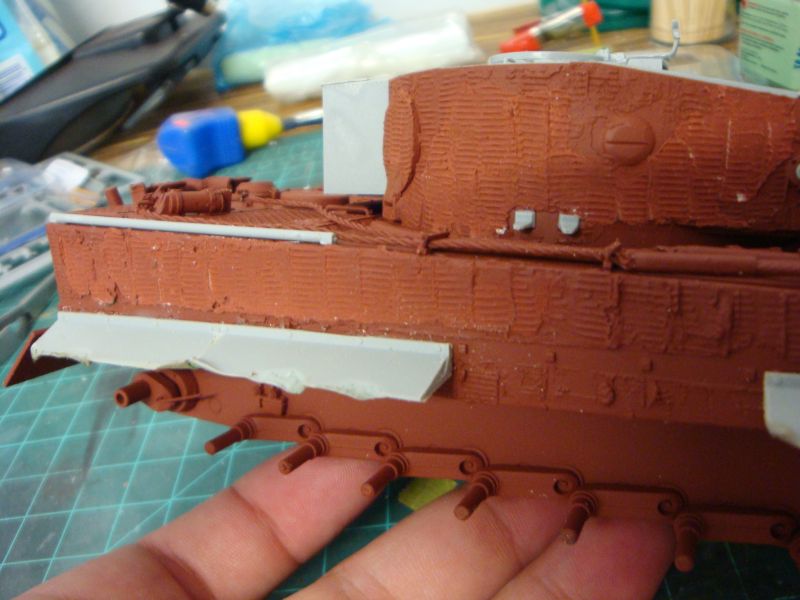
I bought this kit thinking "Hotel Foxtrot, what am I getting myself into?"....After I won the DMoM Novice class for June I figure what the heck. I am not a big history buff when it comes to Tigers so mind the discrepancies, but do point them out please. So I decided to go with the Late Command version. This kit doesn't come with zimmerit, and that was another first. I referenced Ron Goins' Return of the Tiger and David Byrden's Site So here are some Late WIP pictures.

All comments/corrections welcome!!

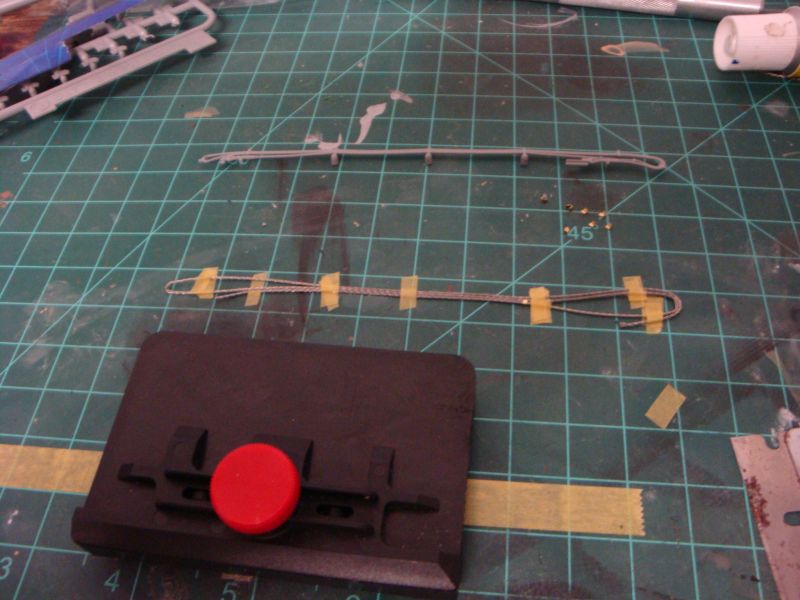
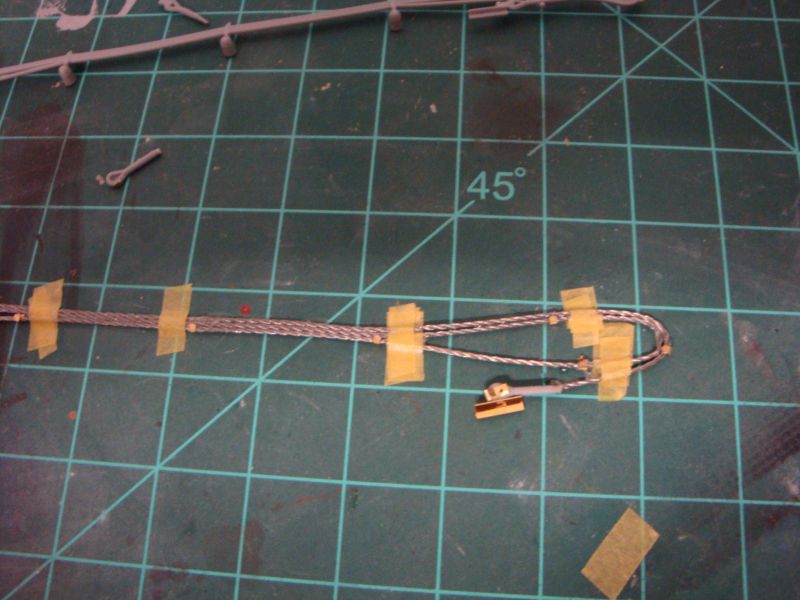
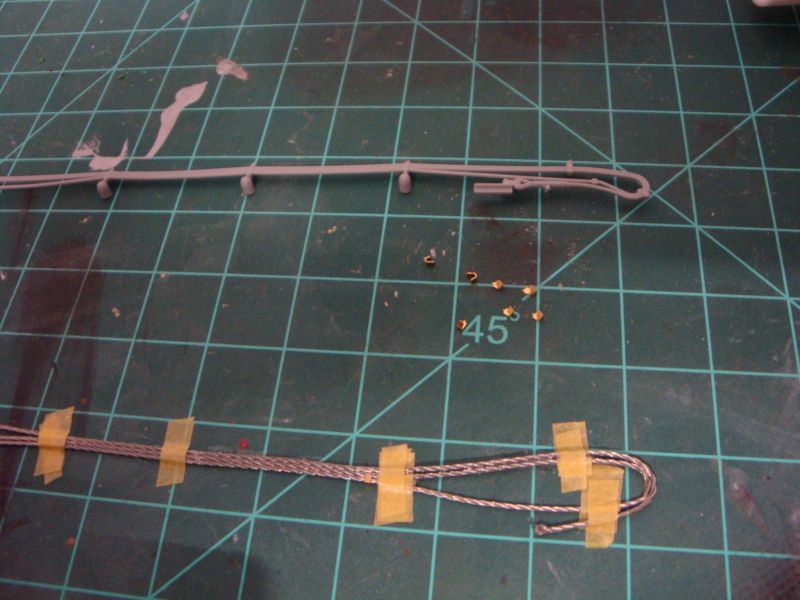
-Photo Etch was shaped with Mr. Fold It from the ARMORY-Review coming soon/supplied wire used for Tow lines.
-Zimmerit was done with Squadron Green Putty (pain in the arse) after my attempt with Miliput failed. Used the Tamiya Zimmerit Tool and AFV Club Zimmerit Roller
-Oh yeah I primed my progress with a Rust colored primer in hopes to have the chipping effect when painting begins.


So that is it for now, again all comments and suggestions are welcome


I AM HAVING TECH DIFF WITH PICS
Jupiterblitz
Joined: December 30, 2007
KitMaker: 885 posts
Armorama: 796 posts
Posted: Thursday, October 01, 2009 - 12:17 PM UTC
Aaarrgghhhh!!! MY EYES!!!!!!!

Sorry Alex, but I could not stand viewing your pics...
AlxUSMC
Visit this Community
Armed Forces Europe, United States
Joined: December 04, 2008
KitMaker: 216 posts
Armorama: 132 posts
Posted: Thursday, October 01, 2009 - 12:21 PM UTC

Quoted Text

Aaarrgghhhh!!! MY EYES!!!!!!!

Sorry Alex, but I could not stand viewing your pics...


damn that bad huh??
NebLWeffah
Visit this Community
Alberta, Canada
Joined: October 13, 2004
KitMaker: 1,683 posts
Armorama: 1,248 posts
Posted: Thursday, October 01, 2009 - 12:31 PM UTC
Alex

I'm no expert on the Tiger but the quality of your work looks good. Having not attempted Zimmerit myself yet, I applaud your efforts. I also agree with Marco that the bright red colour makes the pics a liitle hard on the eyes. The one you have posted that is in a brown tone is easier to look at and shows more detail. Maybe you could colour-correct them so they're not as bright red. Look forward to seeing more.

Also, I would recommend that you ask the site admins to change the title of your post. There are some, including children who use this site, that may be offended by your use of language in the title - I'm just saying.


Bob
AlxUSMC
Visit this Community
Armed Forces Europe, United States
Joined: December 04, 2008
KitMaker: 216 posts
Armorama: 132 posts
Posted: Thursday, October 01, 2009 - 01:34 PM UTC
crap good point on the name...wasnt even thinking
Grumpyoldman
Staff MemberConsigliere
KITMAKER NETWORK
Visit this Community
Florida, United States
Joined: October 17, 2003
KitMaker: 15,338 posts
Armorama: 7,297 posts
Posted: Thursday, October 01, 2009 - 05:10 PM UTC
Title Edited.
NebLWeffah
Visit this Community
Alberta, Canada
Joined: October 13, 2004
KitMaker: 1,683 posts
Armorama: 1,248 posts
Posted: Thursday, October 01, 2009 - 06:43 PM UTC
Cheers guys, appreciate it. Looking forward to see more of your Tiger Alex. I was thinking of using Tamiya White Putty on my Dragon Jagdpanther when I get up the courage to try zimmerit.


Bob
AlxUSMC
Visit this Community
Armed Forces Europe, United States
Joined: December 04, 2008
KitMaker: 216 posts
Armorama: 132 posts
Posted: Sunday, October 04, 2009 - 02:29 AM UTC
Thanks again Grumpy and Bob....again my apologies....let me know if the photos turn out better.
AlxUSMC
Visit this Community
Armed Forces Europe, United States
Joined: December 04, 2008
KitMaker: 216 posts
Armorama: 132 posts
Posted: Monday, October 05, 2009 - 06:12 AM UTC
what color does the tank have on parts where the zimmerit has been chipped??
bizzychicken
Visit this Community
Wales, United Kingdom
Joined: September 06, 2008
KitMaker: 967 posts
Armorama: 842 posts
Posted: Monday, October 05, 2009 - 08:09 AM UTC
Realy like the beat up rough looking ZIM. i think it looks great, nice to see Zim all chipped and ununiformed. Like it alot, looking forward to seeing some colour on it. Great 1st attemp at Zim, great start. Cheers Geraint
AlxUSMC
Visit this Community
Armed Forces Europe, United States
Joined: December 04, 2008
KitMaker: 216 posts
Armorama: 132 posts
Posted: Monday, October 05, 2009 - 11:19 AM UTC
thanks chicken....its great that some of the pros help the amateurs....So do you know the color the skin of the tank is when the zim is chipped
barkmann424
Visit this Community
England - North West, United Kingdom
Joined: November 23, 2008
KitMaker: 357 posts
Armorama: 353 posts
Posted: Monday, October 05, 2009 - 10:54 PM UTC
Hi Alex! This looks like it's going to be a cracker! I like the battle damage to the zimmerit especially, you often see this kind of distress on Tigers in images on the 'Ostfront' where the 'heavier' nature of the atmospherics, would get under the zimmerit of the Tiger, especially if some damage had already occurred.
Now the colours that are shown when such flaking, peeling and damage, follow a reverse procedure from the application of primer, zimmerit, base coat, and camo.
Stay with me on this...
The hull and all metal would be primed in a red oxide hue, followed by an application of zimmerit in two stages, firstly a single thinnish layer would be applied on the vertical and some angled aspects of the Tigers hull. When surface dried a further layer of the paste was added, before the pattern was impressed with the tools, the surface was face cured with a blow torch( the ingredients used all had a pale colour bias, light greys white, 'sawdust'! And in some of the recipes cited, a yellow ochre pigment, I expect that this would differ slightly from the 'Dunkelgelb' basecoat.). Then after a few days drying time the Tank would be basecoated in dark yellow, and dispatched to the assigned units, where their take on camo would be applied, by the work/maintenance echelon.
So if you reverse the process you should have a fair representation of the exposed layers.


Looking forwards to the progress, cheers Phil.
AlxUSMC
Visit this Community
Armed Forces Europe, United States
Joined: December 04, 2008
KitMaker: 216 posts
Armorama: 132 posts
Posted: Tuesday, October 06, 2009 - 09:52 AM UTC
WOW Phil thanks a mil!!!. So you think using some sort of masking technique would help on the parts with the chipped zimmerit? I was even daring into using the hairspray technique and going back later and removing paint to show the oxide primer underneath???
mvfrog
Visit this Community
California, United States
Joined: August 25, 2008
KitMaker: 369 posts
Armorama: 74 posts
Posted: Tuesday, October 06, 2009 - 07:22 PM UTC
Good job, Alex...I find your honesty (first Tiger, etc) a real asset, and it will show in more of your work. Don't change nothin' about your work effort. I have never built a piece of armor, but I know you're on the right track, 'cause it shows, and I know Marines persevere. Good build...look forward to more.

Semper Fi....birthday soon,
Matt
barkmann424
Visit this Community
England - North West, United Kingdom
Joined: November 23, 2008
KitMaker: 357 posts
Armorama: 353 posts
Posted: Tuesday, October 06, 2009 - 07:23 PM UTC
Hi Alex! There are quite a few ways to 'mask' off the primered and other areas you don't want painting with either basecoat or camouflage. Hairspray is an excellent method, for this type of application, a more local heavier covering would be required, you can do this by spraying some into the cans cap, then using a fine to medium detail brush to apply it where you want it to go. you can also use 'hair gel' and Steve zaloga has been known to utilise 'Toothpaste' (for that fresh minty AFV zing!) before putting down your paint layers. Then when all is dry, a little gentle to medium 'scrubbing' with a coarser stubby brush moisted with warm water, should give you the desired, flaked and distressed look you desire!

When your friends and family catch you using such 'modelling supplies' though, that is when this hobby really starts to take some explaining eh?

Good luck with the kitty, Phil
jrrivc
Visit this Community
California, United States
Joined: August 30, 2007
KitMaker: 207 posts
Armorama: 153 posts
Posted: Wednesday, October 07, 2009 - 05:54 AM UTC
What is so offensive with the title "This Is My First Tiger " ? ( just curious) Maybe i missed something. Also the paint .
AlxUSMC
Visit this Community
Armed Forces Europe, United States
Joined: December 04, 2008
KitMaker: 216 posts
Armorama: 132 posts
Posted: Wednesday, October 07, 2009 - 10:05 PM UTC

Quoted Text

What is so offensive with the title "This Is My First Tiger " ? ( just curious) Maybe i missed something.


The original title was - "popping my Tiger/Zimmerit cherry" a bit innapropriate


Quoted Text

Also the paint


Im not quite sure what you mean by Also the paint, kinda incomplete sentence...
jrrivc
Visit this Community
California, United States
Joined: August 30, 2007
KitMaker: 207 posts
Armorama: 153 posts
Posted: Thursday, October 08, 2009 - 06:13 AM UTC
Thanks for the update on the initial title.. I missed that. You'er right , it was'nt appropriate. As to the color. it seems some took issue with the color of your base coat.I really did'nt see anything wrong with it, thats all. Thanks again . Your Tiger is lookin GOOD!!!!

Frank
AlxUSMC
Visit this Community
Armed Forces Europe, United States
Joined: December 04, 2008
KitMaker: 216 posts
Armorama: 132 posts
Posted: Tuesday, October 20, 2009 - 09:58 AM UTC
Got some more work done today....please scrutinize!!!


A lot of epoxy glue left, gotta clean it up later


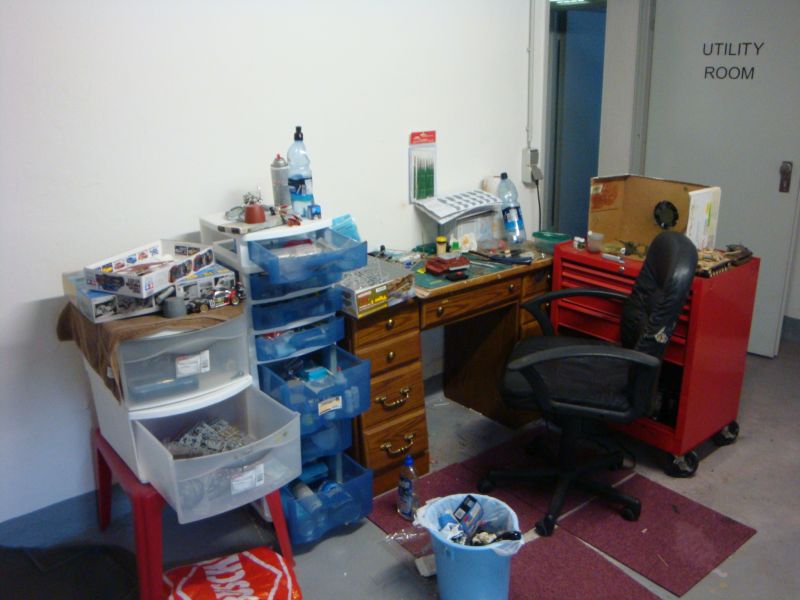
My lovely workspace

AlxUSMC
Visit this Community
Armed Forces Europe, United States
Joined: December 04, 2008
KitMaker: 216 posts
Armorama: 132 posts
Posted: Tuesday, October 27, 2009 - 10:30 AM UTC
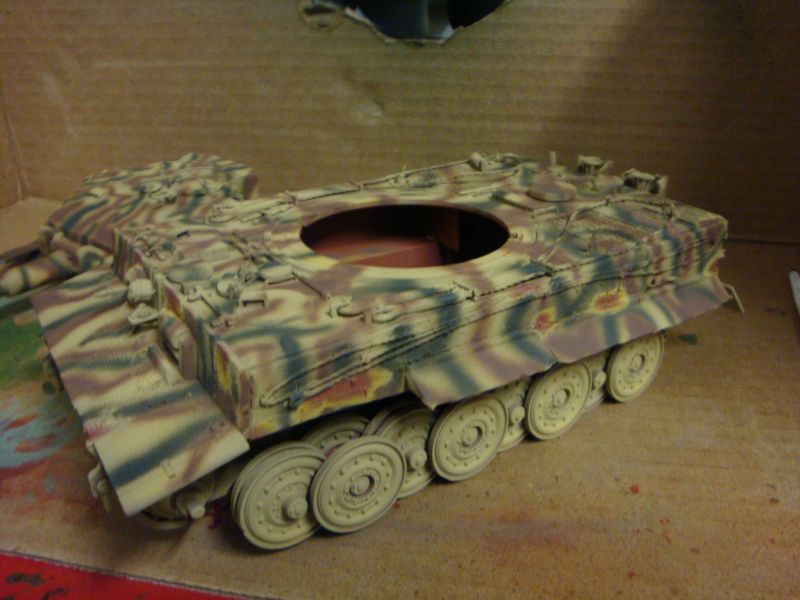
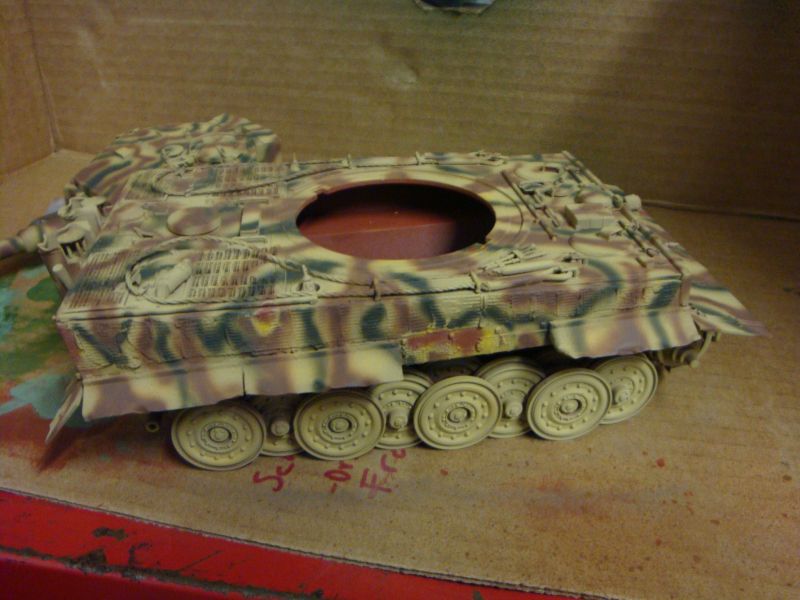
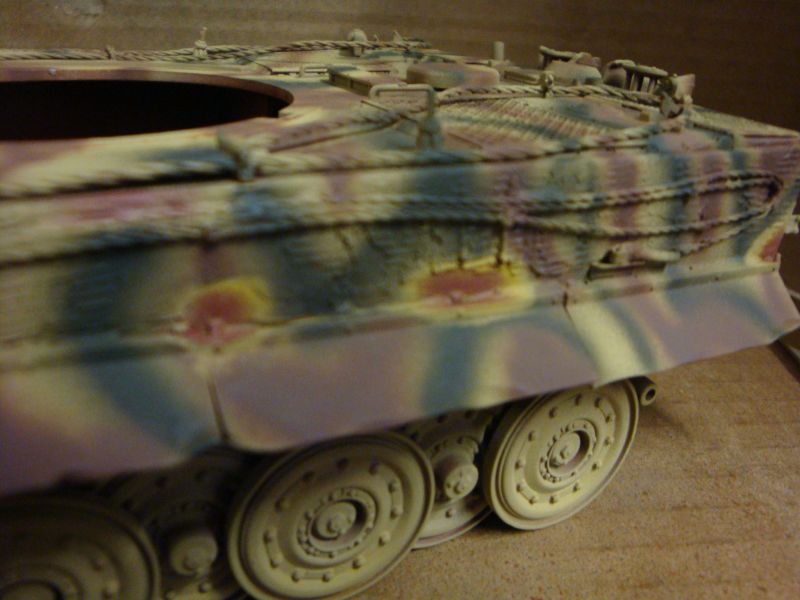
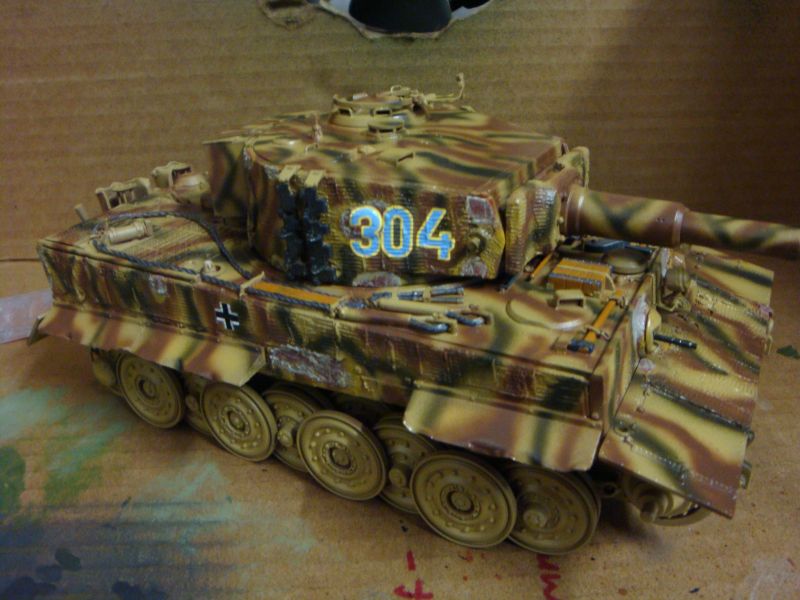
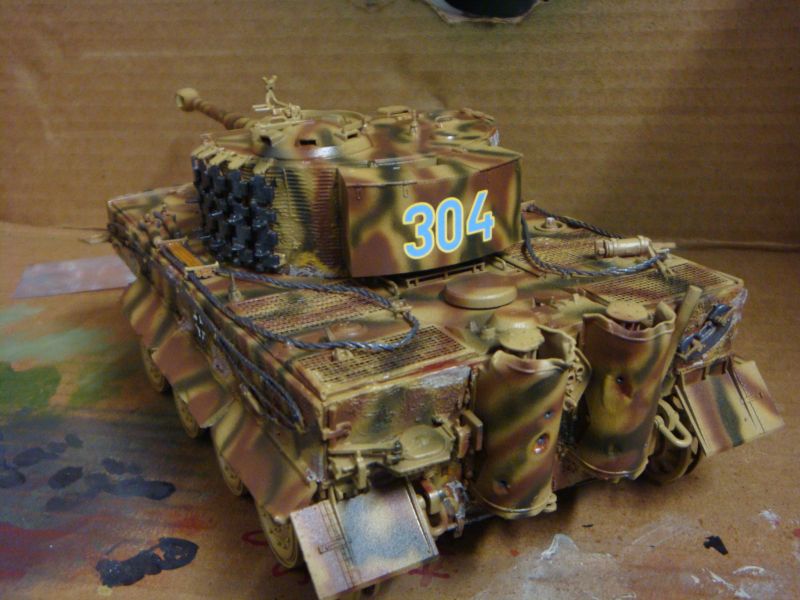
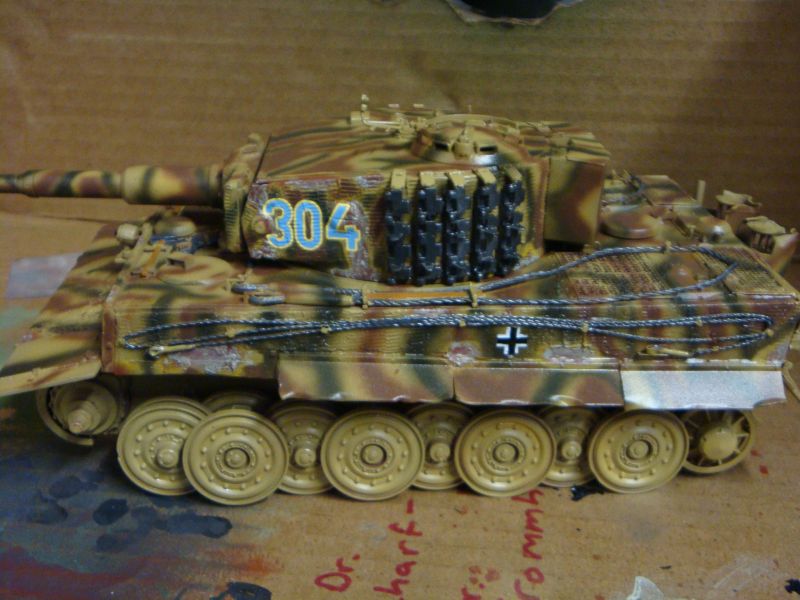
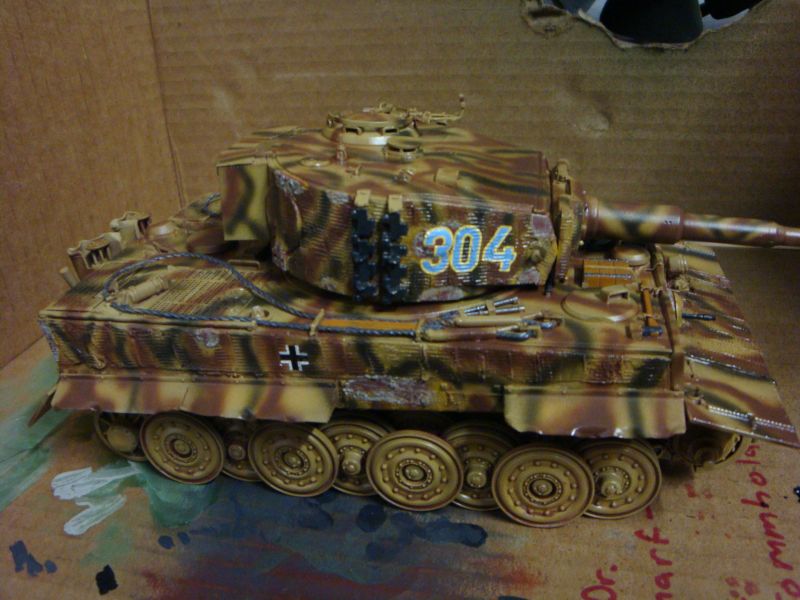
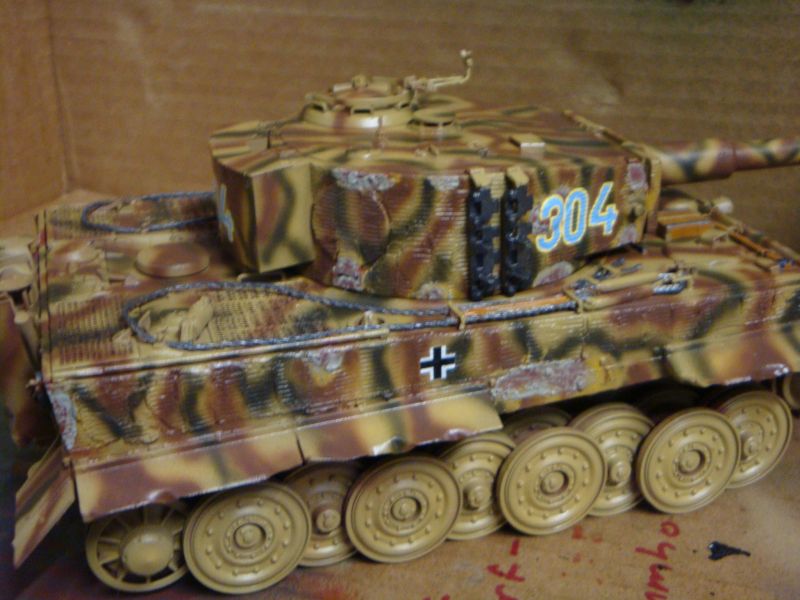
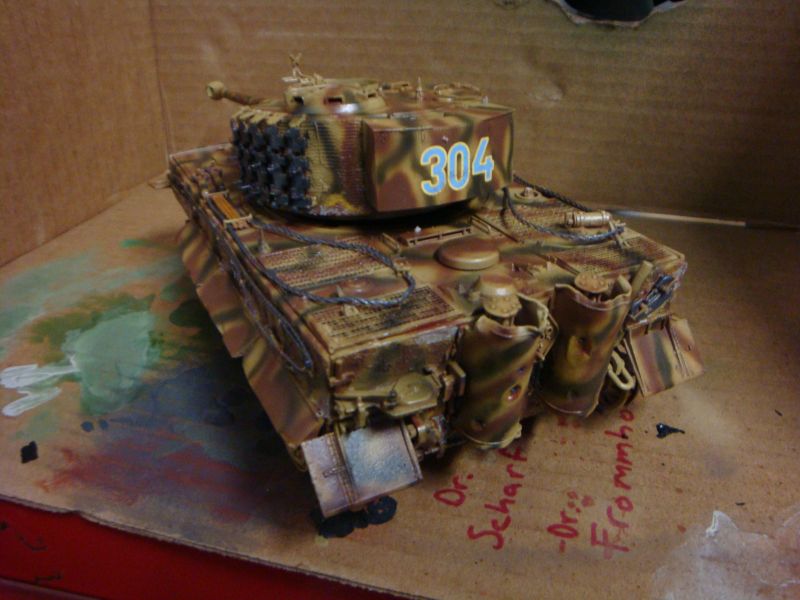
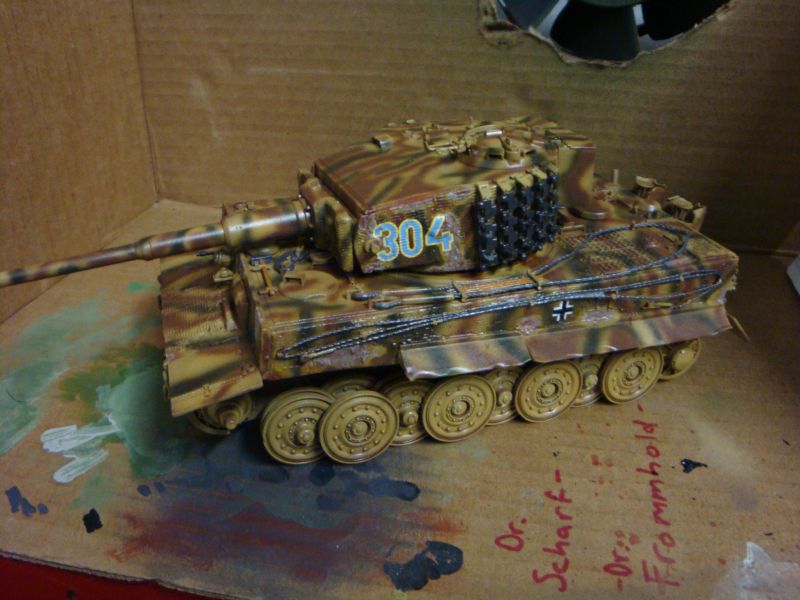
Got a lot done today!

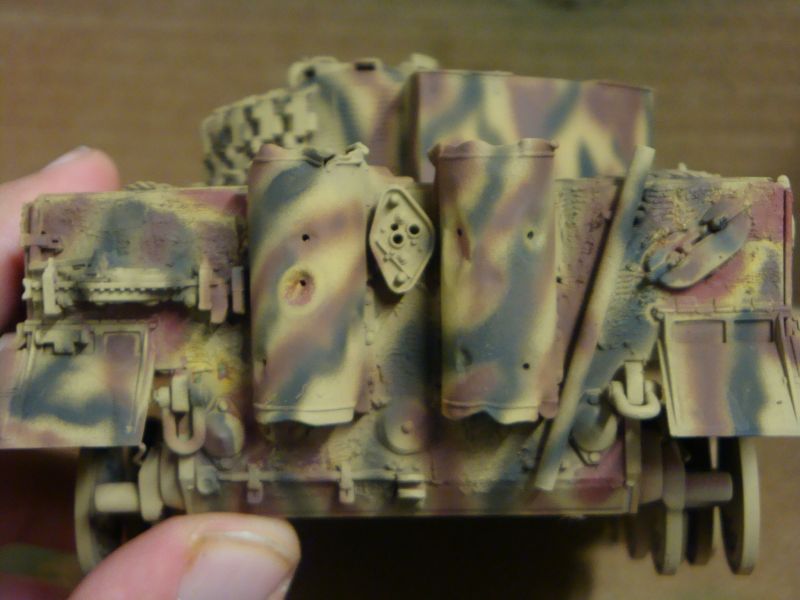
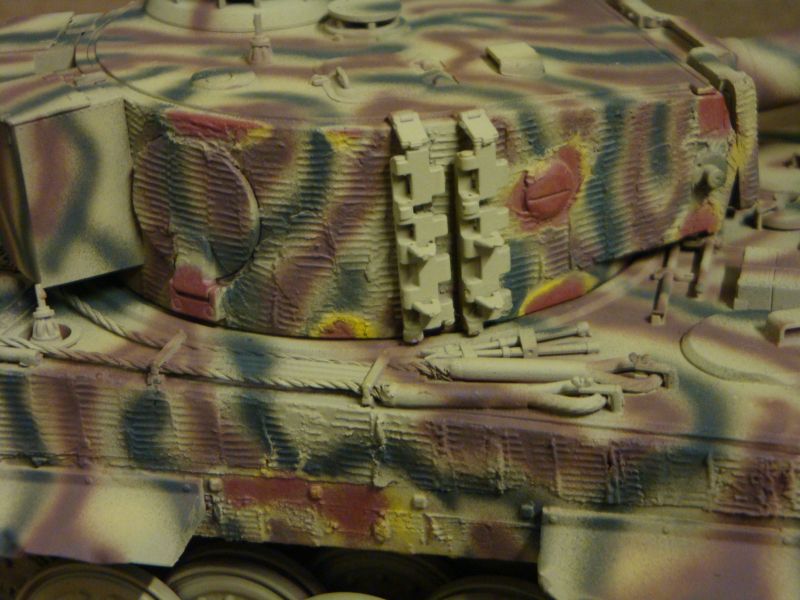
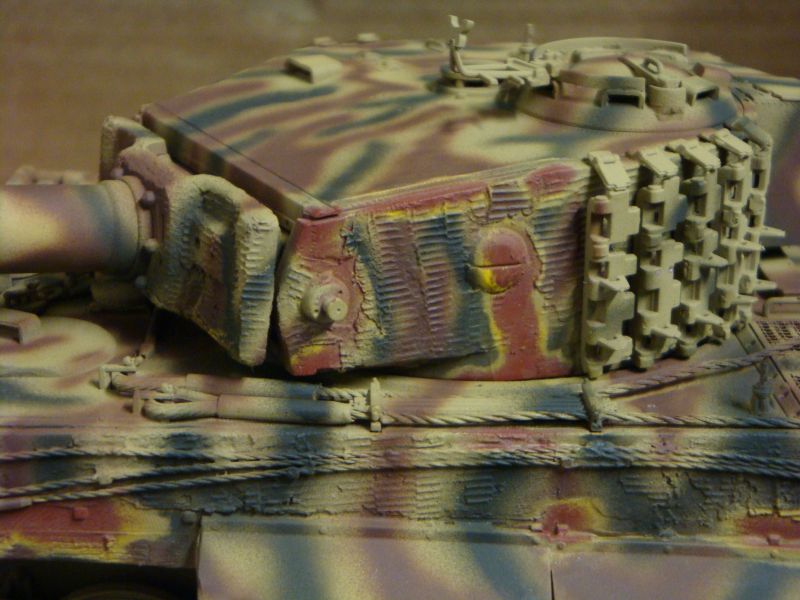
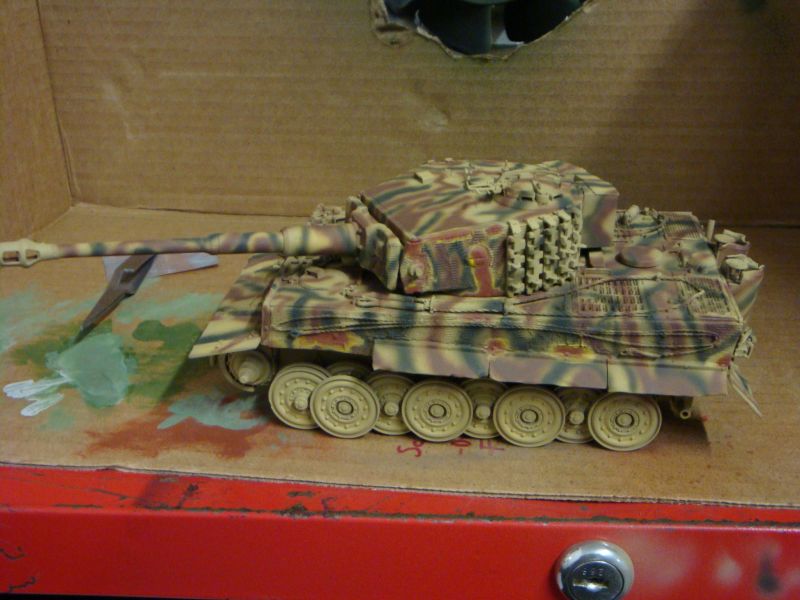
I decided something crazy and attempted to "preshade" the Tiger, I am not too good at Post Shading and since the build was going good so far I didnt want to chance it. I used Tamiyas Flat Yellow Acryl and took it from there,


From here I lightly sprayed Tamiya's Desert Tan over the Flat Yellow, I think the idea works ??


After letting the light coat dry for about 4 hours, I came back to the man cave and sprayed the model with Tamiya Dark Green freehand based on the pictures and instructions of course with my own little twist.


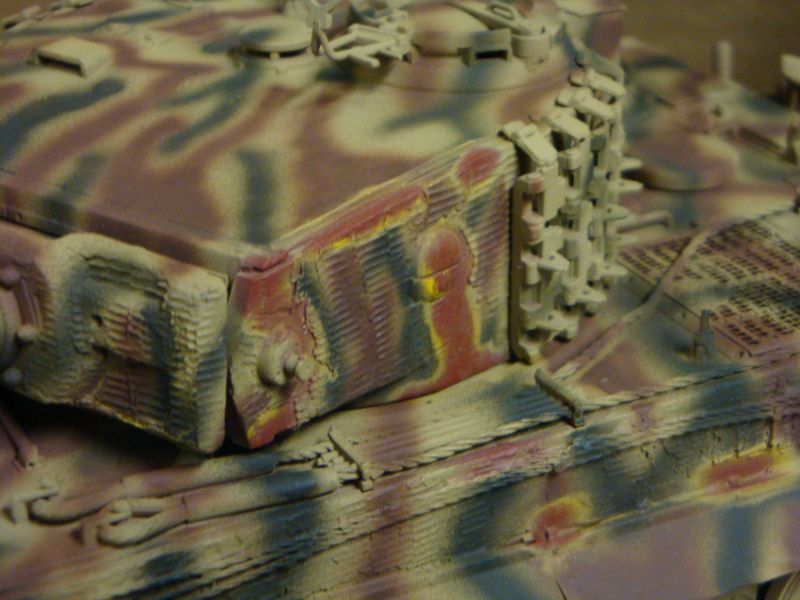
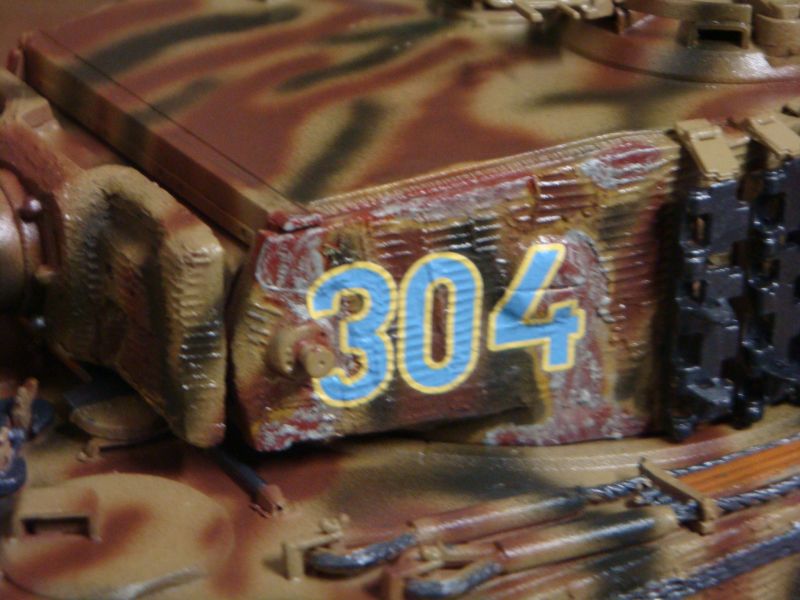
After about two hours I came back and free handed the Tamiya Red Brown. I was a bit reserved about how this one turned out, but I think it turned out ok. The Spots you see are to resemble the damaged zimmerit. I got this effect by taking a stiff brush soaked in windex and started to scrub away until I got to the primer, the yellow worked hand in hand to replicate the yellowish tint that the zimmerit had (according to some pics above)


bellers
Visit this Community
England - East Midlands, United Kingdom
Joined: September 30, 2008
KitMaker: 253 posts
Armorama: 218 posts
Posted: Tuesday, October 27, 2009 - 11:57 AM UTC
looking good alex keep up the good work that pre shadeing came out nice
jimz66
Visit this Community
Connecticut, United States
Joined: December 15, 2006
KitMaker: 1,165 posts
Armorama: 1,105 posts
Posted: Tuesday, October 27, 2009 - 02:53 PM UTC
Looking great Alex. Way to go.
AlxUSMC
Visit this Community
Armed Forces Europe, United States
Joined: December 04, 2008
KitMaker: 216 posts
Armorama: 132 posts
Posted: Tuesday, October 27, 2009 - 07:14 PM UTC

Quoted Text

looking good alex keep up the good work that pre shadeing came out nice


Quoted Text

Looking great Alex. Way to go.


Thanks a lot guys

Got some more done

To get the white in the chipped zimmerit I thinned some Mr. Putty with Lacquer thinner until it was a bit chunky and spread it over the spots that needed it. Once dry I took some Lacquer thinner on a brush and blended it in to the model a bit. After this was dry I applied a heavy coat of future for decal application. I decided to go with Tank 304 because I figured the difference in the light blue and yellow to the RedBrown/DarkGreen mix would stand out a bit more. After another coat of future and about an hour to dry I painted the tools and tow cables, I mixed revell aqua line's steel and flat black for the metallic look. Another coat of future to seal that up!!


Smartin
Visit this Community
Zuid-Holland, Netherlands
Joined: May 07, 2009
KitMaker: 48 posts
Armorama: 40 posts
Posted: Tuesday, October 27, 2009 - 09:13 PM UTC
Hi Alex,

Nice Tiger...I'm making the same at the moment.
1 remark....you have placed the brackets for the spare tracks on the turret the wrong way round (upside down). That's why the top brackets are hanging down.
Perhaps it is not too late to put it right.

Good luck with the rest of the tiger; I'll be following this!

Greetz.

Martin
AlxUSMC
Visit this Community
Armed Forces Europe, United States
Joined: December 04, 2008
KitMaker: 216 posts
Armorama: 132 posts
Posted: Tuesday, October 27, 2009 - 11:06 PM UTC
good catch, actually i have been waiting for someone to say it I caught it only after I went back to attach the spare tracks....its deffinately too late though, you have some pics of yours??
 _GOTOTOP