Hosted by Darren Baker
Panther Ausf G my first armo after 20+ years
Steamjohn

Joined: November 22, 2009
KitMaker: 43 posts
Armorama: 42 posts

Posted: Friday, January 29, 2010 - 01:38 PM UTC
Maybe outline the red w/ white? almost every turret number I've seen has been like that. I said almost. 


barkmann424

Joined: November 23, 2008
KitMaker: 357 posts
Armorama: 353 posts

Posted: Saturday, January 30, 2010 - 10:56 PM UTC
Excellent, camo Dave!  And those cracks! You are going to have to put an SBS together on that technique! Funnily enough, I was just clambering over a heavy piece of plant machinery the other day, that had a similar effect on a horizontal surface, caused by dings and bashes, 'cooked' up with fuel spills seeping beneath the top coat. One of those fortunate happening eh?
Looking good... Cheers Phil.
 And those cracks! You are going to have to put an SBS together on that technique! Funnily enough, I was just clambering over a heavy piece of plant machinery the other day, that had a similar effect on a horizontal surface, caused by dings and bashes, 'cooked' up with fuel spills seeping beneath the top coat. One of those fortunate happening eh?
Looking good... Cheers Phil.

Bronze4

Joined: December 20, 2009
KitMaker: 53 posts
Armorama: 39 posts

Posted: Wednesday, February 10, 2010 - 05:55 AM UTC
I still have more to do on the dirt, some tweaking on the hull, and I have not touched the turret yet as far as that goes. So, what do we think of ‘er so far?


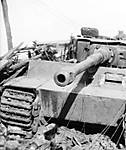
This last photo I used the Photoshop to check and see how my panther would compare to the war photos I’ve looked at.


This last photo I used the Photoshop to check and see how my panther would compare to the war photos I’ve looked at.
Steamjohn

Joined: November 22, 2009
KitMaker: 43 posts
Armorama: 42 posts

Posted: Wednesday, February 10, 2010 - 07:21 AM UTC
I like it! I like it!

Rouse713

Joined: February 03, 2009
KitMaker: 367 posts
Armorama: 326 posts

Posted: Wednesday, February 10, 2010 - 01:22 PM UTC
Hey,
That cat is amazing. I paint in oils only. Before I found out how to use future as protection before washes, I would get what you had on the turret. I would then proceed to crush the models with my foot (no not literally, but I can't say they found their way to my display case either
Anyways, I dont have that problem anymore, but I remember on some spots where that happened, I would lift the paint up on purpose, and use red pigment where it was lifted. It looked very convincingly like red primer with flaking paint. I dont know if I were to emulate that effect how I would do it any differently than "mess up" with a top coat eating away at the bottom.
Just thought you might like to keep that in mind if you had an area that was "unfixable". You dont have to give it the boot right away.
That cat is amazing. I paint in oils only. Before I found out how to use future as protection before washes, I would get what you had on the turret. I would then proceed to crush the models with my foot (no not literally, but I can't say they found their way to my display case either

Anyways, I dont have that problem anymore, but I remember on some spots where that happened, I would lift the paint up on purpose, and use red pigment where it was lifted. It looked very convincingly like red primer with flaking paint. I dont know if I were to emulate that effect how I would do it any differently than "mess up" with a top coat eating away at the bottom.
Just thought you might like to keep that in mind if you had an area that was "unfixable". You dont have to give it the boot right away.
jtrowbridge5

Joined: January 22, 2005
KitMaker: 42 posts
Armorama: 34 posts

Posted: Thursday, February 11, 2010 - 12:23 AM UTC
some photos I put together showing effects of mud on tracks
Dennis
http://put.url.here http://jtrowbridge5.smugmug.com/German-World-WarTwo/tiger1-mud-on-tracks/4950039_3bVWD
Dennis
http://put.url.here http://jtrowbridge5.smugmug.com/German-World-WarTwo/tiger1-mud-on-tracks/4950039_3bVWD
M4A2Sherman

Joined: December 29, 2008
KitMaker: 316 posts
Armorama: 264 posts

Posted: Thursday, February 11, 2010 - 03:59 AM UTC
That's so good! Please tell us all how you did it!
Awesome, just awesome.
M4A2Sherman
Awesome, just awesome.
M4A2Sherman

Bronze4

Joined: December 20, 2009
KitMaker: 53 posts
Armorama: 39 posts

Posted: Thursday, February 11, 2010 - 01:56 PM UTC
Thanks John,
You have been a loyal contributor to my little build and a great source of inspiration to keep plugging away at it. As you can see I opted out on outlining the turret numbers in white. I have two good reasons for that, one I used a stencil to paint them. How would you outline a stenciled number in real world? Secondly, and most importantly, I don’t want to screw it up trying to! I have seen some examples of nonstandard numbers applied, more the exception than the rule I know. If I had some usable decals I would have used them, but when I started this, this was the only tank in my collection… no spares lying about. Thanks for helping to keep me going!
Mark,
I have always thought that there can be a fix with armor modeling. I could very well use that crackling effect down the road. I just didn’t want it on my first tank after so long.
Thanks for looking.
Dennis,
I take it from the link, great link by the way, that you think I need to fill in the track with mud. If driven a few hundred meters on the hard ball, most mud would drop out of the tracks as it drives. In that case it should show the bright steal worn away on the high cleats. I am not dead sure of the setting I plan to put this beast in yet so I have not added any mud to the tracks them selves yet. I lean more to having it set on a road because of the lack of a working suspension. I will admit that it does look rather odd without any mud in them. I may have to add a little in any case.
Great link and I will add it to my research resources, thanks.
Q,
I am not sure which part you want to know how I did… If you are referring to the weathering, I just try to copy what I saw when I was in the Army or what I see in day to day life. All of the techniques I used are in the testing phase and still being perfected by me, this is a new style of weathering to me. If you have any specific questions I’ll do my best to answer them.
Dave Shaw
 |


