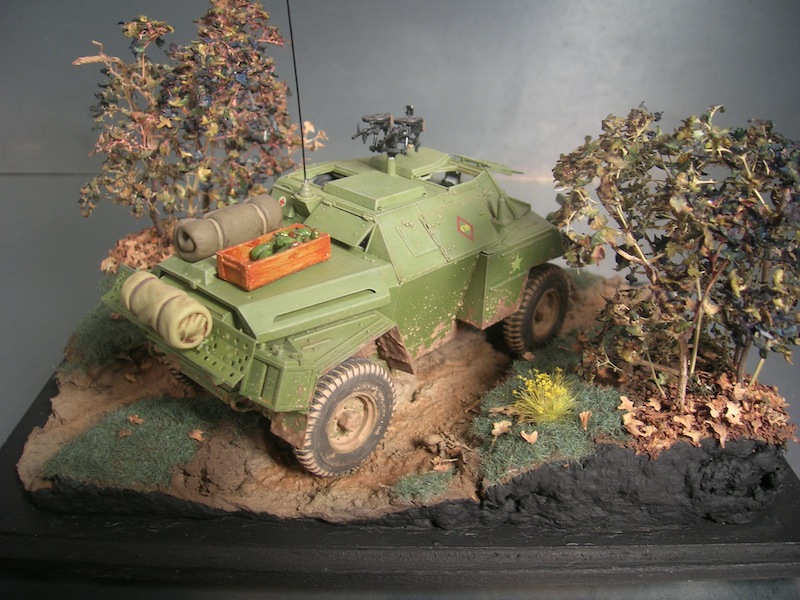
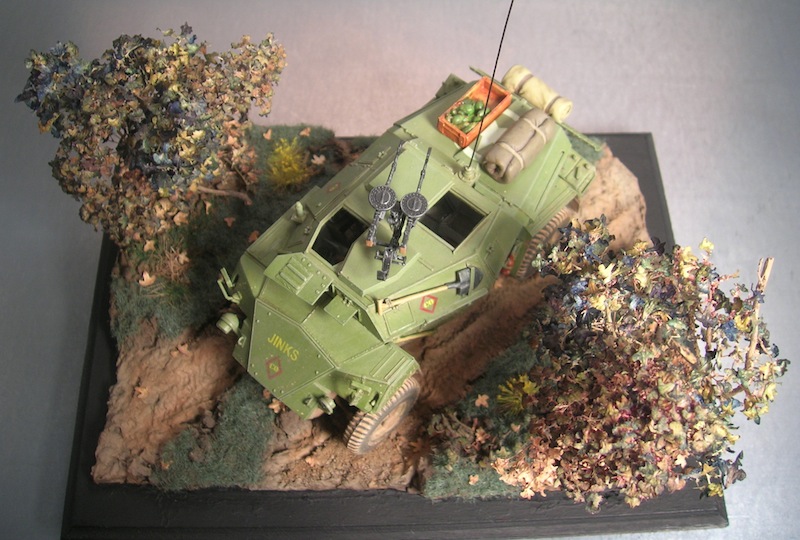
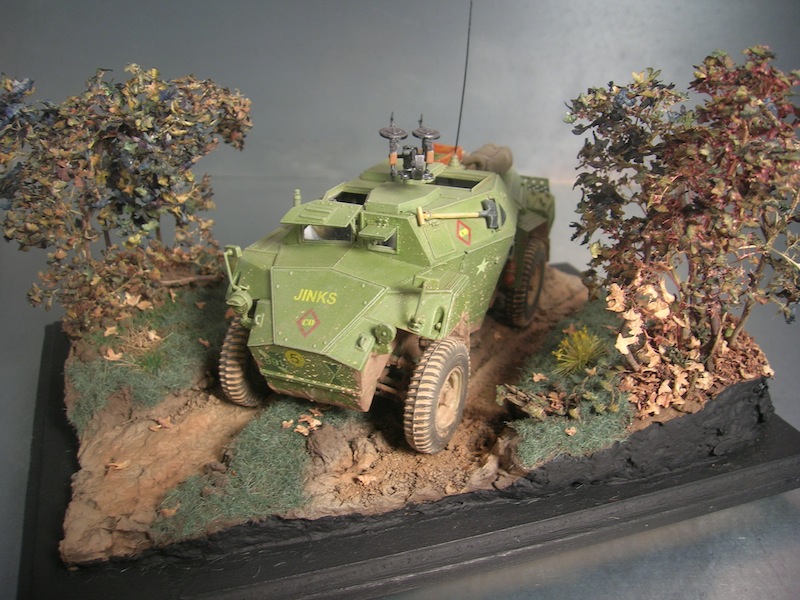
I finished this Humber Scout Car a few months ago and decided to attempt a small base for it. I weathered the Humber using Jon Hayward’s method for applying mud from the Scale Model Medic Youtube channel. I really like the result, although, as usual, I over did it. Because the Humber was coated in dry mud, I wanted the base to depict a washed out road that had already started to dry out. I also wanted to try out a lot of the various groundwork materials I have collected. This is my first base, so any comments or suggestions are appreciated.
Thanks!
Michael
Constructive Feedback
For in-progress or completed build photos. Give and get contructive feedback!
Hosted by Darren Baker, Dave O'Meara
Humber Scout Car with base
mopnglo
United States
Joined: January 07, 2006
KitMaker: 452 posts
Armorama: 271 posts
Joined: January 07, 2006
KitMaker: 452 posts
Armorama: 271 posts
Posted: Tuesday, February 02, 2010 - 08:25 AM UTC
morisoj
Vychodocesky Kraj, Czech Republic
Joined: January 18, 2010
KitMaker: 42 posts
Armorama: 41 posts
Joined: January 18, 2010
KitMaker: 42 posts
Armorama: 41 posts
Posted: Wednesday, February 03, 2010 - 06:36 AM UTC
hi Michael
i like the little dio. nice and clean build. i dont think you have over done the mud on the model. i like it
is it a bronco kit? i have one on the way. is there anything i should be aware of any problematic parts of the build?
thanks pav
i like the little dio. nice and clean build. i dont think you have over done the mud on the model. i like it
is it a bronco kit? i have one on the way. is there anything i should be aware of any problematic parts of the build?
thanks pav
mopnglo
United States
Joined: January 07, 2006
KitMaker: 452 posts
Armorama: 271 posts
Joined: January 07, 2006
KitMaker: 452 posts
Armorama: 271 posts
Posted: Wednesday, February 03, 2010 - 06:45 AM UTC
Thanks, Pav! It is the Bronco kit. Overall, I had a lot of fun with the build. The only issue I encountered was a slightly off fit between the hull top and bottom. That may have been my fault though, because I could have worked with the pieces a bit more while dry fitting. The kits comes with a great interior, although the PE hinges are very, very small. If I find the kit on sale again, I'll definitely pick up another one. I don't really like the base color I chose, it's a bit too green, I think. I wouldn't mind having another go at it.
Thanks!
Michael
Thanks!
Michael
morisoj
Vychodocesky Kraj, Czech Republic
Joined: January 18, 2010
KitMaker: 42 posts
Armorama: 41 posts
Joined: January 18, 2010
KitMaker: 42 posts
Armorama: 41 posts
Posted: Wednesday, February 03, 2010 - 11:30 AM UTC
thank you Michael. I am looking forward to build this one.
pav
pav
exer
Dublin, Ireland
Joined: November 27, 2004
KitMaker: 6,048 posts
Armorama: 4,619 posts
Joined: November 27, 2004
KitMaker: 6,048 posts
Armorama: 4,619 posts
Posted: Wednesday, February 03, 2010 - 09:58 PM UTC
Very nice work I really like the groundwork and bushes. Are you going to place a figure with the model
alewar
Canelones, Uruguay
Joined: December 27, 2006
KitMaker: 773 posts
Armorama: 765 posts
Joined: December 27, 2006
KitMaker: 773 posts
Armorama: 765 posts
Posted: Thursday, February 04, 2010 - 12:35 AM UTC
Hi Pav, I like your groundwork . Materials?. But to me the model looks still "clean". Add some oil and pastels to break the color.
Regards Alvaro
Regards Alvaro
mopnglo
United States
Joined: January 07, 2006
KitMaker: 452 posts
Armorama: 271 posts
Joined: January 07, 2006
KitMaker: 452 posts
Armorama: 271 posts
Posted: Thursday, February 04, 2010 - 02:40 AM UTC
Thanks, Pat and Alvaro! This kind of just fell together, so I didn't plan on adding a figure. I might though, if I can find one that works. I painted my first figure while I was working on the base and had a lot of fun with it. I decided from now on to include at least one figure and a base of some kind with each build. That way I can work on and improve techniques in each area.
Alvaro, the groundwork was made with Sculptamold. I didn't know what to expect when I mixed it up, so I followed some tips I had read and added white glue, water, fine sand, and some craft paint. Once the Sculptamold hardened, the left front tired didn't sit properly, so I added some real dirt with white glue to build it up. You're absolutely right about the "clean" look. I did use some oils in an attempt to add some depth to the base color, but you can't really see it in the photos. It's very subtle. I tend to hold back too much when using pin washes and other techniques. Definitely something for me to work on!
Thanks!
Michael
210cav
Virginia, United States
Joined: February 05, 2002
KitMaker: 6,149 posts
Armorama: 4,573 posts
Joined: February 05, 2002
KitMaker: 6,149 posts
Armorama: 4,573 posts
Posted: Thursday, February 04, 2010 - 03:42 AM UTC
Michael-- I like the vehicle and your display. Really eye catching....what is the base coat (brand and name) on the vehicle?
Nice job
DJ
Nice job
DJ
mopnglo
United States
Joined: January 07, 2006
KitMaker: 452 posts
Armorama: 271 posts
Joined: January 07, 2006
KitMaker: 452 posts
Armorama: 271 posts
Posted: Thursday, February 04, 2010 - 04:02 AM UTC
Thanks, DJ! I used Lifecolor for the base, but I can't remember the name of the color. I'll check when I get home tonight and let you know.
Michael
Michael
mopnglo
United States
Joined: January 07, 2006
KitMaker: 452 posts
Armorama: 271 posts
Joined: January 07, 2006
KitMaker: 452 posts
Armorama: 271 posts
Posted: Thursday, February 04, 2010 - 09:30 AM UTC
DJ -
I checked during lunch and I'm pretty sure I used Lifecolor UA 223 Olive Drab Faded Type 1.
Thanks,
Michael
I checked during lunch and I'm pretty sure I used Lifecolor UA 223 Olive Drab Faded Type 1.
Thanks,
Michael
Posted: Thursday, February 04, 2010 - 06:50 PM UTC
Well, I really like the groundwork - the leaves, mud etc look great.
But I agree with previous posters that the vehicle is overall too clean - it looks like its just driven off the boat, apart from a few spatters of mud around the bottom. Also the track looks quite muddy, but the wheels look merely dusty.
I also agree that it needs a figure to finish it off.
So, a bit more dirt and a crewman and this will be top notch
paul51
Hamilton, New Zealand
Joined: January 03, 2010
KitMaker: 159 posts
Armorama: 158 posts
Joined: January 03, 2010
KitMaker: 159 posts
Armorama: 158 posts
Posted: Thursday, February 04, 2010 - 08:37 PM UTC
I like your ground work,it all comes together nicely,a figure would certainly enhance the scene and tell more of the story.nice job
mopnglo
United States
Joined: January 07, 2006
KitMaker: 452 posts
Armorama: 271 posts
Joined: January 07, 2006
KitMaker: 452 posts
Armorama: 271 posts
Posted: Friday, February 05, 2010 - 03:50 AM UTC
Neil and Paul, thank you for the feedback! I'll start shopping for a figure to add - any suggestions?
Also, do you guys have any suggestions on what techniques I should use to dirty it up a bit?
Thanks again!
Michael
Also, do you guys have any suggestions on what techniques I should use to dirty it up a bit?
Thanks again!
Michael
BuffaloModeler
New York, United States
Joined: November 13, 2007
KitMaker: 66 posts
Armorama: 44 posts
Joined: November 13, 2007
KitMaker: 66 posts
Armorama: 44 posts
Posted: Thursday, February 11, 2010 - 07:54 AM UTC
Hi Michael,
Very impressive build! I also keep things subtle and find that photographs do not not show all of the weather we do.
I just started the Bronco kit (D-Day version) and am looking forward to finishing it.
Well done, Sir!
John Z
Very impressive build! I also keep things subtle and find that photographs do not not show all of the weather we do.
I just started the Bronco kit (D-Day version) and am looking forward to finishing it.
Well done, Sir!
John Z
mopnglo
United States
Joined: January 07, 2006
KitMaker: 452 posts
Armorama: 271 posts
Joined: January 07, 2006
KitMaker: 452 posts
Armorama: 271 posts
Posted: Thursday, February 11, 2010 - 08:35 AM UTC
Thanks, John! I appreciate it.
I'm currently building the Tamiya M3 Stuart kit - a quick build - so I can practice painting and weather. I want to move outside my comfort zone with certain techniques so I can get a better handle on when I don't have to be so subtle.
Thanks again!
Michael
I'm currently building the Tamiya M3 Stuart kit - a quick build - so I can practice painting and weather. I want to move outside my comfort zone with certain techniques so I can get a better handle on when I don't have to be so subtle.
Thanks again!
Michael
ChillyMedic
Ontario, Canada
Joined: October 01, 2005
KitMaker: 54 posts
Armorama: 51 posts
Joined: October 01, 2005
KitMaker: 54 posts
Armorama: 51 posts
Posted: Thursday, February 11, 2010 - 11:06 AM UTC
Quoted Text
Neil and Paul, thank you for the feedback! I'll start shopping for a figure to add - any suggestions?...
Ultracast do a number of nice Brit/Commonwealth tank crew. There are 3 or 4 different commander type figures (assuming you want the figure in the vehicle) and a number of crew figures. I've used a couple of ultracast figures in the past. They assemble nicely and have excellent detail. I don't know if they do a driver that will suit your vehicle though. I know there has to be a figure out there, I just can't think of one off the top of my head.
Stellar dio BTW,
Don
mopnglo
United States
Joined: January 07, 2006
KitMaker: 452 posts
Armorama: 271 posts
Joined: January 07, 2006
KitMaker: 452 posts
Armorama: 271 posts
Posted: Wednesday, February 17, 2010 - 03:42 PM UTC
Thanks, Don! I appreciate the suggestion, because I haven't looked at Ultracast yet. Seems I've been sidetracked with a sudden interest in trying out 1/48 and 1/72 armor. I just can't seem to keep the cash in the wallet!
Thanks again!
Michael
Thanks again!
Michael
jjumbo
British Columbia, Canada
Joined: August 27, 2006
KitMaker: 2,012 posts
Armorama: 1,949 posts
Joined: August 27, 2006
KitMaker: 2,012 posts
Armorama: 1,949 posts
Posted: Wednesday, February 17, 2010 - 03:58 PM UTC
Hey Michael,
Ultracast has a range of figures.
Several are sitting, several are standing, it all depends on what you want.
BTW.......Nice job on the Humber !!
You may want to apply a dark wash around the hatches and any nooks, cracks and crevices to get a bit more depth.
Cheers
jjumbo
Ultracast has a range of figures.
Several are sitting, several are standing, it all depends on what you want.
BTW.......Nice job on the Humber !!
You may want to apply a dark wash around the hatches and any nooks, cracks and crevices to get a bit more depth.
Cheers
jjumbo