_GOTOBOTTOM
Constructive Feedback
For in-progress or completed build photos. Give and get contructive feedback!
First build in 25 years!
JoeKer
Visit this Community
United States
Joined: April 24, 2010
KitMaker: 21 posts
Armorama: 18 posts
Posted: Friday, April 23, 2010 - 05:11 PM UTC
Hi everyone. This is the first model I have built in over 25 years. I loved doing this as a kid, but really just wanted to glue things as quickly as possible and stick it on the shelf. Decided to take it up again, this time more patiently... I should mention that during the time away from modeling I entered the service, so I plan to draw on personal experience and photos for some of my models.

For the first build I decided to take it easy and go with the Academy IDF M113. It was built OOTB and I only added the antennas. The kit was missing the spare tread links that are supposed to go on the front, still need to figure out where to find these Painted with Tamyia acrylics 50% medium gray + 50% buff. Tactical marks were hand painted. Weathering was done by a wash with artists oils (burnt umber + black), and Tamiya weathering compounds (sand and soot).

Can't say I'm very happy with how the periscopes came out, but thats the best I can do for now

Thanks for looking and all constructive comments are welcome!


CMOT
Staff MemberEditor-in-Chief
ARMORAMA
Visit this Community
England - South West, United Kingdom
Joined: May 14, 2006
KitMaker: 10,954 posts
Armorama: 8,571 posts
Posted: Friday, April 23, 2010 - 06:53 PM UTC
Joe the aerials look a little stiff but otherwise I can see no obvious faults, and is an excellent finished model on your return.
ppawlak1
Visit this Community
Victoria, Australia
Joined: March 14, 2006
KitMaker: 1,973 posts
Armorama: 1,843 posts
Posted: Friday, April 23, 2010 - 10:01 PM UTC
Thats really nice work Joe !

I'm fond of the weathering on the wheels and hull, well done !

Cheers

Paul
sgtreef
Visit this Community
Oklahoma, United States
Joined: March 01, 2002
KitMaker: 6,043 posts
Armorama: 4,347 posts
Posted: Saturday, April 24, 2010 - 12:10 AM UTC
Nice job on this after 25 years better then mine was after I stopped.

If you just white glued on the sequins then all you have to do is pop them off at a latter date.

Nice job and hope to see many more builds.
Welcome also.
Psan1185
Visit this Community
Maryland, United States
Joined: April 23, 2010
KitMaker: 2 posts
Armorama: 1 posts
Posted: Saturday, April 24, 2010 - 06:55 AM UTC
Your M113 looks great. How did you do the lens for the periscopes?
JoeKer
Visit this Community
United States
Joined: April 24, 2010
KitMaker: 21 posts
Armorama: 18 posts
Posted: Saturday, April 24, 2010 - 07:27 AM UTC
Thanks everyone for the comments. I agree regarding the aerials. One trick that is used on these in real life is to tie a thin rope to the aerial and to one of the hooks on the top of the hull. This allows the crew to pull the aerials down quickly. I will try and figure out a way to get this incorporated.

Regarding the periscopes, there are a few options. First, I think there are stickers sold specifically for this (can't remember who makes these). What I actually did was take a wrapper from a cereal bar (Nutrigrain mixed berry I think), cut it to size and glue onto the periscope

HeavyArty
Visit this Community
Florida, United States
Joined: May 16, 2002
KitMaker: 17,694 posts
Armorama: 13,742 posts
Posted: Saturday, April 24, 2010 - 08:21 AM UTC
Welcome back to the hobby. It looks pretty good for a first effort in 25 years. Nice finish and weathering. A couple pointers from what I see: First, your headlights are pointed up in the air. Maybe see if you can remove them and refit them so they point slightly downward. The tail lights are painted wrong. Only the upper left oval should be red. The lower left and both upper and lower right should be black slits. You could also drill out the barrel on the .50 cal to make it look more realistic as well.

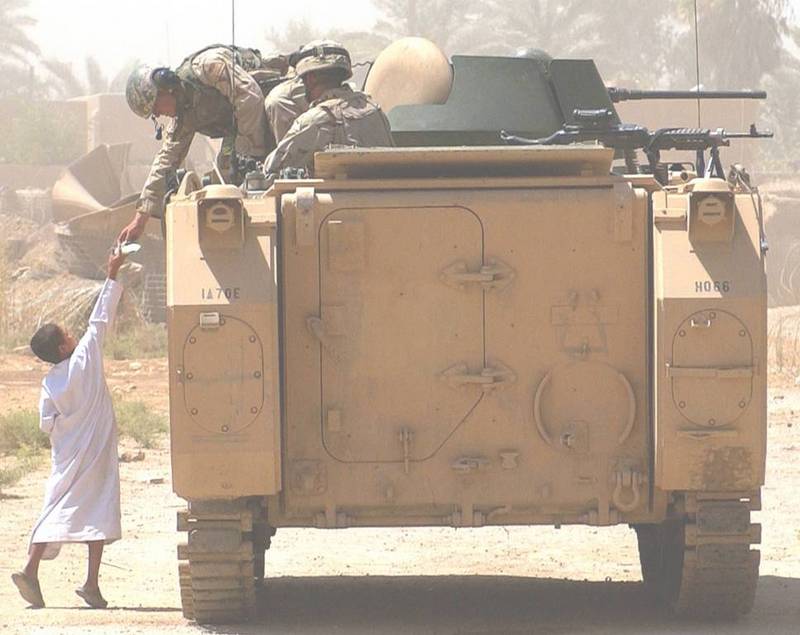
Rear lights should look like this:


Good job overall. A few tweaks and it will be great.
redcap
Visit this Community
England - East Midlands, United Kingdom
Joined: November 06, 2005
KitMaker: 753 posts
Armorama: 378 posts
Posted: Saturday, April 24, 2010 - 10:02 AM UTC
Joe,

That's a great comeback after a 25 years break and I think you pretty much nailed the IDF sand colour. A really nice clean build and paint.

Re. the optics; the bright purple 'glare' does detract somewhat from the rest of the build. I know modern MBT's / AFV's such M1A1 Abrams and Strykers etc. have optics which have a purple/red tinge to them...... but I don't know about older stuff like M-113's? Perhaps a couple of heavy washes with, say, Tamiya Smoke to subdue the bright purple and render it just suggestive of coloured optics when the light catches it would look better?

Other than that - a future M.O.T.M. Winner in the making I reckon! Welcome back to the hobby and keep them coming.

Gary
dioman13
Visit this Community
Indiana, United States
Joined: August 19, 2007
KitMaker: 2,184 posts
Armorama: 1,468 posts
Posted: Sunday, April 25, 2010 - 07:12 AM UTC
Joe, nice come back and welcome to the site. I've a few 113s about and if you lik I can send a few extra track links to you. Just P.M. me with an add, if you want them.
dioman13
Visit this Community
Indiana, United States
Joined: August 19, 2007
KitMaker: 2,184 posts
Armorama: 1,468 posts
Posted: Sunday, April 25, 2010 - 07:15 AM UTC
Being forgetfull. If you burn the paper off a section of twist ties that comes with plastic bags it makes good antenas, just add slight bend and paint. They wont snap like plastic. Have to agree with the tint of periscopes, too bright.
KoSprueOne
Visit this Community
Myanmar
Joined: March 05, 2004
KitMaker: 4,011 posts
Armorama: 1,498 posts
Posted: Sunday, April 25, 2010 - 01:44 PM UTC
Your model looks fine, with the noticed exceptions already mentioned above. Your hand is still steady and attention to detail is keen.
How did you hand paint the markings?


JoeKer
Visit this Community
United States
Joined: April 24, 2010
KitMaker: 21 posts
Armorama: 18 posts
Posted: Monday, April 26, 2010 - 05:41 AM UTC
Will do. Many thanks!


Quoted Text

Joe, nice come back and welcome to the site. I've a few 113s about and if you lik I can send a few extra track links to you. Just P.M. me with an add, if you want them.

JoeKer
Visit this Community
United States
Joined: April 24, 2010
KitMaker: 21 posts
Armorama: 18 posts
Posted: Monday, April 26, 2010 - 05:44 AM UTC
Many thanks. I did the markings by tracing the outline of the tactical markings that came with decals and then filling these in freehand with Tamiya acrylics.


Quoted Text

Your model looks fine, with the noticed exceptions already mentioned above. Your hand is still steady and attention to detail is keen.
How did you hand paint the markings?


ptruhe
Visit this Community
Texas, United States
Joined: March 05, 2003
KitMaker: 2,092 posts
Armorama: 1,607 posts
Posted: Monday, April 26, 2010 - 06:13 AM UTC
Nicely done.

I was think the rear door handle should be in it's normal locked position when the door is closed but the picture Gino attached to his reply shows it nearly in the open position. Strange.

Paul
JoeKer
Visit this Community
United States
Joined: April 24, 2010
KitMaker: 21 posts
Armorama: 18 posts
Posted: Saturday, May 08, 2010 - 05:33 PM UTC
Thanks for all the comments I was able to incorporate many of the suggestions and add additional detail.

First, as mentioned, the antennas looked stiff. What I did here is added a trick often used on these APC and that is tying a rope to pull the antennas down. This can be seen below:


I also added the spare tread links that were missing from the original kit (thanks Bob for these !!!).


Based on other suggestions, I did a smoke wash on the lenses of the periscopes to tame the reflections. I think this worked well:


I also corrected the color of the back right hand side light.


I was unable to reposition the headlamps without damaging them, so I left this alone. Will keep this in mind for my next build of a M113.

Thanks again for all the comments and help with parts
Plasticbattle
#003
Visit this Community
Donegal, Ireland
Joined: May 14, 2002
KitMaker: 9,763 posts
Armorama: 7,444 posts
Posted: Saturday, May 08, 2010 - 06:20 PM UTC
Hi Joe. Welcome back to the hobby .. and congrats on the first attempt. With the little improvements you made, it looks great. Will you add some figures in the open hatches?
JoeKer
Visit this Community
United States
Joined: April 24, 2010
KitMaker: 21 posts
Armorama: 18 posts
Posted: Sunday, May 09, 2010 - 12:56 PM UTC
I would like to add some figures, but usually prefer to do this in the context of a diorama.
jbutler
Visit this Community
Oregon, United States
Joined: April 21, 2007
KitMaker: 76 posts
Armorama: 58 posts
Posted: Sunday, May 09, 2010 - 03:32 PM UTC
Fantastic job, Joe! Very nice work. I think that changes you made really make the model stand out.

Keep on building!

JB
dioman13
Visit this Community
Indiana, United States
Joined: August 19, 2007
KitMaker: 2,184 posts
Armorama: 1,468 posts
Posted: Monday, May 10, 2010 - 02:22 AM UTC
Hey Joe, your welcome. As far a the light being bent, call it battle damage or bad driving.
lukiftian
Visit this Community
British Columbia, Canada
Joined: March 12, 2010
KitMaker: 791 posts
Armorama: 592 posts
Posted: Wednesday, May 19, 2010 - 12:52 PM UTC
I love the periscopes, they look excellent, if a little too clean. Great idea, by the way. Good job all around so far.
bobbyh
Visit this Community
Texas, United States
Joined: September 09, 2009
KitMaker: 433 posts
Armorama: 167 posts
Posted: Monday, June 21, 2010 - 05:10 PM UTC
The periscopes are awesome Joe !
retiredbee2
Visit this Community
Florida, United States
Joined: May 04, 2008
KitMaker: 757 posts
Armorama: 518 posts
Posted: Tuesday, June 22, 2010 - 04:38 AM UTC
very nice Joe.Glad that you subdued the scopes as they were so bright before, that the eye keeps going to the scopes and can't appreciate the rest of the model. You fixed a little thing here and a little thing there and even had you not it is still a very nice job......Al
 _GOTOTOP