M1A1 AIM with TUSK, Dagon 1/35
Texas, United States
Joined: July 30, 2010
KitMaker: 52 posts
Armorama: 45 posts
Posted: Sunday, August 01, 2010 - 03:06 AM UTC
Greetings!
I've decided to post my first Armor build so I can gather tips and hopefully improve my techniques. I'm an aircraft modeler and haven't built armor since I was a kid. Back then it was a short process and ultimately geared towards using firecrackers to blow them up....
I chose the M1A1 AIM kit and will also be using the Legend TUSK upgrade to add more interest. I'll also be using AFV Club tracks.
Now, I know absolutely nothing about armor! The kit instructions have all sorts of 'either / or' options that are no doubt intended to allow modeling a specific version. In my case I'm using a scientific approach here: I choose the parts that look the coolest. Therefore I apologize in advance if this ends up being a accidental what-if.

Here are some pics to bring you up-to-date on the progress thus far:
There was a bit of a gap between the upper and lower hull sections, so I used a piece of sprue to spread the lower hull. It really helped make a clean join.

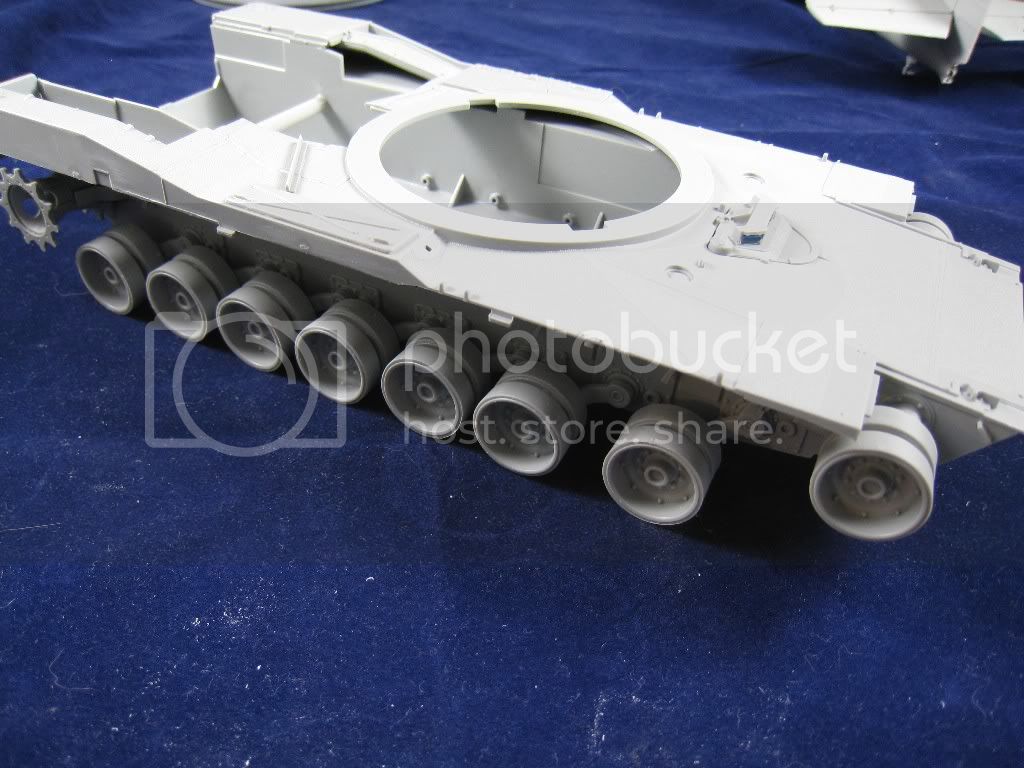


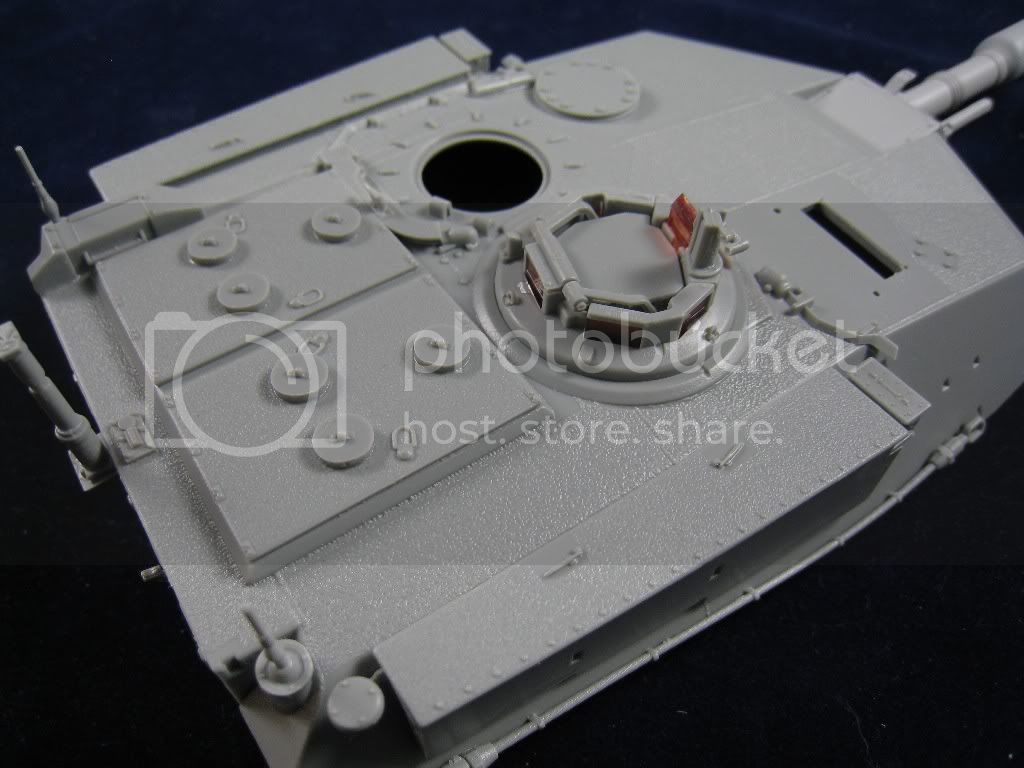
That's about where it stands as of now. I'm waiting for the TUSK set to arrive and will proceed then.
I welcome any and all feedback!
Time flies like an arrow. Fruit flies like a banana.
England - West Midlands, United Kingdom
Joined: February 16, 2008
KitMaker: 597 posts
Armorama: 530 posts
Posted: Sunday, August 01, 2010 - 03:43 AM UTC
Hi David
Good work so far and as a first modern kit, Dragon's Abrams is a delight to build. The parts count is very high, but when its done it is a superbly detailed model. I suggest you have a good look at your references to decide which optional parts to use.
I have been building the M1A2 with the Legends TUSK I,
here which might be of some help dealing with the TUSK kit as it does have some problems.
Also, if you would like some photos of the M1A1 with TUSK, let me know and I'll post them here. Finally I recommend you get a hold of the Tankograd TUSK I & II book if you can as it contains pretty much all you need!
Thats enough waffle from me, and I'm looking forward to seeing your build!
Texas, United States
Joined: July 30, 2010
KitMaker: 52 posts
Armorama: 45 posts
Posted: Tuesday, August 03, 2010 - 06:45 AM UTC
Thanks for the link, Anirudh! That will be most helpful indeed.
A bit more progress from last night.....
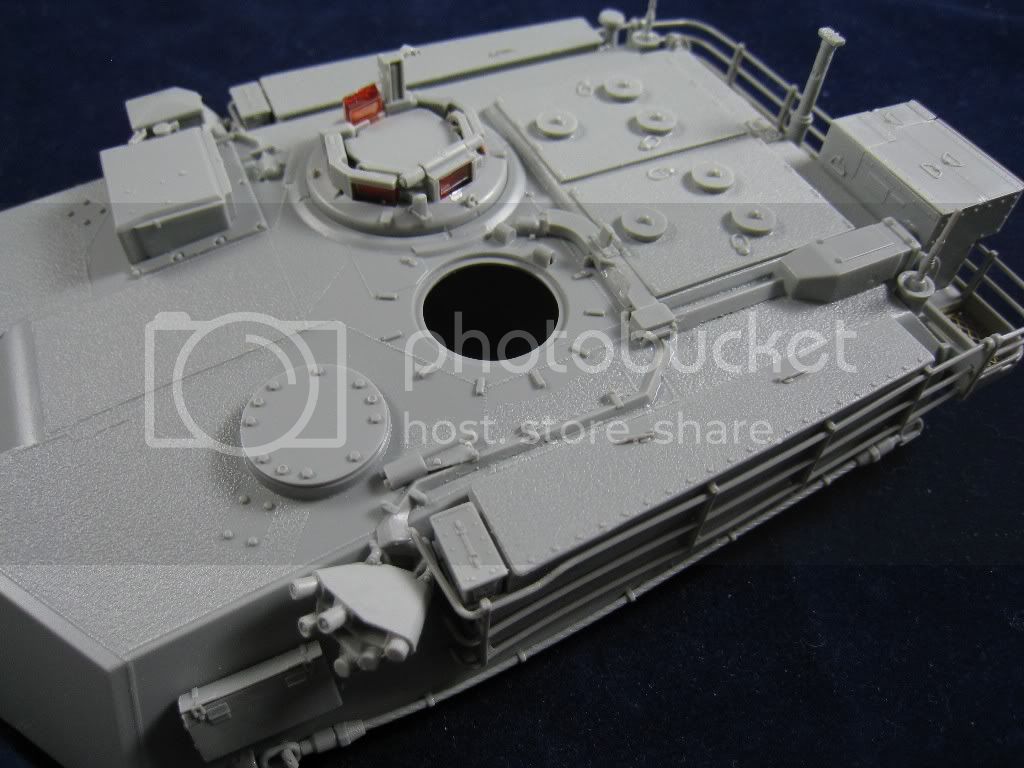
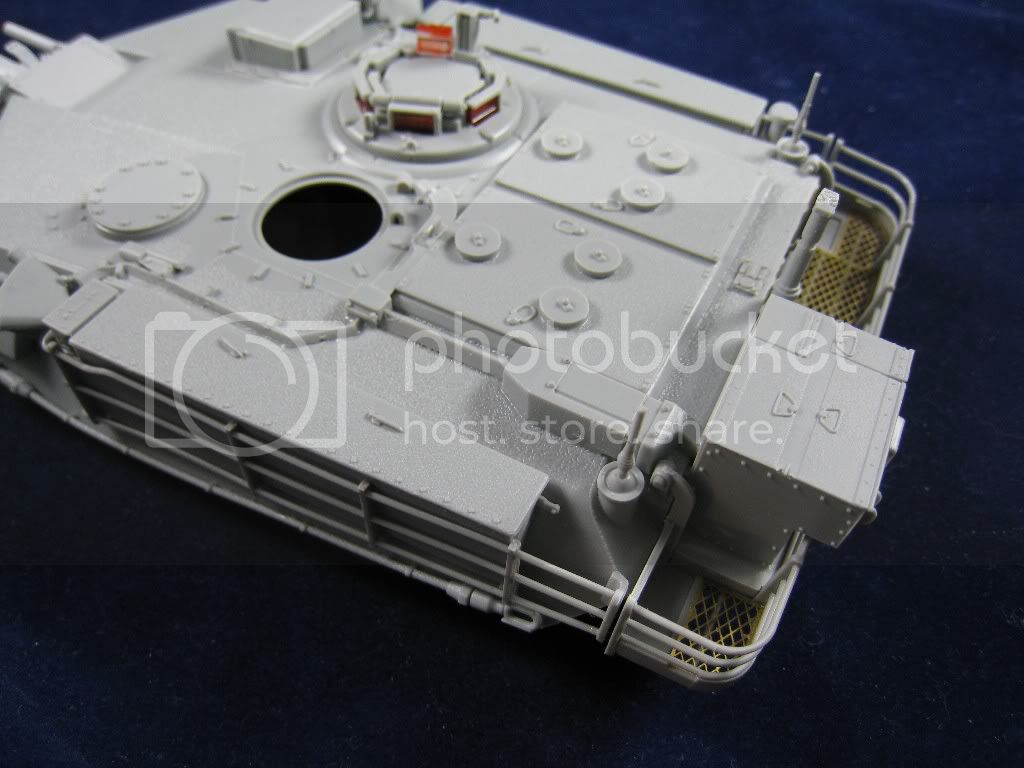
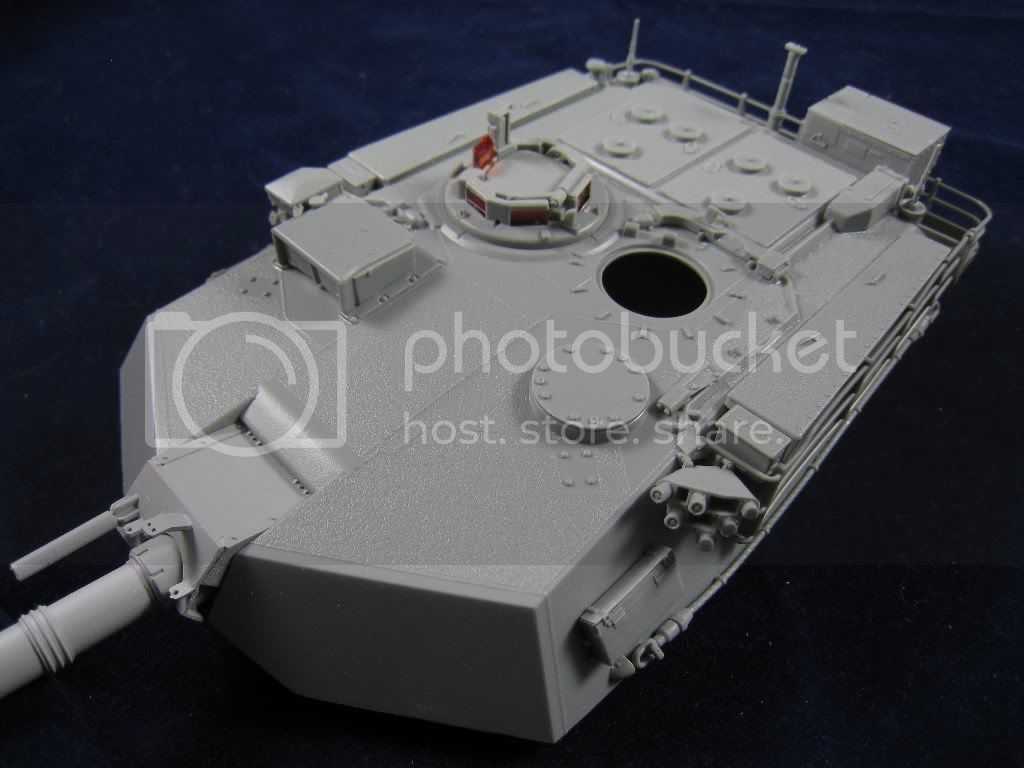
Things seem to be progressing well for me thus far. This is a brilliantly engineered kit, which is not to say it jumps together on its own, but considering the number of parts and level of detail it is most impressive how well it goes together if you're patient. And if you can decipher the instructions.
Time flies like an arrow. Fruit flies like a banana.
South Carolina, United States
Joined: December 14, 2006
KitMaker: 1,355 posts
Armorama: 979 posts
Posted: Tuesday, August 03, 2010 - 01:32 PM UTC
David,
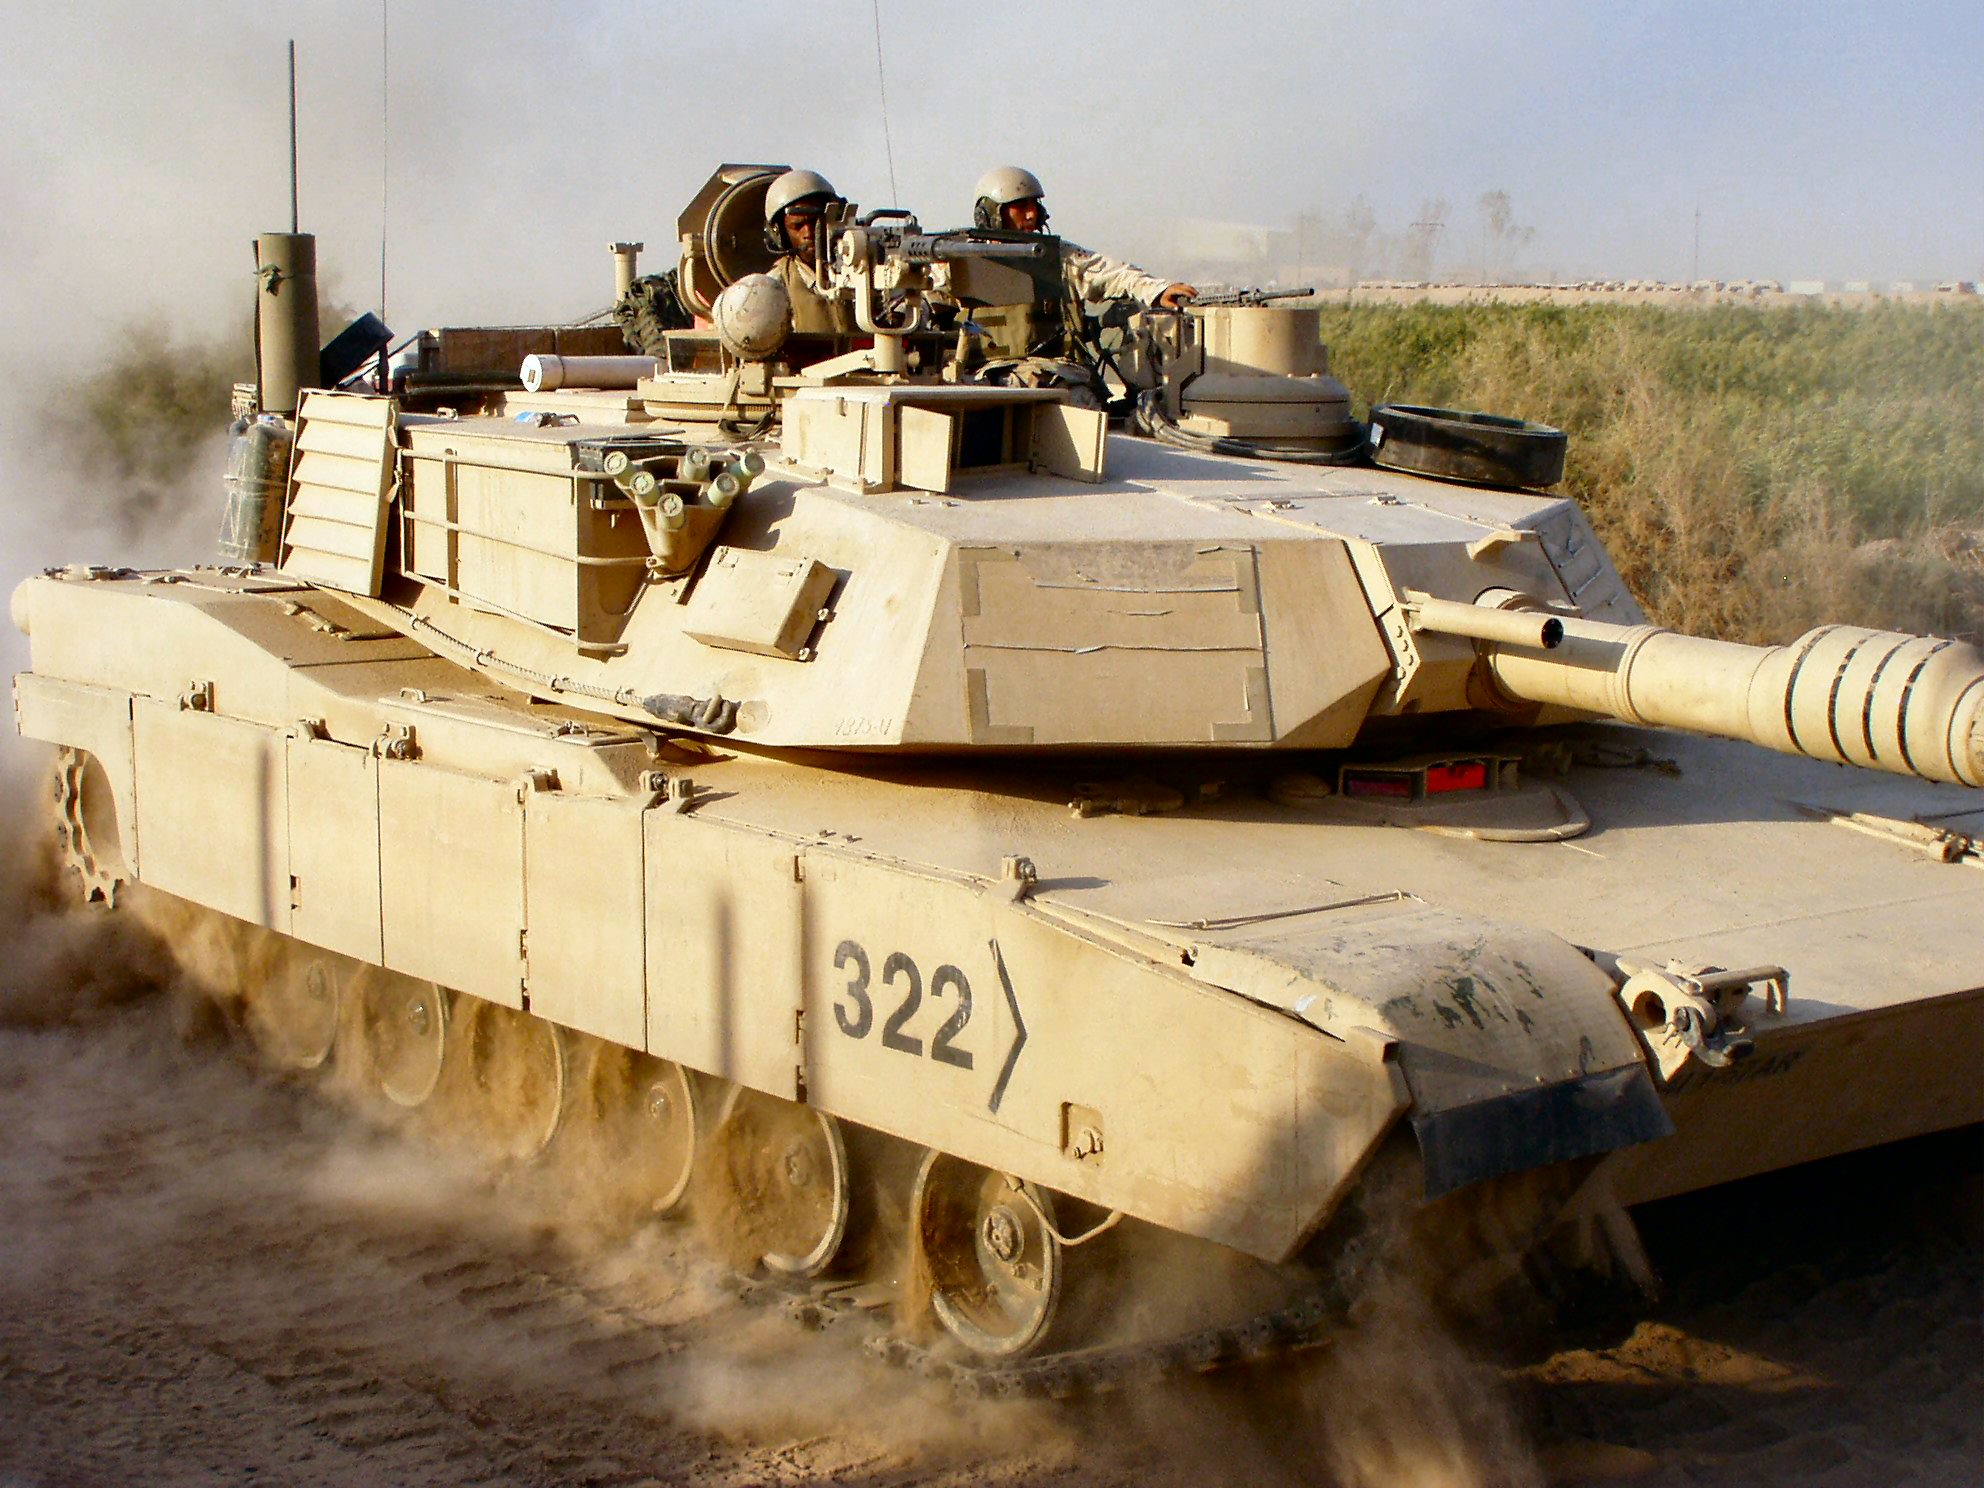
Something is off on your main gun mantlet:

The top of the mantlet should mostly parallel the top of the turret when the gun tube is horizontal. The mantlet top has a hinged plate at the rear to cover the opening with the turret top and allows the assembly to move up and down (images from Prime Portal).


Just trying to help...
ESSAYONS!
"Man does not live until he looks to the future, and that is his salvation in the worst of times.".... (Author Unknown)
AMPS #2102
Texas, United States
Joined: July 30, 2010
KitMaker: 52 posts
Armorama: 45 posts
Posted: Tuesday, August 03, 2010 - 01:47 PM UTC
Hmmm.. Obviously you're correct. Not sure if I'll be able to unwind that little boo-boo or not, but at least now I know its there. Thanks!
Time flies like an arrow. Fruit flies like a banana.
Texas, United States
Joined: July 30, 2010
KitMaker: 52 posts
Armorama: 45 posts
Posted: Tuesday, August 03, 2010 - 02:49 PM UTC
Yep, it's as I feared. The only way to try to correct that mistake of mine would be to break open the turret assembly. I'm afraid I've got too many small bits attached at this point to risk it. Definitely a bummer for this build, but a valuable lesson learned for the next time. I really like this kit so there's bound to be a next time!
Thanks again for pointing it out. Thats why I posted in the feedback area!
Time flies like an arrow. Fruit flies like a banana.
Texas, United States
Joined: July 30, 2010
KitMaker: 52 posts
Armorama: 45 posts
Posted: Tuesday, August 03, 2010 - 04:05 PM UTC
I finally received my TUSK upgrade set by Legend Productions today. Nice bit of resin kit it is, too!
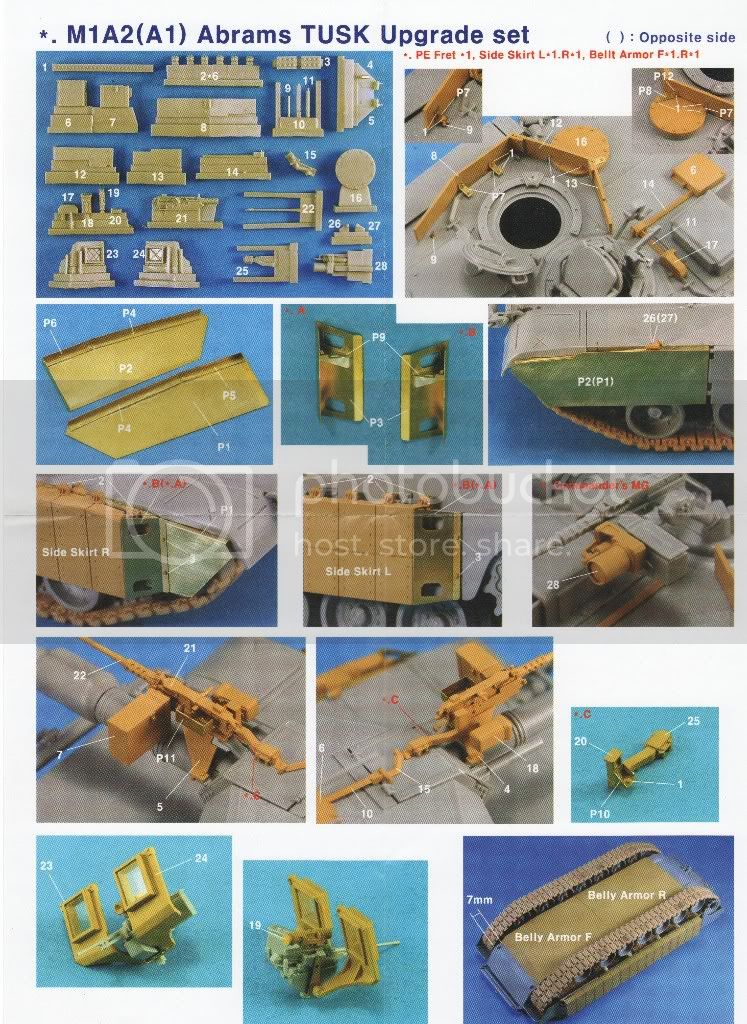
I've already begun removing bits from their pour stubs and installing some of it. Should have more pics tomorrow...
This is fun! I kinda like this armor thing. Go figure...
Time flies like an arrow. Fruit flies like a banana.
Trinidad And Tobago
Joined: December 01, 2005
KitMaker: 91 posts
Armorama: 85 posts
Posted: Tuesday, August 03, 2010 - 07:15 PM UTC
Hi Jeff,
Nice clean build so far. I think you could fix the problem. I not sure if you would go this way but I think you should cut (Razor Saw) the underside of the turret to release the gun, then attach the gun level to the top and reattach the turret piece. This surgery should not be visible when the model is completed. It might just mean the gun would not be able to move up or down, but you could save a very good and expensive model.
England - West Midlands, United Kingdom
Joined: February 16, 2008
KitMaker: 597 posts
Armorama: 530 posts
Posted: Tuesday, August 03, 2010 - 08:48 PM UTC
HI Dave,
Its a clean build so far. With regards to the mantlet, how about adding a piece of plasticard to cover that area and adding bolt detail to it. Just an idea, if you are unable to remove the turret halves.
Also, be aware that the pieces P1 and P2 in the TUSK kit are left and right handed, so are specific to a certain side. I unfortunately didn't notice that and had to remove the whole side skirt assembly to sort that out.
Looking forward to seeing more of your build!
Texas, United States
Joined: July 30, 2010
KitMaker: 52 posts
Armorama: 45 posts
Posted: Wednesday, August 04, 2010 - 04:15 AM UTC
Two very plausible fix ideas, thanks!
Truth is as of last night I was 95% in the direction of shrugging it off as it seemed a fix was going to be problematic at best. The more I looked at it the more it nagged at me however so I slept on it. This morning I had a

moment!
For starters I removed a section from the top of the hull to free up the mantlet and see if that alone would allow me to realign things in a better fashion. Like so:

A good start but somehow the gun still sits too low. I have no idea how this could be since everything inside the turret lined up just fine.

So then I got out the snippers and cut away those mounting points from the inside. When I was done I could almost remove the gun assembly from the inside. The end result is I can now align the gun properly. Like so:

Much better, yes?
The only remaining hurdle is finding a way to adequately secure the gun now. It'll have to be fixed in place, but I'm fine with that. Some CA from the inside should hold everything well enough.
Can't thank you enough for pointing this out and giving me ideas to contemplate! I'm glad I put forth the extra effort.
Time flies like an arrow. Fruit flies like a banana.
Oregon, United States
Joined: April 21, 2007
KitMaker: 76 posts
Armorama: 58 posts
Posted: Wednesday, August 04, 2010 - 06:20 AM UTC
Great job! Nice build. I'll be interested in your weathering process for this vehicle.
JB
"Remember that a pint of sweat will save a gallon of blood!" - George S Patton 1943
Texas, United States
Joined: July 30, 2010
KitMaker: 52 posts
Armorama: 45 posts
Posted: Wednesday, August 04, 2010 - 09:03 AM UTC
Quoted Text
I'll be interested in your weathering process for this vehicle. JB
Frankly, so will I.

This being the first tank I've painted and all.
Time flies like an arrow. Fruit flies like a banana.
South Carolina, United States
Joined: December 14, 2006
KitMaker: 1,355 posts
Armorama: 979 posts
Posted: Wednesday, August 04, 2010 - 09:38 AM UTC
Dave,
I'm glad you were able to at least make a partial correction, since you would have likely been kicking yourself over a mistake on such an otherwise great build of an excellent kit.
Be advised that the TUSK belly armor supposedly only covers under the crew compartment and stops near the #5 Roadwheels (pictures from Prime Portal):
Rear View.
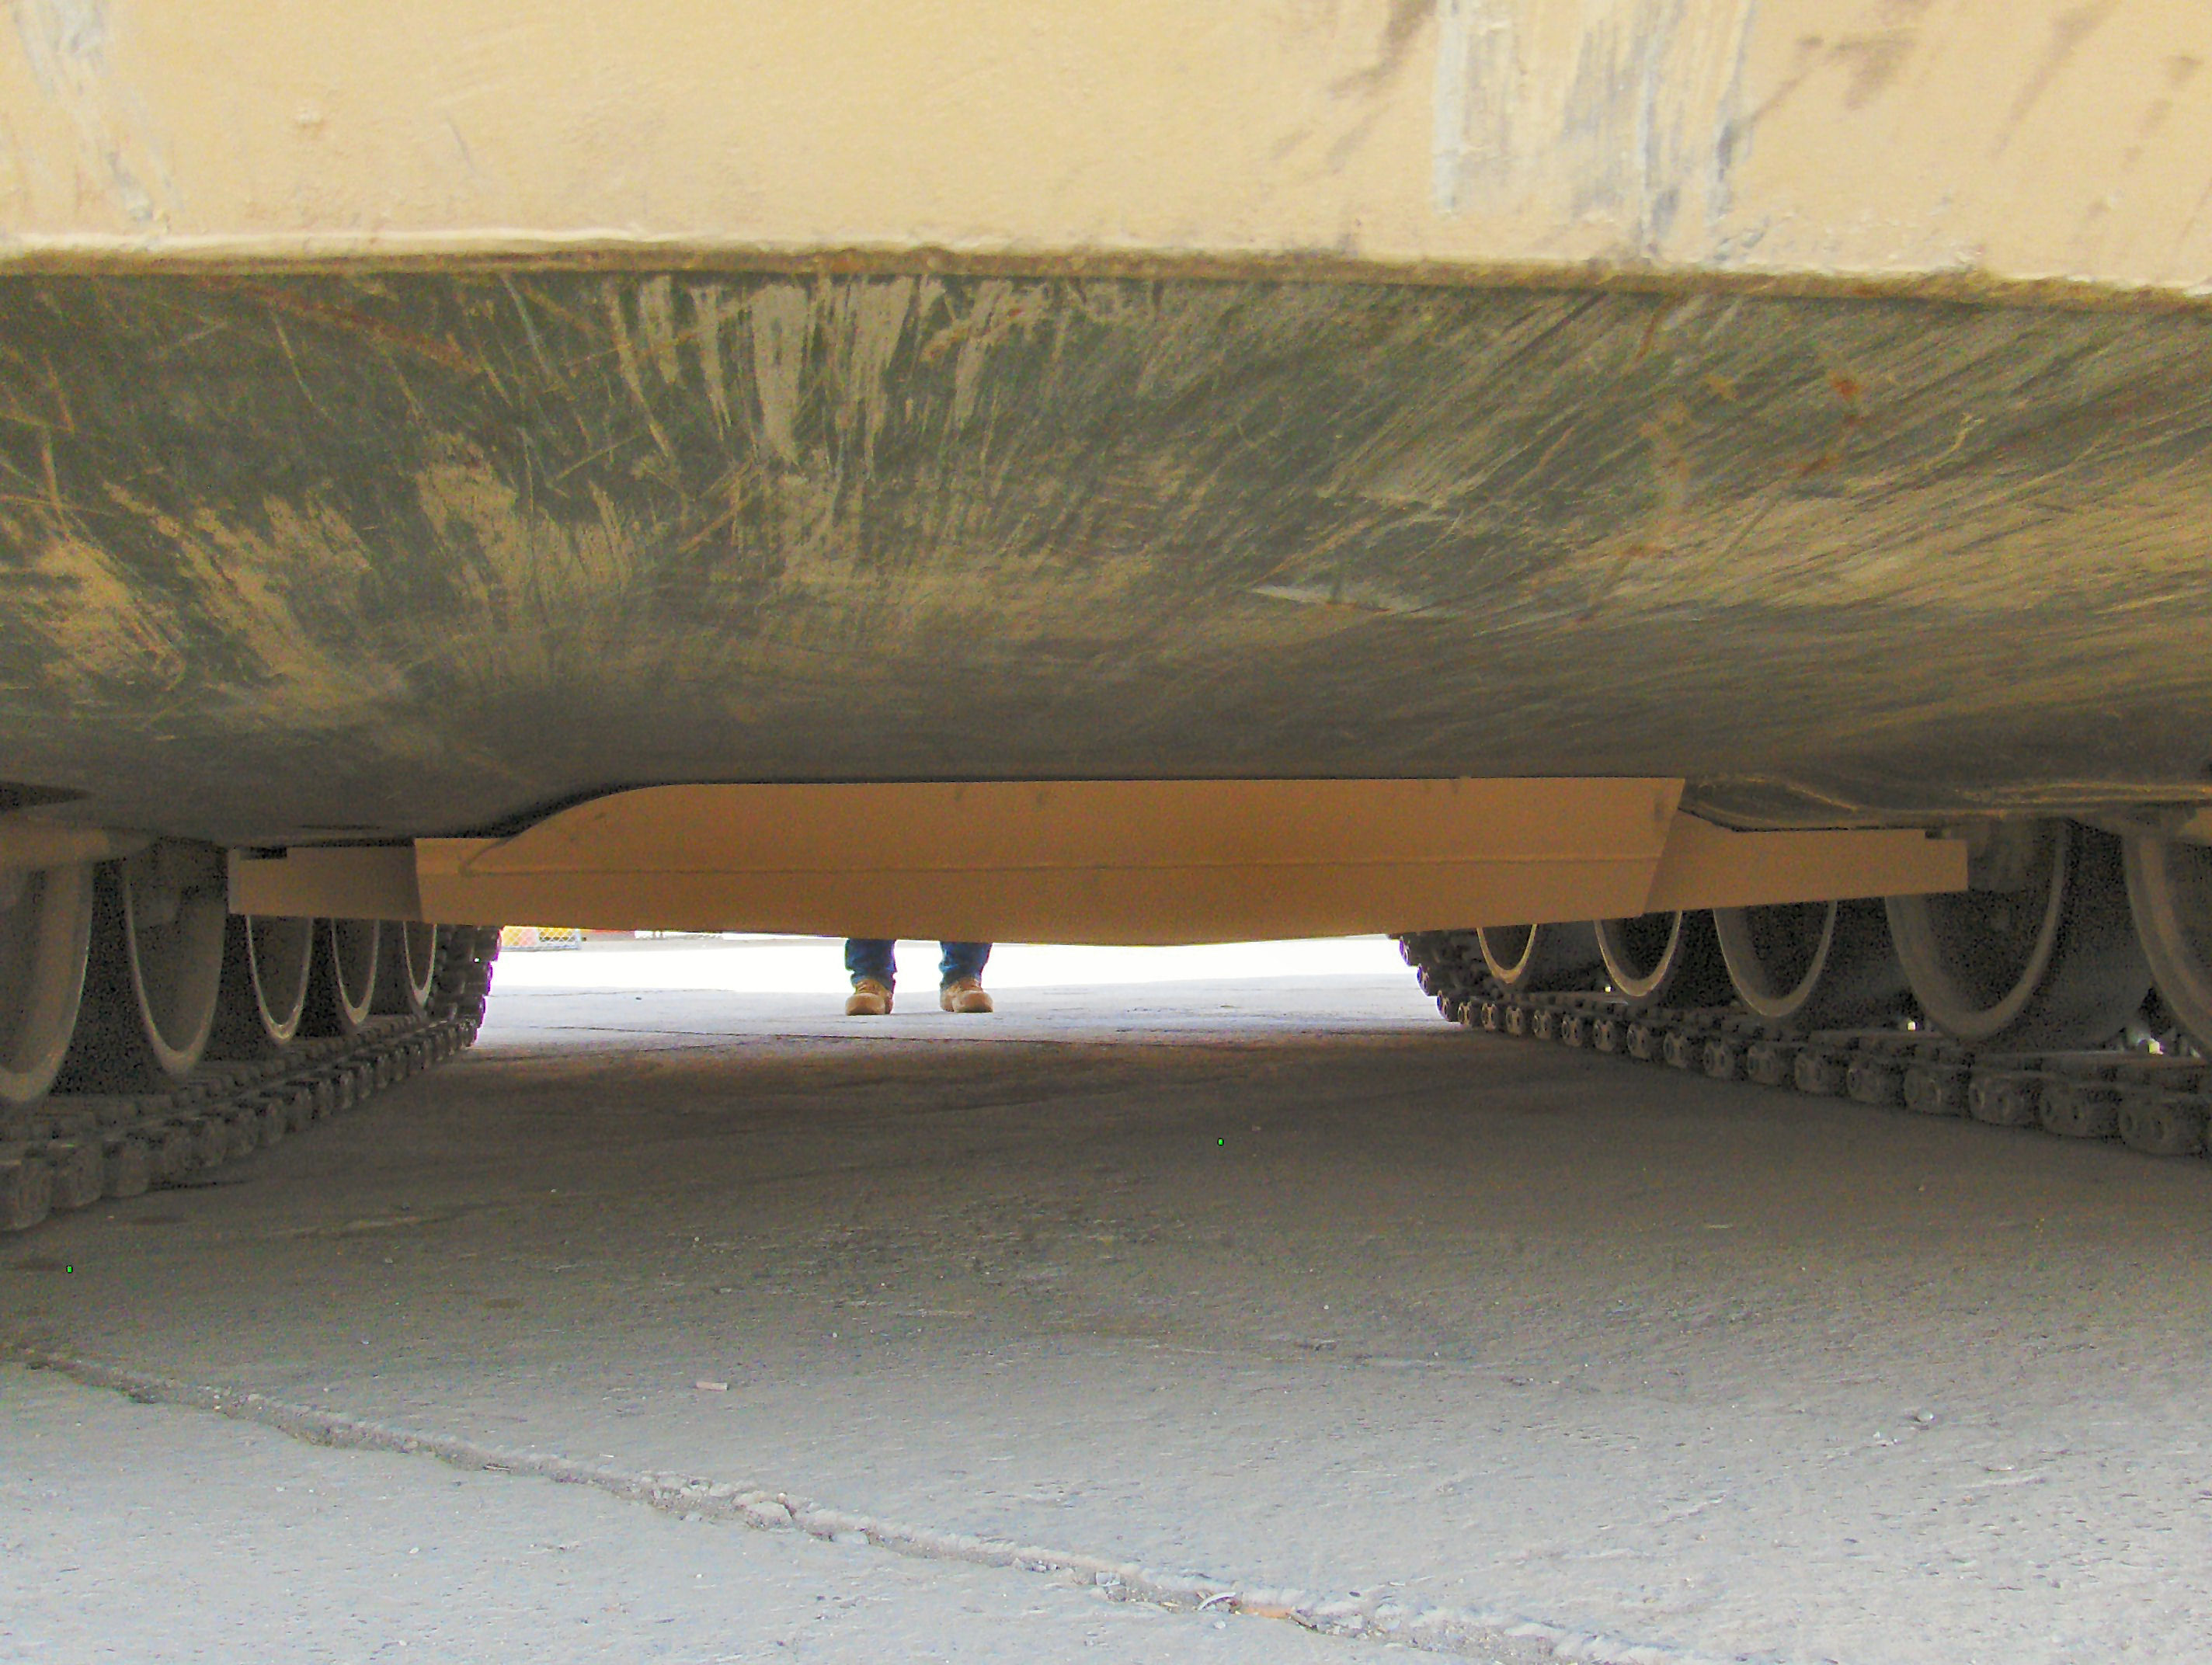
Front View:
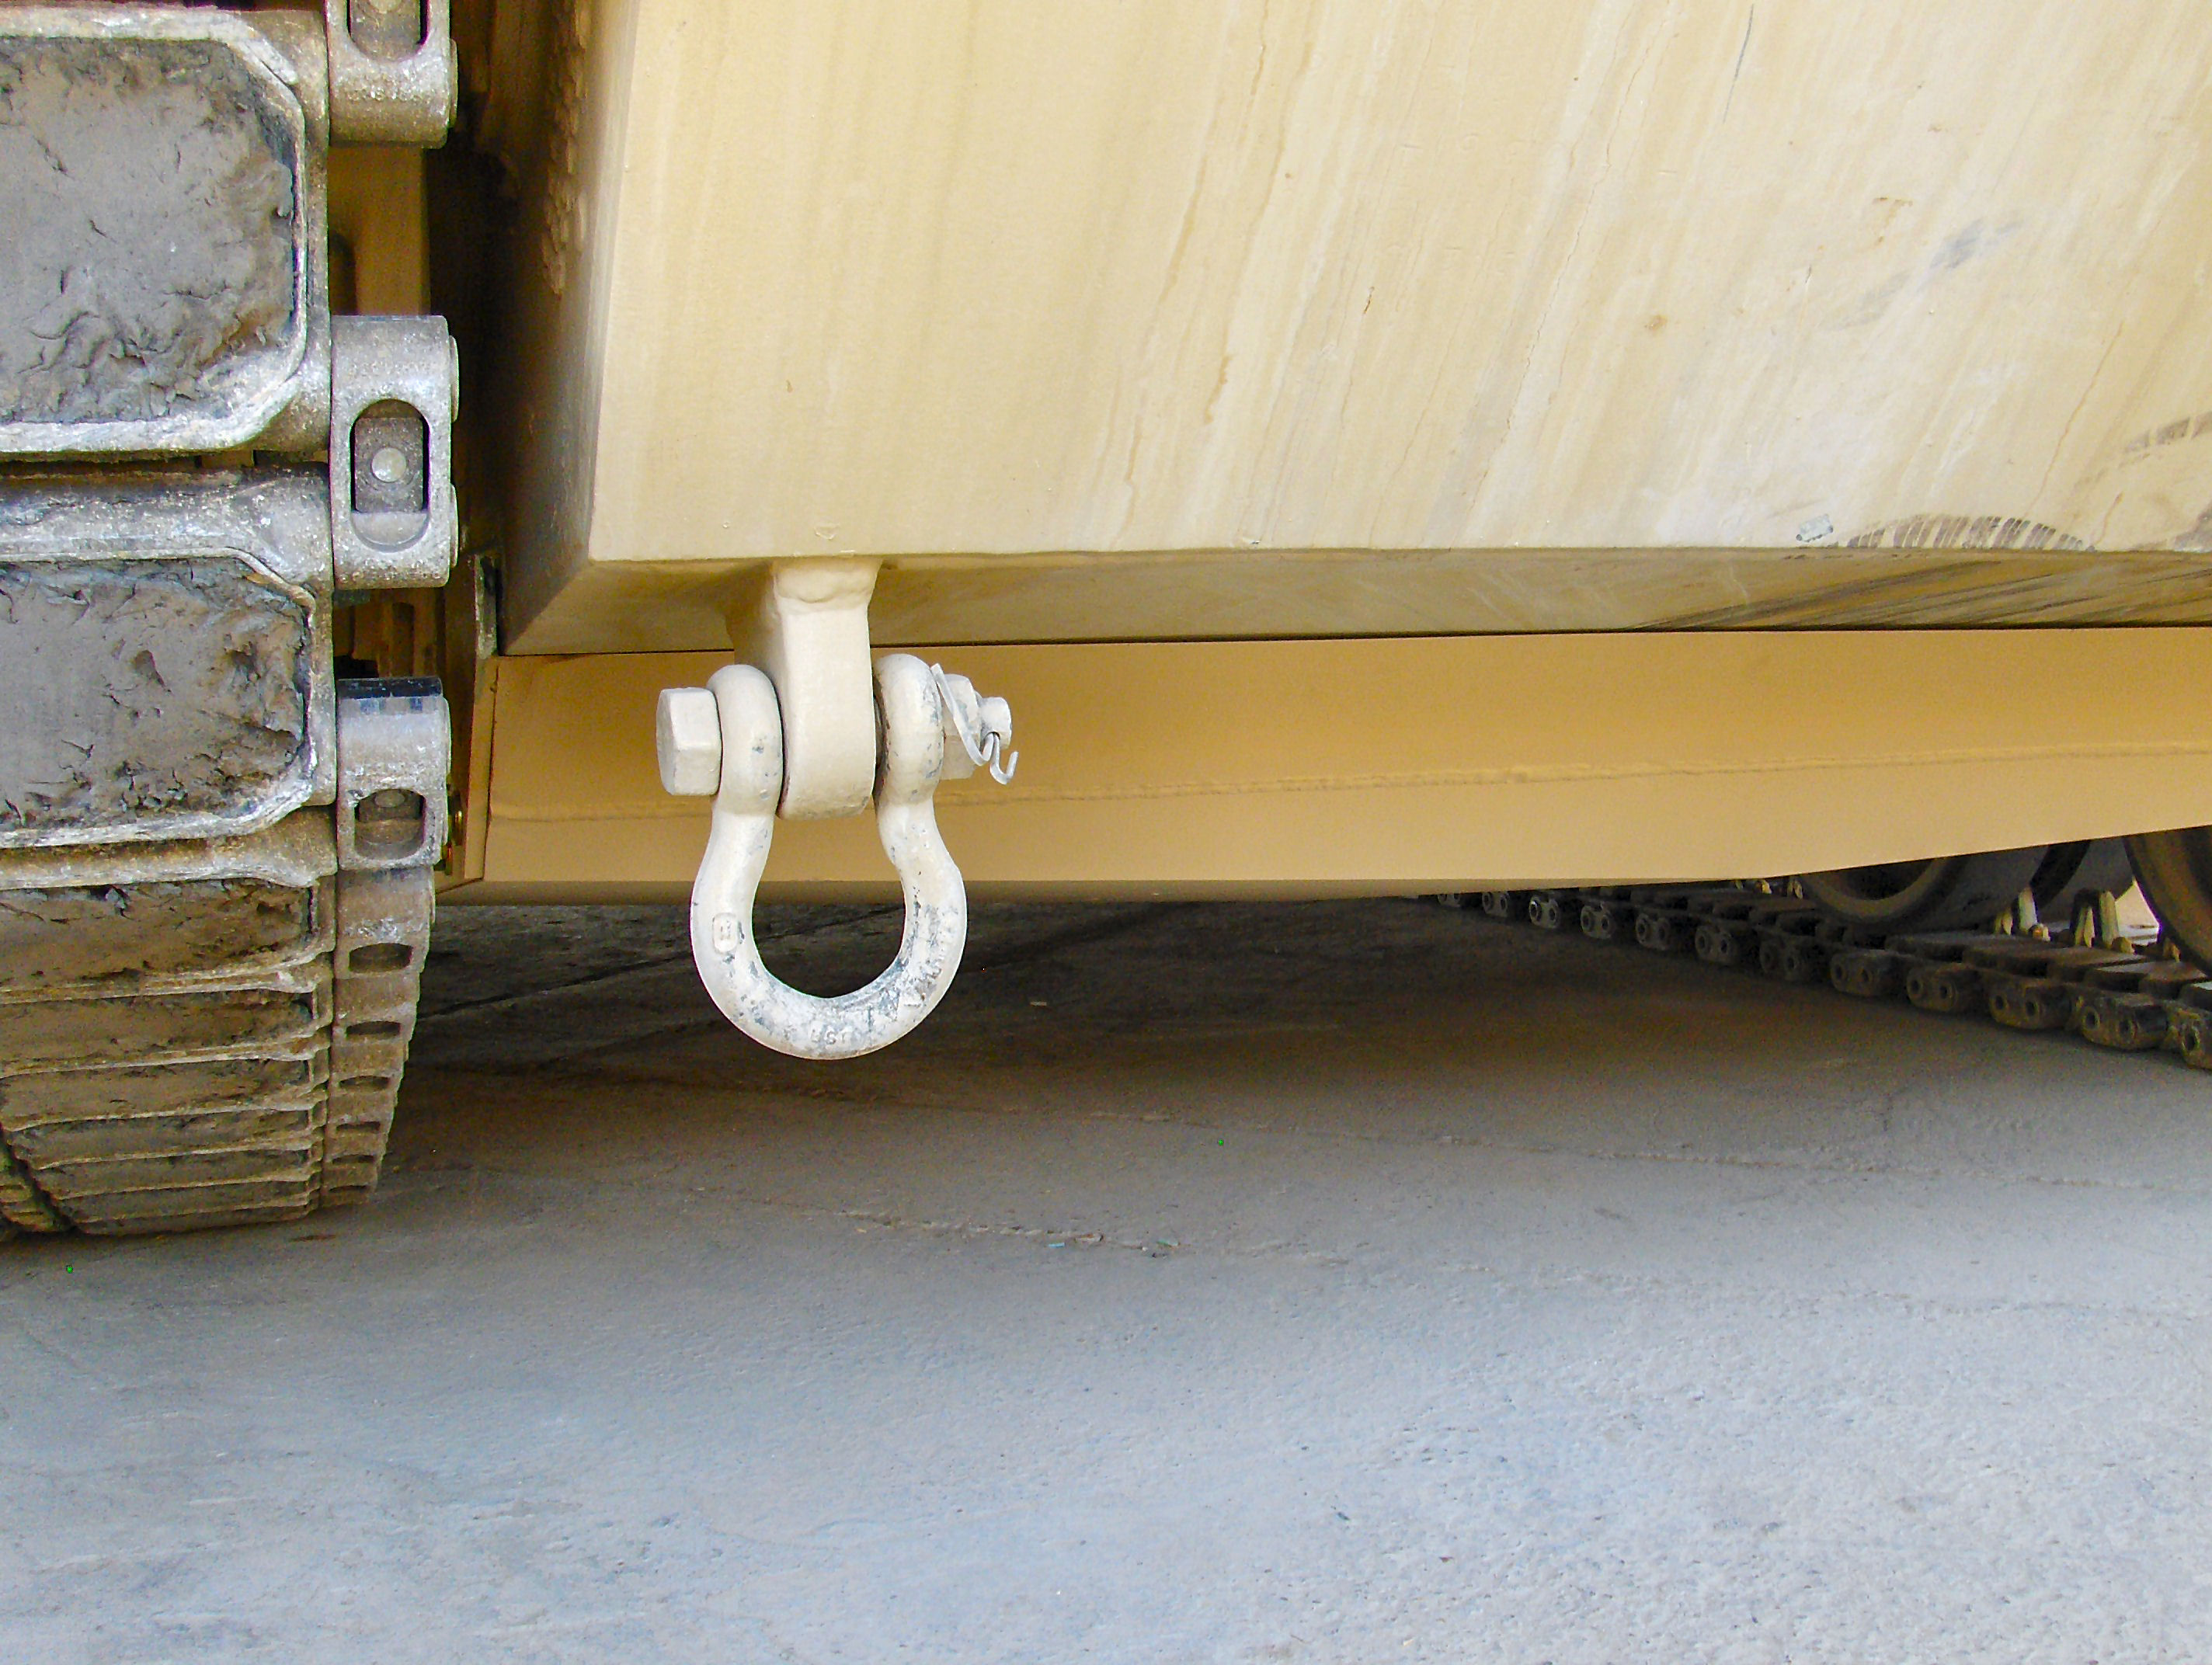
I haven't built the Legend Set, but others on Armorama have in other postings.
ESSAYONS!
"Man does not live until he looks to the future, and that is his salvation in the worst of times.".... (Author Unknown)
AMPS #2102
England - West Midlands, United Kingdom
Joined: February 16, 2008
KitMaker: 597 posts
Armorama: 530 posts
Posted: Wednesday, August 04, 2010 - 09:55 AM UTC
Nice work on the fix, David, I'm glad you managed to fix that.
Jeff is right about the belly armour. It should finish just after the 4th road wheel as it only covers the crew compartment. This should be a simple case of sawing the belly armour where it should end.
South Carolina, United States
Joined: December 14, 2006
KitMaker: 1,355 posts
Armorama: 979 posts
Posted: Wednesday, August 04, 2010 - 12:52 PM UTC
Anirudh,
This image from Prime Portal shows what I believe to be the TUSK belly armor (tan pieces below the suspension arms) between the 4th and 5th Roadwheels, but not between the 5th and 6th Roadwheels:
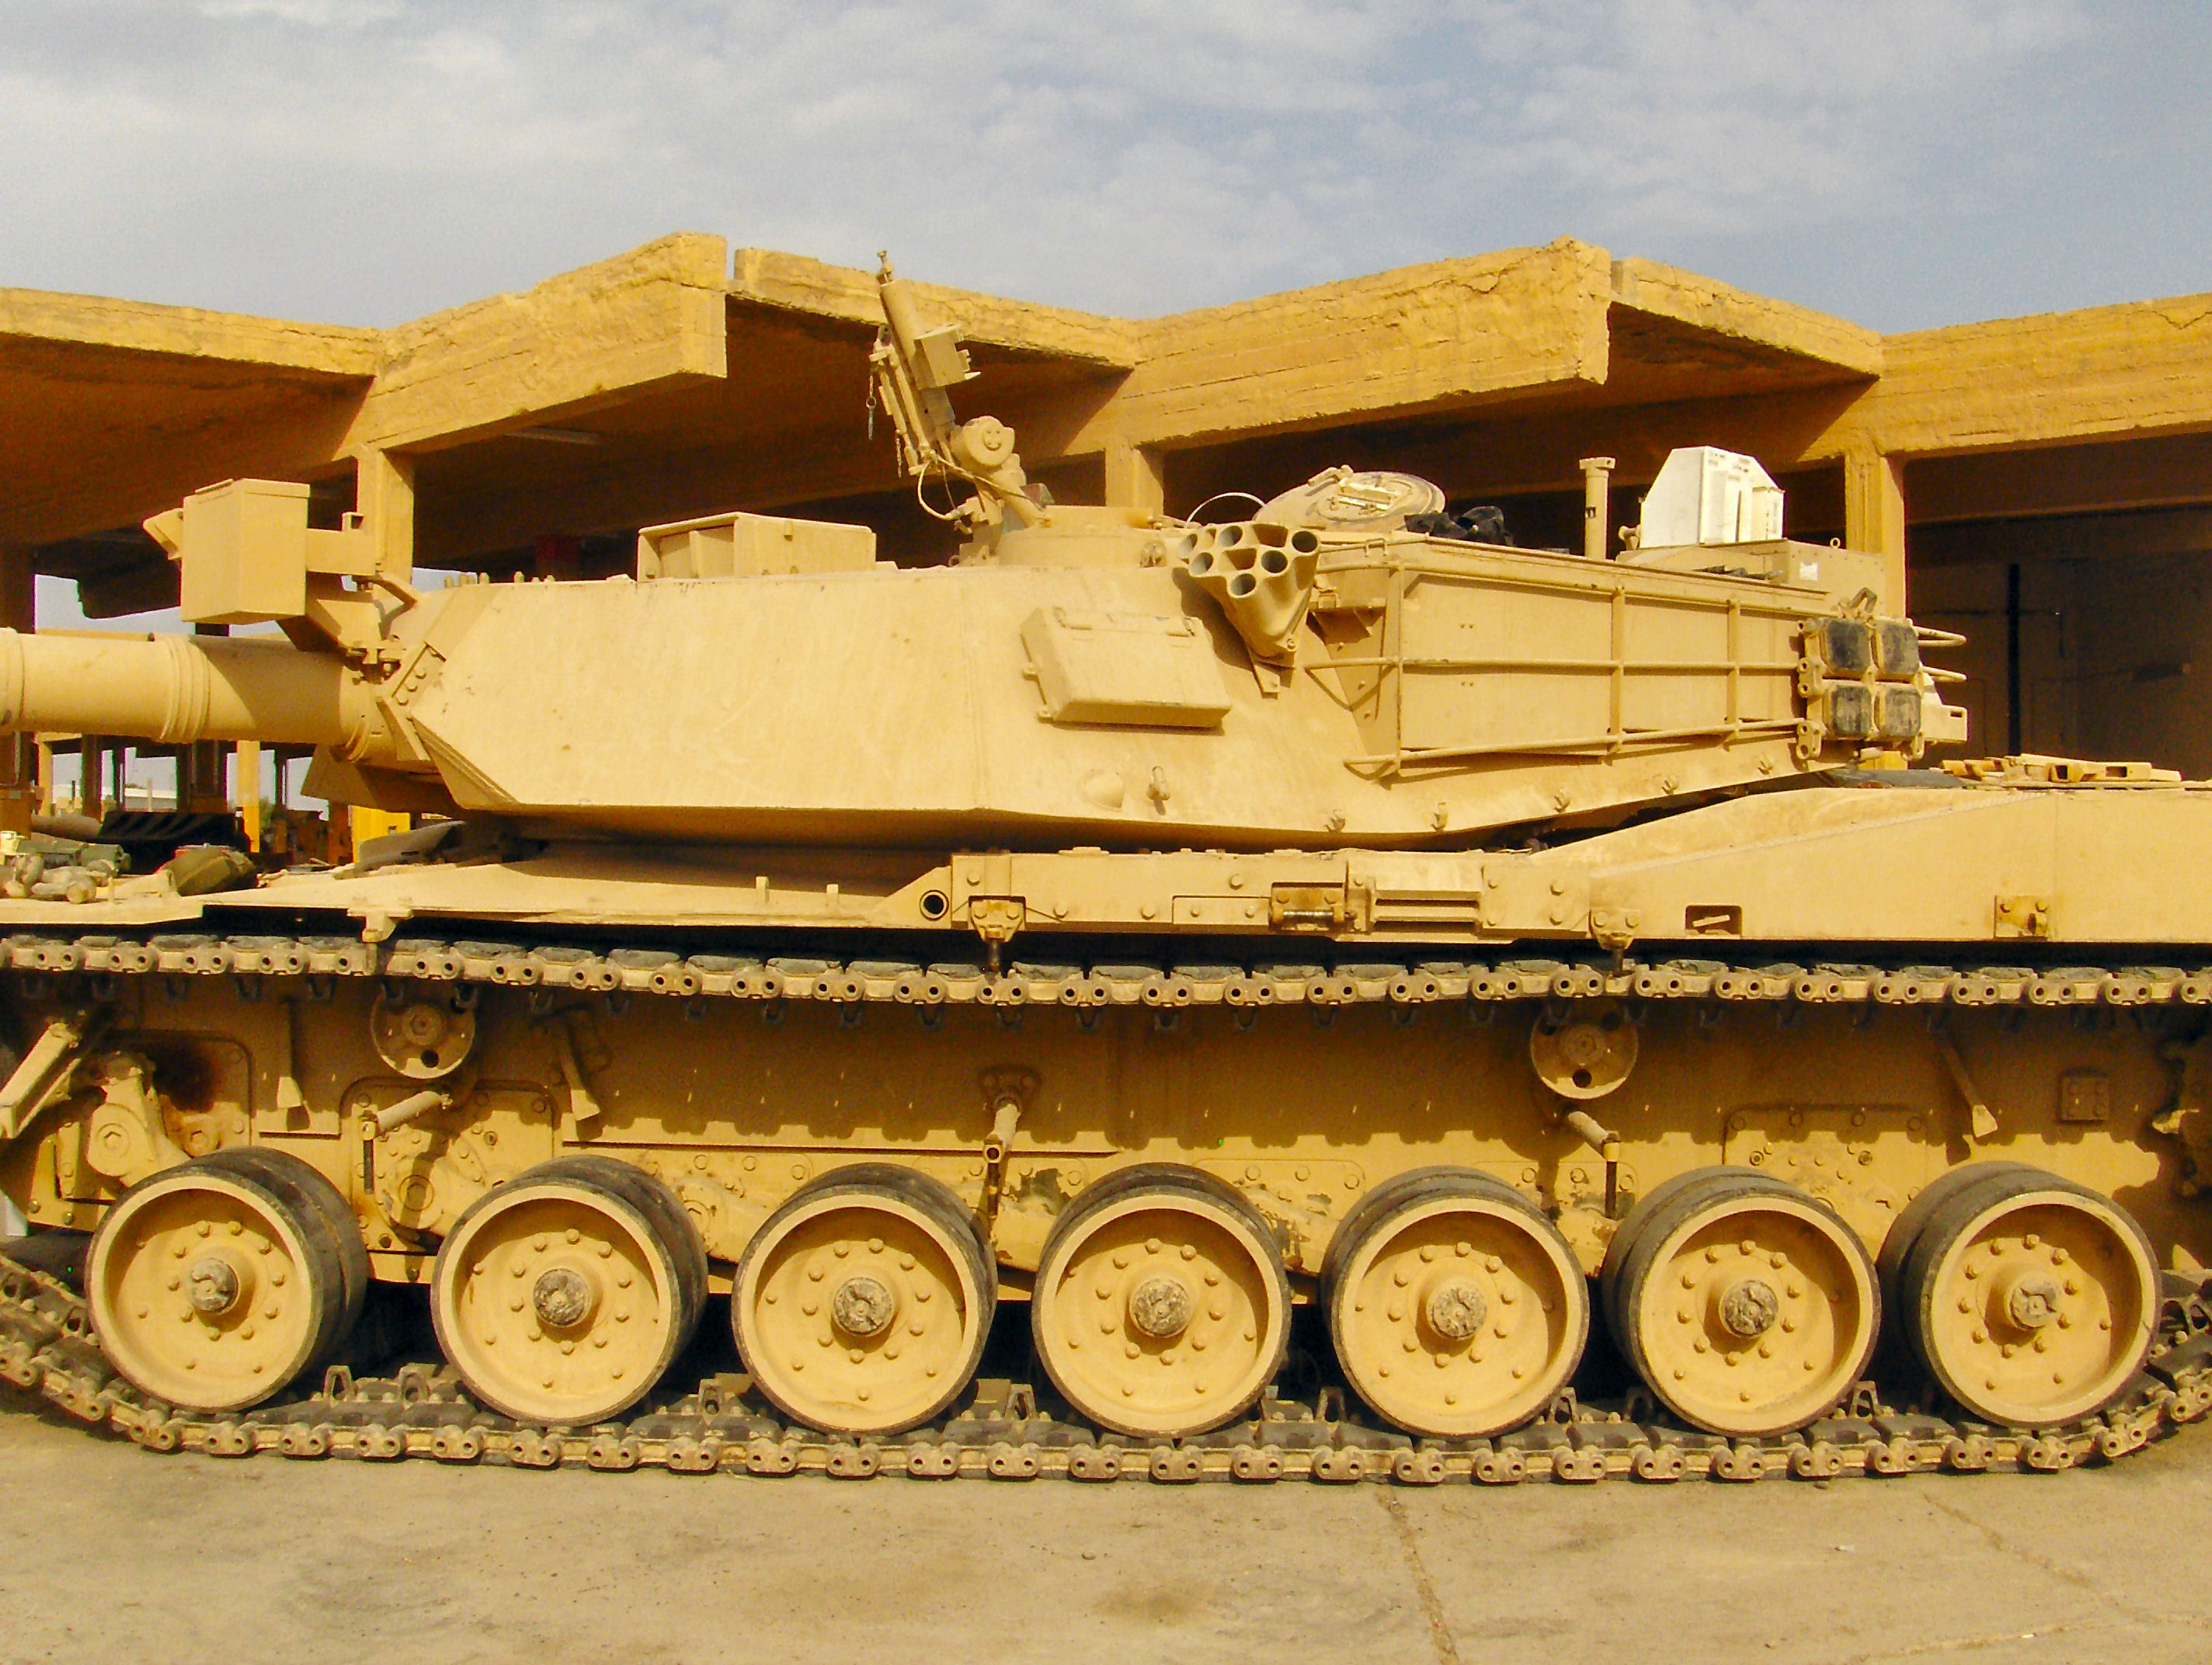
The above image is why I believe the armor ends about the 5th Roadwheel, but I could be wrong since I do not have access the real thing.
The problem is the Rear View image I posted earlier clearly shows that the rear end of the belly armor doesn't just end in a straight edge, but has a "stepped" or staggered ending. Without additional images showing the belly armor before it's installed, I cannot but guess any further...

ESSAYONS!
"Man does not live until he looks to the future, and that is his salvation in the worst of times.".... (Author Unknown)
AMPS #2102
Texas, United States
Joined: July 30, 2010
KitMaker: 52 posts
Armorama: 45 posts
Posted: Wednesday, August 04, 2010 - 01:02 PM UTC
Great reference pics guys, thanks!
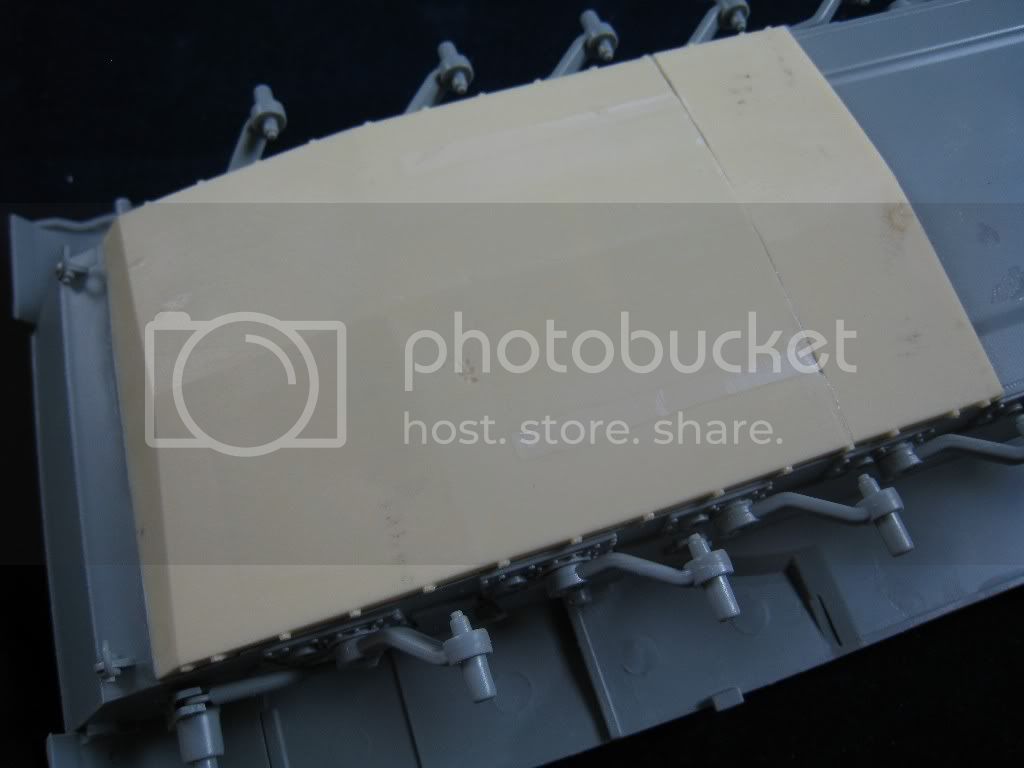
Looks to me like the Legend set could easily have been made with a one-piece casting for the belly armor rather than the two big pieces.
Since all that info was fresh in my mind, that's what I did next. The front part is slightly too small to use by itself and it has no clean end, so I cut off about an inch of the rear part and put them together. Just a small gap to fill and it'll be sufficient for my build.

Finally some shots with the tank mocked up. Starting to look like a tank to me!

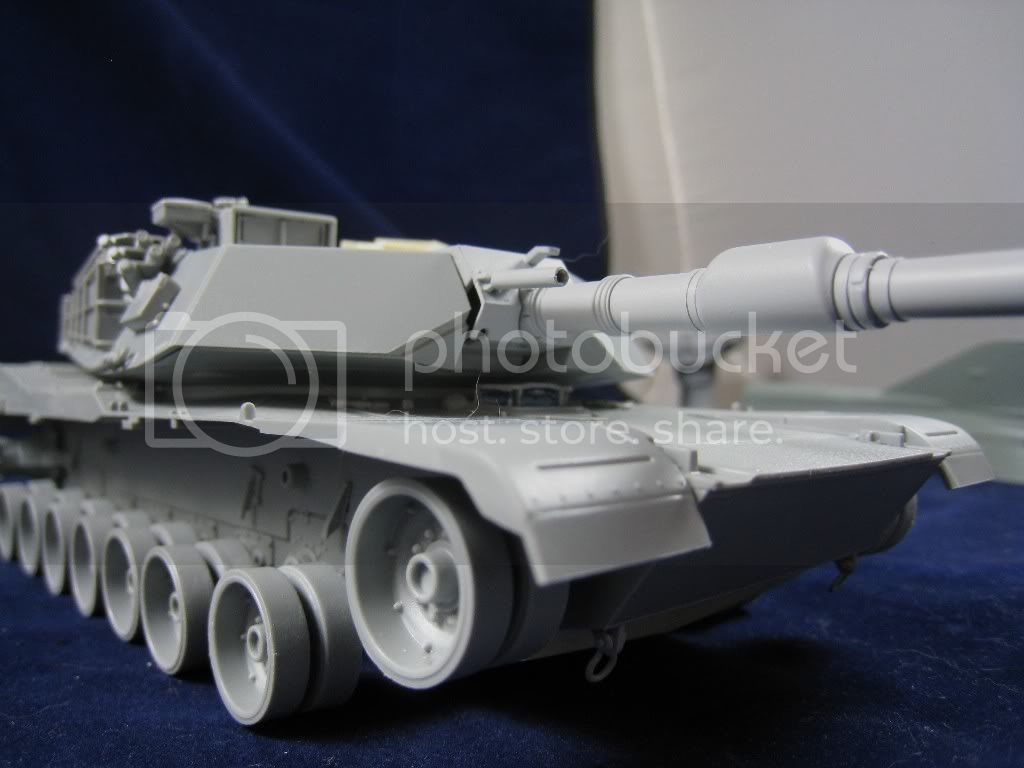
Thanks for looking!
Time flies like an arrow. Fruit flies like a banana.
Georgia, United States
Joined: January 31, 2010
KitMaker: 2,191 posts
Armorama: 1,814 posts
Posted: Wednesday, August 04, 2010 - 06:42 PM UTC
Did the sides of the manlet end up being casualties of the correction? There's a big gap there that's kinda noticeable.
Join AMPS.
http://www.amps-armor.org/ampssite
Armed Forces Europe, United States
Joined: January 01, 2009
KitMaker: 1,036 posts
Armorama: 1,033 posts
Posted: Thursday, August 05, 2010 - 12:14 AM UTC
Quoted Text
Did the sides of the manlet end up being casualties of the correction? There's a big gap there that's kinda noticeable.
Parts N24 + N23 missing

Christopher
" He who seeks to defend everything, defends nothing " Frederick the Great
Texas, United States
Joined: July 30, 2010
KitMaker: 52 posts
Armorama: 45 posts
Posted: Friday, August 06, 2010 - 02:31 PM UTC
Oh, crap. Where's the Homer forehead slap emoticon??
You won't believe how many times I looked back at the instructions trying to decipher those gaps. Did I say earlier that Dragon instructions can be tricky? Doesn't help if it's me doing the reading....
Quoted Text
Quoted Text
Did the sides of the manlet end up being casualties of the correction? There's a big gap there that's kinda noticeable.
Parts N24 + N23 missing 
Christopher
Time flies like an arrow. Fruit flies like a banana.
Texas, United States
Joined: July 30, 2010
KitMaker: 52 posts
Armorama: 45 posts
Posted: Saturday, August 07, 2010 - 06:02 PM UTC
Pardon the length of this post and the slightly tutorial nature of it. I just thought that some folks who haven't tried these would see some benefit....
These AFV Club tracks are an absolute dream! I can tell you right now that I will seek these out for any future armor builds. If they aren't available, I might buy a different kit.
In this box you get sprues of tracks and links, like this:
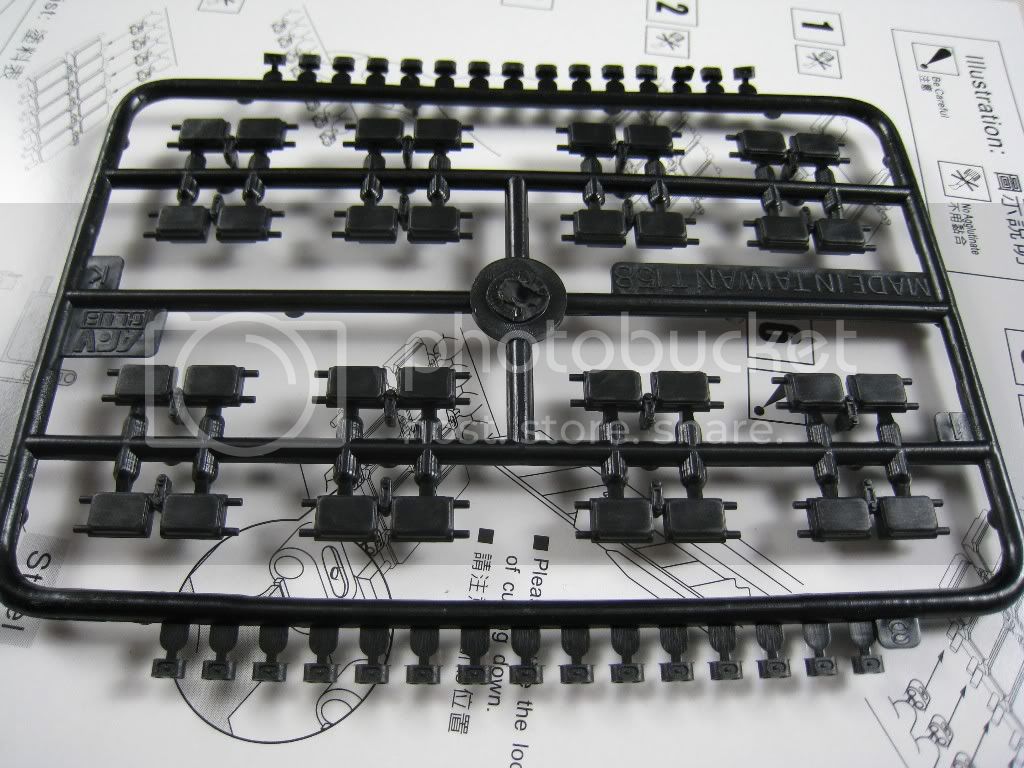
There are
sixteen of these sprues.
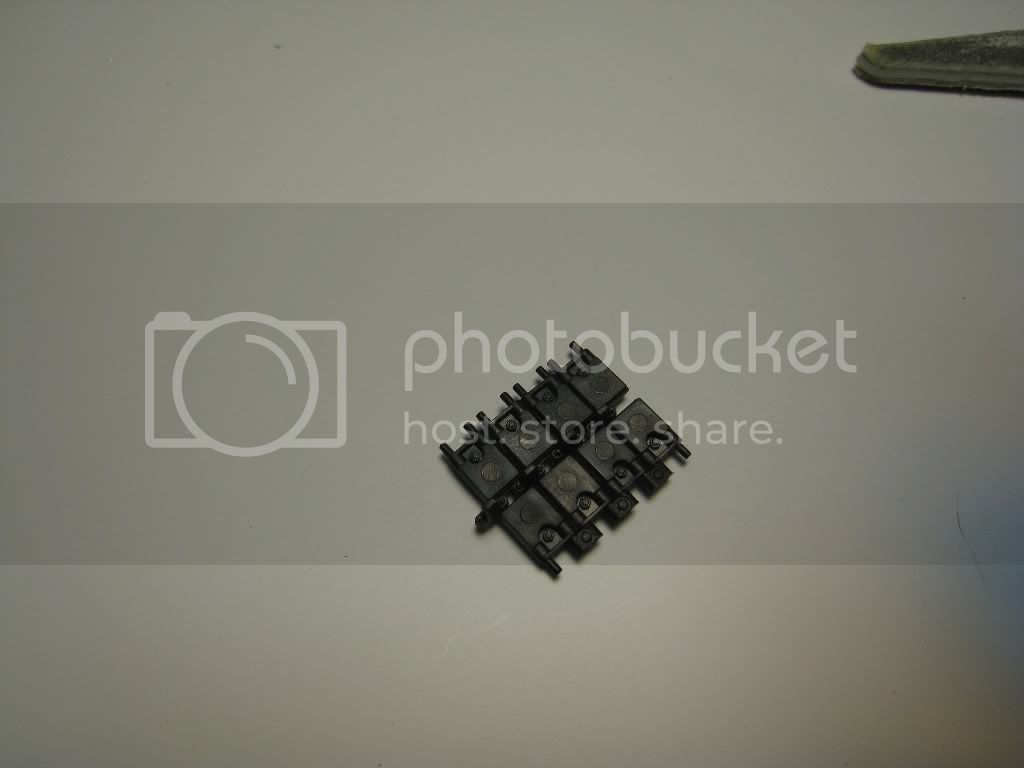
You work in small sections. In this case, I removed four tracks from the sprue:

They just slip together.

Then I cut a section of the sprue with three links. The cool thing here is that they're spaced on the sprue just right so you can use the sprue to get all the links onto their respective pins.

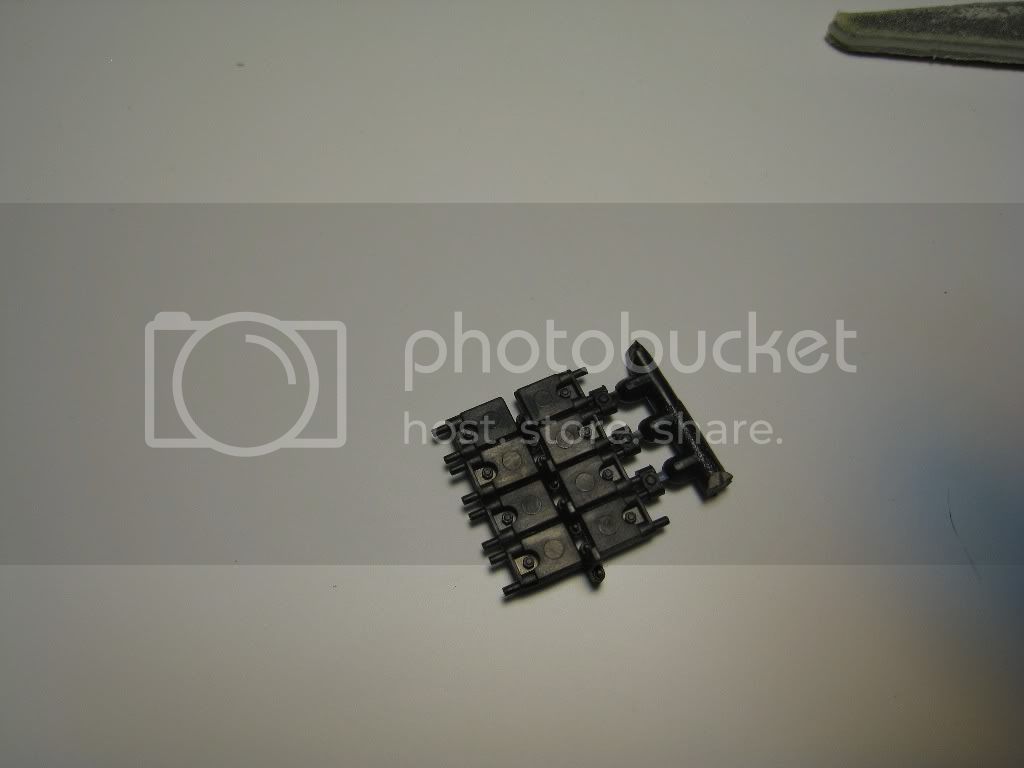
After that you cut the links free of the sprue and that's it! No glue required at all. I guess you could put a tiny drop on each pin but they fit nice and snug so I don't see why you'd bother. The completed sections are workable, just like the box says.
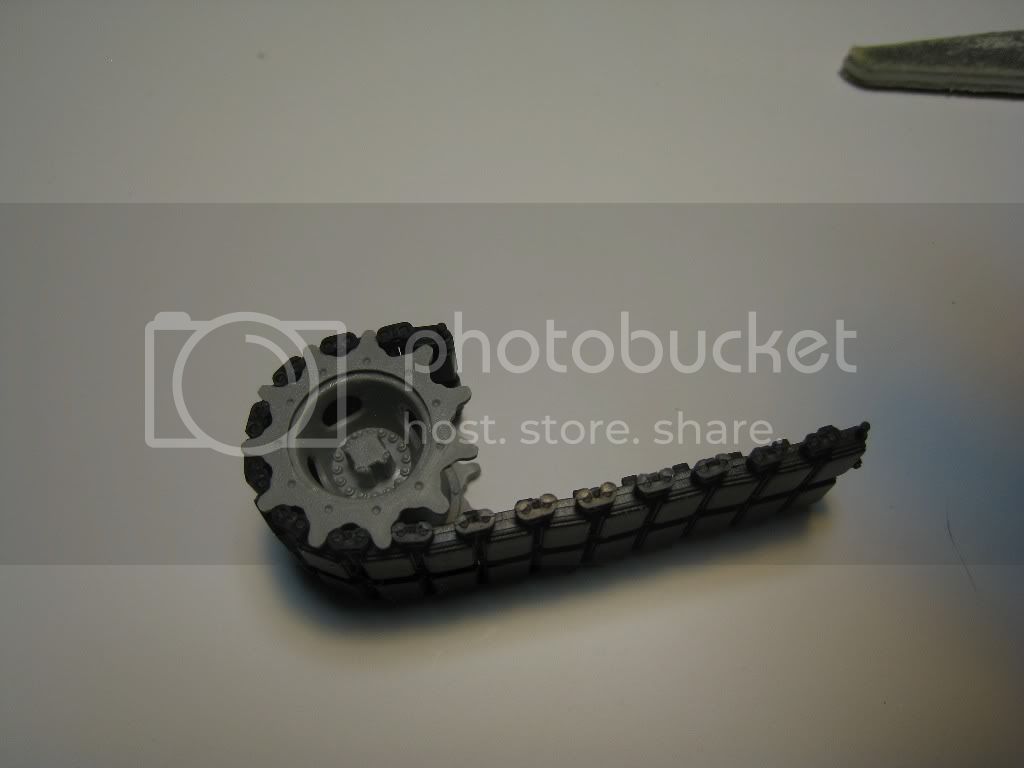
Time flies like an arrow. Fruit flies like a banana.
Texas, United States
Joined: July 30, 2010
KitMaker: 52 posts
Armorama: 45 posts
Posted: Wednesday, August 11, 2010 - 09:45 AM UTC
Time flies like an arrow. Fruit flies like a banana.
Georgia, United States
Joined: January 31, 2010
KitMaker: 2,191 posts
Armorama: 1,814 posts
Posted: Wednesday, August 11, 2010 - 09:57 AM UTC

Some ugly pin marks there...
Join AMPS.
http://www.amps-armor.org/ampssite
Texas, United States
Joined: July 30, 2010
KitMaker: 52 posts
Armorama: 45 posts
Posted: Wednesday, August 11, 2010 - 10:00 AM UTC
Quoted Text

Some ugly pin marks there...
Yes. They are more raised than recessed however and a few passes with a sanding stick pretty much sets that straight.
Time flies like an arrow. Fruit flies like a banana.
Georgia, United States
Joined: January 31, 2010
KitMaker: 2,191 posts
Armorama: 1,814 posts
Posted: Wednesday, August 11, 2010 - 10:07 AM UTC
Good to know. Same goes for the kit "magic tracks". One thing that looks obvious, but is probably pretty small without a zoom lens is the mold seam line through the tread block. Since they're separate pieces, should be pretty ease to run your sanding stick between the posts prior to assembly.
I will say that if/when I build another AIM kit, I'll definately being trying out one of the AM track options. Glad to hear this one is pretty good. Sounds easier than the Bronco option.
Join AMPS.
http://www.amps-armor.org/ampssite
Georgia, United States
Joined: January 31, 2010
KitMaker: 2,191 posts
Armorama: 1,814 posts
Posted: Wednesday, August 11, 2010 - 10:13 AM UTC
For the Abrams experts... and because it's something I'm questioning on my own build... the forward periscope. Should it be mounted that high? Seems like with the .50 cal in place, it would block the view. Thoughts?
Join AMPS.
http://www.amps-armor.org/ampssite


