i will confess there that i didn't do much research when it came to choosing the gun. My inner child screamed USE THE BIGGER GUN! and only now i realise that IFOR AS90's only used the smaller gun
you can blame my inner child for that one
and cheers its good to know im not the only reasonab;y new guy here
i see some peoples models on here and think WOW
then i look back at my japs who look like they have taken something that severely affects the eyes ha ha !
Constructive Feedback
For in-progress or completed build photos. Give and get contructive feedback!
Hosted by Darren Baker, Dave O'Meara
Some Pictures of my builds so far
FIREBIRDC9
England - South West, United Kingdom
Joined: July 27, 2011
KitMaker: 95 posts
Armorama: 81 posts
Joined: July 27, 2011
KitMaker: 95 posts
Armorama: 81 posts
Posted: Saturday, August 20, 2011 - 11:49 AM UTC
FIREBIRDC9
England - South West, United Kingdom
Joined: July 27, 2011
KitMaker: 95 posts
Armorama: 81 posts
Joined: July 27, 2011
KitMaker: 95 posts
Armorama: 81 posts
Posted: Sunday, August 21, 2011 - 12:42 AM UTC
Heres some pictures of my M4A2 Sherman next to the Chi ha so you can see how the weathering turned out
Posted: Sunday, August 21, 2011 - 04:57 AM UTC
Sherman looks good Jack !
FIREBIRDC9
England - South West, United Kingdom
Joined: July 27, 2011
KitMaker: 95 posts
Armorama: 81 posts
Joined: July 27, 2011
KitMaker: 95 posts
Armorama: 81 posts
Posted: Monday, August 22, 2011 - 07:10 AM UTC
Currently having a shot at Franks eye / face painting technique
re painting the face of a jap soldier
and cheers carl
re painting the face of a jap soldier
and cheers carl
Posted: Monday, August 22, 2011 - 08:53 AM UTC
Oh yeah, forgot to mention you should look at the articles section on Kitmaker- plenty of stuff there on figures, especially over on Historicus Forma. I also recommend www.planetfigure.com.
FIREBIRDC9
England - South West, United Kingdom
Joined: July 27, 2011
KitMaker: 95 posts
Armorama: 81 posts
Joined: July 27, 2011
KitMaker: 95 posts
Armorama: 81 posts
Posted: Wednesday, September 14, 2011 - 10:12 AM UTC
had a crack at the eye painting method and has gone well
not amazing but a major improvement over before
Posted: Thursday, September 15, 2011 - 01:00 AM UTC
Good stuff Jack- any pics?
dioman13
Indiana, United States
Joined: August 19, 2007
KitMaker: 2,184 posts
Armorama: 1,468 posts
Joined: August 19, 2007
KitMaker: 2,184 posts
Armorama: 1,468 posts
Posted: Thursday, September 15, 2011 - 03:05 PM UTC
Hey Jack, looks like you are on your way to happy modeling, congradulations. Here's two more tips for you. When I dry brush, I use a peice of card board, like the plain brown stuff on the back of a legal pad, not coated. I drag the brush over it till most of the paint is gone and proceed to brush. Sometimes it takes alot of doing to get the results you want. On my King Aurther figure for the helmet it took about 9 attempts to get the color right. Just take your time and let it build up gredually till your happy with it, takes some practice. Tip 2. It looks as if your tracks on the sherman ( the place where you connected them ) is visable on the bottom of both sides. I always put that area on top of a return roller so they don't show. Hope this helps you down the road. By the way, I don't think the Jappanese stand a chance of breaking through that large wood fence barracade, they might need air support.
FIREBIRDC9
England - South West, United Kingdom
Joined: July 27, 2011
KitMaker: 95 posts
Armorama: 81 posts
Joined: July 27, 2011
KitMaker: 95 posts
Armorama: 81 posts
Posted: Tuesday, September 27, 2011 - 10:23 AM UTC
unfortunatly not
very busy at an IT academy at the moment so little time for pictures and building
Oh yes the sherman treads gave me extreme trouble
they broke so i tried glue.
that failed so i tried staples. that worked but left marks as you can see
since i built these i learned a new method of attaching treads so this problem should'nt happen again
FIREBIRDC9
England - South West, United Kingdom
Joined: July 27, 2011
KitMaker: 95 posts
Armorama: 81 posts
Joined: July 27, 2011
KitMaker: 95 posts
Armorama: 81 posts
Posted: Saturday, December 10, 2011 - 01:42 PM UTC
Quoted Text
Quoted Text4. You can achieve a few different weathering techniques with enamels, however remember that since your base paints are enamel you will need to varnish your model to protect this layer of paint before you beging any of these techniques with enamel paints:
Although I agree with most of the great tips that Karl offers, the above is not necessarily true. It will depend on your curing time and the thinner you use. I use Humbrol enamels and never use a varnish between base paints and weathering.
I strongly recommend Humbrols enamel thinner ... perfect for washes and thinning paints but mild enough to not lift the enamels, if they have had time to cure .... at least 24 hours. Its a bit more expensive that other thinners per volume, but if you only use it for weathering, it should still last a long time. Use your normal thinner for base painting as normal.
An easy way to paint eyes is to use the following method.
1) Paint over the eyes area with an off-white colour (mix in some cream to the white)
2) Draw a black line though the eye. If your right handed, do the left eye first so you can keep them lined up. Always draw the line more to one side ... never striaght in the middle.
3) Draw a line of blue or green through this to add the iris colour
4) Draw a dot in the middle for the pupil
5) Using a dark flesh colour give the eyes shape, keeping equal white lengths on both eyes at each side ... but not too much either. Its better with none rather than too much
6) Highlight and shadow using the moulded detail as a guide.
Brush size is not as important as a good tip ... keep a good quality brush just for eyes. This is probably the single most important step in a figure ... get the eyes wrong, and the figure will never look right, no matter how good you paint it. Thats why I start here and when Im happy, I proceed. Not happy ... use some thinner and remove the last step until I get it right (or at least acceptable). Worst case scenario ... just draw a black line through the eyes .. its enough for most figures at this scale. Painting the eyes after the flesh often gives the lunatic effect with that 1000 yard stare.
See some Tristar figures below, that had quite slanty eyes and it was not really possible to get the whites in.
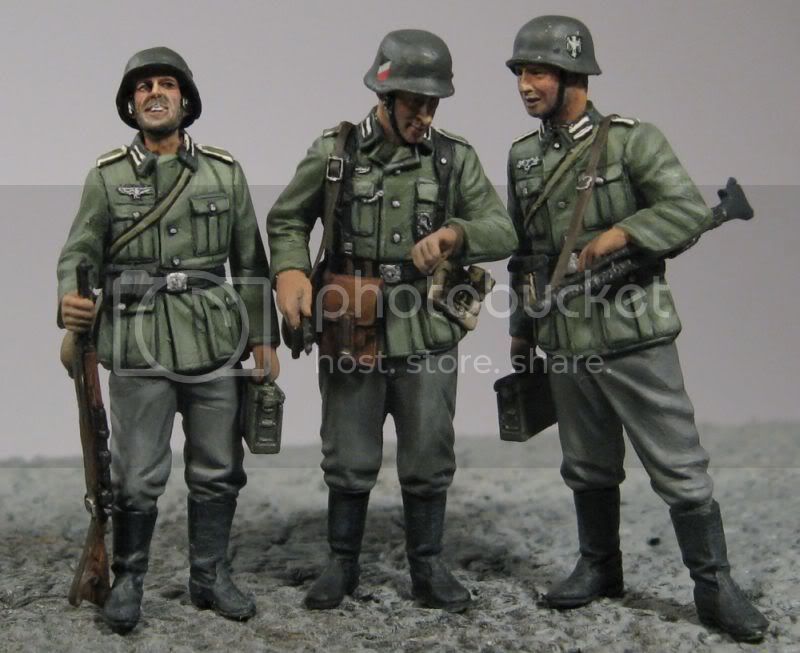
I gave this a shot on a german tank commander that came with a panzer iv i built. Not quite as good as yours but certainly an improvement cheers for the tip
lespauljames
England - South West, United Kingdom
Joined: January 06, 2007
KitMaker: 3,661 posts
Armorama: 2,764 posts
Joined: January 06, 2007
KitMaker: 3,661 posts
Armorama: 2,764 posts
Posted: Saturday, December 24, 2011 - 01:53 AM UTC
You can get great effects with just brush painting. And nice to see another young modeller, although at 22 I dont think I am really considered as young anymore..
heh
I use brushes exclusively as i'm pretty skint.
heh
I use brushes exclusively as i'm pretty skint.