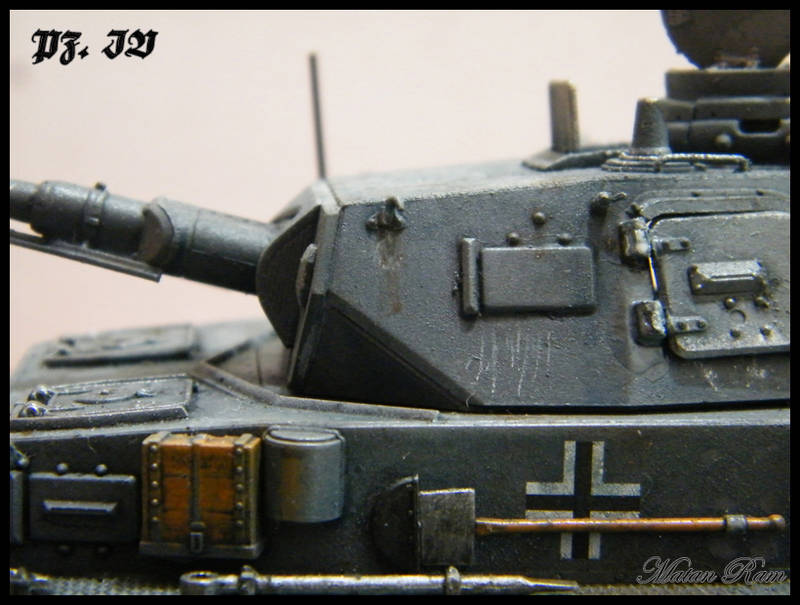
Hey all,
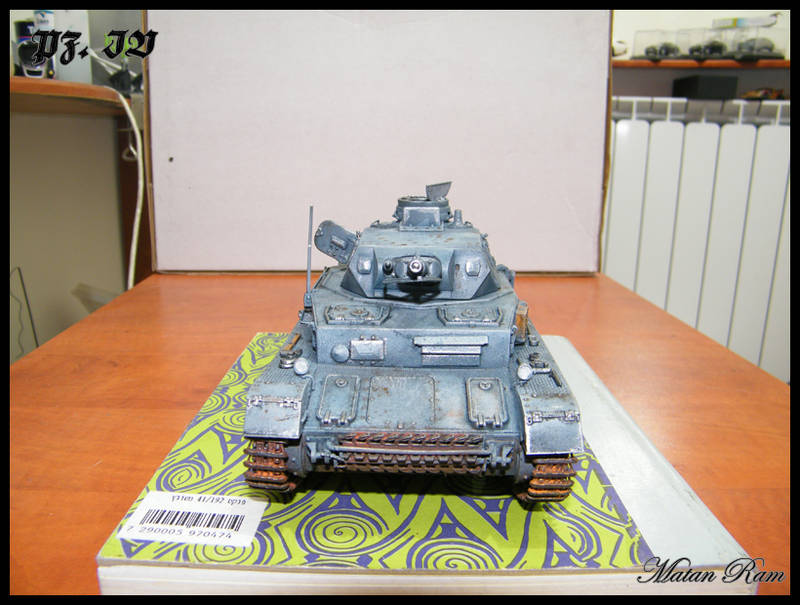
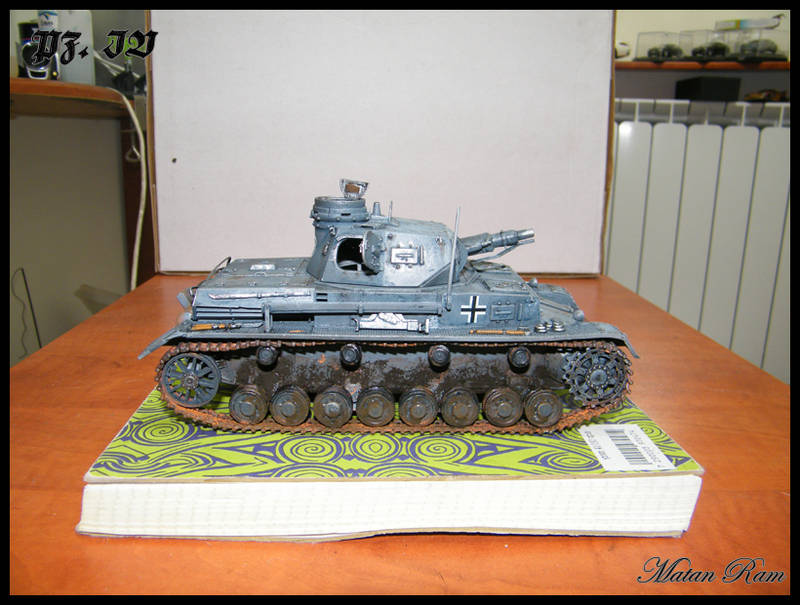
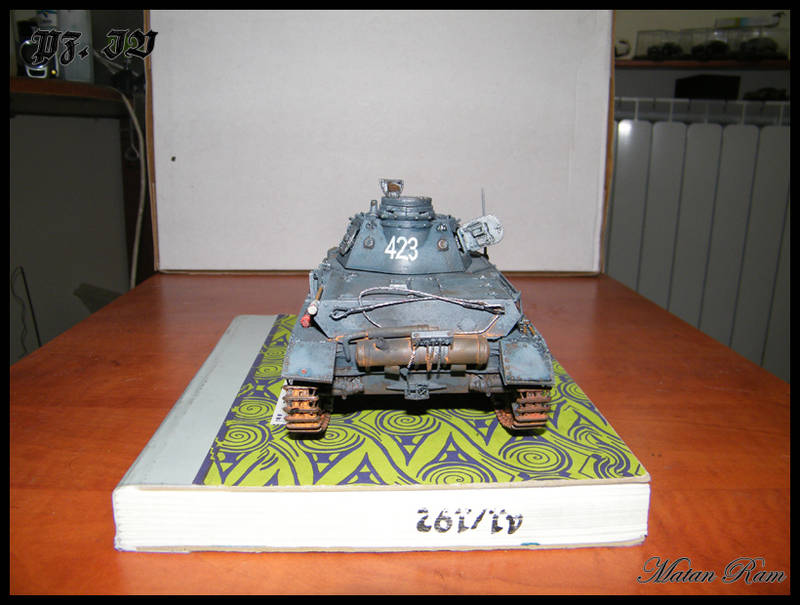
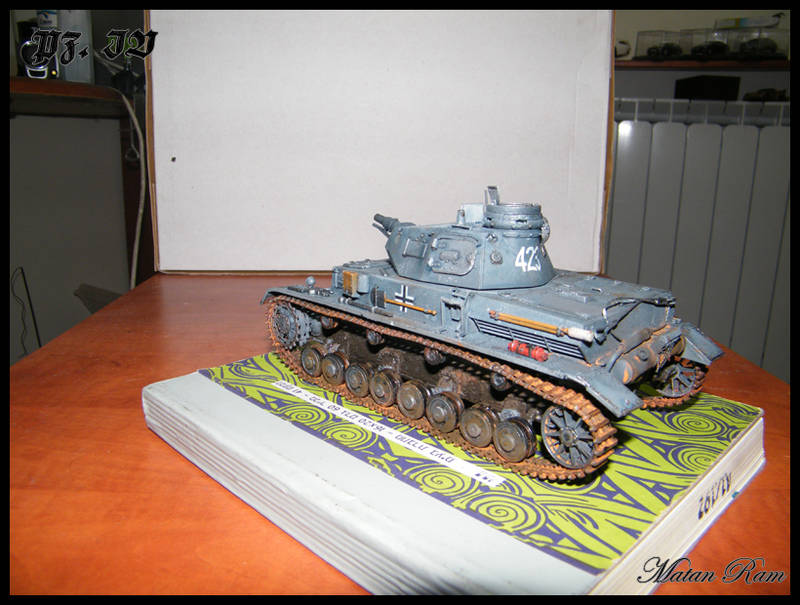
this is a build i've started some time ago, and only now got to finish. I'm feeling that my models are ok, but nothing more than that. I just want them to be better.
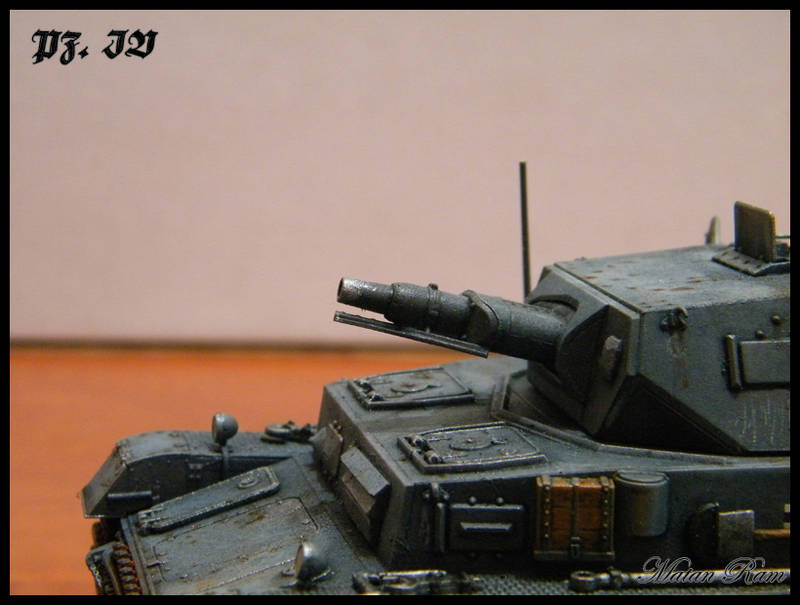
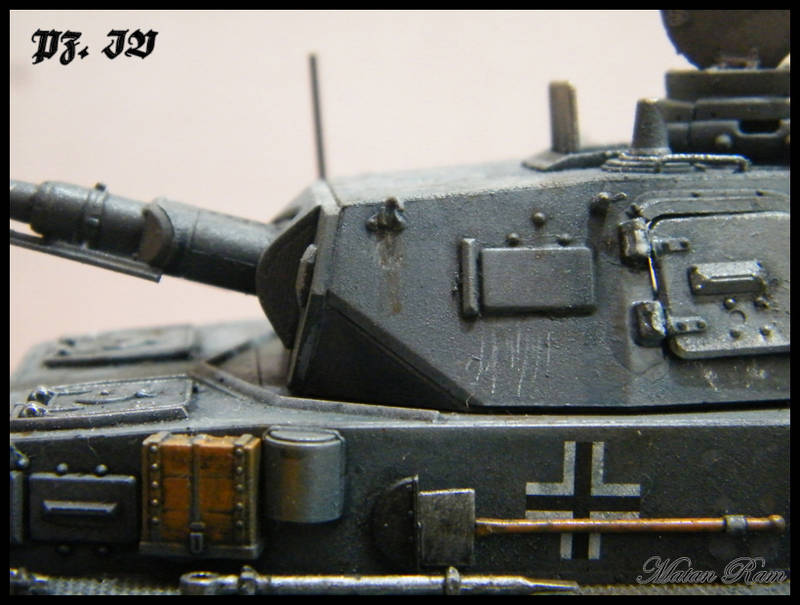
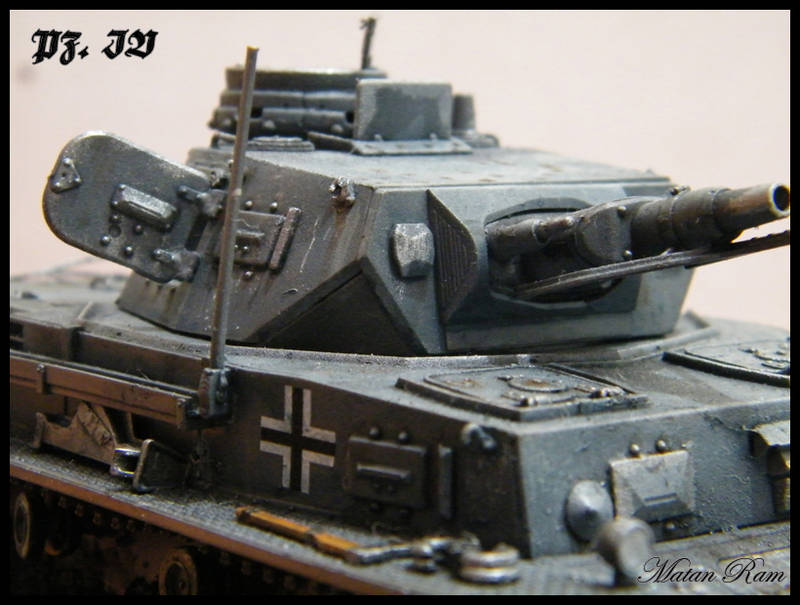
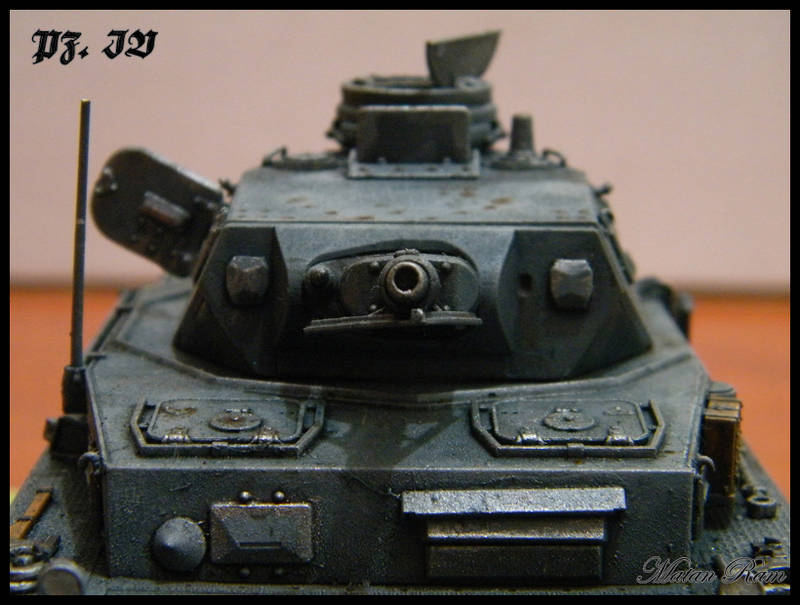
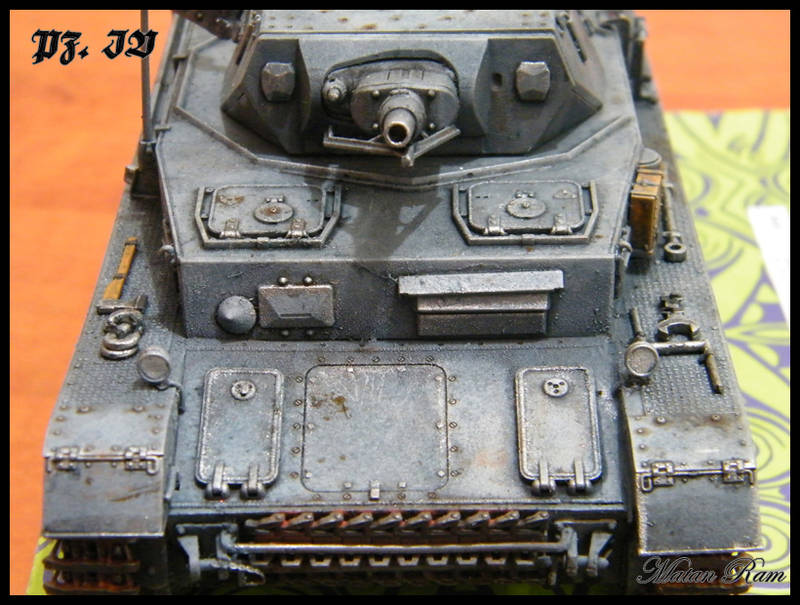
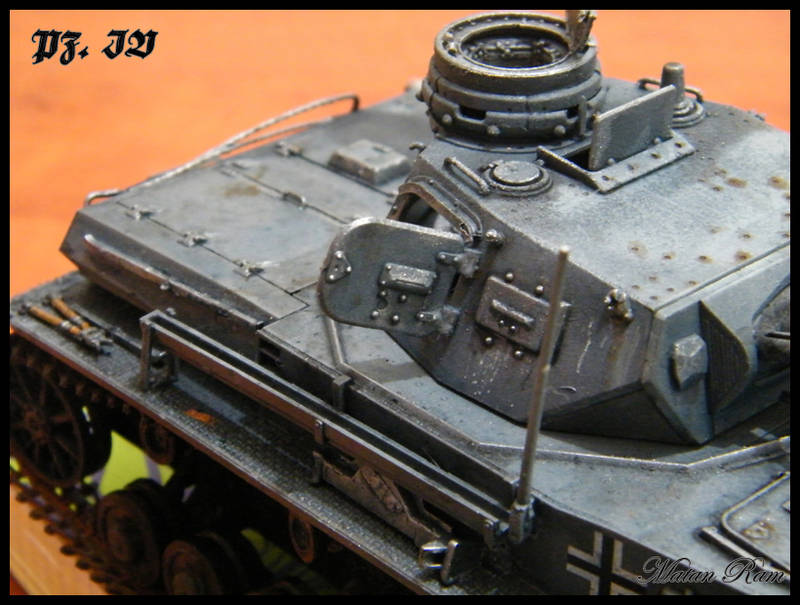
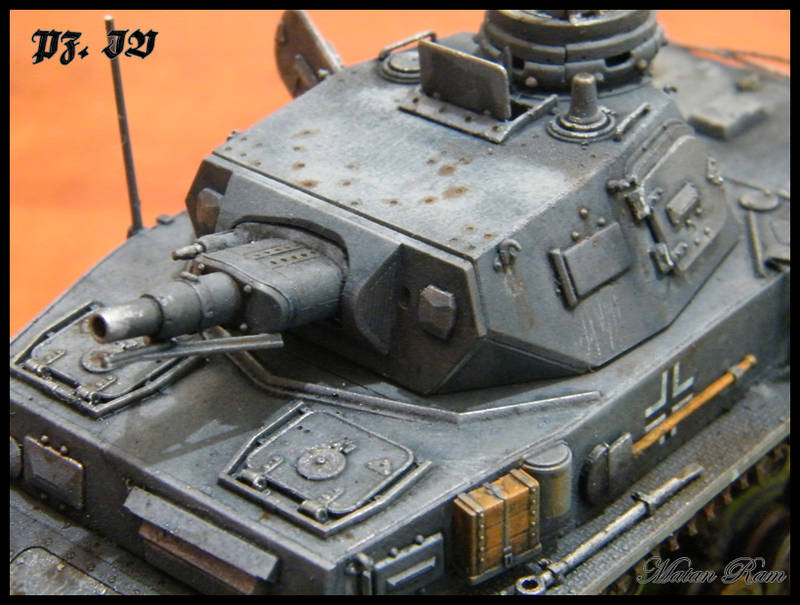
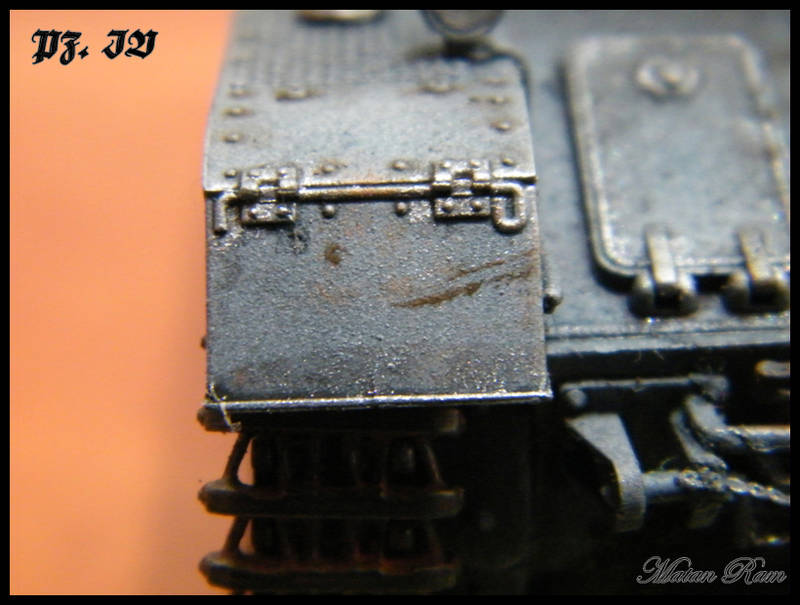
anyway, for this model I went through tons of articles, and viewed lots of photo-features here, trying to learn and do different techniques, in order to have a more realistic model. so - I ask you to heavily criticise my model. note: the left-side hatch broke off several times, hence the ugly glue marks.
Constructive Feedback
For in-progress or completed build photos. Give and get contructive feedback!
Hosted by Darren Baker, Dave O'Meara
my PZ.IV - criticism needed
Posted: Thursday, October 06, 2011 - 08:31 AM UTC
Tojo72
North Carolina, United States
Joined: June 06, 2006
KitMaker: 4,691 posts
Armorama: 3,509 posts
Joined: June 06, 2006
KitMaker: 4,691 posts
Armorama: 3,509 posts
Posted: Thursday, October 06, 2011 - 08:56 AM UTC
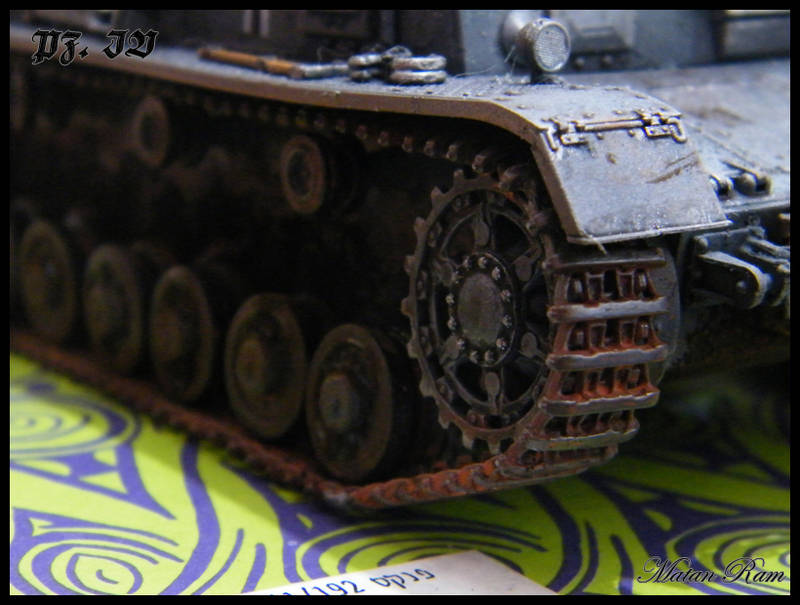
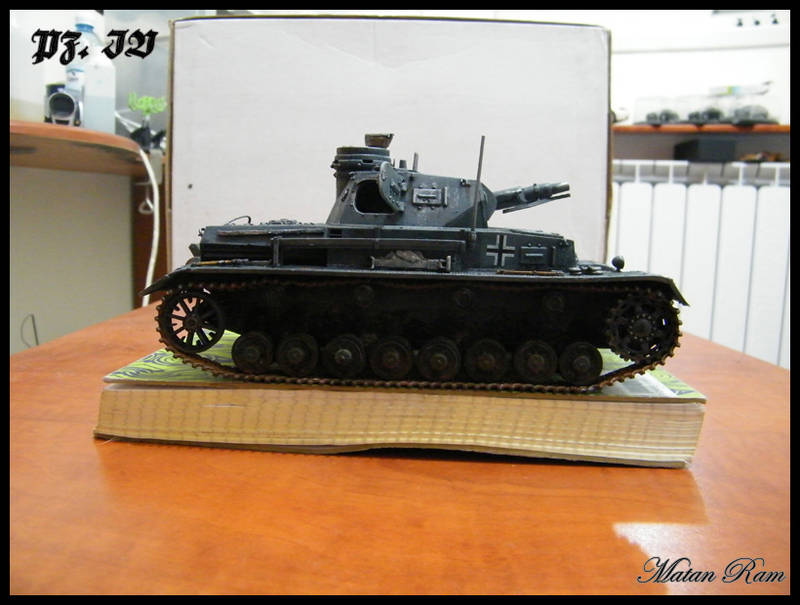
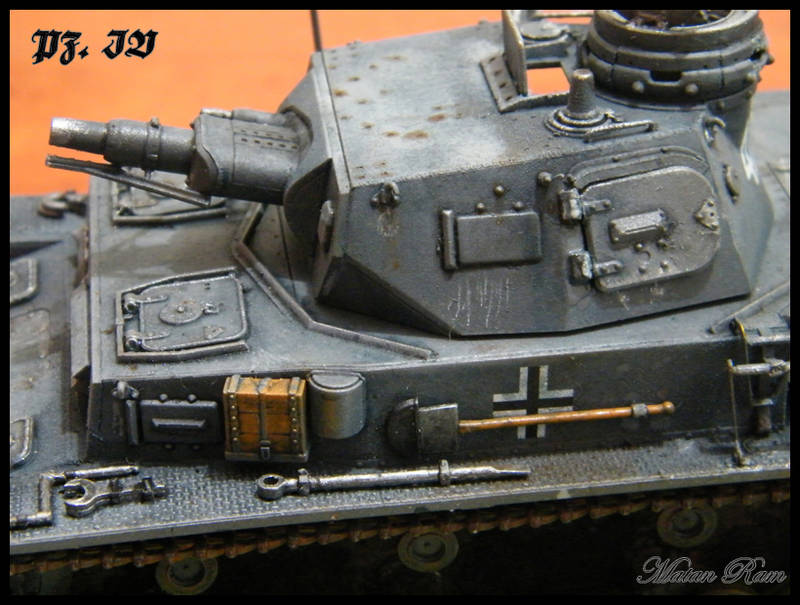
Hello,I think the modulation on the gray looks good,nice variation,the weathering looks good,as do your wood handles.I would say that the tracks are too rusty for a working tank though.
Posted: Thursday, October 06, 2011 - 09:36 AM UTC
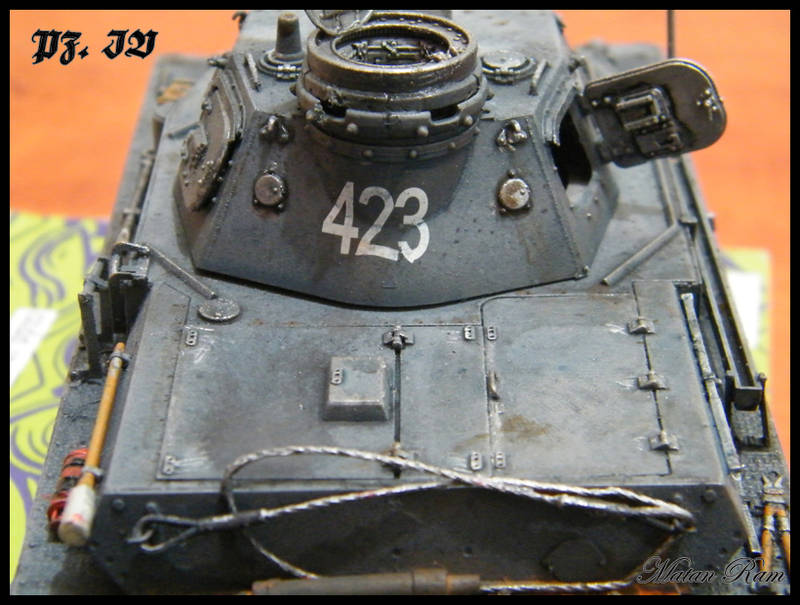
Overall looks great. I am not sure about the tracks being too rusty, but the rust color to me is a little too red. The only comment I would have is the vertical while weathering lines on the turret. Just not my preference in weathering. But a fantastic looking build, great job.
Posted: Thursday, October 06, 2011 - 09:45 AM UTC
thanks for your input! I may have overdid the rust on tracks - got too excited with pigment wash
the vertical lines were supposed to be scratch marks on the turret. I tried to do them as fine as possible. i see the effect did not come as well as i had hoped
retiredyank
Arkansas, United States
Joined: June 29, 2009
KitMaker: 11,610 posts
Armorama: 7,843 posts
Joined: June 29, 2009
KitMaker: 11,610 posts
Armorama: 7,843 posts
Posted: Thursday, October 06, 2011 - 10:32 AM UTC
The metal parts of the tools should be painted the same color as the tank. Shiny metal=easy target. I don't think the tracks are too rusty. In the future, you may want to leave a few of the links out of the weathering process. This will make it look as though they have been replaced. The camo looks great. IMHO I would have left off the vertical marks. It looks like the muffler is about to fall off the tank. One last thing. The markings should not be so perfect on a tank showing this much wear and tear. Paint over a few spots or remove some places, before application.
Posted: Thursday, October 06, 2011 - 11:47 AM UTC
[quote]the vertical lines were supposed to be scratch marks on the turret./quote]
One thing you can try for scratches is a sharp colored pencil, I use slate grey, oxide red, and metallic silver. With the colored pencil you can also dab it for pot marks, etc.
Keep up the good work.
One thing you can try for scratches is a sharp colored pencil, I use slate grey, oxide red, and metallic silver. With the colored pencil you can also dab it for pot marks, etc.
Keep up the good work.
Rouse713
Wisconsin, United States
Joined: February 03, 2009
KitMaker: 367 posts
Armorama: 326 posts
Joined: February 03, 2009
KitMaker: 367 posts
Armorama: 326 posts
Posted: Thursday, October 06, 2011 - 01:37 PM UTC
I think your pin washes are very well done and conservative.
I think you may have had the flash on a few photos (or a bright white light). Anyways I know lighting is everything for colors. That said, it seems there may be a little to much drybrushing / antiquing.
I like to call it "antiquing" because that is exactly what drybrushing does. It makes things look old. If it is done too much, it can make the model look like old furniture. I think there is a lot of silver in your drybrushing as well.
I would recommend drybrushing only a very faint shade lighter than the base color. Then, use a pencil on any of the sharp edges. This really helps to divide the model for the eye. Only use silver for drybrushing very sparingly!
Overall, your model looks awsome! To my eye, a little more refined lines (via less silver drybrushing) will really help to show the contours of the vehicles (espcially dark colors like your panzer is wearing). Keep on keeping on. This panzer IV is a very good model
Posted: Thursday, October 06, 2011 - 11:27 PM UTC
thank you all for your advices! I will try to implement them on my next models
bmikk1
Utah, United States
Joined: February 15, 2008
KitMaker: 199 posts
Armorama: 136 posts
Joined: February 15, 2008
KitMaker: 199 posts
Armorama: 136 posts
Posted: Friday, October 07, 2011 - 02:38 AM UTC
Great looking model Matan, the color modulation looks great. In regards to the rust on the tracks, my experience is that pastel rust tends to show brighter in photos then they do in person. I had a KV-1 build I posted here and in person I felt the rust on the tracks was just right, but when I downloaded the pictures I was shocked at how bright the rust appeared in photos. I toned it down with some dark earth pastels and that made it look more acceptable in photos.
Thanks for sharing your work!
Joel_W
Associate Editor
New York, United States
Joined: December 04, 2010
KitMaker: 11,666 posts
Armorama: 1,143 posts
Joined: December 04, 2010
KitMaker: 11,666 posts
Armorama: 1,143 posts
Posted: Friday, October 14, 2011 - 03:20 AM UTC
Nicely built and weathered. I did find the rusty tracks to stand out a bit too much in your pictures. The 1st series of pictures were washed out from too much flash. If you're using a camera that has flash compensation try going down the scale till the flash no longer washes out your pictures. If not, use a tissue over the flash head to defuse the flash light.
Matt182
United Kingdom
Joined: May 20, 2010
KitMaker: 269 posts
Armorama: 243 posts
Joined: May 20, 2010
KitMaker: 269 posts
Armorama: 243 posts
Posted: Friday, October 14, 2011 - 05:15 AM UTC
I think you have done a nice job with this. I would have to agree with others about the tracks, too much rust and too bright. Maybe try and dust some off and apply some mud pigments to tone it down. Your colour modulation looks good but you seem to have lost your way a little on the turret roof. There is a very stark contrast around the commanders copula. I also think some of your dry brushing is a touch too heavy in some places.
I think you did a very good job on the wood, looks great and your painting of bare metal areas are also very good. Those white marks on the turret and the overly clean decals could use some attention.
Overall it looks like you have tried many new techniques all in one go with some good and some not so good results but your definetly on the right path.
Just remember that with weathering less is usually more, which can be diffcult to get the hang of.
Sorry if that sounds overly negetive, I do like your build and there are plenty of pros to take from it
rholmstr
Oregon, United States
Joined: September 30, 2010
KitMaker: 28 posts
Armorama: 18 posts
Joined: September 30, 2010
KitMaker: 28 posts
Armorama: 18 posts
Posted: Monday, October 17, 2011 - 04:45 PM UTC
Overall it looks great. the tracks do look a bit rusty but its nothing that cant be fixed. i would take a pencil and go over some of the contact points on the tracks and sprockets to give the metal on metal worn look.
great job
great job
Posted: Sunday, October 23, 2011 - 04:53 PM UTC
Matan,
I would echo a lot of what has been said already. You might want to try a dark brown wash on the tracks, it will help tone down the stark rust appearance. The other thing you might want to think about is to bring the mud/dirt farther up the vehicle, it would gunk up the entire lower hull side, not just the bottom portion. I always try to carry some of the earth weathering up onto the fenders, front glacis, and rear areas of the hull as well to help tie everything together. However, the best advice I could give would be to get an old hulk you can practice on to get a feel for what you like best.
Regards,
Rick