_GOTOBOTTOM
Constructive Feedback
For in-progress or completed build photos. Give and get contructive feedback!
Tamiya T-55 - WIP
pseudorealityx
Visit this Community
Georgia, United States
Joined: January 31, 2010
KitMaker: 2,191 posts
Armorama: 1,814 posts
Posted: Monday, December 12, 2011 - 03:15 PM UTC
The Atlanta AMPS club project this year was the Tamiya T-55. For a lot of us, it was to get away from the standard WWII stuff that most of us are so familiar with and a chance to learn something new...

Upon searching online, I found this picture, which is a really neat paint scheme.


I chose to model a similar tank while it was still operational. Along with the Tamiya kit, I've been using the Eduard PE set, the Miniarm T-72 tracks and drive sprockets, and pieces from the Blast Models update for the loader's cupola, as well as a little bit of scratch styrene and wire for handles, fuel lines, brackets, etc. I'll also be using the Bison decals for a Afghan Northern Alliance Tank.

So far, here's the progress.


Thanks for looking!


mother
Visit this Community
New York, United States
Joined: January 29, 2004
KitMaker: 3,836 posts
Armorama: 1,370 posts
Posted: Monday, December 12, 2011 - 03:38 PM UTC
Nice work Jesse, like how the cupola came out. I wanted to do something along the same line you are doing, and like what you said...a chance to learn something new other than modern US armor. Looking forward to your next update.

Happy Modeling,
Joe
shopkin4
Visit this Community
Illinois, United States
Joined: March 29, 2009
KitMaker: 1,135 posts
Armorama: 1,030 posts
Posted: Monday, December 12, 2011 - 04:17 PM UTC
Joe hit it right on the head. I'll be building this next, well with Legend's Enigma conversion. Watching with interest
pantherkid
Visit this Community
Florida, United States
Joined: September 18, 2011
KitMaker: 73 posts
Armorama: 35 posts
Posted: Monday, December 12, 2011 - 04:56 PM UTC
Looking good there Jesse, any chance of getting any pitchers of the fuel lines? I've got two of these and cant find a good shot of them anywere. Also what did you use for the lines, fine soder? good luck on your project. Thanks Rick
dvarettoni
Visit this Community
South Carolina, United States
Joined: September 28, 2005
KitMaker: 778 posts
Armorama: 763 posts
Posted: Monday, December 12, 2011 - 05:20 PM UTC
Looking good Jesse welcome to the dark side lol lol can't wait to see all of your clubs work in feb. can't wait to see this one with paint btw you should check out the T-62 that i'm working on for the show.
dave
junglejim
Visit this Community
Alberta, Canada
Joined: February 18, 2003
KitMaker: 1,728 posts
Armorama: 1,629 posts
Posted: Monday, December 12, 2011 - 05:42 PM UTC

Quoted Text

any chance of getting any pitchers of the fuel lines?


Check my old post HERE on ML.

Jim
Spiderfrommars
Visit this Community
Milano, Italy
Joined: July 13, 2010
KitMaker: 3,845 posts
Armorama: 3,543 posts
Posted: Monday, December 12, 2011 - 10:07 PM UTC

Quoted Text

any chance of getting any pitchers of the fuel lines?


https://modelshipwrights.kitmaker.net/forums/141132&page=1

http://www5b.biglobe.ne.jp/~TANK-GUY/notes/T55manual1.html


Rck, If you need something else let me know

Great build Jesse, i'll follow for sure

cheers
pseudorealityx
Visit this Community
Georgia, United States
Joined: January 31, 2010
KitMaker: 2,191 posts
Armorama: 1,814 posts
Posted: Tuesday, December 13, 2011 - 02:30 AM UTC

Quoted Text

Looking good there Jesse, any chance of getting any pitchers of the fuel lines? I've got two of these and cant find a good shot of them anywere. Also what did you use for the lines, fine soder? good luck on your project. Thanks Rick


I used solder for the thicker line, and silver beading wire for the thinner one. One of our local modelers runs a bead shop, so I picked some stuff up from him.

Lots of pictures found in the links that Spider posted.
pseudorealityx
Visit this Community
Georgia, United States
Joined: January 31, 2010
KitMaker: 2,191 posts
Armorama: 1,814 posts
Posted: Tuesday, December 13, 2011 - 02:33 AM UTC
Oh, also.... my own selfish request for pictures.

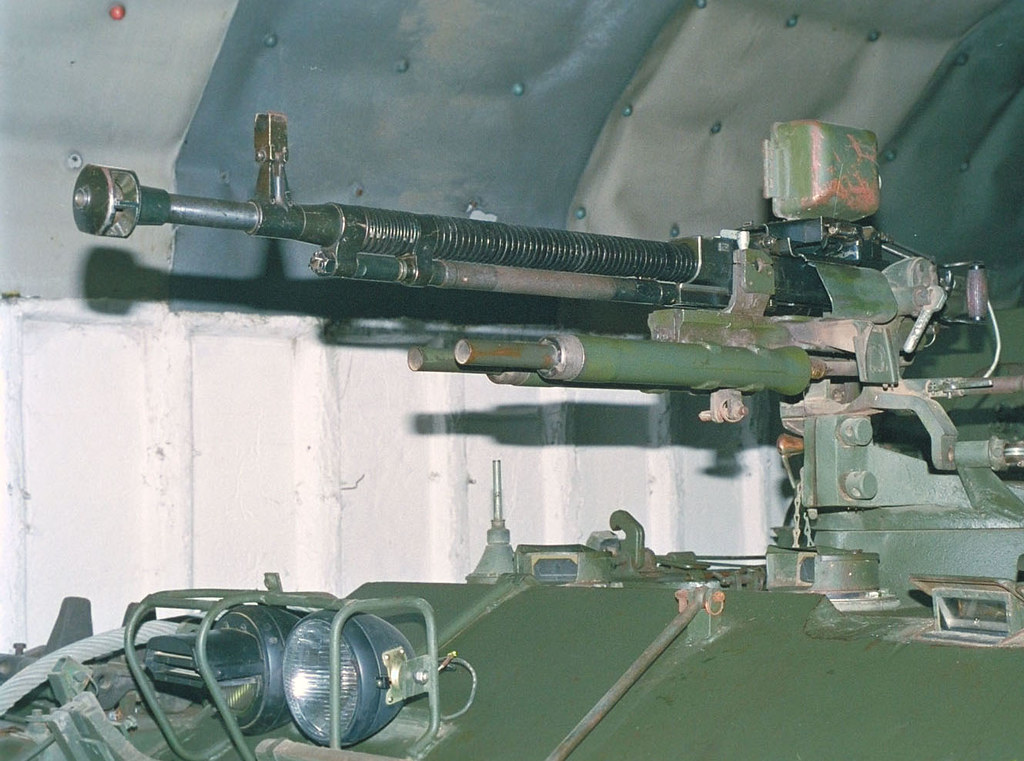
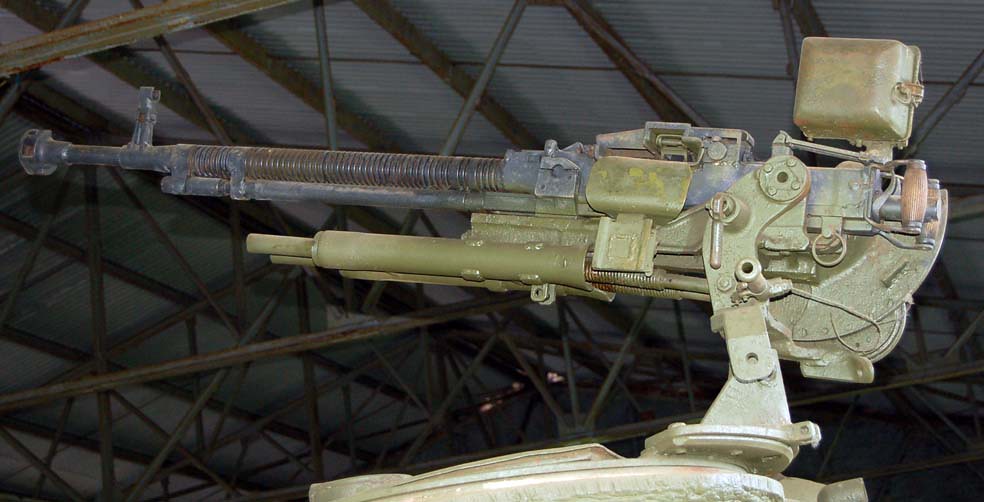
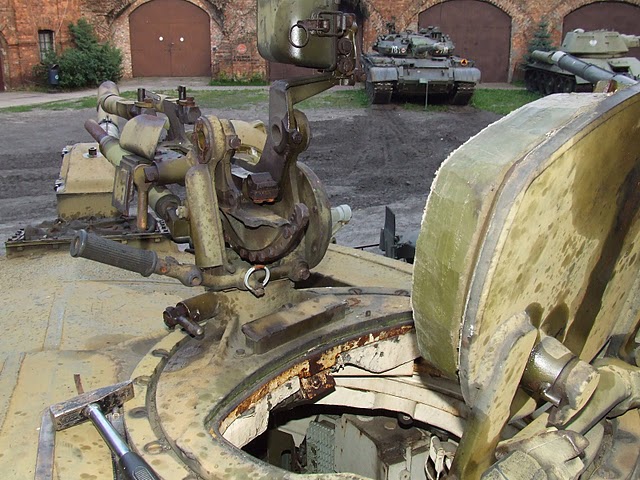
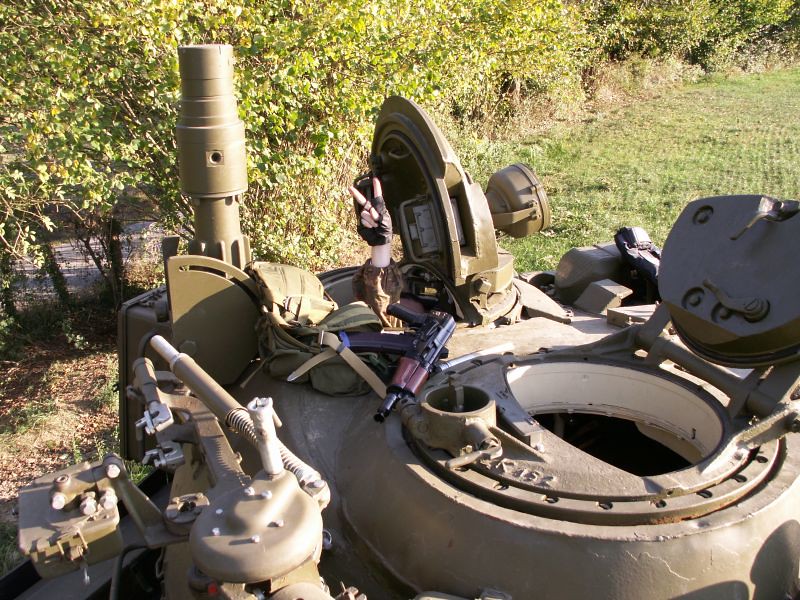
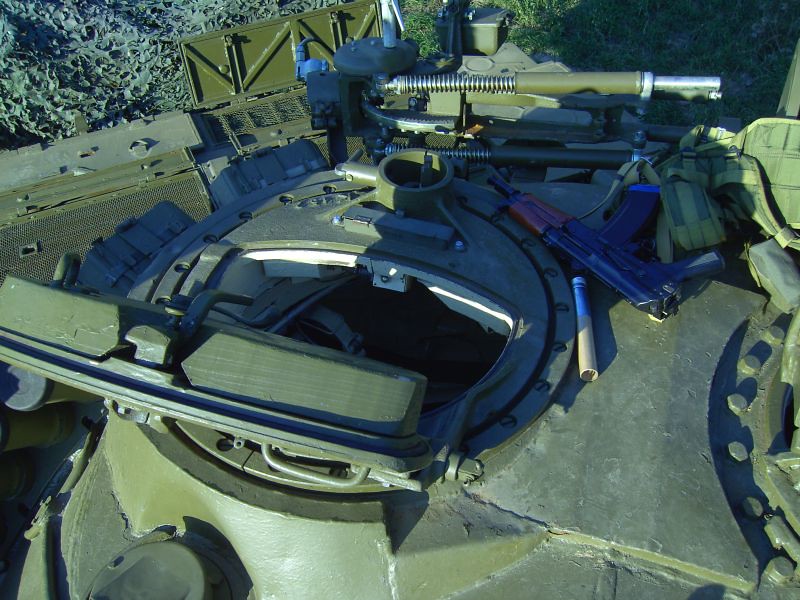
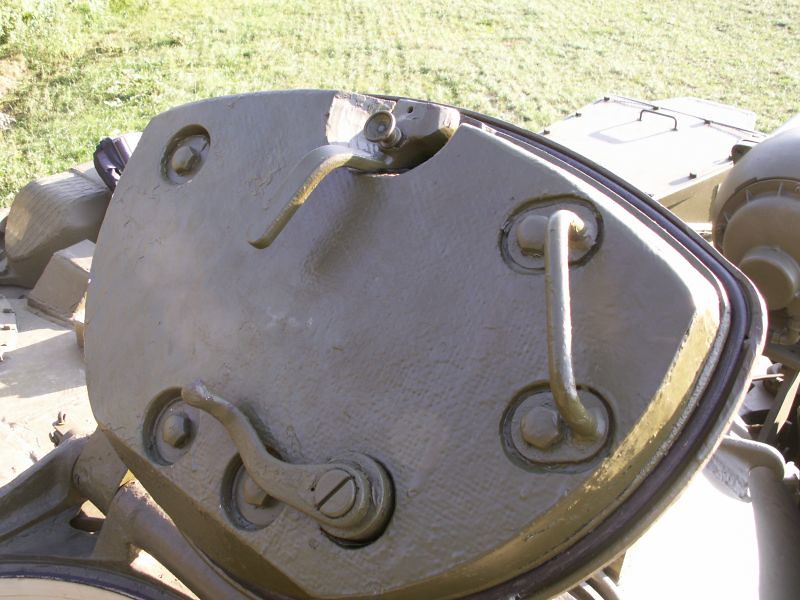
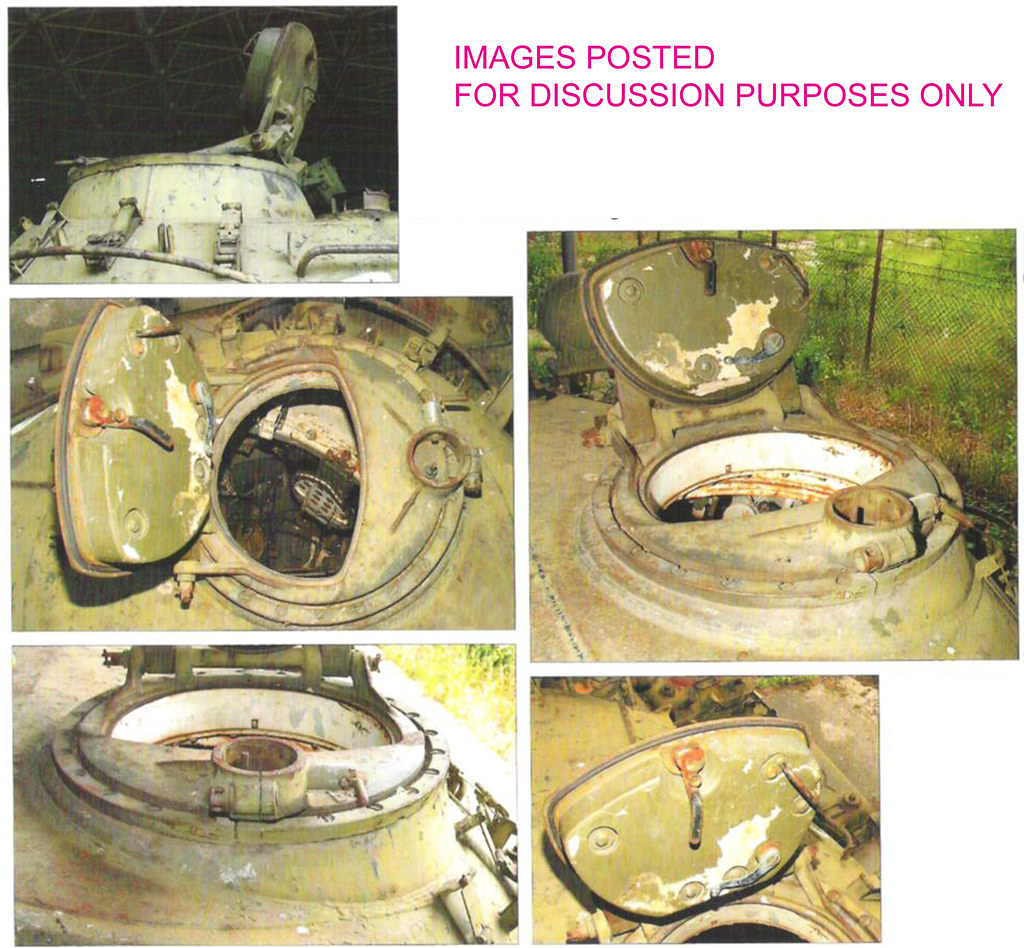
I could use pictures of the inside of the loader's hatch with the "3/4 moon" shape, the one I have installed on the tank. I'd like to model the hatch open to show off the detail, but don't have any pictures of what would be visible as part of the hatch/cupola. I may or may not have a figure in there, so I don't think I need to see the breech. Just the items directly part of the hatch assembly.

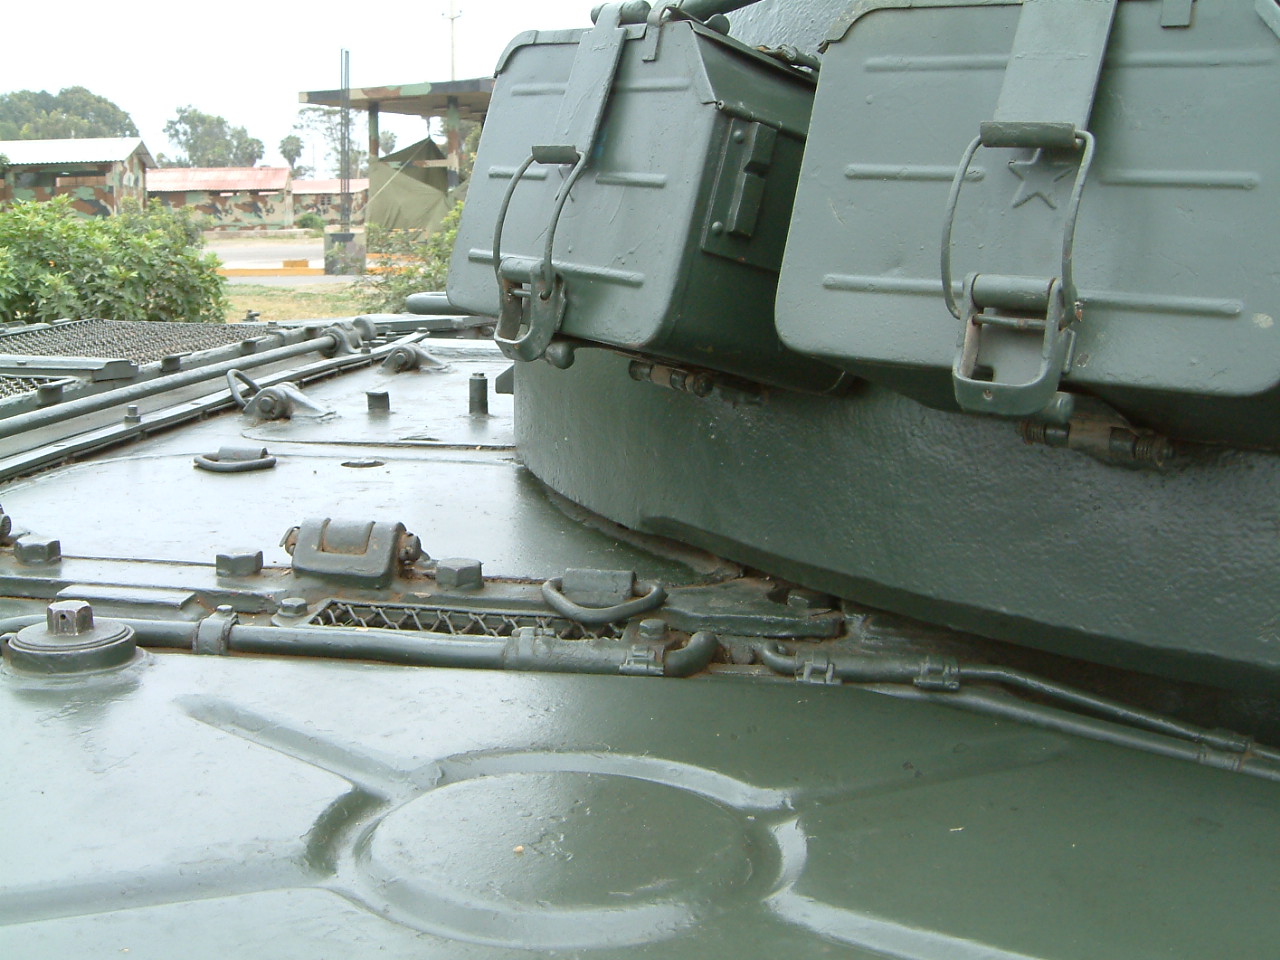
Also, what do the MG ammo box clamps look like when they don't have ammo boxes in them.

Thanks.
pseudorealityx
Visit this Community
Georgia, United States
Joined: January 31, 2010
KitMaker: 2,191 posts
Armorama: 1,814 posts
Posted: Tuesday, December 13, 2011 - 02:36 AM UTC
One more thing...

What are people's thoughts on the base color vs. camo color of the picture at the top?? Is the darker green the base or the camo color? Looking at the bottom of the idler wheel boss, it seems the lighter color might be the base. Then again, it seems the darker color is around all of the things on the tank that would require a bit more care when it comes to masking.

Thoughts?
Spiderfrommars
Visit this Community
Milano, Italy
Joined: July 13, 2010
KitMaker: 3,845 posts
Armorama: 3,543 posts
Posted: Tuesday, December 13, 2011 - 12:39 PM UTC

Quoted Text


Also, what do the MG ammo box clamps look like when they don't have ammo boxes in them.

Thanks.


Quoted Text

I could use pictures of the inside of the loader's hatch with the "3/4 moon" shape, the one I have installed on the tank. I'd like to model the hatch open to show off the detail, but don't have any pictures of what would be visible as part of the hatch/cupola. I may or may not have a figure in there, so I don't think I need to see the breech. Just the items directly part of the hatch assembly.


Quoted Text

One more thing...

What are people's thoughts on the base color vs. camo color of the picture at the top?? Is the darker green the base or the camo color? Looking at the bottom of the idler wheel boss, it seems the lighter color might be the base. Then again, it seems the darker color is around all of the things on the tank that would require a bit more care when it comes to masking.

Thoughts?.


Hey Jesse, mr Ciro Riccio (aka Wakemeup) has been made a stunning Aghan t-55 which have the same camo scheme of your tank


http://armorama.com//features/2614

You could ask him for advice

cheers
pseudorealityx
Visit this Community
Georgia, United States
Joined: January 31, 2010
KitMaker: 2,191 posts
Armorama: 1,814 posts
Posted: Tuesday, December 13, 2011 - 02:14 PM UTC
Oops. With the MG ammo boxes, I meant the clamps on the side of the turret. Ciro added the MG mount, but none of the ammo clamps on the turret.

Thanks for the hatch photos.
pantherkid
Visit this Community
Florida, United States
Joined: September 18, 2011
KitMaker: 73 posts
Armorama: 35 posts
Posted: Tuesday, December 13, 2011 - 04:09 PM UTC
Thank you everybody they were a big help. Would not be able to finish this without your help. Again thank you for your help. Rick
pseudorealityx
Visit this Community
Georgia, United States
Joined: January 31, 2010
KitMaker: 2,191 posts
Armorama: 1,814 posts
Posted: Wednesday, December 14, 2011 - 05:42 PM UTC
Put a base coat of green on her tonight, just to look it over. Have some more sanding and clean up work to do and then I'll do another coat. Company coming in this weekend, so not sure how much work I'll be able to get done.
Spiderfrommars
Visit this Community
Milano, Italy
Joined: July 13, 2010
KitMaker: 3,845 posts
Armorama: 3,543 posts
Posted: Thursday, December 15, 2011 - 12:57 AM UTC

Quoted Text

Oops. With the MG ammo boxes, I meant the clamps on the side of the turret. Ciro added the MG mount, but none of the ammo clamps on the turret.

Thanks for the hatch photos.


Maybe I could find something closer. I hope is enough for now

Cheers
retiredyank
Visit this Community
Arkansas, United States
Joined: June 29, 2009
KitMaker: 11,610 posts
Armorama: 7,843 posts
Posted: Thursday, December 15, 2011 - 01:36 AM UTC
subscribed. too much detail work and photos not to.
Spiderfrommars
Visit this Community
Milano, Italy
Joined: July 13, 2010
KitMaker: 3,845 posts
Armorama: 3,543 posts
Posted: Thursday, December 15, 2011 - 02:08 AM UTC


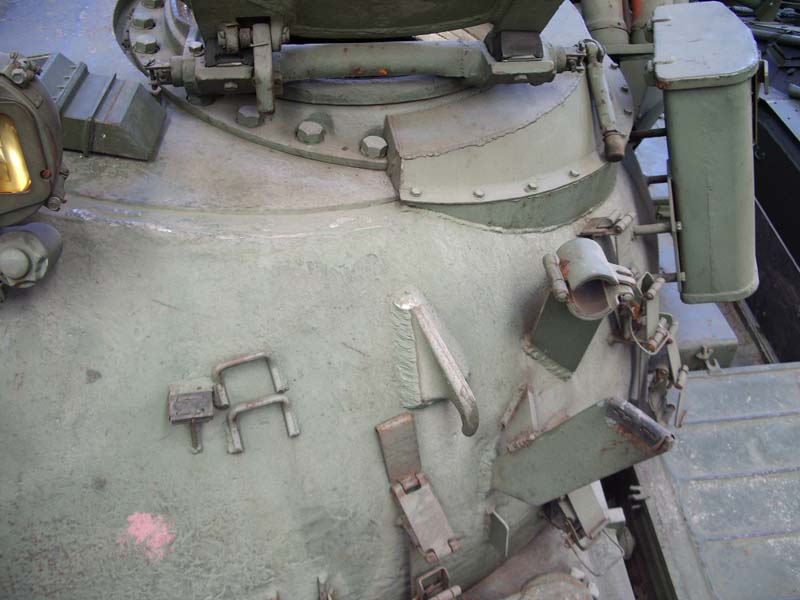
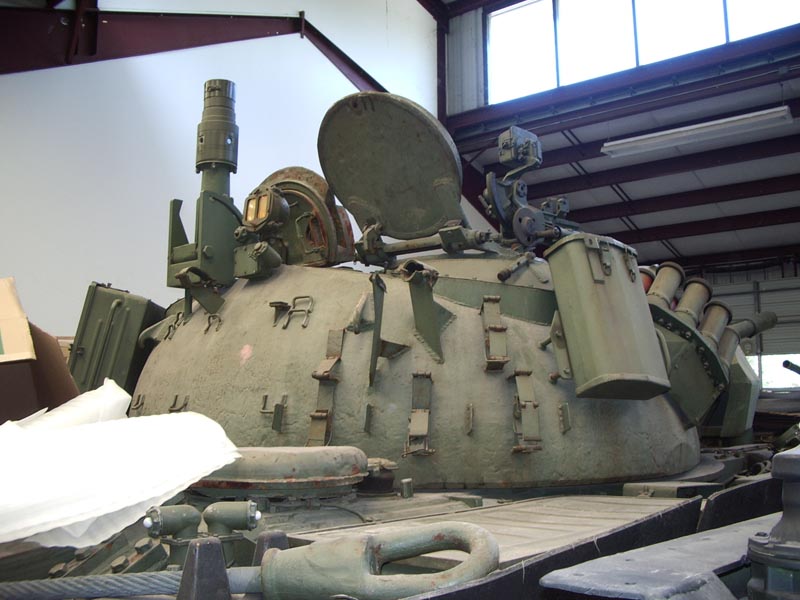
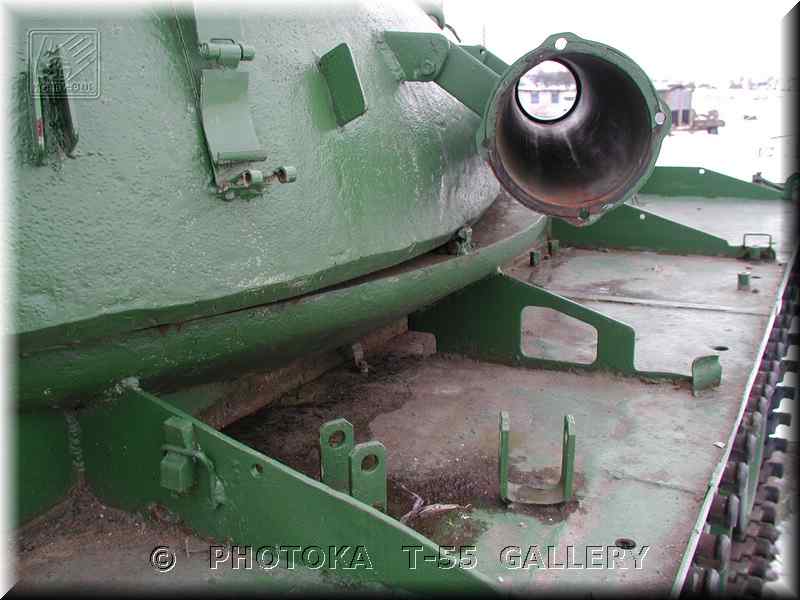
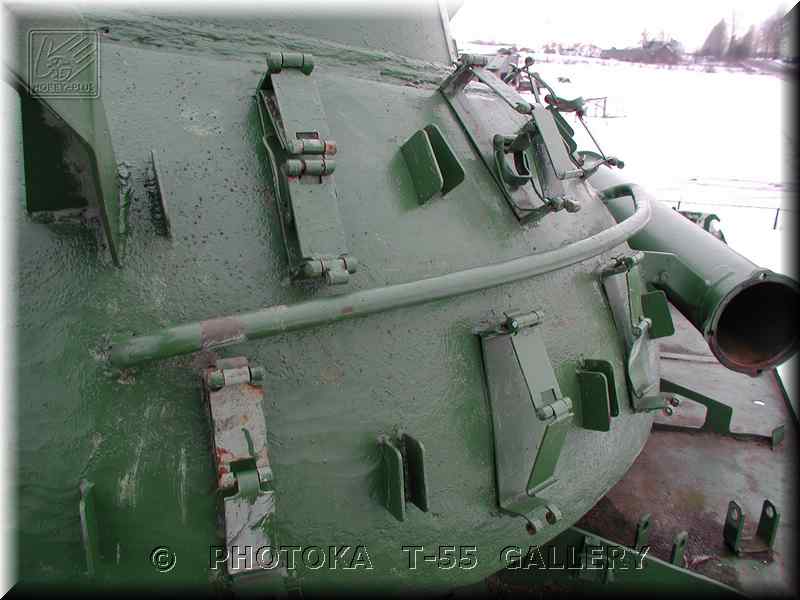
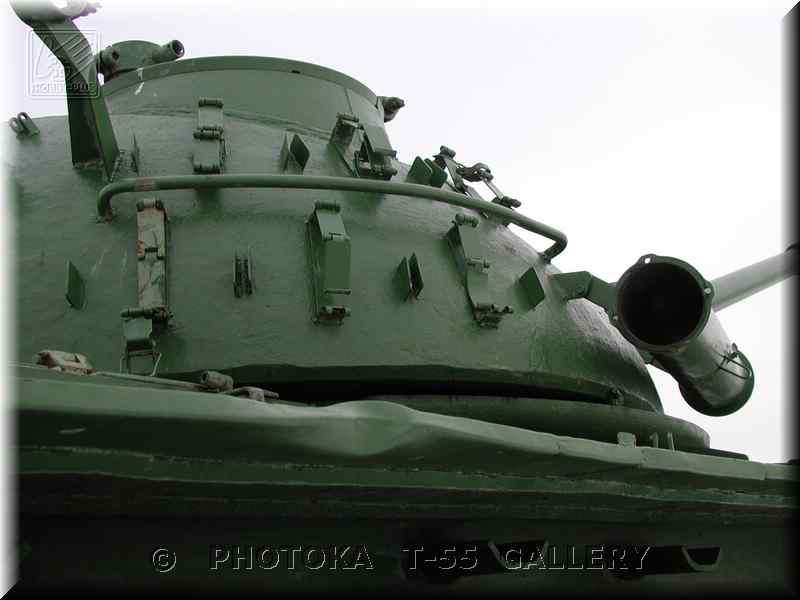
I think this exemplar is quite similar to yours Jesse:

http://www.photoka.info/t55/index.htm

http://www.photoka.info/t55/index2.htm

http://www.photoka.info/t55/index3.htm

cheers
BBD468
Visit this Community
Texas, United States
Joined: March 08, 2010
KitMaker: 2,465 posts
Armorama: 2,383 posts
Posted: Thursday, December 15, 2011 - 03:09 AM UTC

Quoted Text

subscribed. too much detail work and photos not to.


Me too Matt, im loving this! looking forward to this build Jesse.

Gary
pseudorealityx
Visit this Community
Georgia, United States
Joined: January 31, 2010
KitMaker: 2,191 posts
Armorama: 1,814 posts
Posted: Thursday, December 15, 2011 - 03:29 AM UTC
Great! I already see a few details I want to add.
Totalize
Visit this Community
Ontario, Canada
Joined: February 04, 2009
KitMaker: 743 posts
Armorama: 549 posts
Posted: Thursday, December 15, 2011 - 01:56 PM UTC
Nice to see some modern russian armor.

Looking forward to seeing the progress on this one Jesse.

THanks for sharing.

Dave.
Nito74
Visit this Community
Lisboa, Portugal
Joined: March 04, 2008
KitMaker: 5,386 posts
Armorama: 4,727 posts
Posted: Thursday, December 15, 2011 - 02:28 PM UTC
Mauro, is there an angle of the T-55 that you don't have a photo ?

..mmmhh I don't think so.

Nice progress so far Jesse, I'll look forward to see it finished.
pseudorealityx
Visit this Community
Georgia, United States
Joined: January 31, 2010
KitMaker: 2,191 posts
Armorama: 1,814 posts
Posted: Thursday, December 15, 2011 - 03:08 PM UTC
Family is coming into town tonight through the weekend, so I probably won't get a lot done. And then more family next week for the holiday. Hopefully be able to put in an hour here or there. Will update as progress happens.
vonHengest
Visit this Community
Texas, United States
Joined: June 29, 2010
KitMaker: 5,854 posts
Armorama: 4,817 posts
Posted: Thursday, December 15, 2011 - 05:43 PM UTC
No worries, I'm pretty sure most of us are going through something similar. Just goes with that this time of the year. I'm really enjoying your T-55 build.
Spiderfrommars
Visit this Community
Milano, Italy
Joined: July 13, 2010
KitMaker: 3,845 posts
Armorama: 3,543 posts
Posted: Thursday, December 15, 2011 - 09:21 PM UTC

Quoted Text

Mauro, is there an angle of the T-55 that you don't have a photo ?

..mmmhh I don't think so.


Well, actually I have about 1,8 Gb of T-55 references on my hd....I think is quite enough
pseudorealityx
Visit this Community
Georgia, United States
Joined: January 31, 2010
KitMaker: 2,191 posts
Armorama: 1,814 posts
Posted: Friday, December 16, 2011 - 07:53 PM UTC
Got a couple hours in tonight to add a few details and go back through it and clean up a few areas that I noticed once the paint was on.

I took some pictures of some details that weren't real obvious in the first round of pictures.

Modified the Eduard PE searchlight bracket combing it with the kit piece after hacking it up. Also added the linkage down to the copula.


Details added for the plumbing for the driver's vision blocks.


Scratch built a 'bare' co-axial light bracket. Can also see that I added the chamfer at the bottom of the turret. Another thing that's not visible is that I shimmed the entire mantlet at the bottom to elevate the gun very slightly. Enough that I could still use the kit canvas cover.


Moved the front tow hooks up on the hull to match the real thing rather than where Tamiya wants them. Can also see just the bottom of my bent up headlight guard that I built with some lead wire and a PE bracket for the missing headlight.


Fuel plumbing. Also at the top you can see the electrical conduit running down to the headlights, and over to the side indicators.


More fuel plumbing. And the 'end' of the chamfer on the turret bottom.


Added weld beads, casting numbers, and caps to tops of the final drive housing.


Commander's hatch interior.


Thanks for looking!
 _GOTOTOP