_GOTOBOTTOM
Constructive Feedback
For in-progress or completed build photos. Give and get contructive feedback!
ChMZAP-5247G - wood planking?
heliman
Visit this Community
New York, United States
Joined: June 14, 2010
KitMaker: 702 posts
Armorama: 604 posts
Posted: Tuesday, February 28, 2012 - 01:11 PM UTC
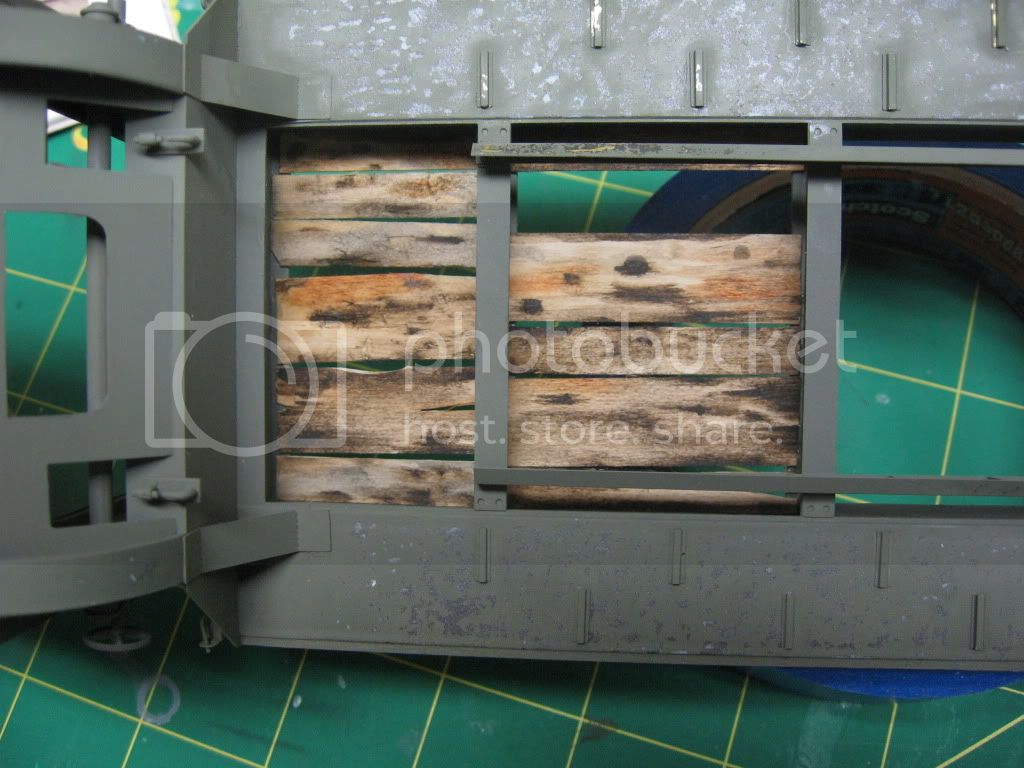
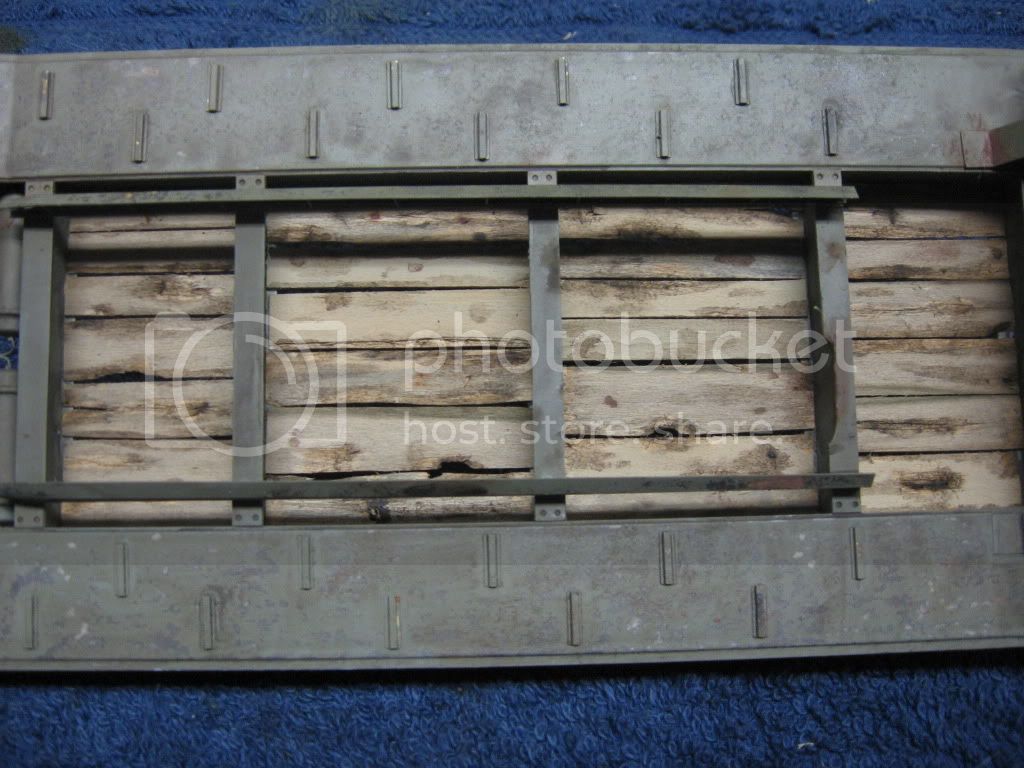
Hey fellow glue- sniffers, I'm trying a new technique, and could use another opinion! The project is the semitrailer ChMZAP 5247G trailer and Im adding the wood planking found between the frame rails. Heres a few pics of my work..


I'm looking for the heavy worn look, and still need to add the dust layer. oils were used for the grime.

any feedback welcome Thanks
panzerbob01
Visit this Community
Louisiana, United States
Joined: March 06, 2010
KitMaker: 3,128 posts
Armorama: 2,959 posts
Posted: Tuesday, February 28, 2012 - 02:23 PM UTC
Jeff;

IMO, that's fine-looking "first draft" wood, Pard!

Of course, after you add some dirt and grime to the whole thing, it will look better (not that there's much betterness to get!). Presuming that these are floor-boards on an equipment trailer, you may want to consider where some cargo item may have leaked some oil or such and add some specific oily stain in there. Also, wood tends to gray-out fairly quickly with exposure to sunlight and the elements - so maybe a thin gray wash will address this and tone down a little the apparent contrasts.

What did you use for the planks? And - is /are the widths appropriate to the scale? They do seem like maybe wide boards to my naive eye! When I look at heavy-hauler trailers with wood in the floors, usually that stuff is fairly narrow and thick - maybe 4 x 6 or 4 x 8 or 4 x 10 - inch boards?

And... I may be way off, here... my exposure to equipment trailers has the wood deck up at the top or near-level with the top metal rails or floor runs. Your stuff looks like it's way down below the deck-level. Is this what you want?

But I have no knowledge of the specific item you are doing, so all this may well be besides the point! As wood goes, your's goes well, IMO! I'm looking forward to seeing the next, more aged - step!

Cheers!

Bob
heliman
Visit this Community
New York, United States
Joined: June 14, 2010
KitMaker: 702 posts
Armorama: 604 posts
Posted: Wednesday, February 29, 2012 - 12:30 PM UTC
Bob..thank you for the comments. I haven't tried this before, so others input is invaluable! The wood is basswood, about 1/2 inch wide, and maybe .040" thick. I split the wood in half for the narrower planks, and distressed them a little. The grime is W/N oil paints, streaked w/ mineral spirits.
I did try to age the timbers using a product called "weather-it", maybe more is needed? The floorboards are deeply sunk in the framerails on the actual trailer, using the Tankograd book for pics.

Tonite I added the remaining boards, and coated them in "weather-it"...hoping it ages them out. Would powders spread over the timbers help even more?

Thanks again,
Jeff
panzerbob01
Visit this Community
Louisiana, United States
Joined: March 06, 2010
KitMaker: 3,128 posts
Armorama: 2,959 posts
Posted: Wednesday, February 29, 2012 - 04:24 PM UTC
Jeff;

Powdering (dusting - with pigments or with powdered artists pastels, as I do -) comes last. I would "bleach" and gray the wood a little with very thin gray paints. These could be very thinned acryls or enamels. A gray wash. Use some paler grays - deck tan, light gray, etc. Maybe a couple of different shades lightly streaked along the grain. Different boards can be differently treated.

The dusting will come last after you do all your washes and staining on the trailer, and should cover both the metal and wood bits.

It will look GOOD!

OK - sounds like you are keeping a "scale" sunkenness about those boards. After you have assembled and weathered the whole thing, making a slurry of colored plaster and washing it into corners will create some nice dirt build-up, I think!

Cheers!

Bob
vonHengest
Visit this Community
Texas, United States
Joined: June 29, 2010
KitMaker: 5,854 posts
Armorama: 4,817 posts
Posted: Wednesday, March 07, 2012 - 06:47 PM UTC
That is really cool, hope you have more on this for us soon!
sgtSprue
Visit this Community
Nevada, United States
Joined: June 28, 2008
KitMaker: 26 posts
Armorama: 12 posts
Posted: Wednesday, March 07, 2012 - 07:09 PM UTC
I do this with all my tractor truck trailers! It brings the model to life and makes it look very real. The more weathered you can get it the better! Keep up the great work and hope to see more soon!
Jurjen
Visit this Community
Groningen, Netherlands
Joined: September 21, 2003
KitMaker: 3,040 posts
Armorama: 1,016 posts
Posted: Wednesday, March 07, 2012 - 09:41 PM UTC
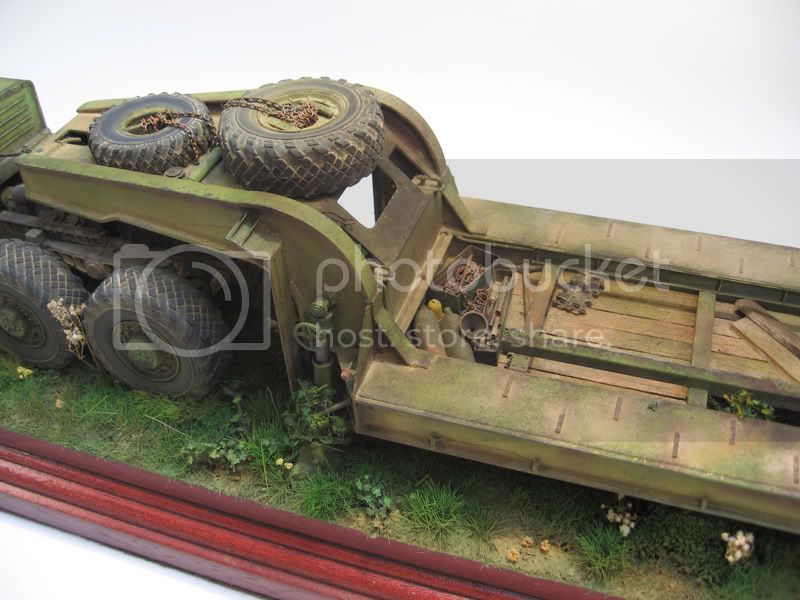
Very nice! Adding wooden planking really adds something extra. Maybe you can also use some tools and other things (chains, spare parts etc.) I did it this way.


panzerbob01
Visit this Community
Louisiana, United States
Joined: March 06, 2010
KitMaker: 3,128 posts
Armorama: 2,959 posts
Posted: Thursday, March 08, 2012 - 02:54 AM UTC
Jeff;

How goes the wood project?

The post by Jurjen above captures very very nicely, IMO, one version of the aging and wear on the wood - possibly in this case, of partially-painted wood. Very blended and varied. When you fade and dust yours, you will capture lots of the similar type of variation, I think. His crap stowed around adds an interesting touch, too - but every trailer is different...

One thing which does pop out in his build is that apparent thickness of the wood... looks much like what I've seen on countless industrial trailers - loosely fills the frame space. I still think you want your wood thicker- maybe just double it with some blanks cut and glued beneath would help this aspect a lot - it's the only sort of "down-check" I see in your otherwise great wood!

Just a suggestion!

Bob
retiredyank
Visit this Community
Arkansas, United States
Joined: June 29, 2009
KitMaker: 11,610 posts
Armorama: 7,843 posts
Posted: Thursday, March 08, 2012 - 03:06 AM UTC
You can use "Age It" for the floor. This stuff will cause the wood to take on a gray or aged brown caste. It is available from MicroMark located here: http://www.micromark.com/SearchResult.aspx?deptIdFilter=0&searchPhrase=age+it
heliman
Visit this Community
New York, United States
Joined: June 14, 2010
KitMaker: 702 posts
Armorama: 604 posts
Posted: Thursday, March 15, 2012 - 12:19 PM UTC
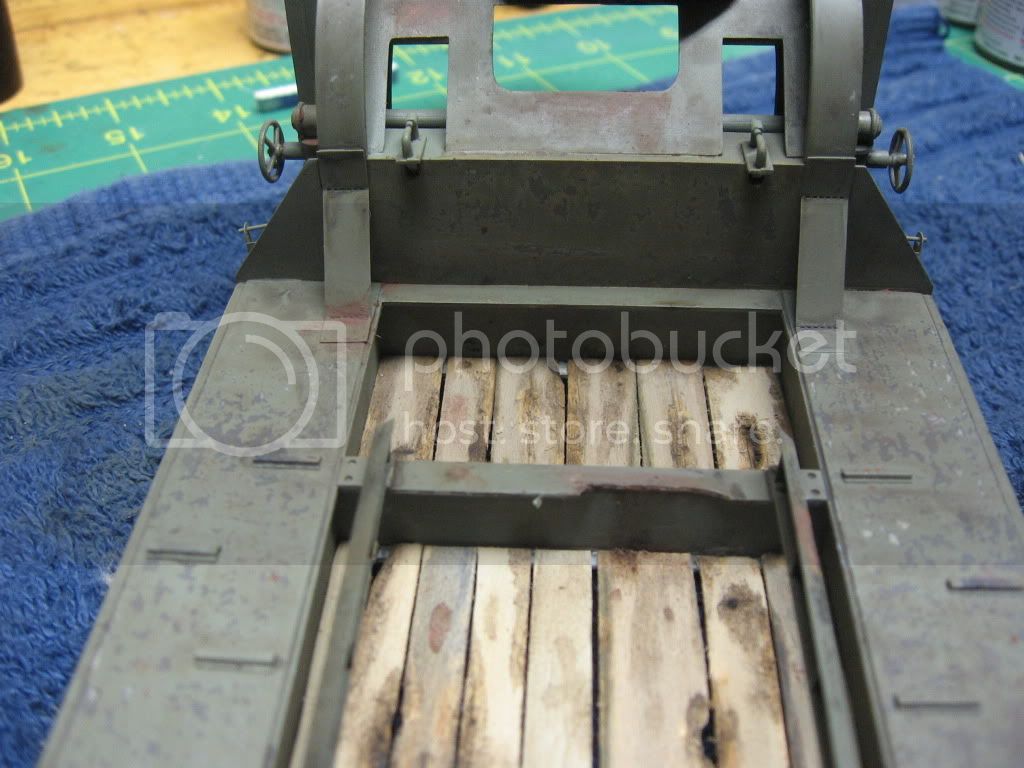
I actually have a few pics of my final draft! The pics from above really looked too "spotty" so I started over...

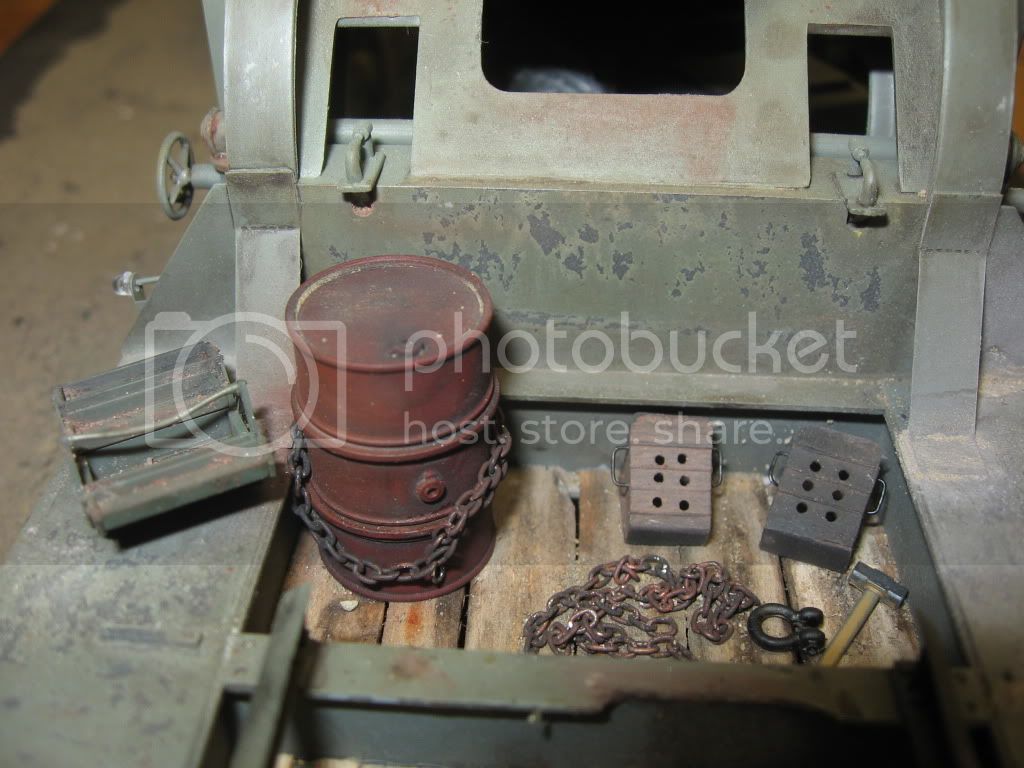
The included pic of the trailer really helped, all the tools, chains clutter. really tie the scene together.! I have a few chains to add, and a dust coat..heres a few pics so far!


I used the deck-tan wash to age the wood, and beat it up using several methods...earning a few cuts along the way!
I flooded the gouges w/ brown oil wash, plan to add tools tomarrow

Any comments appreciated!
heliman
Visit this Community
New York, United States
Joined: June 14, 2010
KitMaker: 702 posts
Armorama: 604 posts
Posted: Monday, March 19, 2012 - 11:28 AM UTC
I added a dust coat to the metal parts today, and started painting the tools and chains for the decking!

I kept the dust minimal, hope it shows! pic taken by my smartphone..


Heres the hauler..!
Jurjen
Visit this Community
Groningen, Netherlands
Joined: September 21, 2003
KitMaker: 3,040 posts
Armorama: 1,016 posts
Posted: Sunday, March 25, 2012 - 02:48 AM UTC
Looks good!
heliman
Visit this Community
New York, United States
Joined: June 14, 2010
KitMaker: 702 posts
Armorama: 604 posts
Posted: Sunday, March 25, 2012 - 08:23 AM UTC
Thanks ..working on the tools and gear this weekend!
Jurjen
Visit this Community
Groningen, Netherlands
Joined: September 21, 2003
KitMaker: 3,040 posts
Armorama: 1,016 posts
Posted: Sunday, March 25, 2012 - 08:53 AM UTC
Nice! Keep it up and show the results
heliman
Visit this Community
New York, United States
Joined: June 14, 2010
KitMaker: 702 posts
Armorama: 604 posts
Posted: Monday, March 26, 2012 - 11:28 AM UTC
Heres a couple pics of it finished..


Thanks everyone for their help!

Jeff
 _GOTOTOP