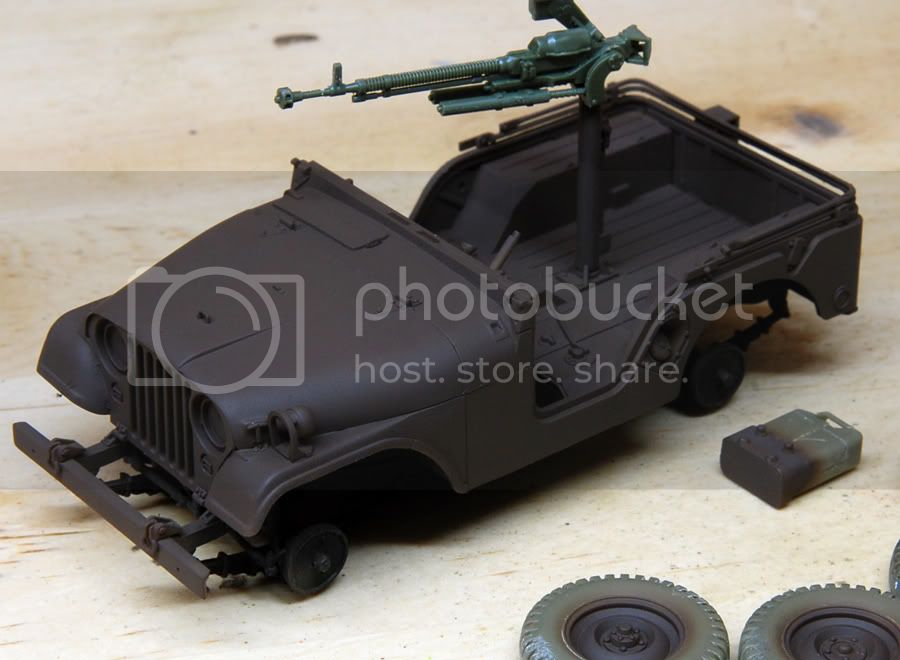
This was a project that was rolling in my head for 3 year or so now. My workbench is now finally clear of half-built and abandoned projects, so it's time to start a brand new one!
My idea was to take an existing off-road vehicle kit and convert it into a technical. There are many choices, but I picked Skybow/AFV Club M-38A1 because it's one of my favorite vehicles in terms of looks.
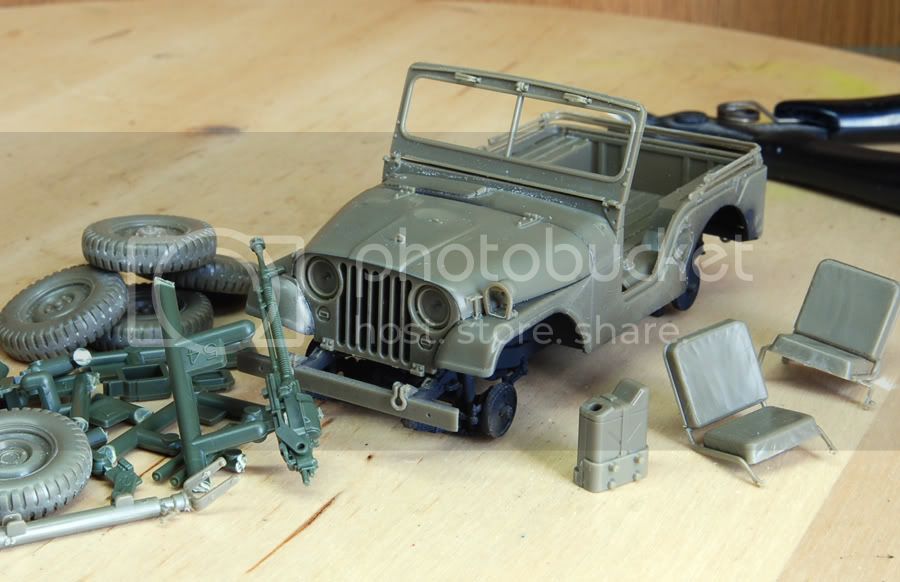
The kit includes details for the engine and the suspension parts. The hood can be modeled in an open position to reveal all engine detail. At first, I thought about detailing the engine, but then decided to close it up as I wanted to show my paintwork.
Chassis, engine and suspension assembled and ready:
Assembling the rest of the body was relatively easy. It goes together relatively well, just watch out while attaching the left and right mudguards. If you are not careful, they can be crooked. In addition, I decided to swap the .50 cal Browning included in the kit with a DSkh machine gun. (Looking at techical photos from Somalia, I could have kept the .50 cal as well... seems to be a favorite)
Constructive Feedback
For in-progress or completed build photos. Give and get contructive feedback!
Hosted by Darren Baker, Dave O'Meara
M-38A1 Technical "Somewhere in Africa"
emroglan
Istanbul, Turkey / Türkçe
Joined: December 16, 2004
KitMaker: 1,163 posts
Armorama: 842 posts
Joined: December 16, 2004
KitMaker: 1,163 posts
Armorama: 842 posts
Posted: Sunday, April 29, 2012 - 09:19 PM UTC
emroglan
Istanbul, Turkey / Türkçe
Joined: December 16, 2004
KitMaker: 1,163 posts
Armorama: 842 posts
Joined: December 16, 2004
KitMaker: 1,163 posts
Armorama: 842 posts
Posted: Sunday, April 29, 2012 - 09:33 PM UTC
In the final stage just before painting, I decided on some changes. I removed the windshield completely. I also decided not to install the rear seat. I'll fill the rear with boxes and equipment instead.
The chassis and lower areas were painted with flat black. The jeep was painted with Tamiya's XF-64 Red Brown, darkened by adding a little flat black to simulate a rust color. The DSkh was attached temporarily to see how it looks. One fellow modeler pointed out that it wouldn't be installed that way (it is currently configured to be attached to a T series tank turret). I will make the necessary changes to make a proper mount for the machine gun.
My initial plan was to paint the jeep with a light brown color, show some rusty spots. Then add hand-brushed yellow and black patches and streaks as if the milita using the jeep decided to apply camouflage in the field. For the light brown, I decided to use Tamiya's XF-57 Buff. I only used that color to simulate mud and dust. This time it will properly be used for a vehicle .
When my plans met reality... well, they failed! I started chipping the Buff to reveal the rust color underneath. I liked the worn effect so much that I decided not to make a camouflaged jeep. It will be a very heavily weathered one instead.
I'll keep on building when I can find some proper modelling time. My plan is to scratchbuild a simple new mount for the DSkh and start the weathering of the body. Let's see how things turn out.
Jeff8600
Georgia, United States
Joined: June 19, 2007
KitMaker: 254 posts
Armorama: 76 posts
Joined: June 19, 2007
KitMaker: 254 posts
Armorama: 76 posts
Posted: Monday, April 30, 2012 - 02:00 AM UTC
Looking good! I like the chipping!
emroglan
Istanbul, Turkey / Türkçe
Joined: December 16, 2004
KitMaker: 1,163 posts
Armorama: 842 posts
Joined: December 16, 2004
KitMaker: 1,163 posts
Armorama: 842 posts
Posted: Saturday, May 05, 2012 - 05:08 AM UTC
Thanks Jeff.
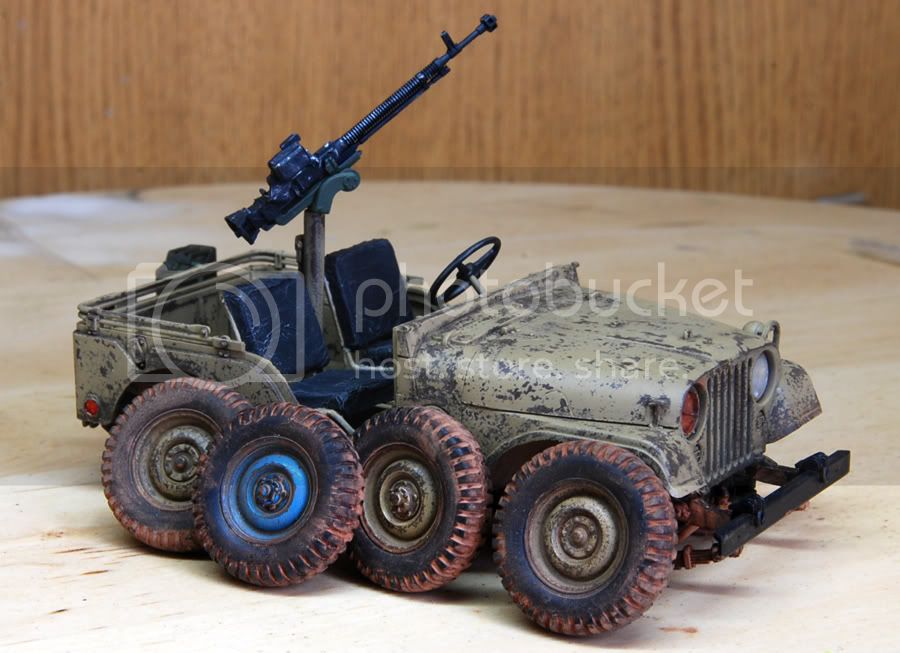
The seats were too plain. I wanted them weathered and torn at places. To give them the required texture, I stole some aluminium foil from the kitchen and covered my seats.
I picked black to paint the seats as I thought it would give better contrast with the jeep's Buff color compared to khaki or green. The torn areas aren't painted yet, so they are not very visible.
I tried to scratchbuilt a mount for the DShk but nothing looked or worked okay. As a result, I tried a little trick. I used the gun's own mount, just reversed and put a rod to support the gun. I added an attachment point to hold the gun against the pin. Very crude, but effective. The gun can be elevated and it also revolves. What more can a militiaman ask for?
One of the front tires was also painted in a different color to make it look like it was "borrowed" from another vehicle. The wheels aren't fixed yet and they tend to fall off when I try to take a photo.
HeavyArty
Florida, United States
Joined: May 16, 2002
KitMaker: 17,694 posts
Armorama: 13,742 posts
Joined: May 16, 2002
KitMaker: 17,694 posts
Armorama: 13,742 posts
Posted: Saturday, May 05, 2012 - 05:19 AM UTC
Its coming along nicelt. Good job on the worn and faded paint.
emroglan
Istanbul, Turkey / Türkçe
Joined: December 16, 2004
KitMaker: 1,163 posts
Armorama: 842 posts
Joined: December 16, 2004
KitMaker: 1,163 posts
Armorama: 842 posts
Posted: Tuesday, May 08, 2012 - 05:39 PM UTC
Thank you Gino!
The wheels were weathered with MIG's African Earth. That color seemed too bright and red and I tried to change its tone with adding yellow toned pigments... Well it became worse!
The left headlight is missing, rusted and electrical cables hanging. The rest of the taillights, signal lights and the working headlight were completed. I searched through my figure stash for a suitable African militiaman. I picked a figure from an Academy Vietnam set. The figures were out of proportion with large heads, long and very thin arms and legs. Not nice for normal figures, but I think it would make a malnutritioned African militiaman. The figure is currently held together with Uhu-tac (the yellow stuff). I think I'll place a cigarette in his right hand. His left hand looks like an alien claw. Believe me, it was worse, this is the best I could do with it!
retiredyank
Arkansas, United States
Joined: June 29, 2009
KitMaker: 11,610 posts
Armorama: 7,843 posts
Joined: June 29, 2009
KitMaker: 11,610 posts
Armorama: 7,843 posts
Posted: Tuesday, May 08, 2012 - 09:47 PM UTC
Very detailed jeep. I would have been tempted to leave off the hood entirely. Can't stand Academy figures. Although, they make good corpses. Are you going to have room for supplies with the figure in the back of the truck? I may have to try your technique with the aluminum foil.