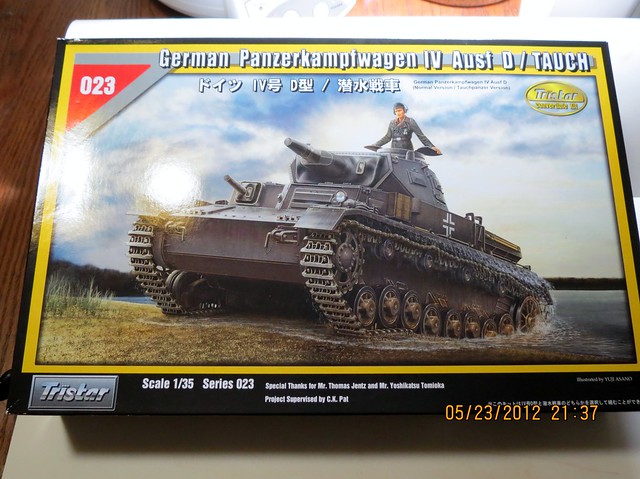
OK, so here I go after failing on the Panther build. Tristars Tauchpanzer, OOB.
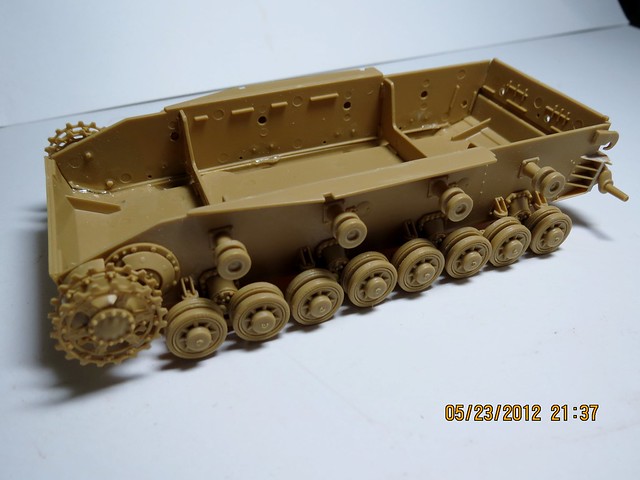
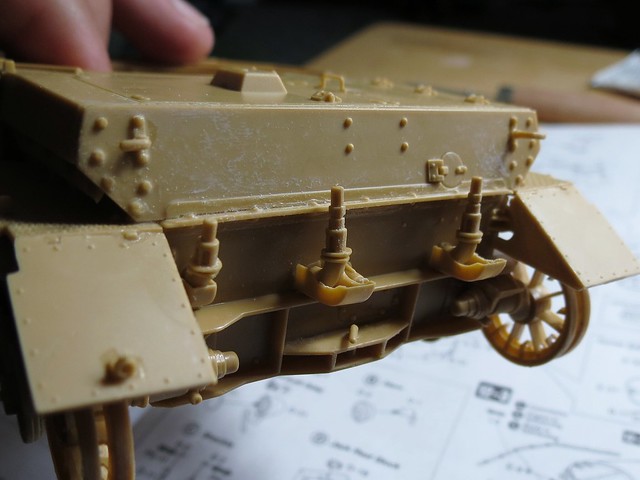
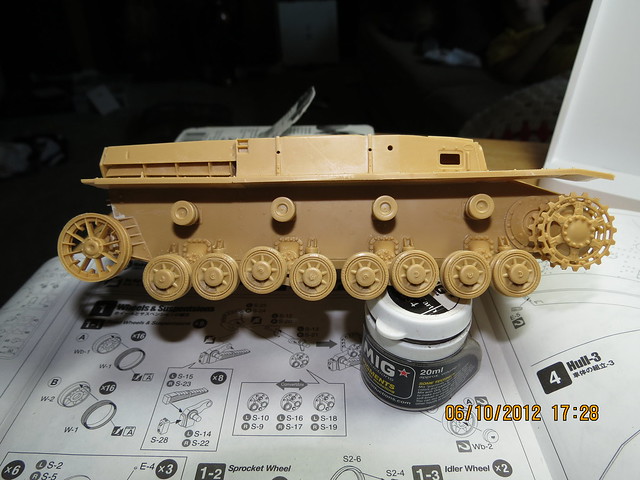
Lower hull and running gear build up.
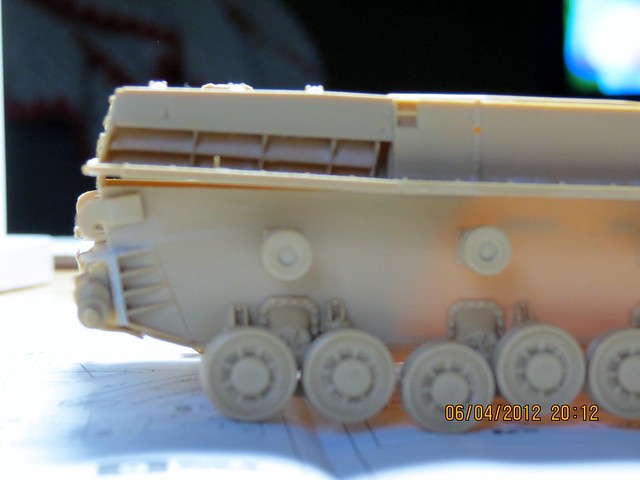
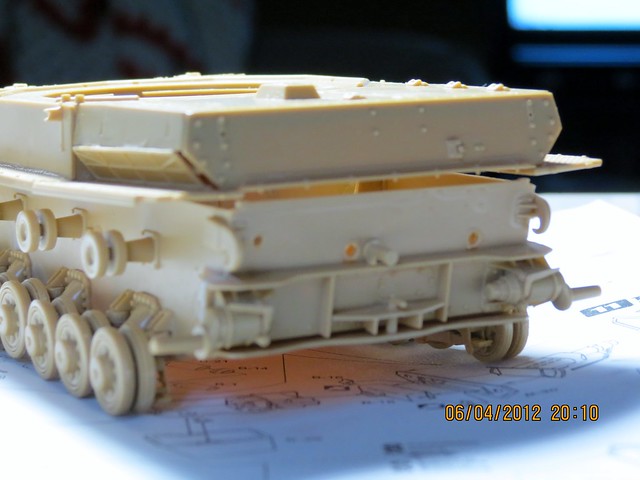
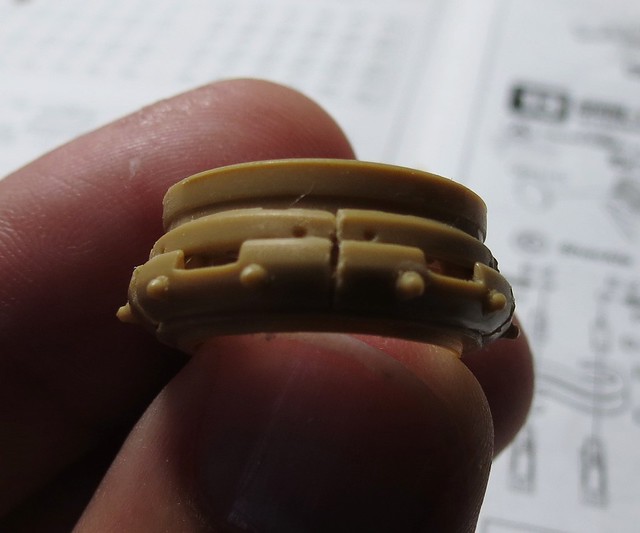
Working on the upper hull (not attached)
Based on this shade of Panzer Grey on a PzI at Aberdeen Proving Ground that I thought was a primer but was corrected in an e-mail conversation with Dr Atwater (curator at the time)that this is in fact Panzer grey out of the factory based on a paint chip sample.
Constructive Feedback
For in-progress or completed build photos. Give and get contructive feedback!
Hosted by Darren Baker, Dave O'Meara
Tristar Tauchpanzer
fireontheway
Pennsylvania, United States
Joined: May 17, 2006
KitMaker: 370 posts
Armorama: 368 posts
Joined: May 17, 2006
KitMaker: 370 posts
Armorama: 368 posts
Posted: Thursday, May 24, 2012 - 12:08 PM UTC
Totalize
Ontario, Canada
Joined: February 04, 2009
KitMaker: 743 posts
Armorama: 549 posts
Joined: February 04, 2009
KitMaker: 743 posts
Armorama: 549 posts
Posted: Tuesday, June 05, 2012 - 12:53 AM UTC
Timothy,
Coming along nicely. The Tristar early Panzer IV's are nice kits. Looking forward to seeing more progress.
Thanks for sharing.
Coming along nicely. The Tristar early Panzer IV's are nice kits. Looking forward to seeing more progress.
Thanks for sharing.
PantherF
Indiana, United States
Joined: June 10, 2005
KitMaker: 6,188 posts
Armorama: 5,960 posts
Joined: June 10, 2005
KitMaker: 6,188 posts
Armorama: 5,960 posts
Posted: Tuesday, June 05, 2012 - 01:18 AM UTC
You're off to a great start Timothy and a good project too.
Without changing the subject, what happened to the Panther?
~ Jeff
Without changing the subject, what happened to the Panther?
~ Jeff
fireontheway
Pennsylvania, United States
Joined: May 17, 2006
KitMaker: 370 posts
Armorama: 368 posts
Joined: May 17, 2006
KitMaker: 370 posts
Armorama: 368 posts
Posted: Wednesday, June 06, 2012 - 10:45 AM UTC
Well the Panther ended up having fit issues, top hull to lower hull. Then I dropped it, PE flew off, "magic tracks" came apart. All in all the fun departed and once that left its time to move on. Which leads me back to the Tauchpanzer and its "issues". More to come.
retiredyank
Arkansas, United States
Joined: June 29, 2009
KitMaker: 11,610 posts
Armorama: 7,843 posts
Joined: June 29, 2009
KitMaker: 11,610 posts
Armorama: 7,843 posts
Posted: Wednesday, June 06, 2012 - 02:57 PM UTC
Quoted Text
Well the Panther ended up having fit issues, top hull to lower hull. Then I dropped it, PE flew off, "magic tracks" came apart. All in all the fun departed and once that left its time to move on. Which leads me back to the Tauchpanzer and its "issues". More to come.
I constantly enjoy my cat deciding that my models are his "toys". The build really looks nice. I have always wondered about the quality of Tristar kits. That particular shade of grey is different from MM panzer grey, which is darker. I'll follow along.
PantherF
Indiana, United States
Joined: June 10, 2005
KitMaker: 6,188 posts
Armorama: 5,960 posts
Joined: June 10, 2005
KitMaker: 6,188 posts
Armorama: 5,960 posts
Posted: Wednesday, June 06, 2012 - 11:01 PM UTC
Oh, tough news about the Panther.
I have had cats on and off for years and now we have 3 dogs exclusively. I have never had a problem with the cats getting into trouble breaking things.
I guess it's false that cats cannot be trained. Mine were.
~ Jeff
I have had cats on and off for years and now we have 3 dogs exclusively. I have never had a problem with the cats getting into trouble breaking things.
I guess it's false that cats cannot be trained. Mine were.
~ Jeff
retiredyank
Arkansas, United States
Joined: June 29, 2009
KitMaker: 11,610 posts
Armorama: 7,843 posts
Joined: June 29, 2009
KitMaker: 11,610 posts
Armorama: 7,843 posts
Posted: Thursday, June 07, 2012 - 01:22 PM UTC
Quoted Text
Oh, tough news about the Panther.
I have had cats on and off for years and now we have 3 dogs exclusively. I have never had a problem with the cats getting into trouble breaking things.
I guess it's false that cats cannot be trained. Mine were.
~ Jeff
My cat is spoiled rotten. I can't be mad at him, because he always loves on me and acts extra cute after he gets into trouble.
fireontheway
Pennsylvania, United States
Joined: May 17, 2006
KitMaker: 370 posts
Armorama: 368 posts
Joined: May 17, 2006
KitMaker: 370 posts
Armorama: 368 posts
Posted: Thursday, June 07, 2012 - 02:37 PM UTC
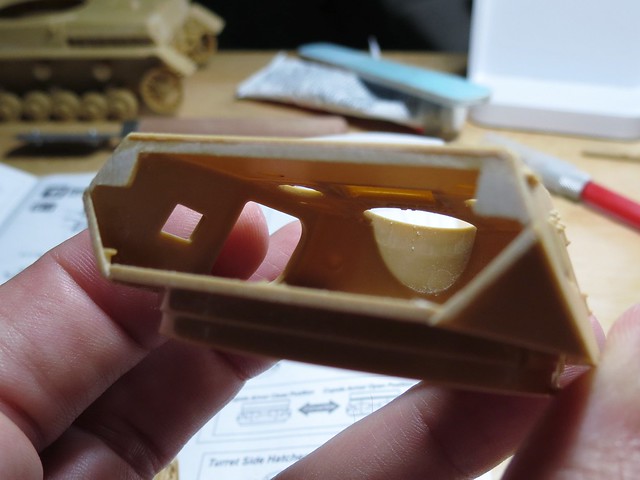
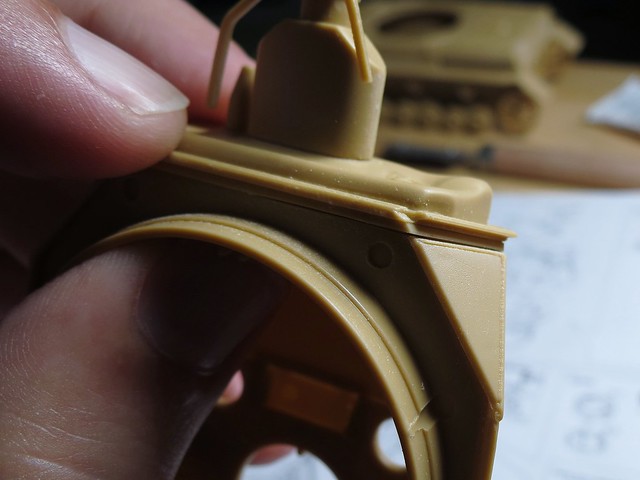
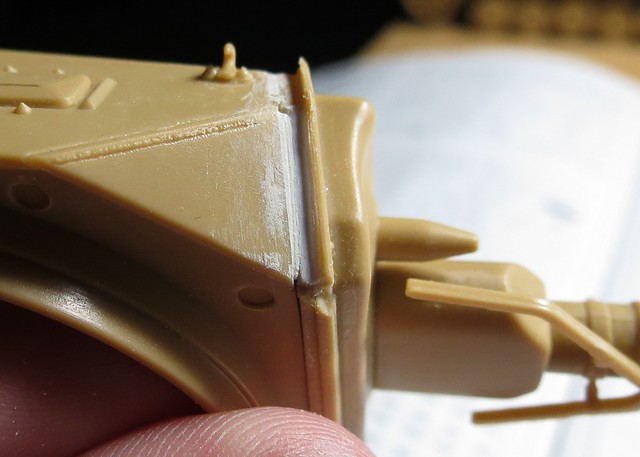
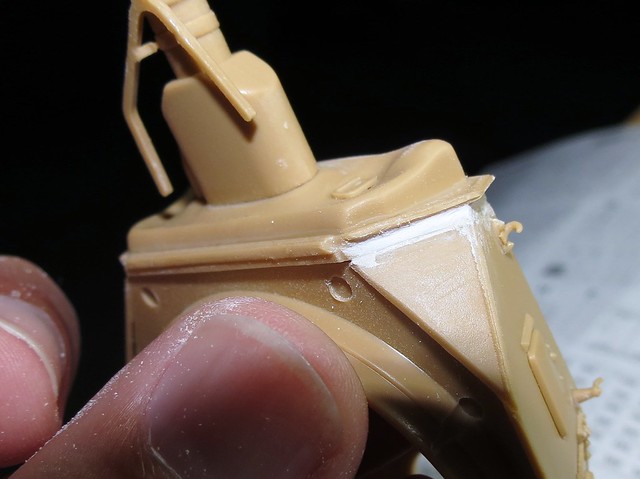
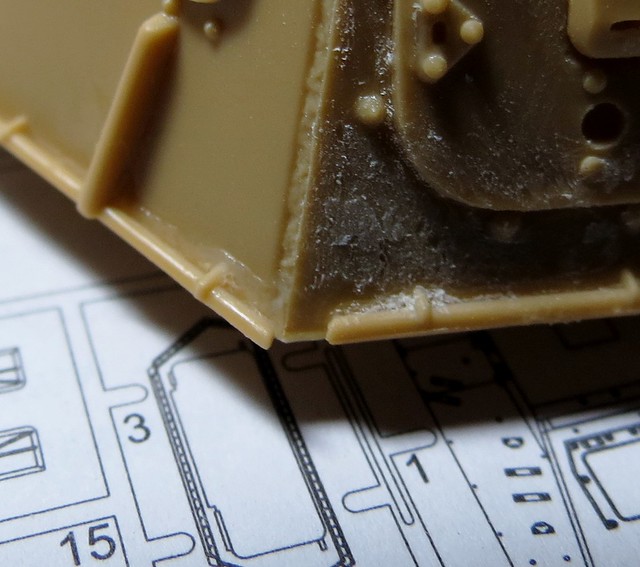
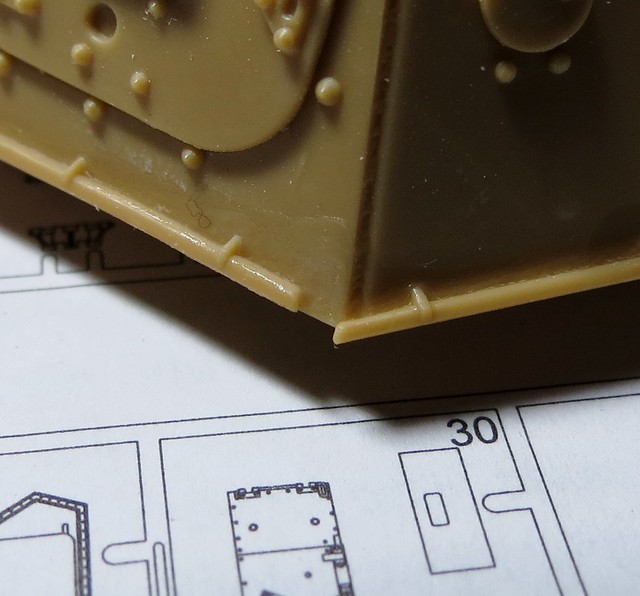
OK, generally speaking I was expecting good things from Tristar. This kit though has fit and warpage issues. I just came from a kit that had the same issues and I am beginning to think its me. So look at the pics and tell me what you think. I am glad to report that I am beyond these obstacles at the current time.
retiredyank
Arkansas, United States
Joined: June 29, 2009
KitMaker: 11,610 posts
Armorama: 7,843 posts
Joined: June 29, 2009
KitMaker: 11,610 posts
Armorama: 7,843 posts
Posted: Thursday, June 07, 2012 - 10:52 PM UTC
Looks like a job for ca glue.
Totalize
Ontario, Canada
Joined: February 04, 2009
KitMaker: 743 posts
Armorama: 549 posts
Joined: February 04, 2009
KitMaker: 743 posts
Armorama: 549 posts
Posted: Friday, June 08, 2012 - 04:59 AM UTC
Quoted Text
Timothy,
Coming along nicely. The Tristar early Panzer IV's are nice kits. Looking forward to seeing more progress.
Thanks for sharing.
re my comments on the kit.
uh....perhaps i take that back
vonHengest
Texas, United States
Joined: June 29, 2010
KitMaker: 5,854 posts
Armorama: 4,817 posts
Joined: June 29, 2010
KitMaker: 5,854 posts
Armorama: 4,817 posts
Posted: Friday, June 08, 2012 - 06:34 AM UTC
Timothy, if this is a common problem for you it may be an issue as simple as storage. Where do you normally store your kits?
fireontheway
Pennsylvania, United States
Joined: May 17, 2006
KitMaker: 370 posts
Armorama: 368 posts
Joined: May 17, 2006
KitMaker: 370 posts
Armorama: 368 posts
Posted: Friday, June 08, 2012 - 08:49 AM UTC
Normally I store them in my basement. I am aware of the power of mister golden sun, and plain ole hi temps on plastic. These 2 kits just seem to be the exception. What we pay for these kits I am not about to let Mother nature destroy before I get my fat fingers on them.
vonHengest
Texas, United States
Joined: June 29, 2010
KitMaker: 5,854 posts
Armorama: 4,817 posts
Joined: June 29, 2010
KitMaker: 5,854 posts
Armorama: 4,817 posts
Posted: Friday, June 08, 2012 - 01:10 PM UTC
Ok good man. It may just be that the upper decks were pulled from the molds too fast, before they had a chance to properly cool. Holding the part in warm water and reshaping it with your hands often works well in this situation.
fireontheway
Pennsylvania, United States
Joined: May 17, 2006
KitMaker: 370 posts
Armorama: 368 posts
Joined: May 17, 2006
KitMaker: 370 posts
Armorama: 368 posts
Posted: Sunday, June 10, 2012 - 12:39 PM UTC
Well I am not good with the reshaping of warped parts, so when in doubt go get the same kit and start again.
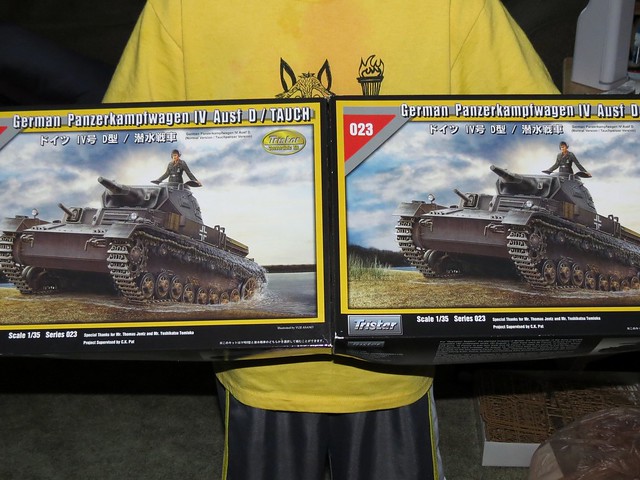
Heres how things look on the 2nd kit as compared to the first. Big difference.
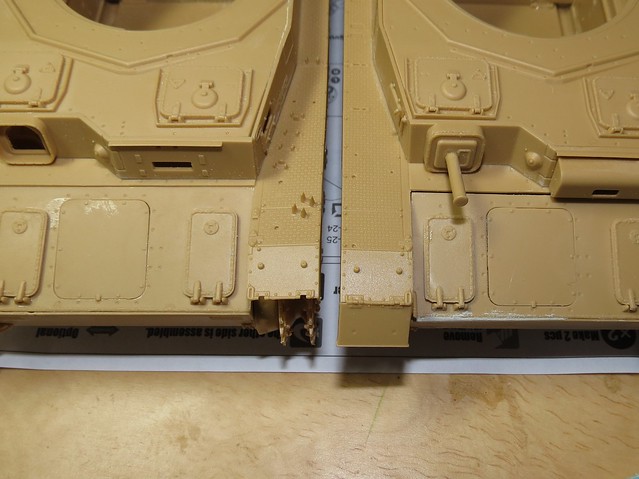
Only had to make 2 minor fill ins on both sides where the upper and lower hulls meet, just above the sprocket wheels.
1 more to fill on the rear right this was after I had to sand the last section of fender on both sides down to fit.
The directions for the assembly of the wheels, running gear etc., is very busy and confusing. The instructions for the placement of the last wheel shows the longer end sticking out
I did this and it is wrong, the wheel will stick out too far
This is the correct way with the long end inserted and the short end for the wheel to be attached on.
Another problem that I found was the directions for assembling the bogies. They dont show where exactly to install the leaf springs. S-15 should go thru S12 & S13
So this is what I did the first time, and said to myself "something is way wrong"
This is what they should look like, and the springs needed filed down to fit properly also.
This is the completed side of the wheels running gear install. Still work to finish on the hull then on to the turret.
Heres how things look on the 2nd kit as compared to the first. Big difference.
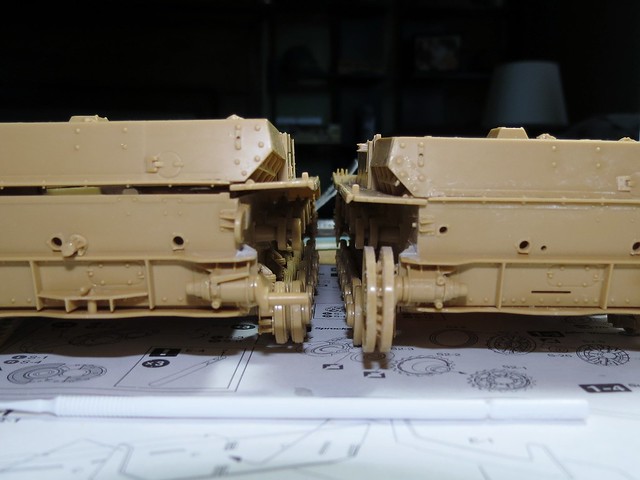
Only had to make 2 minor fill ins on both sides where the upper and lower hulls meet, just above the sprocket wheels.
1 more to fill on the rear right this was after I had to sand the last section of fender on both sides down to fit.
The directions for the assembly of the wheels, running gear etc., is very busy and confusing. The instructions for the placement of the last wheel shows the longer end sticking out
I did this and it is wrong, the wheel will stick out too far
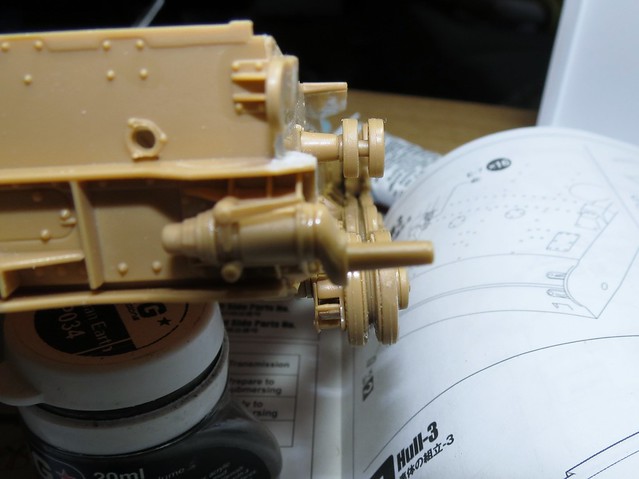
This is the correct way with the long end inserted and the short end for the wheel to be attached on.
Another problem that I found was the directions for assembling the bogies. They dont show where exactly to install the leaf springs. S-15 should go thru S12 & S13
So this is what I did the first time, and said to myself "something is way wrong"
This is what they should look like, and the springs needed filed down to fit properly also.
This is the completed side of the wheels running gear install. Still work to finish on the hull then on to the turret.
vonHengest
Texas, United States
Joined: June 29, 2010
KitMaker: 5,854 posts
Armorama: 4,817 posts
Joined: June 29, 2010
KitMaker: 5,854 posts
Armorama: 4,817 posts
Posted: Tuesday, June 12, 2012 - 03:08 AM UTC
Quoted Text
Well I am not good with the reshaping of warped parts, so when in doubt go get the same kit and start again.
Actually I'm guilty of buying a second "backup" kit for kits I really like just for this type of thing. I never know what is going to go horribly wrong in my hands
While looking in the back of a modelling magazine I noticed that there is a book out now covering the Tauchpanzer, including both the DML and Tristar kits. It was noted that the Tristar kit is recognized as being the more accurate of the two. It may be something you'd be interested in adding to your library.
fireontheway
Pennsylvania, United States
Joined: May 17, 2006
KitMaker: 370 posts
Armorama: 368 posts
Joined: May 17, 2006
KitMaker: 370 posts
Armorama: 368 posts
Posted: Saturday, June 16, 2012 - 01:12 PM UTC
OK did ome work to both the front and rear faces of the hull.
No real problems encountered here.
Not really happy with the directions for the gun assy and how it should be done for the Tauch
I tried looking for ref pics for the mantlet and turret where they come together, couldnt find a good shot. So I decided to fille what I thought to be a gap with styrene and putty on both sides
And this is the result
fireontheway
Pennsylvania, United States
Joined: May 17, 2006
KitMaker: 370 posts
Armorama: 368 posts
Joined: May 17, 2006
KitMaker: 370 posts
Armorama: 368 posts
Posted: Saturday, June 16, 2012 - 01:16 PM UTC
Sorry these were the hull shots
retiredyank
Arkansas, United States
Joined: June 29, 2009
KitMaker: 11,610 posts
Armorama: 7,843 posts
Joined: June 29, 2009
KitMaker: 11,610 posts
Armorama: 7,843 posts
Posted: Saturday, June 16, 2012 - 02:41 PM UTC
Looking real nice Timothy! Anxiously awaiting your next update.
fireontheway
Pennsylvania, United States
Joined: May 17, 2006
KitMaker: 370 posts
Armorama: 368 posts
Joined: May 17, 2006
KitMaker: 370 posts
Armorama: 368 posts
Posted: Monday, June 25, 2012 - 01:17 PM UTC
Sorry took a weeks vacation. Just a minor update. Found the turret seals to be too short on both sides, will fill with styrene rod.
And the spaces between the vision blocks on the cuploa were sanded unevenly by me so I will have to fill and sand.
But things are coming along. I put just a light coat of primer on the turret to get a different perspective on it so far.
And the spaces between the vision blocks on the cuploa were sanded unevenly by me so I will have to fill and sand.
But things are coming along. I put just a light coat of primer on the turret to get a different perspective on it so far.
fireontheway
Pennsylvania, United States
Joined: May 17, 2006
KitMaker: 370 posts
Armorama: 368 posts
Joined: May 17, 2006
KitMaker: 370 posts
Armorama: 368 posts
Posted: Monday, June 25, 2012 - 01:23 PM UTC
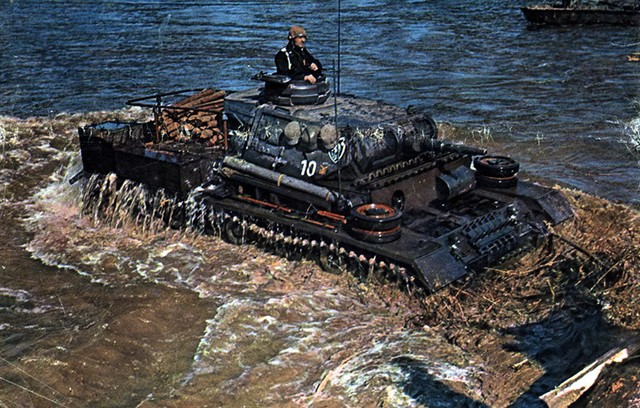
My overall goal for this build is to end with with my panzer in a similar display as this Tauchpanzer III. Remember I said "similar" not exact. Wish me luck, I will need it.
Hangelafette
Pennsylvania, United States
Joined: April 22, 2012
KitMaker: 344 posts
Armorama: 315 posts
Joined: April 22, 2012
KitMaker: 344 posts
Armorama: 315 posts
Posted: Monday, June 25, 2012 - 01:50 PM UTC
Tim,
Looking really good so far and very educational to follow your solutions to the fit issues. I'm looking forward to see this tank and the diorama come together.
Nate
Looking really good so far and very educational to follow your solutions to the fit issues. I'm looking forward to see this tank and the diorama come together.
Nate
fireontheway
Pennsylvania, United States
Joined: May 17, 2006
KitMaker: 370 posts
Armorama: 368 posts
Joined: May 17, 2006
KitMaker: 370 posts
Armorama: 368 posts
Posted: Wednesday, June 27, 2012 - 01:17 PM UTC
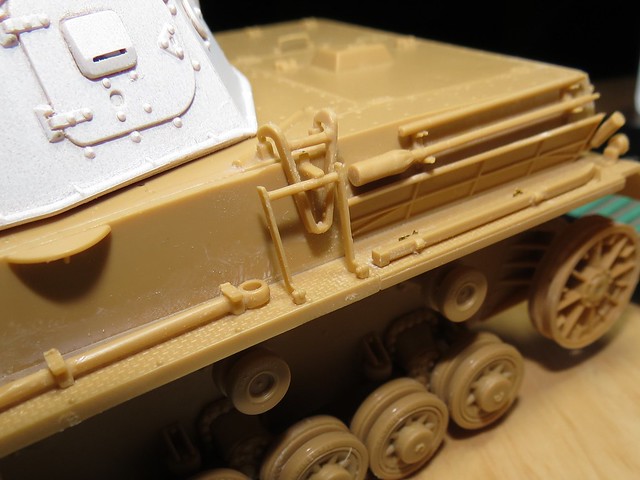
OK, todays update is all about the pioneer tool installation on the LH fender. I dont know whats worse dealing with tiny PE or tiny plastic parts that you can barely hold onto to sand. Very tedious on this build.
Next this step/I cant remember what the other tool is for was an absolutely pain in the @#$%^. If not for my last ounce of patience this thing would have been crushed.
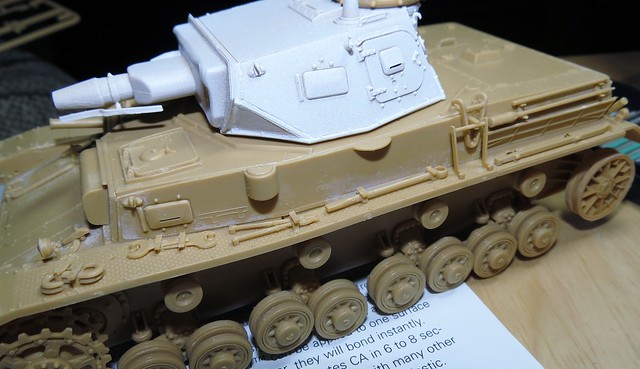
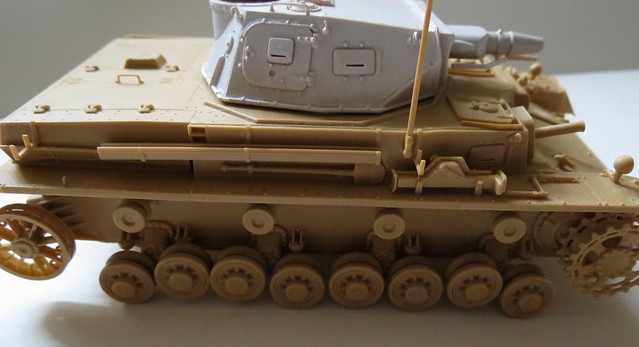
Lastly a full view of the LH side with 1 or 2 additional pieces to be added yet.
Next this step/I cant remember what the other tool is for was an absolutely pain in the @#$%^. If not for my last ounce of patience this thing would have been crushed.
Lastly a full view of the LH side with 1 or 2 additional pieces to be added yet.
fireontheway
Pennsylvania, United States
Joined: May 17, 2006
KitMaker: 370 posts
Armorama: 368 posts
Joined: May 17, 2006
KitMaker: 370 posts
Armorama: 368 posts
Posted: Monday, July 09, 2012 - 11:46 AM UTC
OK, sorry for the lull in the action. Continued on the right side fender. The jack when fitted in position would not allow for the handle so I am leaving it off, will cover with a rag. Also the axe position on the fender does not allow the axe head to lay flat on the fender. The fender angles downward so the axe head and bracket would "float" above the fender, have to work on this one.
Just a sidewiew
Here is the basic box base I am making. I know its small but this is the first time I will be working with "Magic Water" so I wanted to start small
Just a sidewiew
Here is the basic box base I am making. I know its small but this is the first time I will be working with "Magic Water" so I wanted to start small
retiredyank
Arkansas, United States
Joined: June 29, 2009
KitMaker: 11,610 posts
Armorama: 7,843 posts
Joined: June 29, 2009
KitMaker: 11,610 posts
Armorama: 7,843 posts
Posted: Monday, July 09, 2012 - 03:17 PM UTC
For sanding tiny parts, you may want to put a very small dot of white glue on a piece of glass or cd. Use the glue to secure the piece so that the area you want to sand is accessible. Sand using light strokes. When done, pop the part off and rinse it under warm water.
fireontheway
Pennsylvania, United States
Joined: May 17, 2006
KitMaker: 370 posts
Armorama: 368 posts
Joined: May 17, 2006
KitMaker: 370 posts
Armorama: 368 posts
Posted: Tuesday, July 10, 2012 - 06:51 AM UTC
Thanks Matt, hadnt given that any thought. K.I.S.S. applies more times than not.