I hear ya Paul, my Dad always told me if I had a brain I'd be dangerous.
Finished the underneath and front plate piping. Last thing to do for that is under the platform, need to run some wire for the gauges.
Thanks for looking,
Bob
Constructive Feedback
For in-progress or completed build photos. Give and get contructive feedback!
Hosted by Darren Baker, Dave O'Meara
Peleliu LVT 4 Flame Tractor and USS Fubar
BobCard
Florida, United States
Joined: August 09, 2006
KitMaker: 1,008 posts
Armorama: 847 posts
Joined: August 09, 2006
KitMaker: 1,008 posts
Armorama: 847 posts
Posted: Wednesday, October 17, 2012 - 11:00 AM UTC
captfue
Texas, United States
Joined: September 02, 2006
KitMaker: 785 posts
Armorama: 44 posts
Joined: September 02, 2006
KitMaker: 785 posts
Armorama: 44 posts
Posted: Wednesday, October 17, 2012 - 01:39 PM UTC
Really cool build fantastic details.
newfish
England - West Midlands, United Kingdom
Joined: June 23, 2008
KitMaker: 2,329 posts
Armorama: 2,110 posts
Joined: June 23, 2008
KitMaker: 2,329 posts
Armorama: 2,110 posts
Posted: Wednesday, October 17, 2012 - 11:25 PM UTC
Hi Bob ! great plumbing work so far I can understand your frustration do you use tweezers? As for information I was hoping to get some information on the LVT-4 Buffalo..I'm after the drivers compartment and some good walk arounds. If you could point me in the right direction of any books or information I'd reallt appreciate it. I was after some info and pics on the M4A3 Flame tank but I'm not in any rush for that. Thank you and please keep this excellent work going.
All the best.
Jaymes
All the best.
Jaymes
BobCard
Florida, United States
Joined: August 09, 2006
KitMaker: 1,008 posts
Armorama: 847 posts
Joined: August 09, 2006
KitMaker: 1,008 posts
Armorama: 847 posts
Posted: Thursday, October 18, 2012 - 12:49 AM UTC
Anthony, Jaymes thanks for the comments.
Jaymes, best book I have found for the Pacific LVT-4 is the LVT-4 Model Tech Manual, By David Harper is still my favorite. I believe they are still being sold by Squadron. The British version has some differences, I have a build review that some made up for that but I'm not sure of the accuracy or validly because of the weapon changes. (Polsten Cannon) Another is in Military Modelling Vol.32, No.4, 2002.
If all else fails I can send some specific items once you know what you want to build.
On the M4A3 Flame, I remember reading that they are exactly the same as the normal gun tank version, all the changes are on the inside. Specifics come in to play on the outside depending on which Battle you are looking at and which Battalion, company etc…
Again when you get down to closer ideas I’m sure I can help. Never did a M4A3 Flame as yet so it might be a learning experience for both of us.
Let me know,
Bob
BobCard
Florida, United States
Joined: August 09, 2006
KitMaker: 1,008 posts
Armorama: 847 posts
Joined: August 09, 2006
KitMaker: 1,008 posts
Armorama: 847 posts
Posted: Sunday, October 21, 2012 - 09:30 AM UTC
Special Thanks to Mark Corbett, sent me a PDF with new info on the Q gun. Thanks Mark!
Just the basics, all still not connected together. Trying to allow them to dry before final Painting, joining, painting again. Still need lines to Q gun and shield brackets.
Sorry a little blurry but it's Captain Morgan time.....
Thanks for looking and all comments are welcome,
Bob
Just the basics, all still not connected together. Trying to allow them to dry before final Painting, joining, painting again. Still need lines to Q gun and shield brackets.
Sorry a little blurry but it's Captain Morgan time.....
Thanks for looking and all comments are welcome,
Bob
BobCard
Florida, United States
Joined: August 09, 2006
KitMaker: 1,008 posts
Armorama: 847 posts
Joined: August 09, 2006
KitMaker: 1,008 posts
Armorama: 847 posts
Posted: Tuesday, October 23, 2012 - 02:04 AM UTC
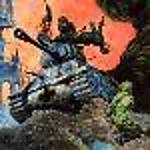
Almost finished still need;
Q gun shields, no bend, try to correct or replace gun shield.
Small square plate on front gun shield
Weld seams on tank, gun connection; lift brackets and angle iron around deck
Paint all major assemblies Neutral Grey, Q gun and tank refill pipe Flat Black
Place decals, 2 info plates on shield boxes, gauges
Glue all major assemblies together; include small and thinner connection straps on main shield
Spot paint final items.
Weather with other models
If anyone sees something I missed please let me know,
Thanks for looking,
Bob
(Sorry forgot to mention that I finished the Q gun last night, I'd better take some photos before I ness with the shield)
BobCard
Florida, United States
Joined: August 09, 2006
KitMaker: 1,008 posts
Armorama: 847 posts
Joined: August 09, 2006
KitMaker: 1,008 posts
Armorama: 847 posts
Posted: Tuesday, October 23, 2012 - 02:32 PM UTC
Q model, Navt Mark 1 Flame gun, a little blurry but just a quick update
Bob
Bob
Tanksami
Victoria, Australia
Joined: August 06, 2011
KitMaker: 1,314 posts
Armorama: 1,217 posts
Joined: August 06, 2011
KitMaker: 1,314 posts
Armorama: 1,217 posts
Posted: Tuesday, October 23, 2012 - 09:15 PM UTC
Hi Bob,
I looked on Google to come up with some new words to describe what you are doing & what has already been stated but all I can do is mimic JFK & say ask not what modeling can do for you but what you can do for modeling!! Stunning simply stunning!!
Cheers Mike
I looked on Google to come up with some new words to describe what you are doing & what has already been stated but all I can do is mimic JFK & say ask not what modeling can do for you but what you can do for modeling!! Stunning simply stunning!!
Cheers Mike
BobCard
Florida, United States
Joined: August 09, 2006
KitMaker: 1,008 posts
Armorama: 847 posts
Joined: August 09, 2006
KitMaker: 1,008 posts
Armorama: 847 posts
Posted: Wednesday, October 24, 2012 - 03:49 AM UTC
Thanks Mike, but believe it or not mine compared to what Mark Corbett is doing makes mine look sloppy. Hopefully Mike will do a post or feature on his construction.
Thanks for the comments, I'll take all I can get,
Bob
Thanks for the comments, I'll take all I can get,
Bob
tsweeney
New Jersey, United States
Joined: February 09, 2007
KitMaker: 149 posts
Armorama: 131 posts
Joined: February 09, 2007
KitMaker: 149 posts
Armorama: 131 posts
Posted: Wednesday, October 24, 2012 - 05:27 AM UTC
Bob Great piece of scratch building. I wish I had your talent.
Can't wait to see the finished model
Tom
Can't wait to see the finished model
Tom
BobCard
Florida, United States
Joined: August 09, 2006
KitMaker: 1,008 posts
Armorama: 847 posts
Joined: August 09, 2006
KitMaker: 1,008 posts
Armorama: 847 posts
Posted: Thursday, October 25, 2012 - 09:53 AM UTC
Thanks Tom for the comments, you give me way too much credit.
Almost finished product, I noticed some prints and excess paint in a couple of spots, a couple of brackets and have to finish the last two cables.
Out of a possible 10, I give this a 6, I'm still in the learning stages of scratch building, was very interesting, have to say more power to the guys who make a lot of these, the details are enormous;
Parts before assembly;
And assenbled;
Looks better from a distance;
I think I'll start on the USS Fubar 1st before finishing the LVT 4.
Thanks for looking and any comments are welcome,
Bob
Delta42
Georgia, United States
Joined: August 27, 2002
KitMaker: 616 posts
Armorama: 511 posts
Joined: August 27, 2002
KitMaker: 616 posts
Armorama: 511 posts
Posted: Thursday, October 25, 2012 - 10:46 AM UTC
Bob,
Great build. I have been following along, because I like to do the odd, not out of the box builds too. Scratch building is always a challenge, because you have to put a lot of imagination into fabricating some of the components of your build.
Again, well done.
Dave
Great build. I have been following along, because I like to do the odd, not out of the box builds too. Scratch building is always a challenge, because you have to put a lot of imagination into fabricating some of the components of your build.
Again, well done.
Dave
BobCard
Florida, United States
Joined: August 09, 2006
KitMaker: 1,008 posts
Armorama: 847 posts
Joined: August 09, 2006
KitMaker: 1,008 posts
Armorama: 847 posts
Posted: Friday, October 26, 2012 - 07:43 AM UTC
Thanks Dave,
Not too bad for my first total scratch built.
Next time I'll be a bit wiser on materials, stock and actual construction techniques.
Thanks for the comments,
Bob
Not too bad for my first total scratch built.
Next time I'll be a bit wiser on materials, stock and actual construction techniques.
Thanks for the comments,
Bob
steph2102
Isere, France
Joined: April 23, 2011
KitMaker: 735 posts
Armorama: 606 posts
Joined: April 23, 2011
KitMaker: 735 posts
Armorama: 606 posts
Posted: Friday, October 26, 2012 - 07:57 AM UTC
hello, for a first try, this is a master stroke. great job
steph
steph
BobCard
Florida, United States
Joined: August 09, 2006
KitMaker: 1,008 posts
Armorama: 847 posts
Joined: August 09, 2006
KitMaker: 1,008 posts
Armorama: 847 posts
Posted: Sunday, October 28, 2012 - 02:17 AM UTC
Thanks Steph,
Already have lists for the next atttempt, stock, specific items to watch for.
Thanks again,
Bob
Already have lists for the next atttempt, stock, specific items to watch for.
Thanks again,
Bob