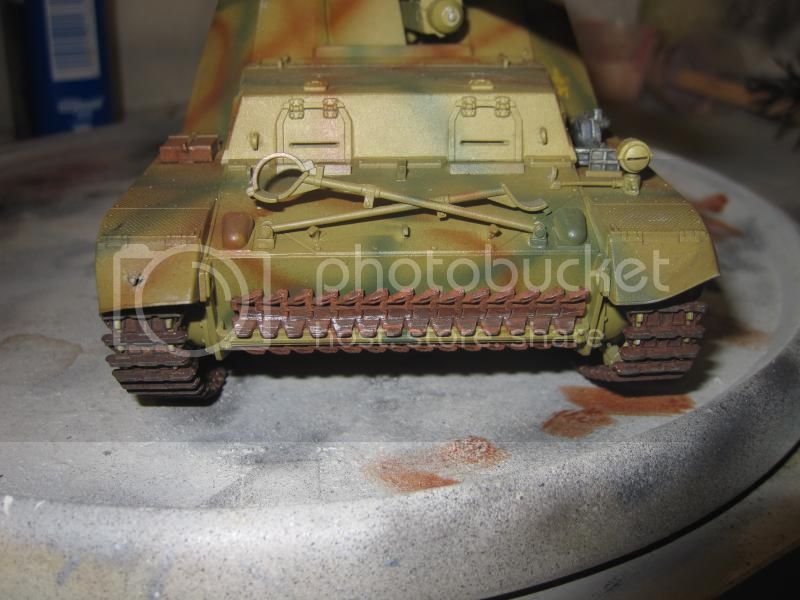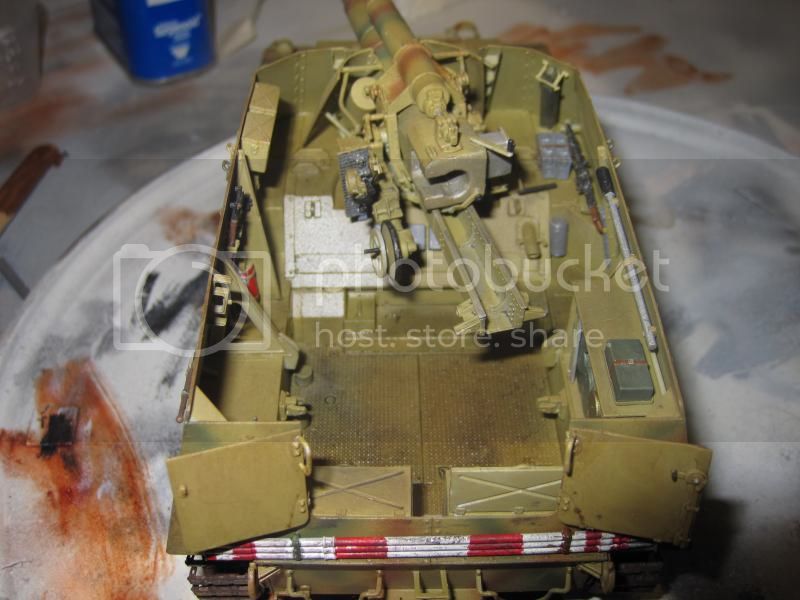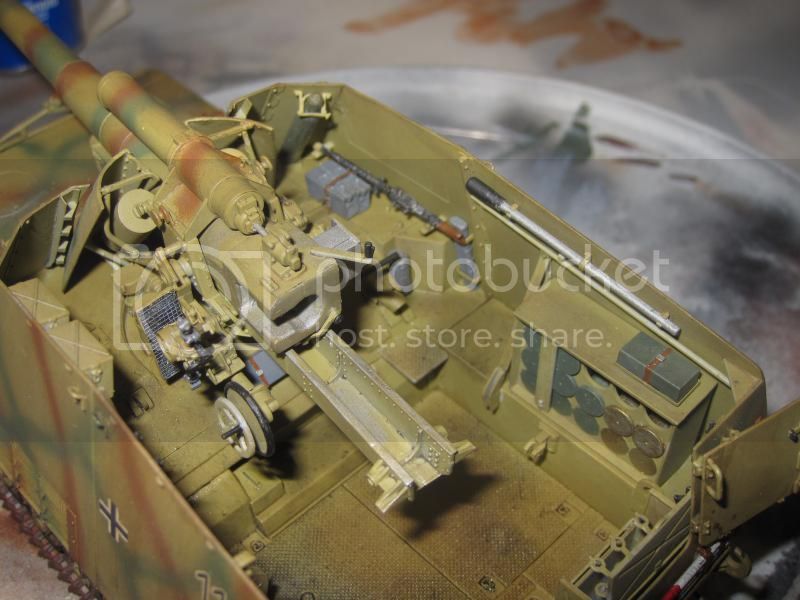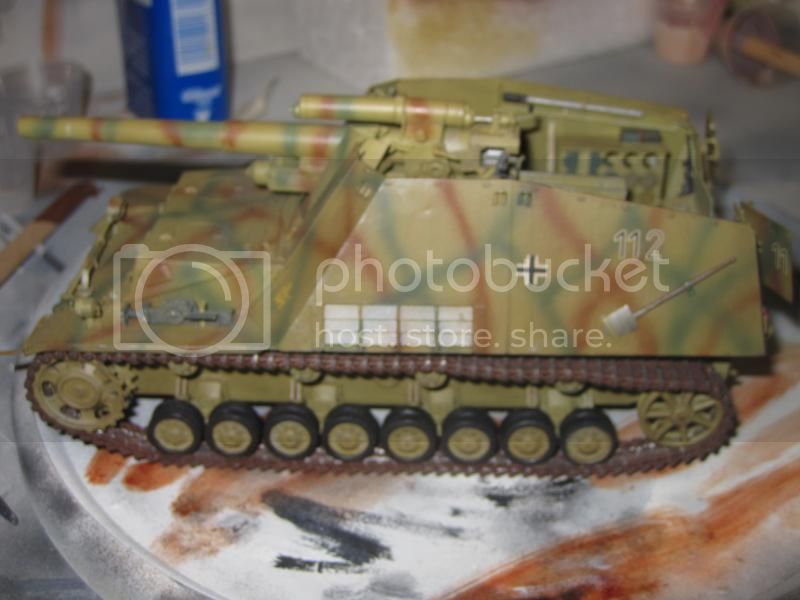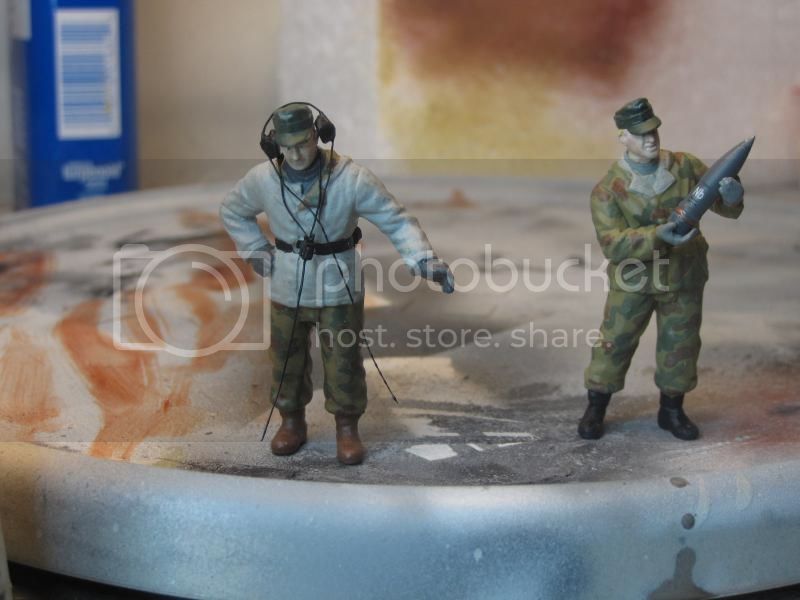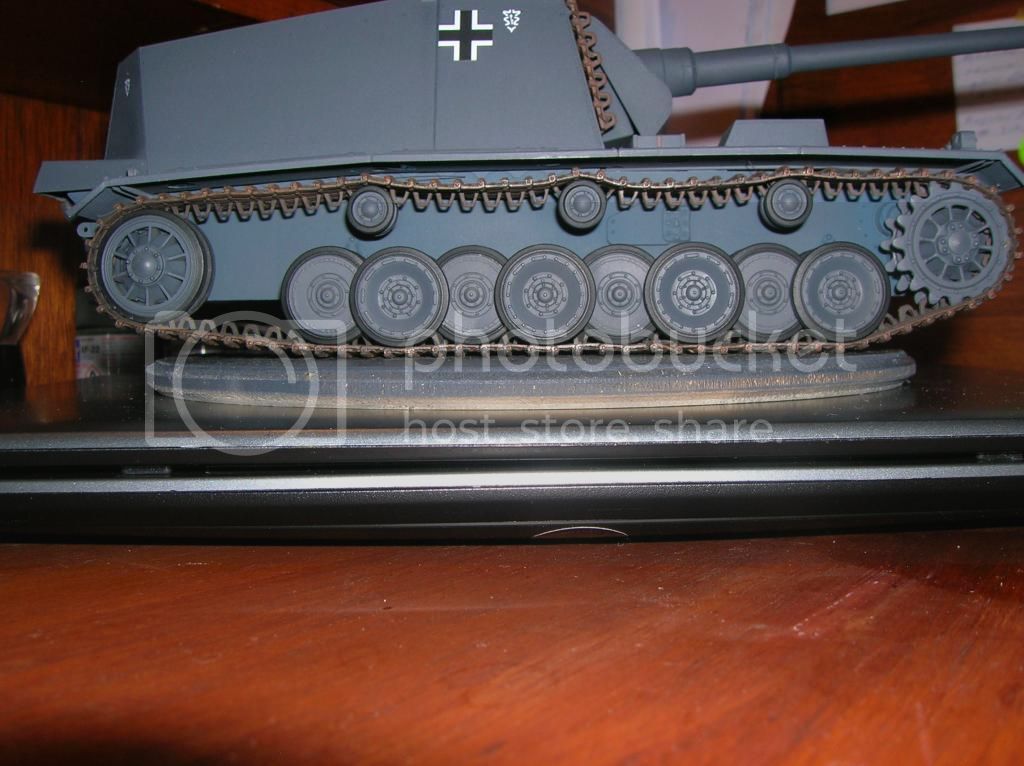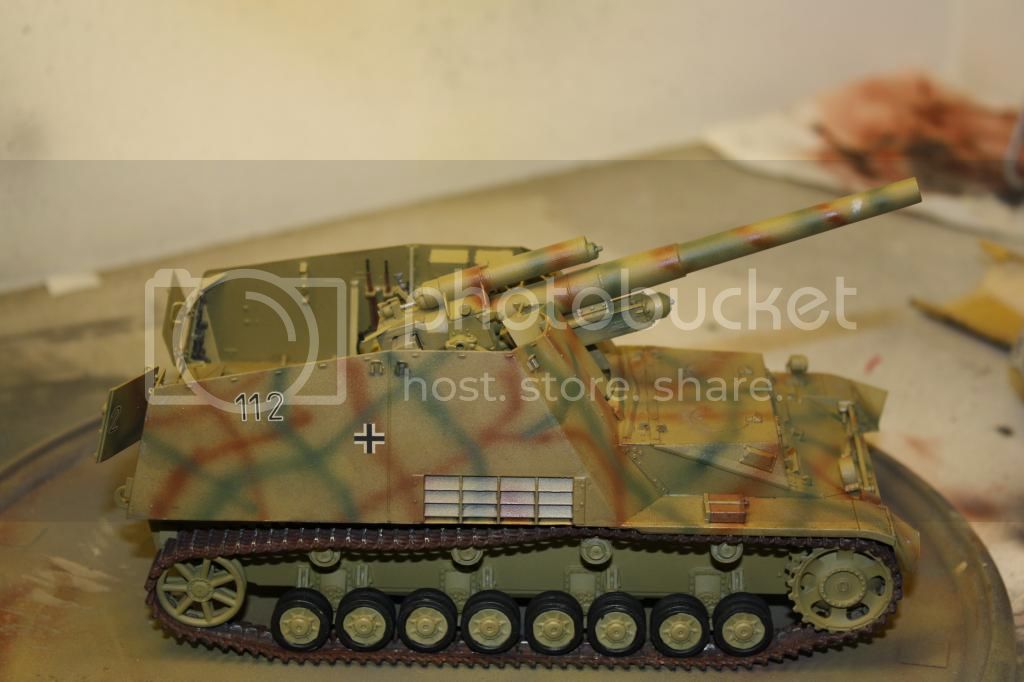
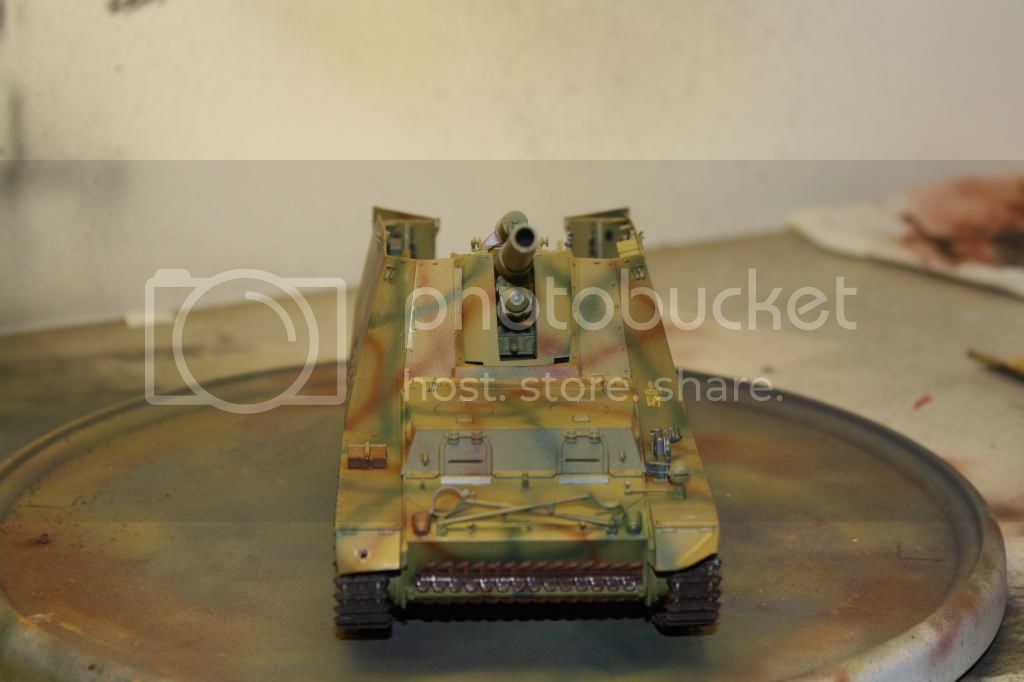
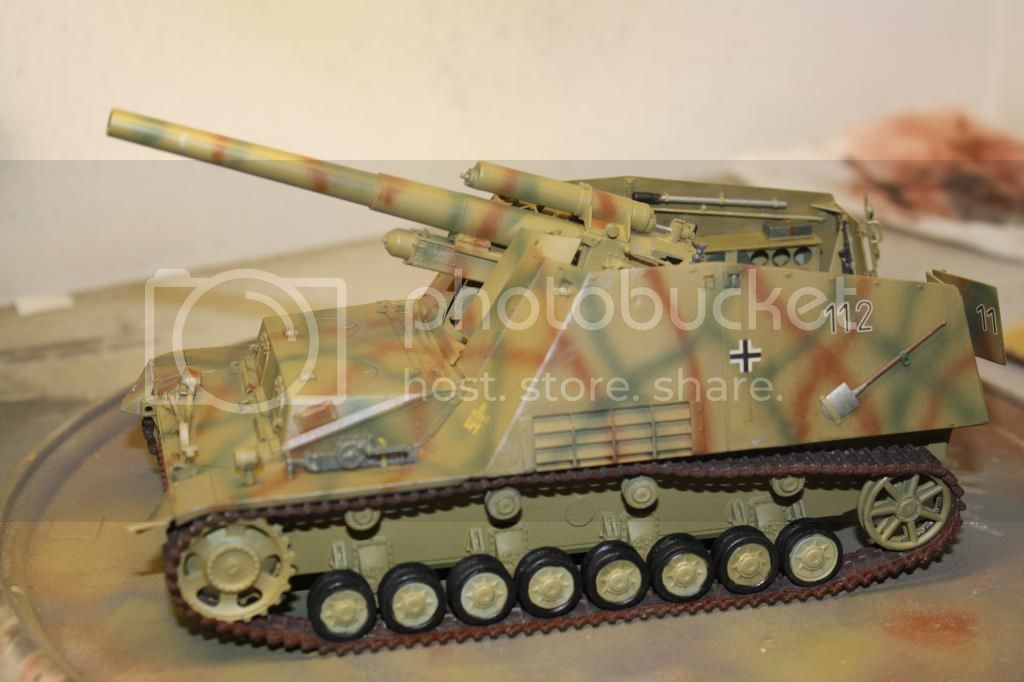
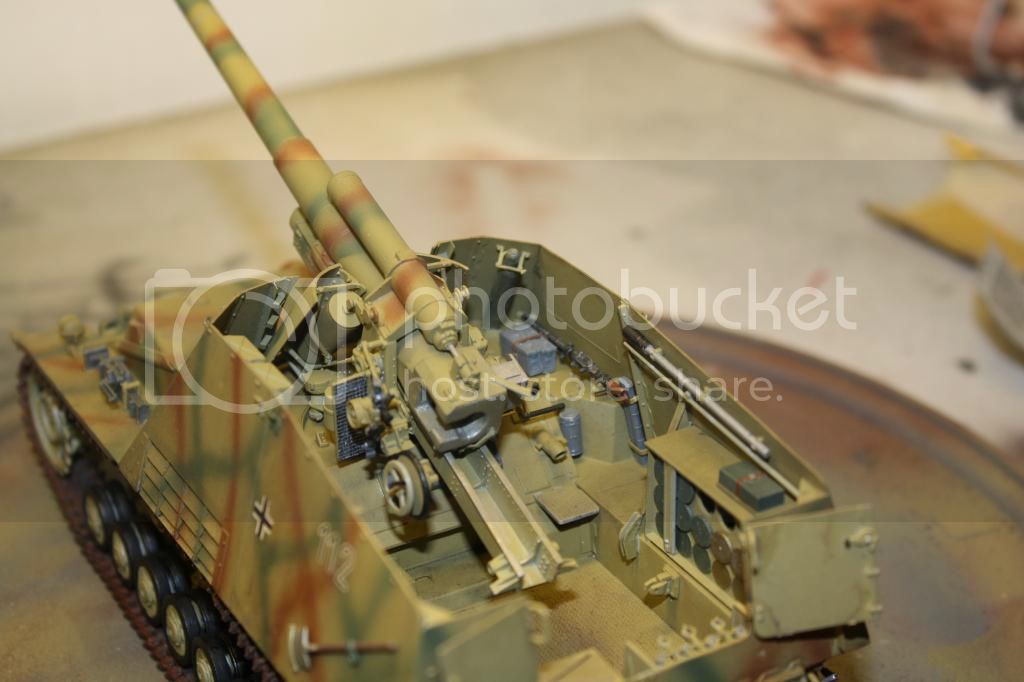
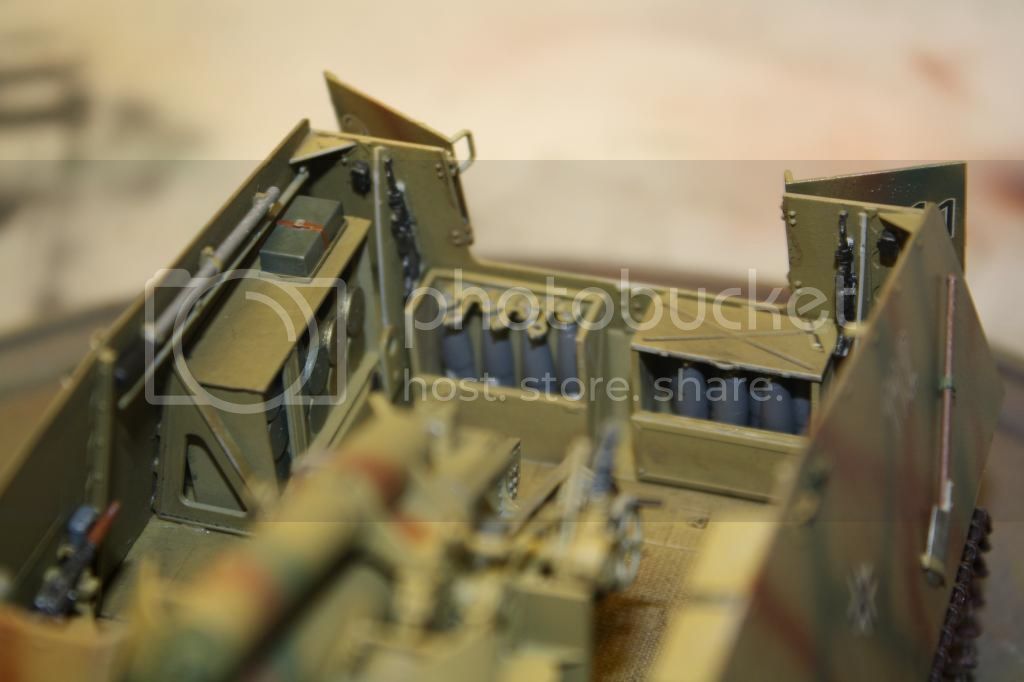
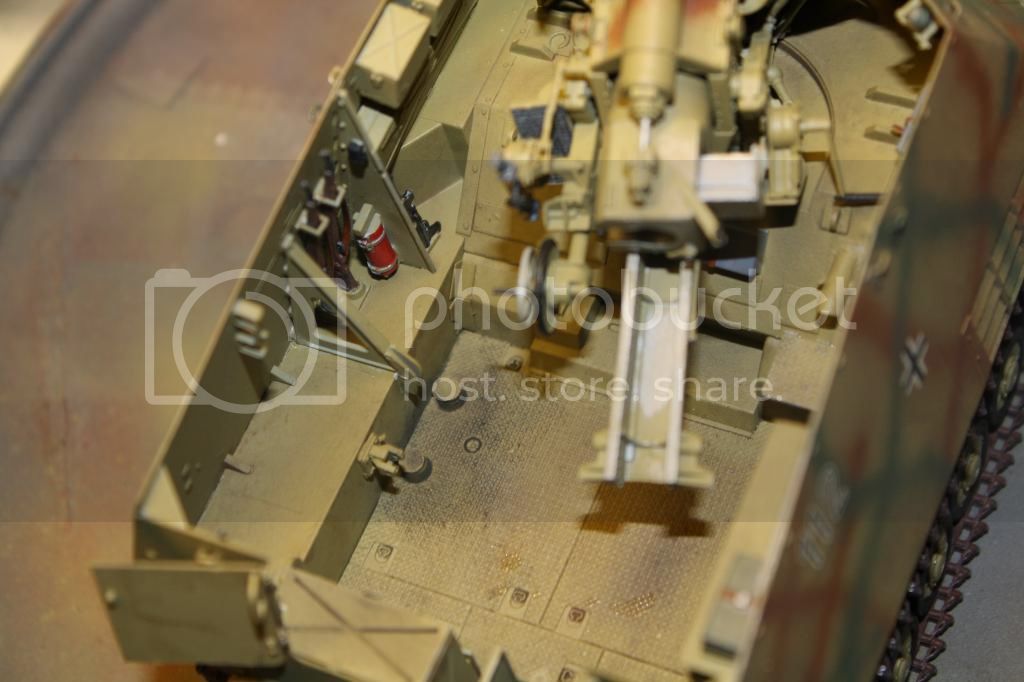
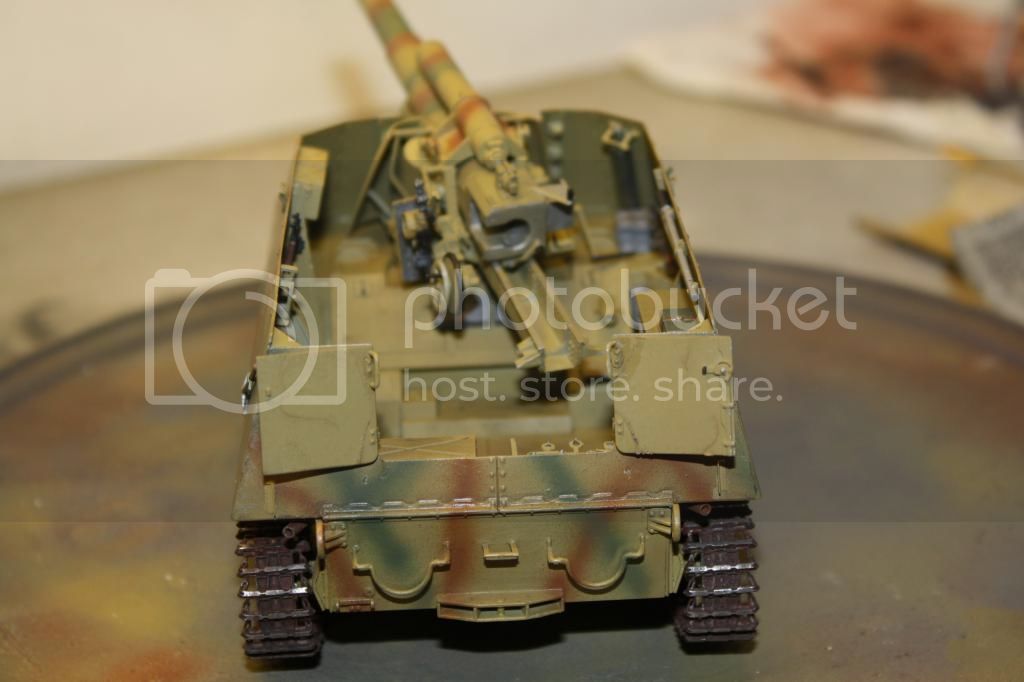
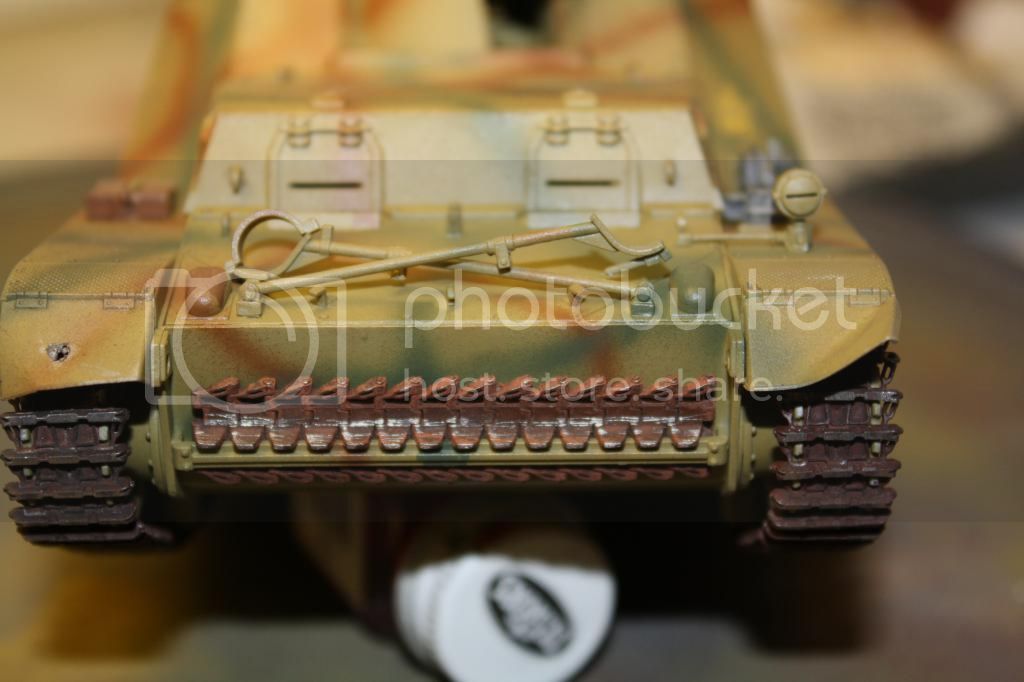
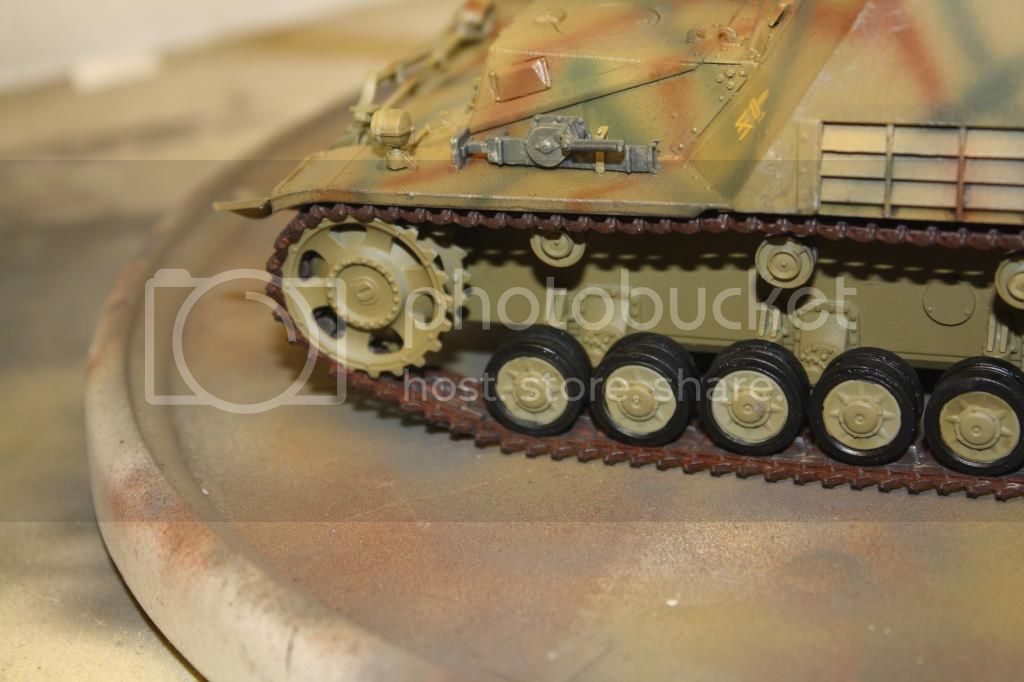
I started this kit in October 2011 hoping to have it done in time for the Art of the Battlefield campaign, but life, family and work, took priority. I stil have a few small parts to add and then finish the weathering. The lower hull and running gear need to have some washes and weathering done to them, as only the interior and upper surfaces were done. Once the vehicle is done, I will start the crew and the base. The idea is that ammunition was just dropped off behind the vehicle and the crew is loading it into the storage lockers on the vehicle. Here are some pics as it sits right now.
Constructive Feedback
For in-progress or completed build photos. Give and get contructive feedback!
Hosted by Darren Baker, Dave O'Meara
Sd.Kfz. 165 Hummel almost done.
Tank178
Illinois, United States
Joined: December 30, 2009
KitMaker: 92 posts
Armorama: 63 posts
Joined: December 30, 2009
KitMaker: 92 posts
Armorama: 63 posts
Posted: Wednesday, December 19, 2012 - 11:04 AM UTC
AFVFan
North Carolina, United States
Joined: May 17, 2012
KitMaker: 1,980 posts
Armorama: 1,571 posts
Joined: May 17, 2012
KitMaker: 1,980 posts
Armorama: 1,571 posts
Posted: Wednesday, December 19, 2012 - 05:00 PM UTC
That's looking pretty nice so far Art. I like the interior work.
A little FYI for the future... I noticed on your roadwheels that the black rubber area extends a bit too far. It should stop at the raised rib which is part of the steel wheel.
Tank178
Illinois, United States
Joined: December 30, 2009
KitMaker: 92 posts
Armorama: 63 posts
Joined: December 30, 2009
KitMaker: 92 posts
Armorama: 63 posts
Posted: Thursday, December 20, 2012 - 10:51 PM UTC
Thanks for the kind words Bob. The road wheels always seem to give me problems. I have a Panzer IV in my stash that I want to build, but the sheer number of road wheels is making me not want to rush into it lol. I hope to get this finished shortly after the holidays.
AFVFan
North Carolina, United States
Joined: May 17, 2012
KitMaker: 1,980 posts
Armorama: 1,571 posts
Joined: May 17, 2012
KitMaker: 1,980 posts
Armorama: 1,571 posts
Posted: Friday, December 21, 2012 - 05:16 AM UTC
Quoted Text
Thanks for the kind words Bob. The road wheels always seem to give me problems. I have a Panzer IV in my stash that I want to build, but the sheer number of road wheels is making me not want to rush into it lol. I hope to get this finished shortly after the holidays.
Yeah, the Germans did like their roadwheels! The Mk IV's are bad, but the early Tiger I makes it seem tame in comparison. Luckily, if you plan on doing a few Mk IV based kits, there are paint templates you can buy to take some of the load off doing them.
Tiger_213
California, United States
Joined: August 10, 2012
KitMaker: 1,510 posts
Armorama: 1,443 posts
Joined: August 10, 2012
KitMaker: 1,510 posts
Armorama: 1,443 posts
Posted: Friday, December 21, 2012 - 05:33 AM UTC
Looks great, though it's very, very clean.
Tank178
Illinois, United States
Joined: December 30, 2009
KitMaker: 92 posts
Armorama: 63 posts
Joined: December 30, 2009
KitMaker: 92 posts
Armorama: 63 posts
Posted: Monday, February 02, 2015 - 07:35 AM UTC
I still haven't gotten around to completely finishing this one,(I swear I have model related ADHD, I keep starting other kits and have several in various stages of completeness lol) As far as the weathering, I have given it a black pinwash. It still looks pretty shiny so I am going to shoot it with some flat clear coat. I have also started the crew and plan to place them and the vehicle in a small dio. The dio will be a ammo resupply. Here are some updated pics. My figure painting is still not as good as I would like, but I am practicing. This was my first attempt at the German camo.
AFVFan
North Carolina, United States
Joined: May 17, 2012
KitMaker: 1,980 posts
Armorama: 1,571 posts
Joined: May 17, 2012
KitMaker: 1,980 posts
Armorama: 1,571 posts
Posted: Tuesday, February 03, 2015 - 10:23 AM UTC
Yeah, a coat of flat will knock that shine down.
From the looks of the figures, I'd say we're on about the same level there!
dommy20
California, United States
Joined: July 30, 2010
KitMaker: 133 posts
Armorama: 40 posts
Joined: July 30, 2010
KitMaker: 133 posts
Armorama: 40 posts
Posted: Tuesday, February 03, 2015 - 11:25 AM UTC
Quick tip on the roadwheels:
Paint them the same base color as the rest of the tank to begin with, weathering and what not will even them out. When it's time to paint the rubber, mix up a thin oil wash of burnt umber, let the wash flow around the edge of the wheel and rubber, then paint on some thicker wash to the rest of the rubber.
Take a look at any tank roadwheel that's been out in the dirt, any tire even, the rubber is not black! It is dusty and dirty, it's barely even grey at some points. So don't paint it black. Let the oil wash dry, then weather and dirty up your suspension, by the time you're done you probably won't see much of the beginning color anyways!
doppelganger
Idaho, United States
Joined: March 09, 2010
KitMaker: 557 posts
Armorama: 217 posts
Joined: March 09, 2010
KitMaker: 557 posts
Armorama: 217 posts
Posted: Wednesday, February 04, 2015 - 05:13 AM UTC
It is difficult to photograph a model without the flash causing some degree of shine. here is a pic of my model painted with dead flat clear coat...still has a little bit of a shine to it.I think your model is flawless in regards to construction, looks like the sides of the hull are unpainted? I prefer to not weather my models, seems I can never get it right.
Tank178
Illinois, United States
Joined: December 30, 2009
KitMaker: 92 posts
Armorama: 63 posts
Joined: December 30, 2009
KitMaker: 92 posts
Armorama: 63 posts
Posted: Wednesday, February 04, 2015 - 07:56 AM UTC
Quoted Text
I think your model is flawless in regards to construction, looks like the sides of the hull are unpainted?
Thanks for the kind words. I am slowing trying to work on the weathering part of model building, but it always makes me nervous! The hull sides were painted the same base color, dunkelgelb before I put the roadwheels and tracks on. I am still nervous about trying to muddy it up!
mpkev31b
United States
Joined: April 29, 2008
KitMaker: 54 posts
Armorama: 51 posts
Joined: April 29, 2008
KitMaker: 54 posts
Armorama: 51 posts
Posted: Wednesday, February 04, 2015 - 09:04 PM UTC
Nice build, but i think you have the tracks faceing the wrong direction.
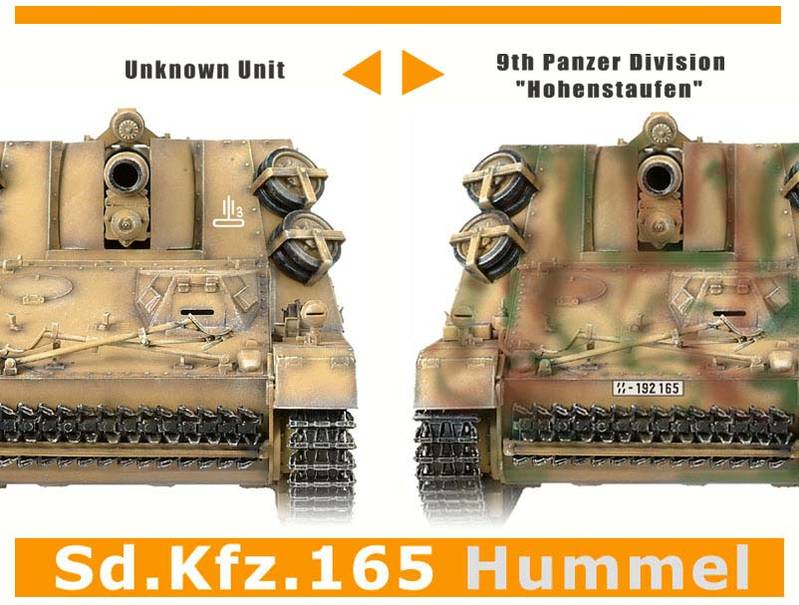
the bottome cleets that look like triangles are facing the wrong way. look at this picture of a real hummel's tracks the triangles should be faceing towards the rear not forward.
Giovanni1508
Napoli, Italy
Joined: April 17, 2014
KitMaker: 652 posts
Armorama: 600 posts
Joined: April 17, 2014
KitMaker: 652 posts
Armorama: 600 posts
Posted: Wednesday, February 04, 2015 - 09:28 PM UTC
Hi Art,
So, this is a long project. The construction is going well. I like very much the result. The interior is awesome.
Tracks: I agree with the last comment from Kevin. Unfortunately the tracks are installed in the wrong direction.
This for your reference. You can see the detail:
IMO, you can try to change, if possible without making damages.
Cheers
Giovanni
Tank178
Illinois, United States
Joined: December 30, 2009
KitMaker: 92 posts
Armorama: 63 posts
Joined: December 30, 2009
KitMaker: 92 posts
Armorama: 63 posts
Posted: Thursday, February 05, 2015 - 05:35 AM UTC
Thanks for pointing out the track direction, I hadn't even realized that! Luckily, I left the rear idler adjustable so it will be easy enough to take the track off and switch them to the right direction! Since the tracks are Friulmodel, I didn't need to glue them down to get the right sag.
210cav
Virginia, United States
Joined: February 05, 2002
KitMaker: 6,149 posts
Armorama: 4,573 posts
Joined: February 05, 2002
KitMaker: 6,149 posts
Armorama: 4,573 posts
Posted: Thursday, February 05, 2015 - 06:08 AM UTC
Art-- like your work
Well done
DJ
Well done
DJ
AFVFan
North Carolina, United States
Joined: May 17, 2012
KitMaker: 1,980 posts
Armorama: 1,571 posts
Joined: May 17, 2012
KitMaker: 1,980 posts
Armorama: 1,571 posts
Posted: Thursday, February 05, 2015 - 01:42 PM UTC
You actually have the option to change the tracks or not. It is not unheard of to have them installed the wrong way when being replaced in the field. There's a StuG in a museum, I believe in Europe, that was pulled from a bog with one track facing one way and the other going the opposite.
Tracks were rolled for shipment. Generally, when being replaced the new track was unrolled in front of the vehicle. If they were rolled wrong to begin with, then they'd be facing wrong on installation.
rdleis
California, United States
Joined: March 28, 2013
KitMaker: 55 posts
Armorama: 30 posts
Joined: March 28, 2013
KitMaker: 55 posts
Armorama: 30 posts
Posted: Thursday, February 05, 2015 - 10:06 PM UTC
Your build is coming along nicely. I've been thinking about getting one of Dragon's Hummels myself. What did you use for the leather straps inside the vehicle, and the commander's headphone wires? Did they come with the kit?
Tank178
Illinois, United States
Joined: December 30, 2009
KitMaker: 92 posts
Armorama: 63 posts
Joined: December 30, 2009
KitMaker: 92 posts
Armorama: 63 posts
Posted: Saturday, February 07, 2015 - 04:11 AM UTC
Quoted Text
What did you use for the leather straps inside the vehicle, and the commander's headphone wires? Did they come with the kit?
Thanks for the kind words. The leather strap around the two machine gun ammo cans is photoetch which comes with the Dragon Smart Kit #6321. As for the Commander's Headphones, that is from the Royal Model German Tanker Headphones kit which has two styles of headphones, throat mics and handheld mics. The wires for the throat mic and headphones are photoetch as well as the headband for the headphones. http://www.bnamodelworld.com/images/royalmodel/RM217.jpg