_GOTOBOTTOM
Constructive Feedback
For in-progress or completed build photos. Give and get contructive feedback!
M4 sherman
MeowMix
Visit this Community
Metro Manila, Philippines
Joined: December 25, 2012
KitMaker: 34 posts
Armorama: 29 posts
Posted: Monday, January 28, 2013 - 06:01 PM UTC
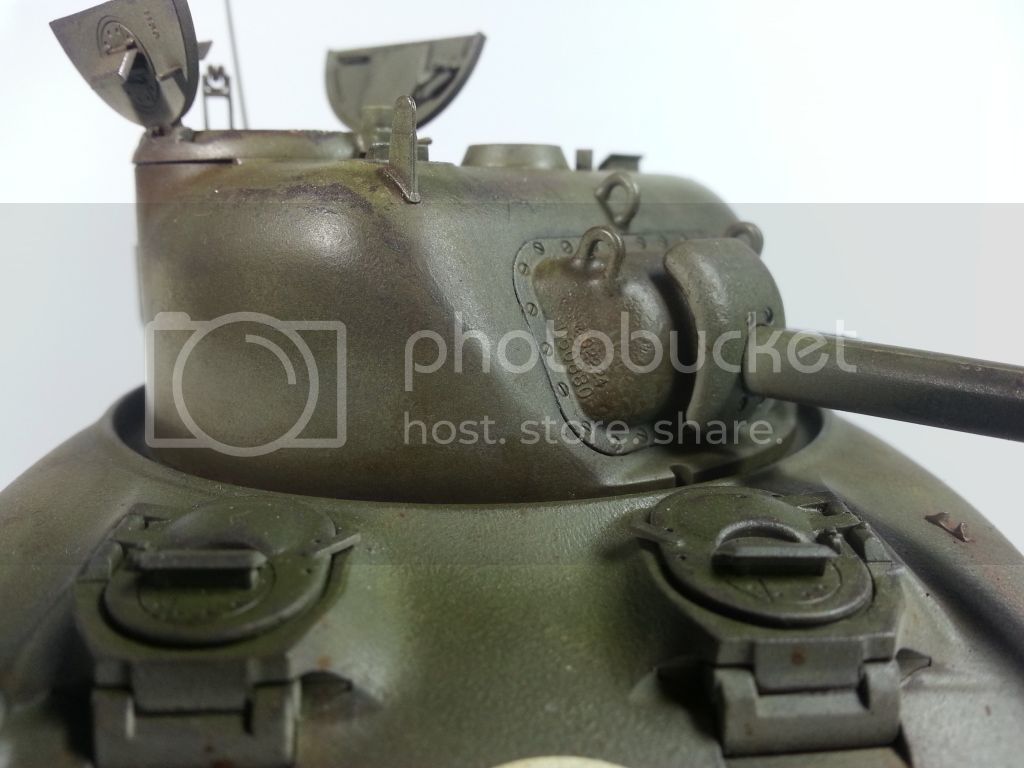
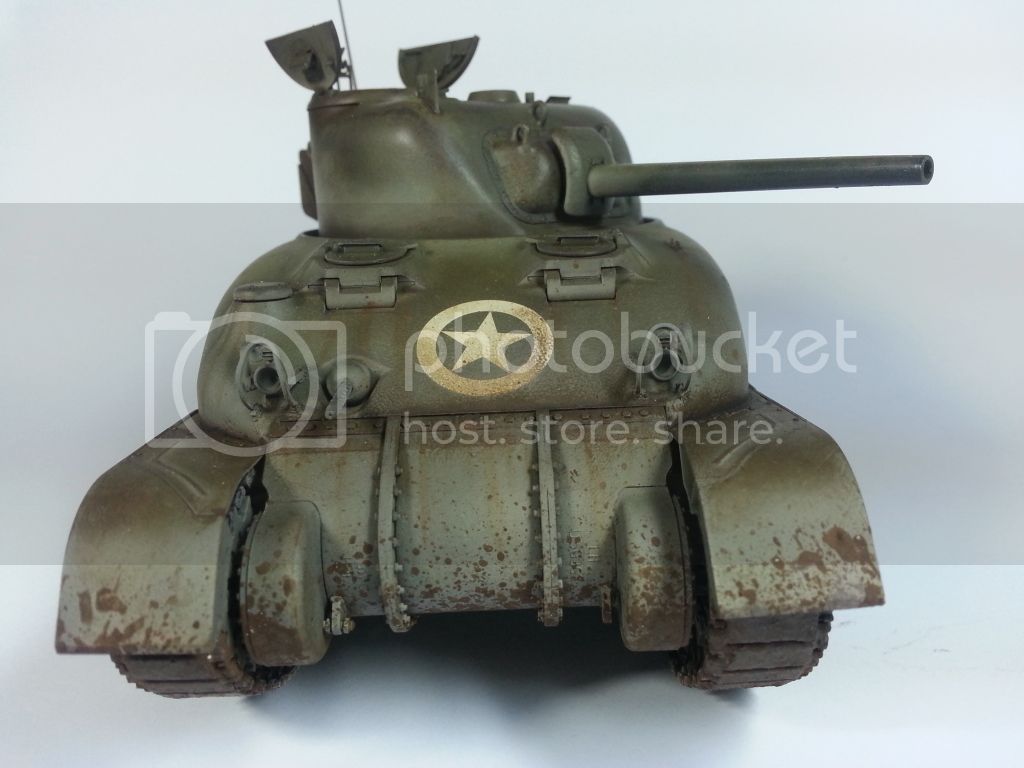
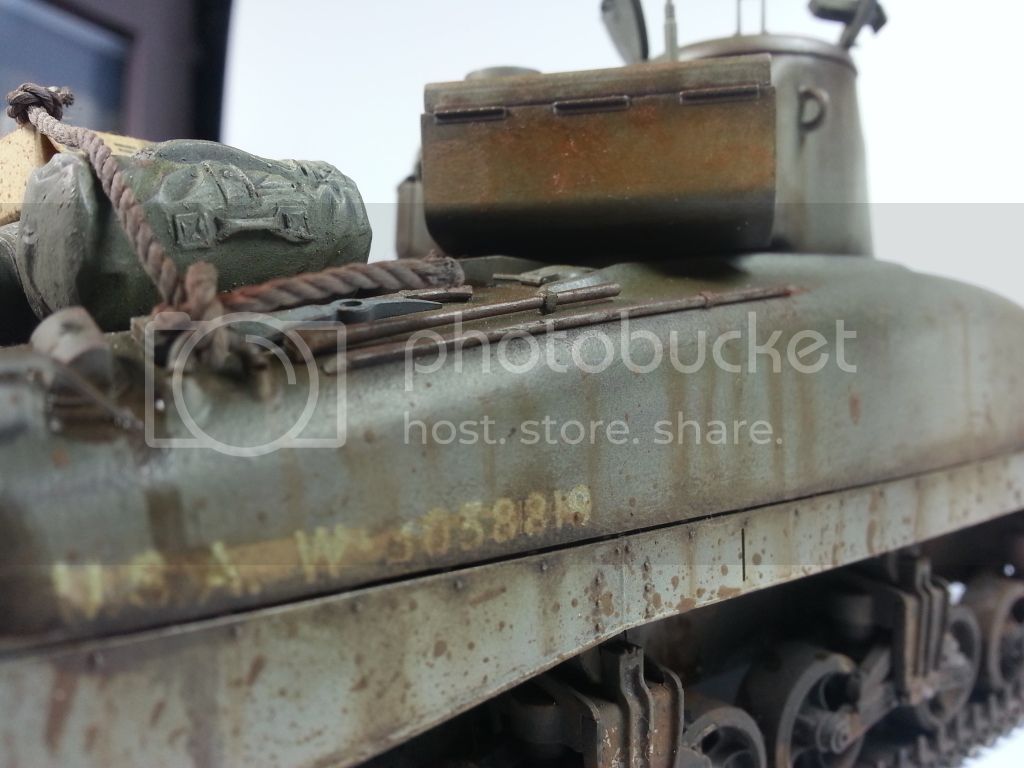
This is my 8th model to date. Its a tasca kit. The entire build process took around 5 days with the painting process around a week due to the slow drying of paints which was layered.

The build is 100% out of the box with the exception of the stowage which is from tamiya. I did a lot of 'first time' techniques in this project.

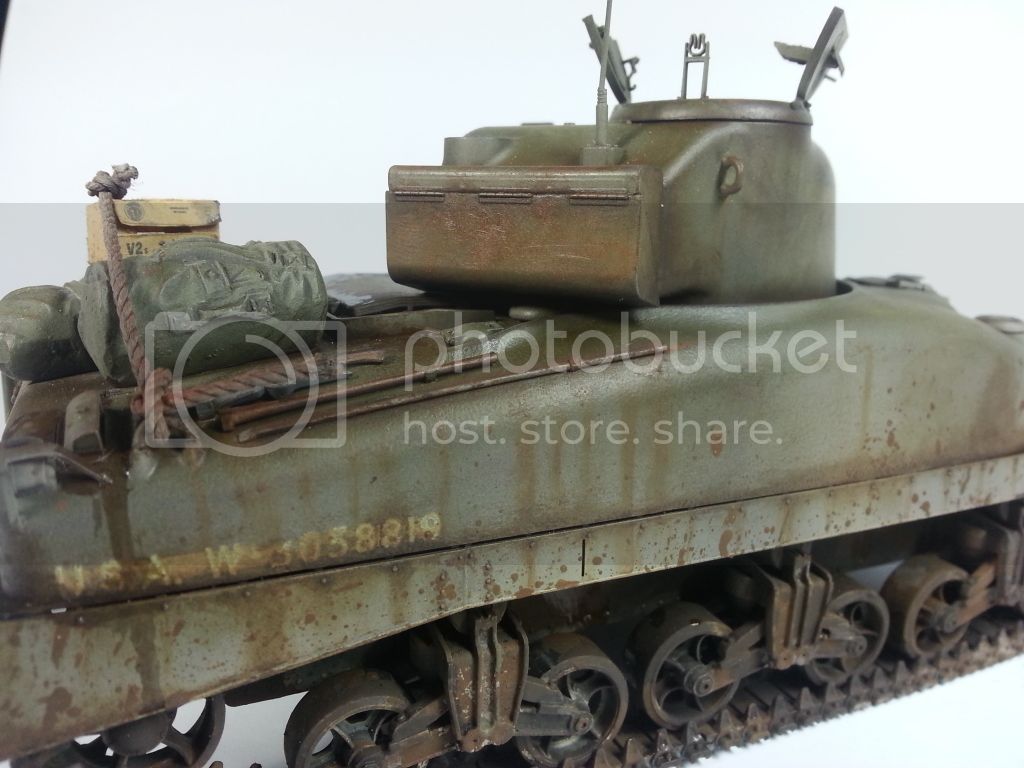
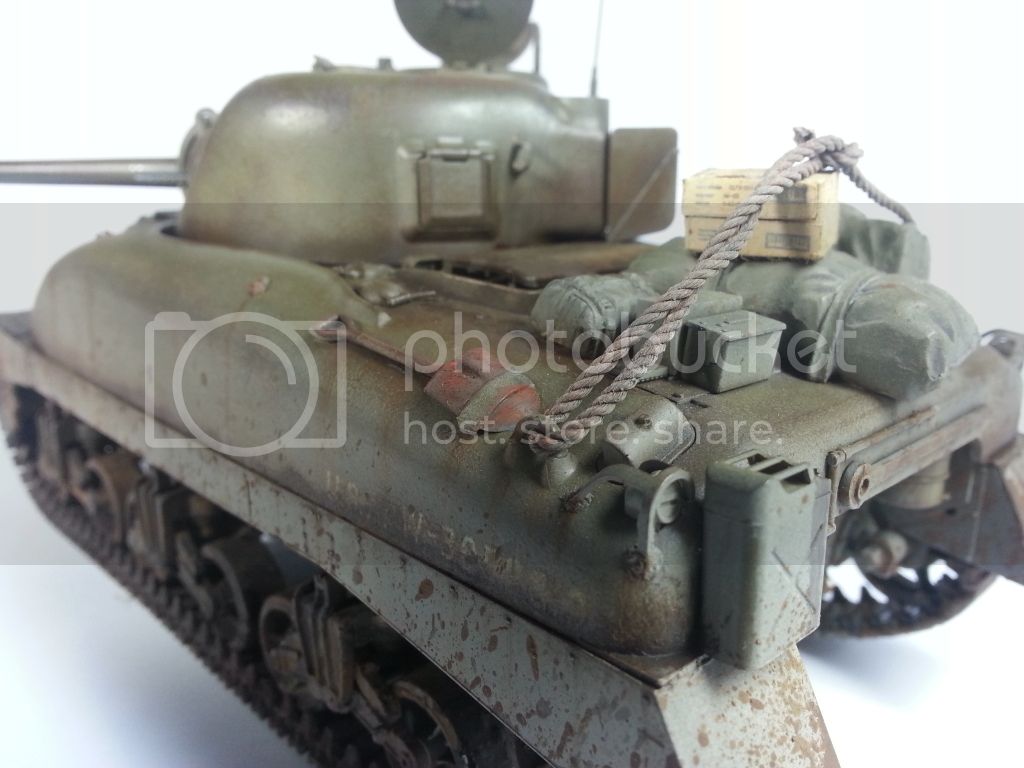
Overall im happy with this project. Ive learned a lot by trying various techniques that Ive learned from the previous models that i built. I feel I need to improve a few areas of my modeling. More specifically the decal application - seems like the transparent plastic that holds the letters turned brown and too evident, youll see it in one of the pics below. Another area is the construction and sanding of the barrel. The seem line is visible. I guess thats why people go with aftermarket barrels? Apart from those i think Ive Improved since my ladt build (check out my last project here)

Anyway here are the photos. I hope you guys will like it. Comments are welcome and of course, constructive criticisms! Next on my list would be an M109A2 Self propelled howitzer by AFV club. Its nearly done so stay tuned for that

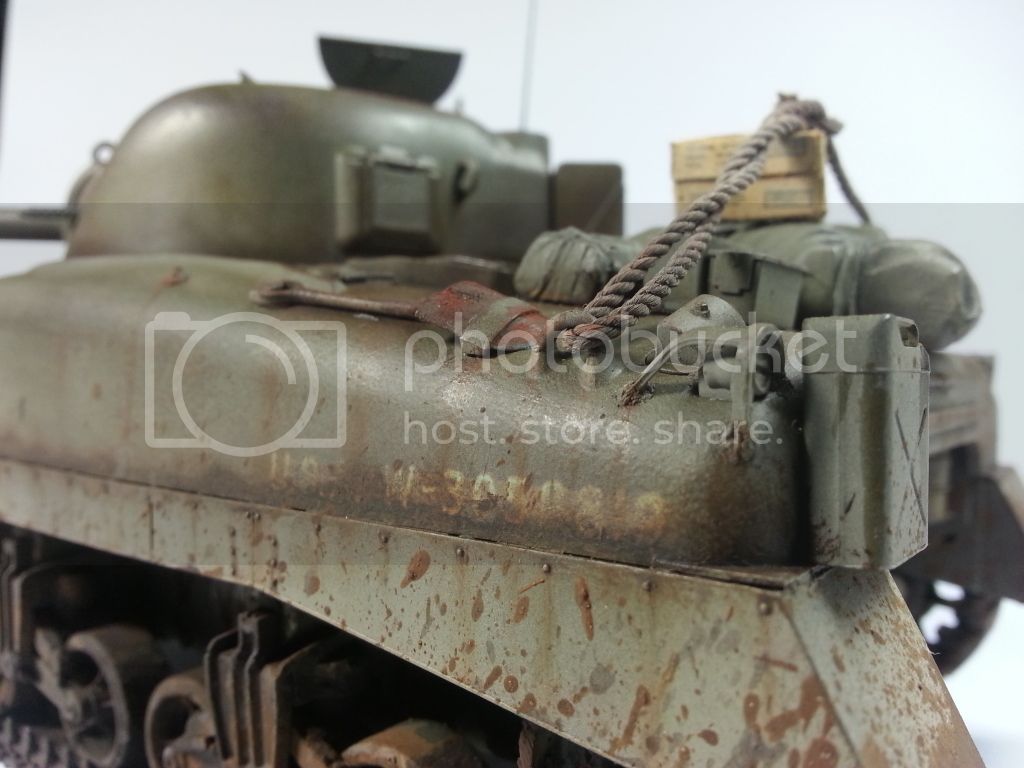
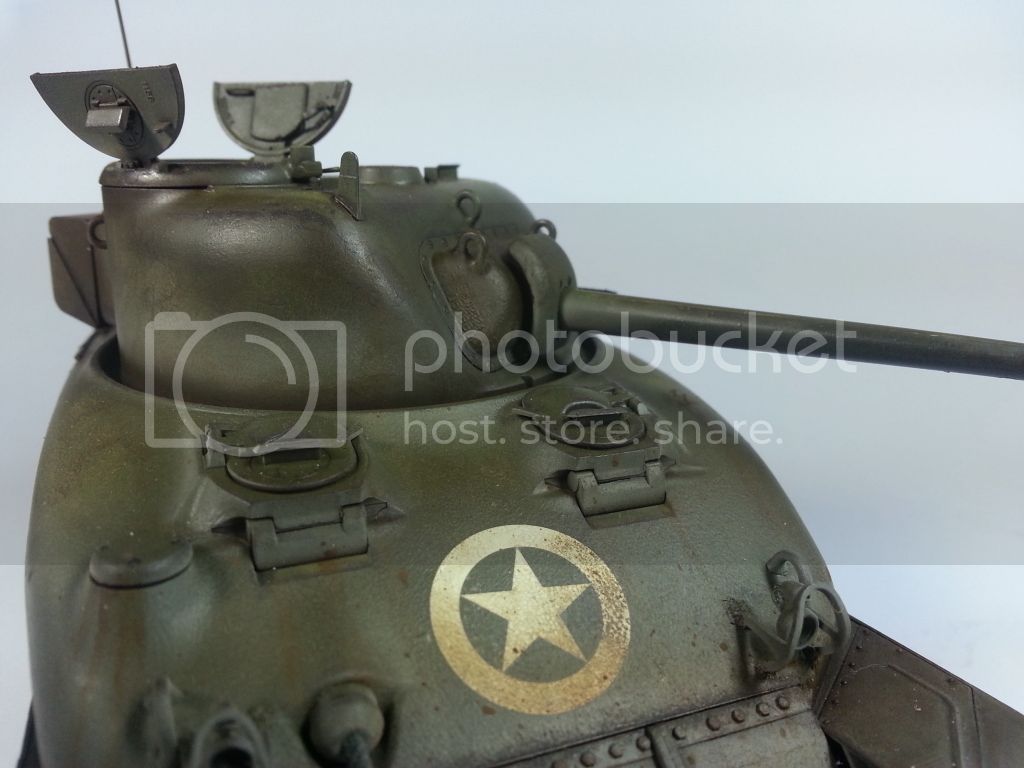
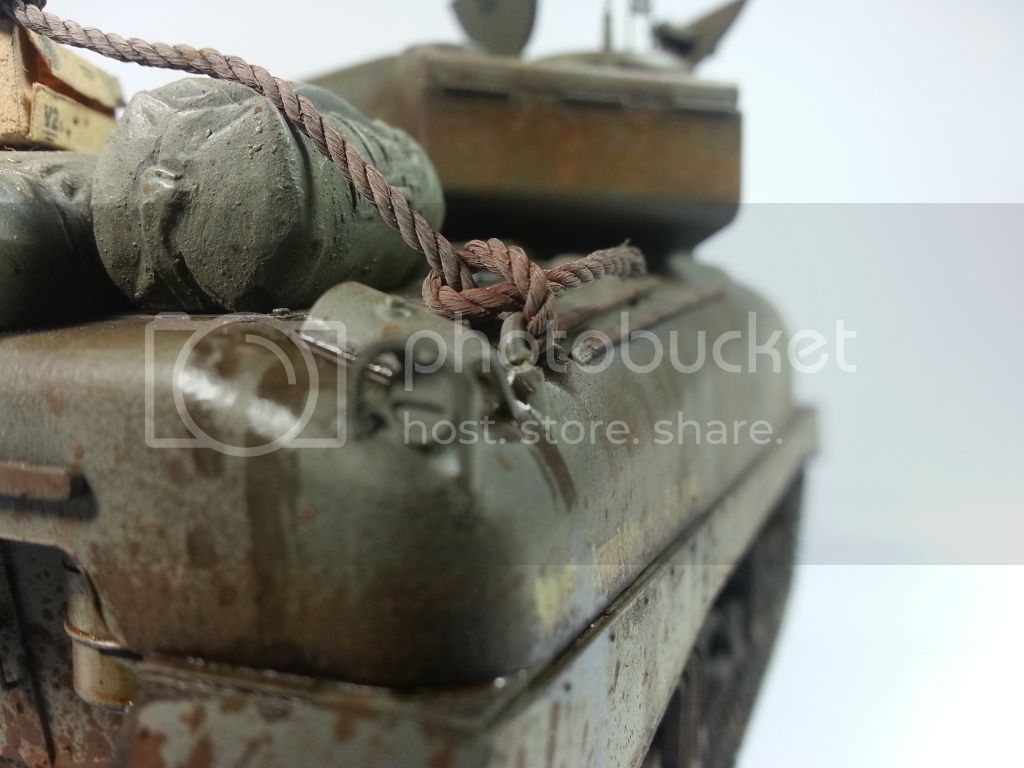
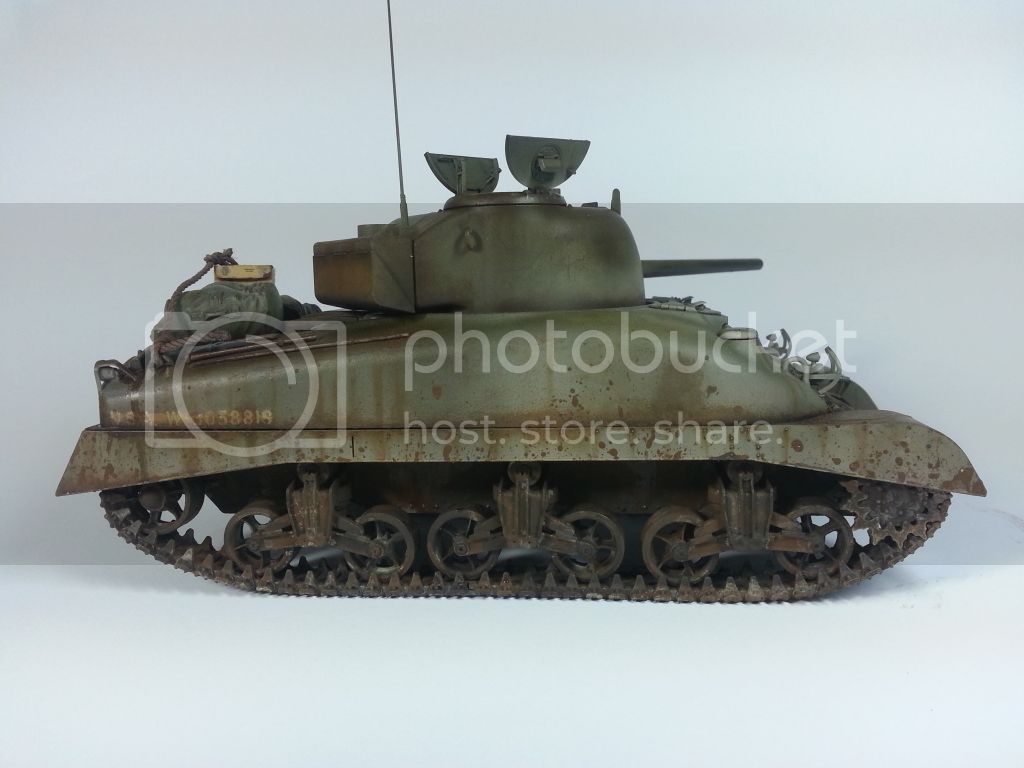


This is the decal that ive mentioned


exer
Visit this Community
Dublin, Ireland
Joined: November 27, 2004
KitMaker: 6,048 posts
Armorama: 4,619 posts
Posted: Monday, January 28, 2013 - 10:21 PM UTC
Nice work. The turret stowage box would make it a British or commonwealth tank. Unfortunately it is upside down.
retiredyank
Visit this Community
Arkansas, United States
Joined: June 29, 2009
KitMaker: 11,610 posts
Armorama: 7,843 posts
Posted: Monday, January 28, 2013 - 11:32 PM UTC
I like it. The streaks could use a little work. They appear to be too wide and uniform. What did you use for the rope tying the stowage down? An easy to get rid of seem lines on barrels is to glue the two halves togther and let it cure. Then apply a thin line of putty down the length of the seem. I find auto body putty works best. Once this has dried, sand down the putty so that it follows the contour of the barrel. The decal you mentioned isn't too bad. It looks like part of it has been worn off. We all make these mistakes, from time to time.
Pat: It should be easy to flip the turret stowage box. The bigger problem would be painting the area under it, so that it matches the rest of the tank.
Keep building!
MeowMix
Visit this Community
Metro Manila, Philippines
Joined: December 25, 2012
KitMaker: 34 posts
Armorama: 29 posts
Posted: Monday, January 28, 2013 - 11:40 PM UTC
Thanks guys for your comments. I noticed the incorrect stowage box when i was about to prime it. I tried to remove it but unfortunately a part of the box starts ripping off. I guess I applied too much cement on it.

I used the rope that came with my JS-3 tamiya kit.
retiredyank
Visit this Community
Arkansas, United States
Joined: June 29, 2009
KitMaker: 11,610 posts
Armorama: 7,843 posts
Posted: Monday, January 28, 2013 - 11:58 PM UTC
To remove parts, I generally use a no.11 blade to cut along the seem, as it gently pries the piece apart.
plasticman17
Visit this Community
Pennsylvania, United States
Joined: January 12, 2013
KitMaker: 78 posts
Armorama: 52 posts
Posted: Tuesday, January 29, 2013 - 12:11 AM UTC
Looks awesome, love the weathering. Too me the rope looks alittle to thick for the scale. But, you did a great job, well done
PantherF
Visit this Community
Indiana, United States
Joined: June 10, 2005
KitMaker: 6,188 posts
Armorama: 5,960 posts
Posted: Tuesday, January 29, 2013 - 02:01 AM UTC
Realistically, the crate on top of the stowage should not be there as it would fall off. I would place it somewhere around the stowage and use a smaller diameter rope.

Also, why do you have... is it fuel stains around and underneath the grousers? They would not have anything to do with any liquids as they are a vent. The fuel caps which WOULD have those fuel stains are just behind the turret ring on the rear deck.

Over all... this is a beautiful tank my friend! Love the weathering!


~ Jeff
MeowMix
Visit this Community
Metro Manila, Philippines
Joined: December 25, 2012
KitMaker: 34 posts
Armorama: 29 posts
Posted: Tuesday, January 29, 2013 - 02:18 AM UTC
Hi jeff. Thanks for the comments. Unfortunately research is where I need to improve. Ive built all my models without reference pictures so i would not know the parts of a specific tank. I tried googling for them but its a bit hard to obtain a clear copy of a tank.

On every model I build, I always aim to achieve something. This time I wanted to improve my weathering skills and I hope in the next few kits that i completed I would improve in historical accuracy aswell.
thewrongguy
Visit this Community
Ontario, Canada
Joined: October 17, 2002
KitMaker: 448 posts
Armorama: 306 posts
Posted: Tuesday, January 29, 2013 - 02:29 AM UTC
Both the sherman and the JS3 are really nice. If there is a model railroad shop near your place you might consider ordering some m.v lenses for the headlights. They're pretty inexpensive (50 cents a piece last time I bought them) and they add a lot to a sherman model.

Great work

Jeff
jowady
Joined: June 12, 2006
KitMaker: 1,027 posts
Armorama: 683 posts
Posted: Tuesday, January 29, 2013 - 03:10 AM UTC
This is your 8th kit? Wow! Very nice!
18Bravo
Visit this Community
Colorado, United States
Joined: January 20, 2005
KitMaker: 7,219 posts
Armorama: 6,097 posts
Posted: Tuesday, January 29, 2013 - 05:00 AM UTC
Very nice weathering! You've obviously read up on several techniques. As for your research abilities, try primeportal.net. You can often find what you you need there (though strangely not much on Shermans, especially Israeli ones)
I also the think the rope is a little thick. The good thing is doesn't have any fuzz on it. That can really kill the look of an otherwise good model.
On that decal, I think it may not have been sealed well before you added the wash. It looks as if it may have seeped underneath the decal. Easy fix next time, just seal it with a nice flat varnish of some sort. For now, I think you could just add a little mud there.
MeowMix
Visit this Community
Metro Manila, Philippines
Joined: December 25, 2012
KitMaker: 34 posts
Armorama: 29 posts
Posted: Tuesday, January 29, 2013 - 07:15 AM UTC
Thanks for the comments guys. I checked the website and it has a wide selection of reference photos. Thanks for sharing!

The rope is actually a tow cable that came with my tamiya js-3 kit. I wanted it to look like a steel rope that are being used on barges and some fishing boats but I failed and it just looked like a plain rope.
jowady
Joined: June 12, 2006
KitMaker: 1,027 posts
Armorama: 683 posts
Posted: Tuesday, January 29, 2013 - 09:35 AM UTC

Quoted Text

Thanks for the comments guys. I checked the website and it has a wide selection of reference photos. Thanks for sharing!

The rope is actually a tow cable that came with my tamiya js-3 kit. I wanted it to look like a steel rope that are being used on barges and some fishing boats but I failed and it just looked like a plain rope.


I think its better as plain rope, I haven't seen too many steel cables use to secure ephemera to Shermans.
 _GOTOTOP