_GOTOBOTTOM
Constructive Feedback
For in-progress or completed build photos. Give and get contructive feedback!
first atempt weathering spitfire
gavcarter
Visit this Community
United Kingdom
Joined: January 21, 2013
KitMaker: 45 posts
Armorama: 43 posts
Posted: Wednesday, January 30, 2013 - 02:45 PM UTC
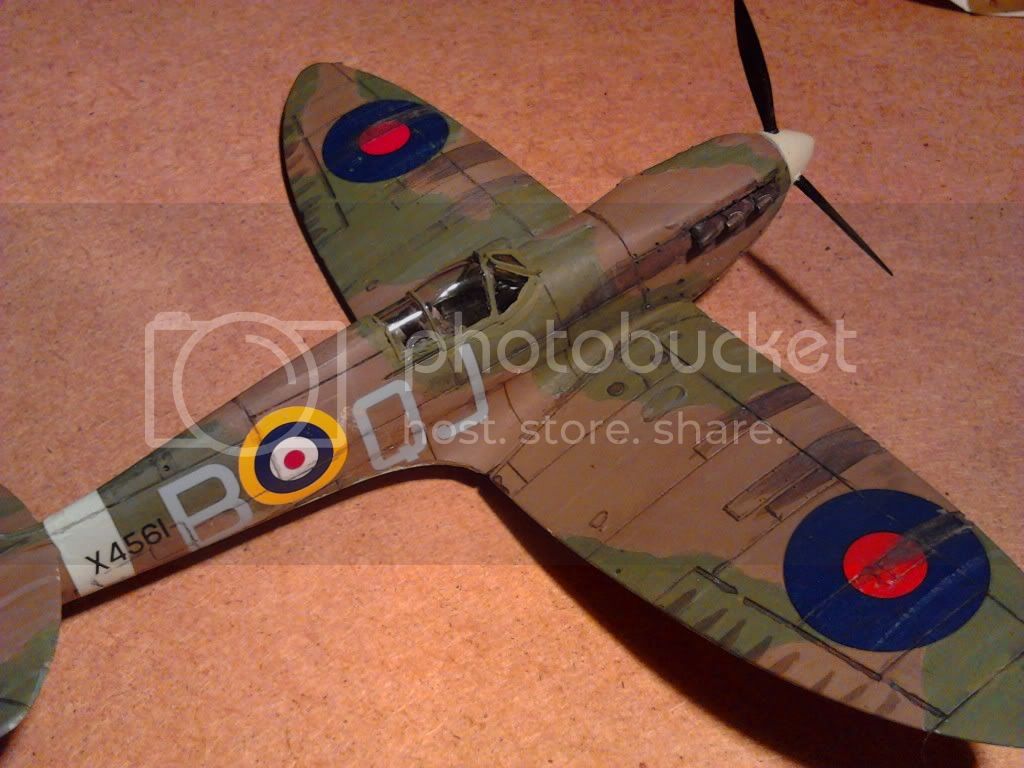
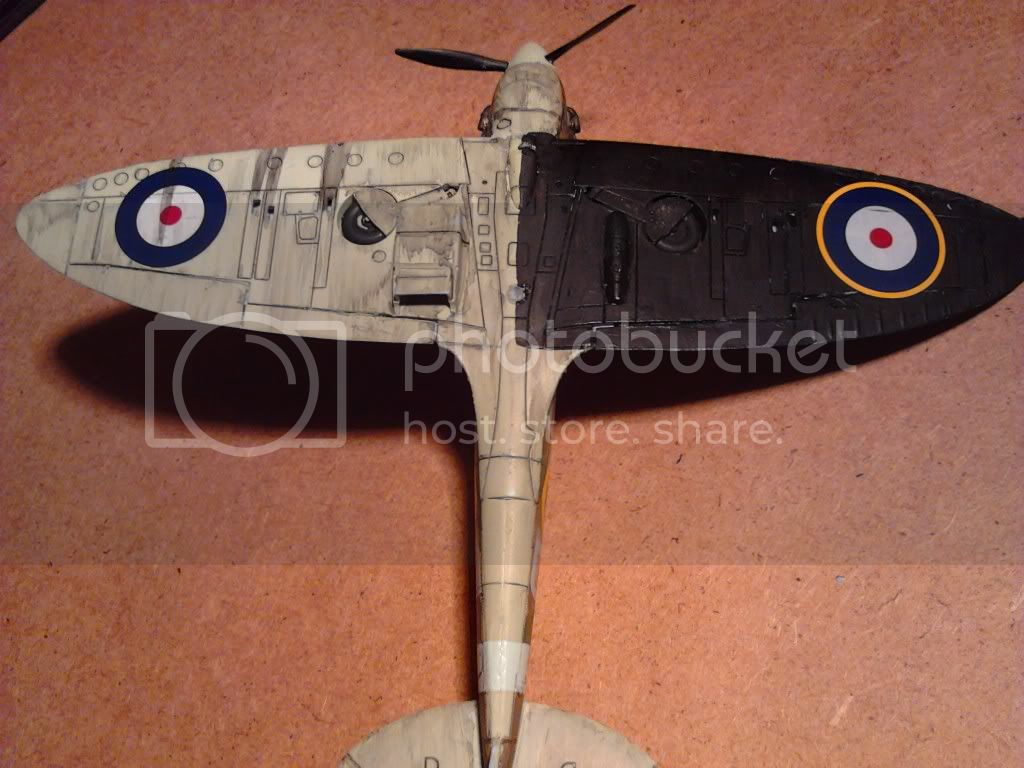
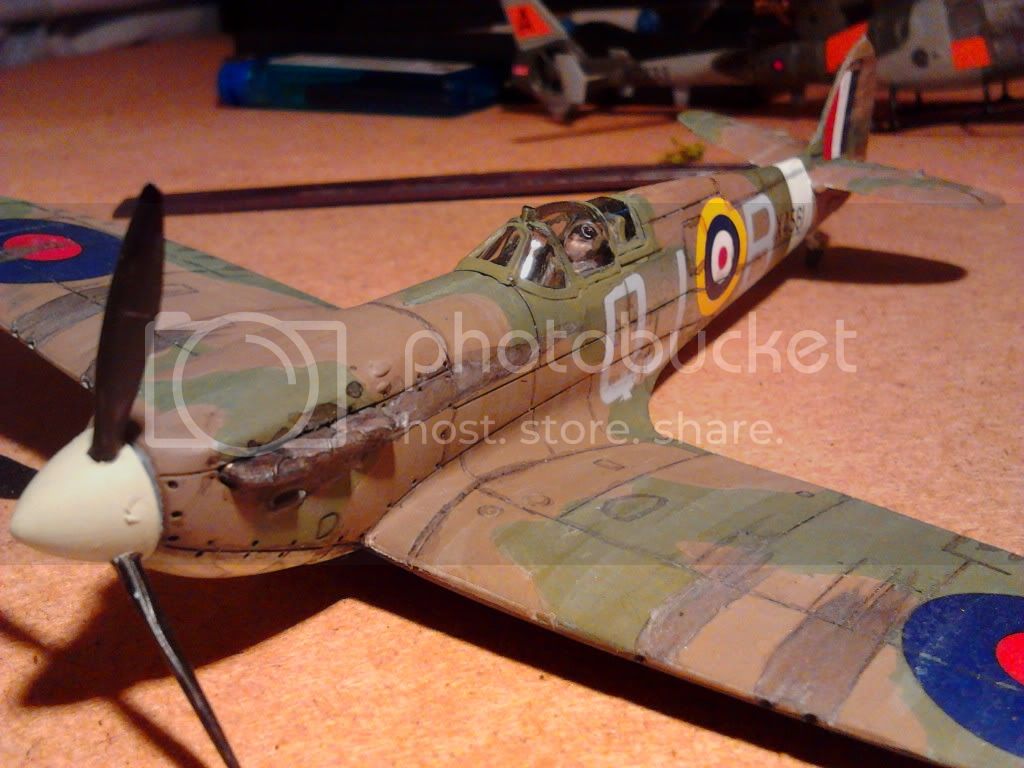
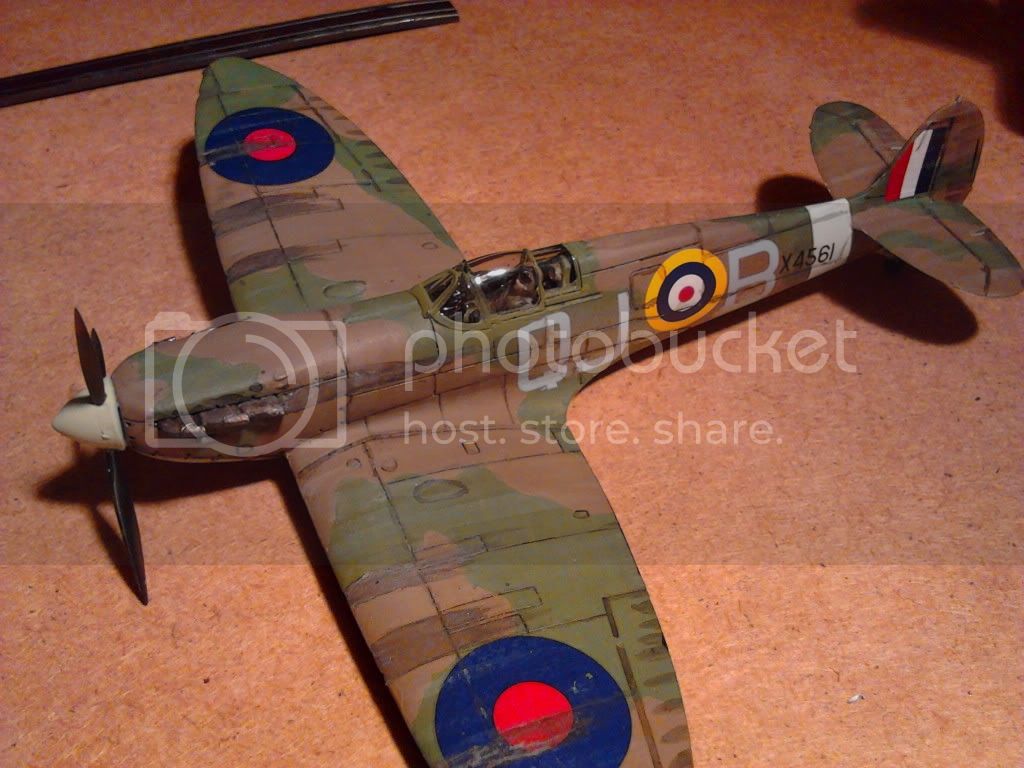
Here is my first attempt at weathering a spitfire. The camera has made the washes look darker then they are although i feel they are still slightly darker than ideal.
thewrongguy
Visit this Community
Ontario, Canada
Joined: October 17, 2002
KitMaker: 448 posts
Armorama: 306 posts
Posted: Wednesday, January 30, 2013 - 02:57 PM UTC
Looks pretty good, but maybe a touch over weathered. I believe that was a 38-40 scheme so probably would have been a fairly well maintained plane.

You might want to check out Armorama's sister site AeroScale.

AeroScale constructive feedback forum

Same usernames and passwords will work as this site.

Cheers


Jeff
Joel_W
Staff MemberAssociate Editor
AUTOMODELER
Visit this Community
New York, United States
Joined: December 04, 2010
KitMaker: 11,666 posts
Armorama: 1,143 posts
Posted: Saturday, February 02, 2013 - 05:48 AM UTC
There are some basic weathering issues that are fairly easy to correct.

Before any washes or filters are applied, all your weathering via paint/airbrush should be applied, then sealed with a gloss medium. As for the basic paint scheme, the black demarcation line on the bottom between the two wings should have been masked, and then the black airbrushed on the one wing. Once dry, use Pledge/Future to seal the paint and prepare the aircraft for decaling. After decaling, a 2nd heavy coat of Pledge is applied via a air gun to seal the decals, and blend them into the paint. Now you're ready to start the weathering process.

Your gun residue and engine exhausts would have a more realistic look if they were applied with a air brush before sealing. The paint mixture should be something in the order of 25/75.

Your pin washes both top and bottom should have been different colors. For the bottom I would have used the same color mixed with 75/25 or so with flat black. The top should be a darkish gray for a more subtle shadow effect.

An enamel base pin wash is applied by holding the line you want to have the pin wash run down in at a downward angle. Then with a small brush you just touch one spot in the panel recess and the wash will run down it a inch or so. Repeat till the whole area is done. Then go back using a Qtip moistened with Mineral Spirits to clean up any run off or puddling, by gently rubbing the areas. Try not to go over the panel lines as the Qtip will remove any of the wash it contacts.

Also use a pin wash on and around any rivets, vents, etc, and clean up with a Qtip.

I prefer to seal this layer with Testors Dullcoat. Once dry you can start to do your washes with either acrylic or enamel based paints. The Dot method works well for those streaks on the wings leading edge backwards. Once you're done, seal again with Testors Dullcoat.

Testors Dullcoat and Glosscoat are lacq1uer based, so proper ventilation and or a paint booth should be used.

Joel
gavcarter
Visit this Community
United Kingdom
Joined: January 21, 2013
KitMaker: 45 posts
Armorama: 43 posts
Posted: Saturday, February 02, 2013 - 06:15 AM UTC
Thanks for the advice joel, an airbrush is something i will have to invest it, but its tad expensive especially when you consider all the things to go with it, sprayable matt and gloss coats, paint thinners retarders etc.
Plus if i got an airbrush i HAVE to have new models to paint ha ha
Joel_W
Staff MemberAssociate Editor
AUTOMODELER
Visit this Community
New York, United States
Joined: December 04, 2010
KitMaker: 11,666 posts
Armorama: 1,143 posts
Posted: Saturday, February 02, 2013 - 06:36 AM UTC

Quoted Text

Thanks for the advice joel, an airbrush is something i will have to invest it, but its tad expensive especially when you consider all the things to go with it, sprayable matt and gloss coats, paint thinners retarders etc.
Plus if i got an airbrush i HAVE to have new models to paint ha ha


Gavin, You don't need an airbrush to paint aircraft models, just a different technique,but in either case you need a gloss and matt media. From what you said I gather that you never sealed the paint through the entire process.

You can apply A future based product with a soft, large paint brush, but puddling if not careful is always an issue. It's also easily correctable, but not get any is the way to go. Testors Model Master Dullcoat and Glosscoat come in spray cans.

To paint a model by hand, you're going to need to rub out each layer of paint till it's smooth. This will eventually remove all brush marks. Work is layers. Hand painting is much easier if your use a hobby acrylic primer like Tamiya's Gray primer that comes in spray cans as well. Keep in mind that rattle cans put out a lot of paint, so it builds up fast with little control.

Let each layer completely dry for a few days. Then using wet sandpaper, lightly rub with 400, then 600, then 1,200. Wipe down with a damp rag. Do not use Alcohol as you'll remove the paint. Repeat the color and process till you have a solid smooth coat. Then mask and move on to the next camo color. Repeat the process. Then finally do the bottom color.

For masking use only Tamiya masking tape.

This will take much longer then if you used an airgun, but results are amazing.

You can also use rattle cans for the entire painting process as Tamiya and Testors have a pretty decent line of paints, but not all the colors you'll ever need. You could use a combination of both.

I would really look into a decent single action, siphon type airbrush and a compressor from a local hardware chain store. Make sure it has a regulator and air tank.

Joel
gavcarter
Visit this Community
United Kingdom
Joined: January 21, 2013
KitMaker: 45 posts
Armorama: 43 posts
Posted: Saturday, February 02, 2013 - 07:31 AM UTC
I have a small compressor but it has no tank, the only thing i have with a tank is a 2hp one for air tools etc it is a bit loud for moddelling. I dont get time to do the rubbing down method i only get an hour here and there so it would yake a fortnight to do a single colour. I will try and get a regulator and a cheap double action air brush and see how things go with that. As for the pledge i may well skip that and just use a normal acylic gloss, there are so many threads on future and klear changing or being the wrong one the gloss coat may be a safer bet.
Joel_W
Staff MemberAssociate Editor
AUTOMODELER
Visit this Community
New York, United States
Joined: December 04, 2010
KitMaker: 11,666 posts
Armorama: 1,143 posts
Posted: Saturday, February 02, 2013 - 09:08 AM UTC
Gavin, for years I used a small hobby compressor with no tank until I bought a new one with tank and compressor. Don't buy a cheap airbrush, they're next to useless and will cause you all sorts of grief. You can get a Paasche 1H single action gun with the complete kit for under $100. Mine lasted 40 years until I replaced it a few years ago with a new one.

You can't look at the correct method to hand paint as taking to long. The whole sanding process might take you 1 hour or two per coat. These are very lite sandings. The whole idea is to remove the brush marks, and smooth the paint. I would even suggest that before you do a model, practice hand painting some scrap sheet plastic. then sand though the 3 courses of paper I suggested.

Pledge or whatever commercial product is straight Future works perfectly. The issues in many threads here is acrylic flats that stay milky when they dry. Future doesn't do that as it's a gloss. Like I said, you can use Testors Model Master Glosscoat and Dullcoat from a rattle can. Just remember that they're lacquer based.

Keep in mind that this hobby isn't about how many models you build in a years time, but how well your built models turn out. I saw a video last year of a Japanese modeler that only hand brushes. He built and painted a 1/32 scale Zero, hand painted the markings, weather it, and it came out perfect. That should be your goal. Not saying that this is the best I can do because I don't have the equipment nor the time to build, paint, and finish all my models to a higher level.

Just think about it. You should set a standard for yourself, then when you reach it after a few builds, it's time to raise the bar. That's how you progress and become a better modeler.

Here's one other modeling story that still amazes me to this day. There is a race car modeler in Britain that builds 1/8 scratch built Porsche race cars. Completely detailed to the last nut and bold. His models take about 3 years each, and are literally exact miniatures of the read deal. He has a tremendous skill level for sure that he's attained over the years. But the part of this story that should inspire you is that he doesn't own nor use a single power tool other then a regular electric drill!! He doesn't own an air brush. All his jigs are made from LEGOS !!

It's the end results that count.
Joel

gavcarter
Visit this Community
United Kingdom
Joined: January 21, 2013
KitMaker: 45 posts
Armorama: 43 posts
Posted: Saturday, February 02, 2013 - 10:36 AM UTC
I may treat myself to one of the starter airbrushes from iwata or harder n steenbeck. They both do an entry level dual action for around 60pounds. Paasche seem a bit thin for choice and availabilty in the uk ( ive only had a quick search like) but i would expect them to be a lot better than the cheap unbranded ones. I have done a fair bit of spraying hence the 2hp compressor but its been motorbikes, scooters and car parts etc, i will give the rubbing down a go on an old model and usr it as an opportunity to straighten some parts of it out.
Some good stories and info in your last few posts joel thanks for taking the time to reply.
Gav
Joel_W
Staff MemberAssociate Editor
AUTOMODELER
Visit this Community
New York, United States
Joined: December 04, 2010
KitMaker: 11,666 posts
Armorama: 1,143 posts
Posted: Saturday, February 02, 2013 - 11:12 AM UTC
Gavin, just trying to help out another fellow modeler. I've have more then my fair share of help in more then 40 years of modeling. I also have a brother who shares both hobbies of plastic modeling (he's into 1/32 scale airplanes), and photography with me.
Joel
 _GOTOTOP