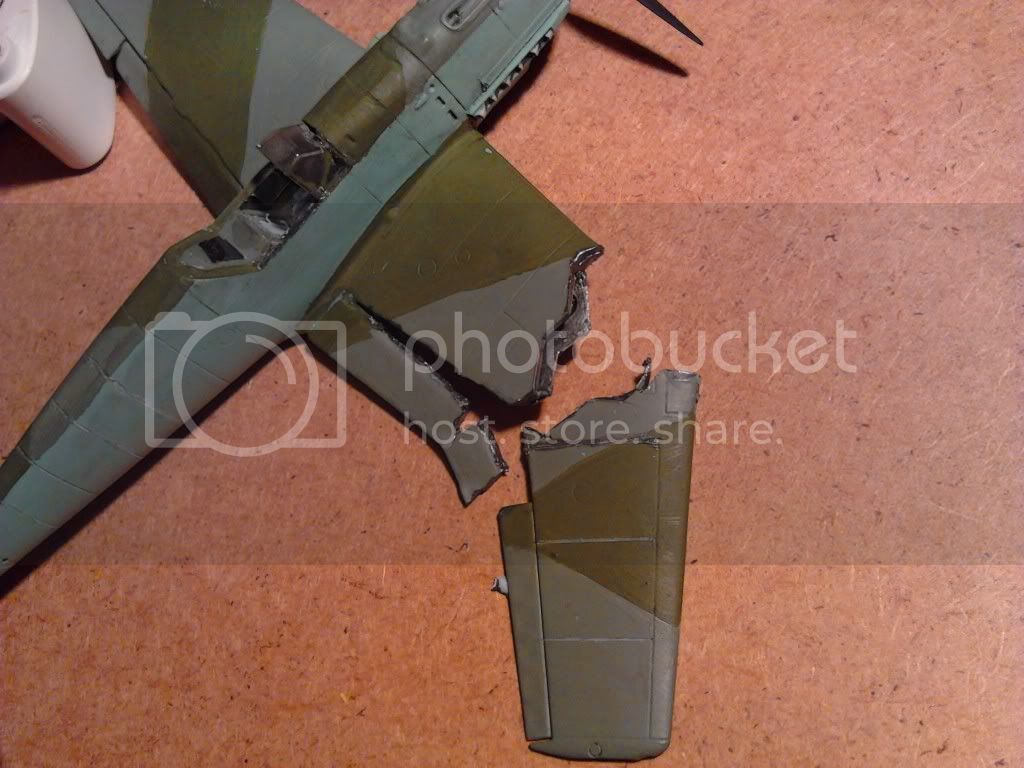
I have my very first here i did such a bad job on it i decided to scrub the stickers off touch up the naff camo job then rip off the canopy and snap the wing with the help off a sharp knire and wire cutters. The plan is to cover up the bad build and paint job by having this plane filled with bullet holes in mid break-up and the spitfire chasing it down. I also want to add the pilot ejecting but will focus on plane first.
I will do this thread as a build log because it will be a good learning curve for me providing some members are willing to follow the thread and give me guidance and advice through the build.
I have painted the edges of broken wing in a metallic silver to try and simulate the unpainted metal, you can see in first pic the angle i was thinking of joining the peice i also think there should be some wires or pipes between the two section? All comments welcome this is the first kit ive built in over ten years
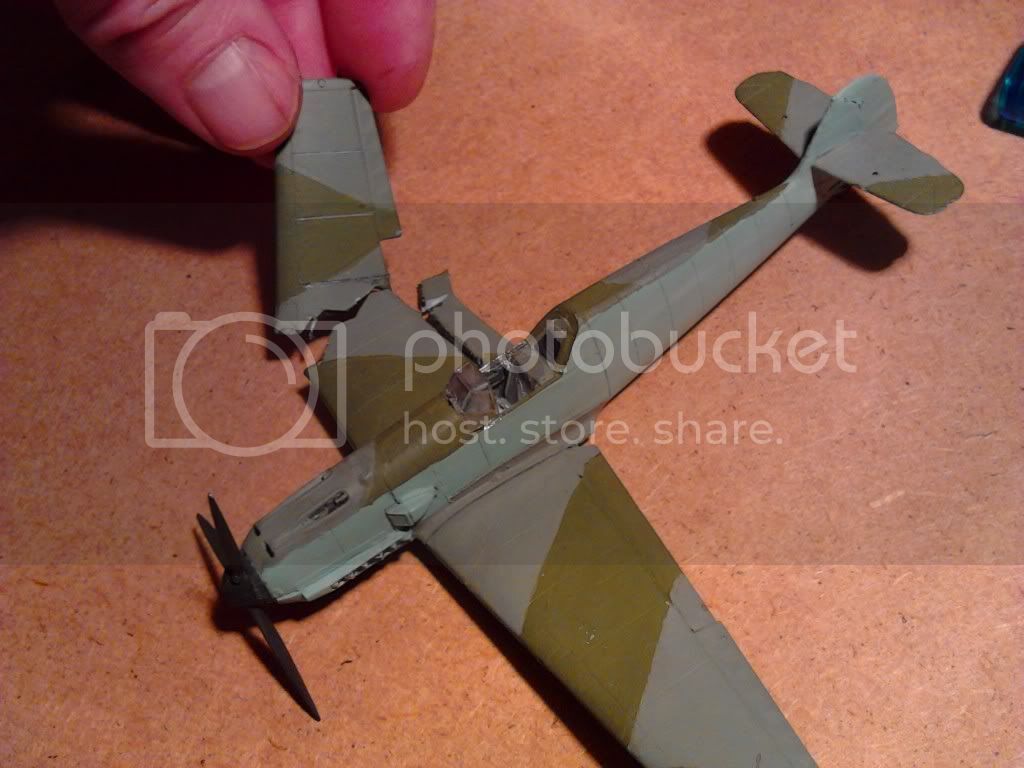
(im 28 so even when i was doing them regulary i was 12 and they were crap lol)
Constructive Feedback
For in-progress or completed build photos. Give and get contructive feedback!
Hosted by Darren Baker, Dave O'Meara
messershmidt dogfight ejection
gavcarter
United Kingdom
Joined: January 21, 2013
KitMaker: 45 posts
Armorama: 43 posts
Joined: January 21, 2013
KitMaker: 45 posts
Armorama: 43 posts
Posted: Wednesday, January 30, 2013 - 03:08 PM UTC
panzerman1
Maryland, United States
Joined: September 30, 2010
KitMaker: 430 posts
Armorama: 291 posts
Joined: September 30, 2010
KitMaker: 430 posts
Armorama: 291 posts
Posted: Wednesday, January 30, 2013 - 08:05 PM UTC
Great idea...ambitious too. I like the concept....turning a fault to a fabulous.
Might try thinning the edges along the break, also some spars and broken beams jutting out along the break would add to the illusion.
Wish you the Best of Luck with the build. Bill.
Might try thinning the edges along the break, also some spars and broken beams jutting out along the break would add to the illusion.
Wish you the Best of Luck with the build. Bill.
Joel_W
Associate Editor
New York, United States
Joined: December 04, 2010
KitMaker: 11,666 posts
Armorama: 1,143 posts
Joined: December 04, 2010
KitMaker: 11,666 posts
Armorama: 1,143 posts
Posted: Friday, February 01, 2013 - 04:23 AM UTC
Gavin, I'm a little confused as to why you're posting a aircraft build in the armor constructive feedback sub forum. KitMaker Network hosts the AeroScale forums for aircraft modeling.
While I understand your reasoning for changing focus and doing a diorama with the ME109E coming apart from air combat, I think you would have been better off going back, and trying to redo your basic building and painting errors. After all, you're going to have the issues with your next build.
I can't see any real building errors except how the canopy is fitted, glued, and blended into the fuselage contours. Also your hard edged camo pattern has a lot of bleed through caused by the paint running under your masking medium. I would suggest Tamiya masking tape, then a coat of of Testors Glooscoat to seal the edges. Then paint the camo color. Repeat as necessary. You'll get a perfect edge every time. If you don't want to go through the Gloss step, make sure that you burnish down the edges of the tape, and mist on the camo color lightly so it will seal the edge. Then fill in the areas.
Some weathering on the exhaust manifolds, the MG, and prop would go a long way as well.
Joel
gavcarter
United Kingdom
Joined: January 21, 2013
KitMaker: 45 posts
Armorama: 43 posts
Joined: January 21, 2013
KitMaker: 45 posts
Armorama: 43 posts
Posted: Friday, February 01, 2013 - 06:56 AM UTC
To honest i didnt realise aircraft were meant to go on the other site lol i am on a mobile so what might be blatantly obvious on a desktop might be obscured or hidden on my mobile. Sorry for the confusion
Joel_W
Associate Editor
New York, United States
Joined: December 04, 2010
KitMaker: 11,666 posts
Armorama: 1,143 posts
Joined: December 04, 2010
KitMaker: 11,666 posts
Armorama: 1,143 posts
Posted: Friday, February 01, 2013 - 07:17 AM UTC
Gavin, I only suggested AeroScale as you will get a lot more feedback.
Joel
Joel
gavcarter
United Kingdom
Joined: January 21, 2013
KitMaker: 45 posts
Armorama: 43 posts
Joined: January 21, 2013
KitMaker: 45 posts
Armorama: 43 posts
Posted: Friday, February 01, 2013 - 07:30 AM UTC
Oh right, i thought i had missed some forum rules or something
Joel_W
Associate Editor
New York, United States
Joined: December 04, 2010
KitMaker: 11,666 posts
Armorama: 1,143 posts
Joined: December 04, 2010
KitMaker: 11,666 posts
Armorama: 1,143 posts
Posted: Friday, February 01, 2013 - 08:44 AM UTC
Quoted Text
Oh right, i thought i had missed some forum rules or something
Garvin, no rule about it as far as I know.
Joel