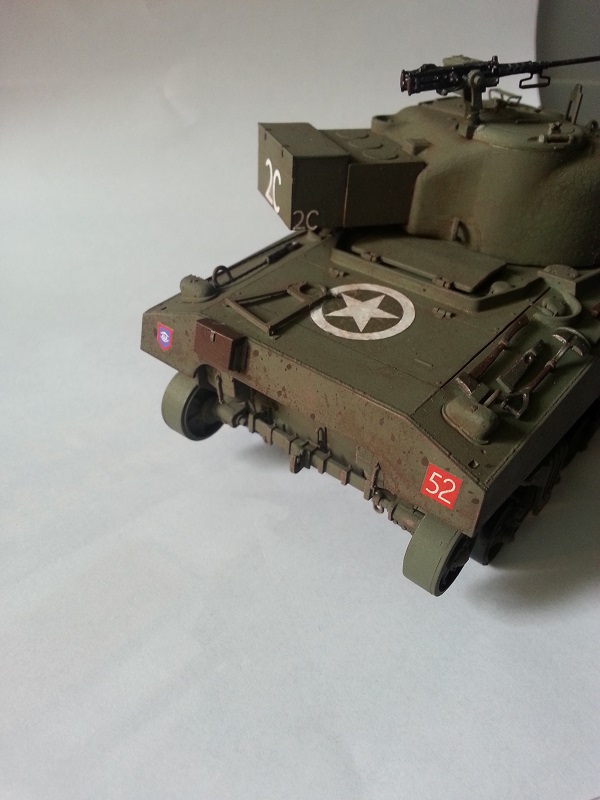
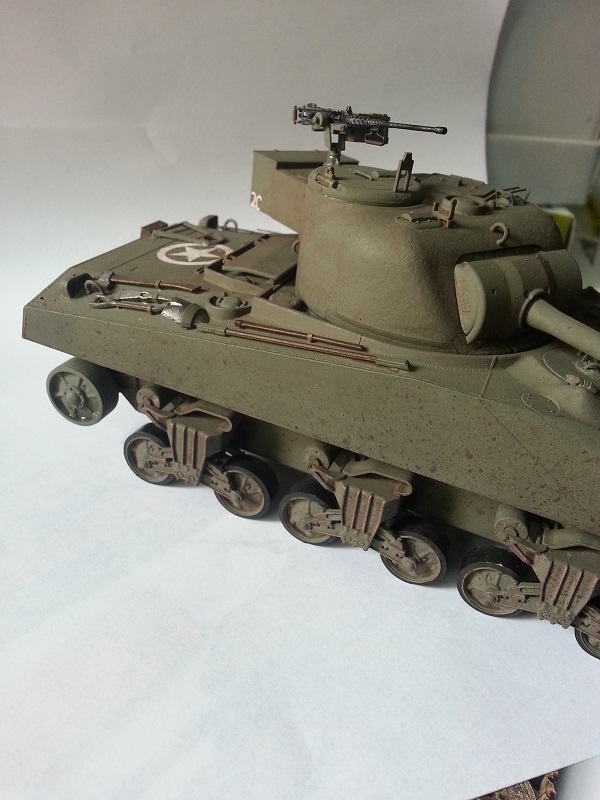
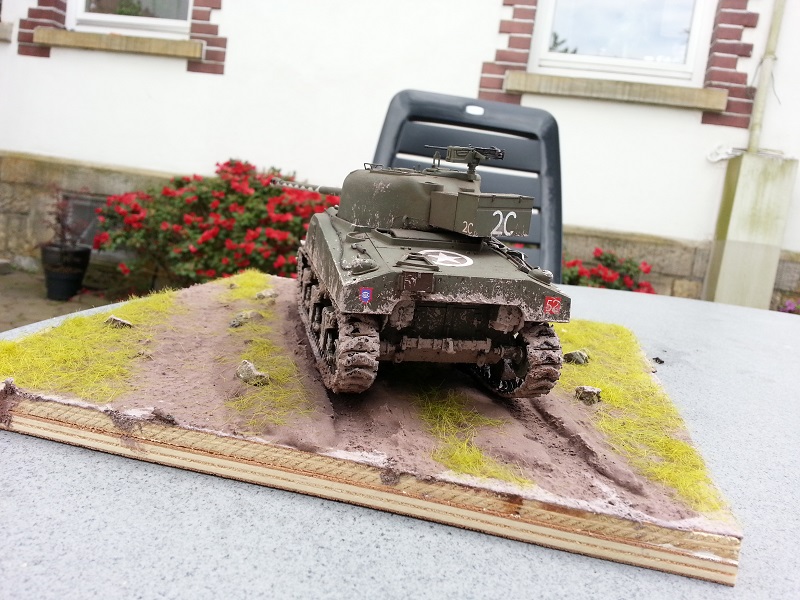
So about 6 months ago I picked up this amazing hobby and here i'm nearing the final stages of my first model.
Dragon's 1/35 Sherman Mk.Ic Firefly Hybrid.
Even though it has taken alot longer to complete that I would have liked due to other RL commitments as well as plenty of modelling research inbetween stages, I've enjoyed the kit immensely.
All that's left to do is to tackle the horrible (imo) one piece tracks and then pick up some pigments and such to give the weathering more texture and dimension as i'm not happy with the pure paint approach.
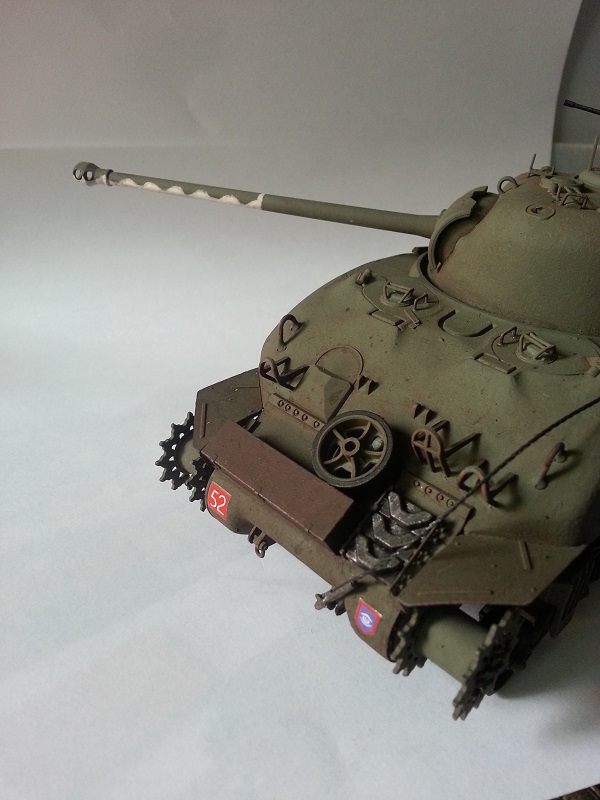
I would love to hear any feedback, tips and criticisms from you more experienced modelmakers as my next project is already on the table !
Constructive Feedback
For in-progress or completed build photos. Give and get contructive feedback!
Hosted by Darren Baker, Dave O'Meara
1/35 Sherman Firefly, my humble beginnings
IamTJones
Niedersachsen, Germany
Joined: May 12, 2013
KitMaker: 128 posts
Armorama: 125 posts
Joined: May 12, 2013
KitMaker: 128 posts
Armorama: 125 posts
Posted: Monday, May 13, 2013 - 04:08 AM UTC
Panzer-Ole
Kobenhavn, Denmark
Joined: August 27, 2006
KitMaker: 155 posts
Armorama: 145 posts
Joined: August 27, 2006
KitMaker: 155 posts
Armorama: 145 posts
Posted: Monday, May 13, 2013 - 07:40 AM UTC
Du did a great job with that Sherman, especially since this is your first model.
Things you could consider for your next project is:
Use of photoetch for light guard
More use of filters or bigger colour variation of the green. E.g more pale green on the vertical surfaces due to sun reflection
Use of satin varnish instead of matt varnish
I would also suggest photos of the whole tank and not just part of it.
Looking forward to see the Firefly after pigment treatment
Br Ole
retiredyank
Arkansas, United States
Joined: June 29, 2009
KitMaker: 11,610 posts
Armorama: 7,843 posts
Joined: June 29, 2009
KitMaker: 11,610 posts
Armorama: 7,843 posts
Posted: Monday, May 13, 2013 - 07:52 AM UTC
You definitely need more color variation. But, the weathering is very good! I would suggest a little more wear on the road wheels. The mg should not sit level. The breach should be angled downward. I'm interested to see you finish, this one.
IamTJones
Niedersachsen, Germany
Joined: May 12, 2013
KitMaker: 128 posts
Armorama: 125 posts
Joined: May 12, 2013
KitMaker: 128 posts
Armorama: 125 posts
Posted: Monday, May 13, 2013 - 08:25 AM UTC
Thanks guys! I know the green is very monotonous, something I definitely want to avoid in the future by use of more layers of different shades.
@Ole: I sadly steared away from most of the PE with this one as after 2-3 very frustrating attempts I wanted to move on instead of linger. Something I've already overcome with my second build actually. And I will definitely include full body shots next time
@Matt: If you mean the breech of the MG then that isn't a problem since the part is on a movable hinge. I will take another shot at the roadwheels though thanks!
Now I have another direct questions for you guys, can anybody suggest some kind of clear coat spray I can use to seal the paint and more importantly the transfers? I'm scared that they will slide about when I continue weathering.
retiredyank
Arkansas, United States
Joined: June 29, 2009
KitMaker: 11,610 posts
Armorama: 7,843 posts
Joined: June 29, 2009
KitMaker: 11,610 posts
Armorama: 7,843 posts
Posted: Monday, May 13, 2013 - 08:32 AM UTC
Apply a clear coat. If you haven't applied a gloss coat over the transfers, I would recommend Pledge Future floor polish. I don't know what it is called, in Germany. After it has dried for 48 hours, you can apply a flat coat. I use MM clear flat or Testors dull coat.
pseudorealityx
Georgia, United States
Joined: January 31, 2010
KitMaker: 2,191 posts
Armorama: 1,814 posts
Joined: January 31, 2010
KitMaker: 2,191 posts
Armorama: 1,814 posts
Posted: Monday, May 13, 2013 - 09:10 AM UTC
I think you've done very well for your first model.
As far 'needing' more color variation, that's up to you. They painted the real thing in only 1 color. "Old school" techniques like a basic pin wash will start to pull details out.
The MG had a spring equibrilator that would allow the MG to sit at various angles. If anything, the barrel should probably nose down.
The small "J" shaped bracket on the top of the turret is reversed 180 degrees. The taller part should be towards the rear.
The working surface of the idler wouldn't have any paint on it. I like to rub a pencil on the entire surface to make it look like worn steel.
The long tool on the right side was a large pry bar, and would be steel, not wood.
exer
Dublin, Ireland
Joined: November 27, 2004
KitMaker: 6,048 posts
Armorama: 4,619 posts
Joined: November 27, 2004
KitMaker: 6,048 posts
Armorama: 4,619 posts
Posted: Monday, May 13, 2013 - 09:13 AM UTC
No need to be humble at all. As Jesse says it's great work for a first model. Look forward to seeing more Shermans from you
IamTJones
Niedersachsen, Germany
Joined: May 12, 2013
KitMaker: 128 posts
Armorama: 125 posts
Joined: May 12, 2013
KitMaker: 128 posts
Armorama: 125 posts
Posted: Monday, May 13, 2013 - 10:04 AM UTC
@Jesse & Pat: Thanks to both of you! And especially thanks for the tips Jesse, I'll be sure to correct the pry bar and Idlers, maybe even the "j" bracket if I can remove it without damage.
martyncrowther
England - West Midlands, United Kingdom
Joined: September 12, 2007
KitMaker: 1,548 posts
Armorama: 1,407 posts
Joined: September 12, 2007
KitMaker: 1,548 posts
Armorama: 1,407 posts
Posted: Wednesday, May 15, 2013 - 11:20 AM UTC
Het Tristan great work on your Sherman I like the weathering.
Good to see another 21 year old on here.
Martyn
Good to see another 21 year old on here.
Martyn
IamTJones
Niedersachsen, Germany
Joined: May 12, 2013
KitMaker: 128 posts
Armorama: 125 posts
Joined: May 12, 2013
KitMaker: 128 posts
Armorama: 125 posts
Posted: Wednesday, May 22, 2013 - 11:27 AM UTC
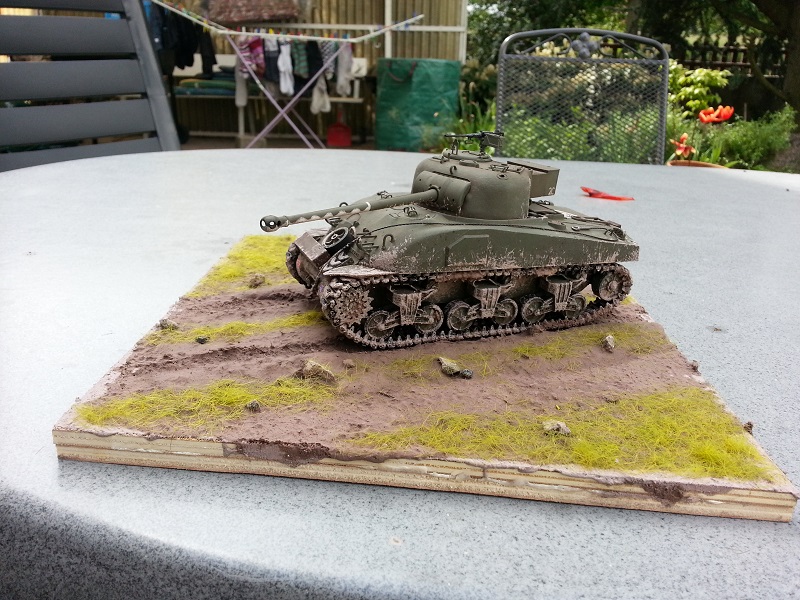
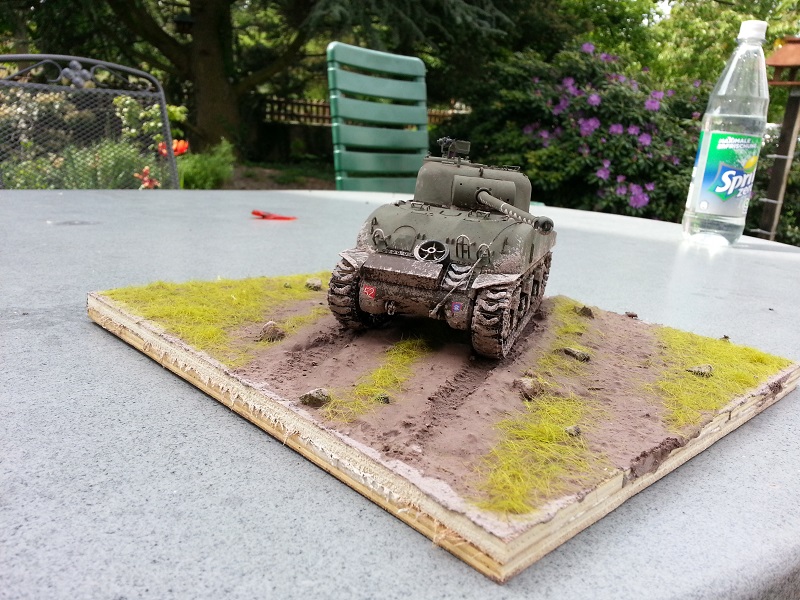
Small update: I've added liberal amounts of mud to the sherman aswell as carrying out a few minor detail fixes as were pointed out by you great folks.
I've also knocked up my first model base, not totally finished yet. I still want to add some different shades of grass in to break of the monotony as well as sand and smooth the edges of the base but i'm really proud at how the home made mud ground came out.
I'm also ordering some British tank riders and some on patrol to finish the small scene. Anyway enough chat, more photos!
As always, any feedback is greatly welcomed.
Tristan
retiredyank
Arkansas, United States
Joined: June 29, 2009
KitMaker: 11,610 posts
Armorama: 7,843 posts
Joined: June 29, 2009
KitMaker: 11,610 posts
Armorama: 7,843 posts
Posted: Thursday, May 23, 2013 - 12:28 AM UTC
Well done!
PantherF
Indiana, United States
Joined: June 10, 2005
KitMaker: 6,188 posts
Armorama: 5,960 posts
Joined: June 10, 2005
KitMaker: 6,188 posts
Armorama: 5,960 posts
Posted: Thursday, May 23, 2013 - 12:47 AM UTC
Better than anything I could put out! Love the mud too.
I mostly like the "Gate Guard" look.
~ Jeff
I mostly like the "Gate Guard" look.
~ Jeff
IamTJones
Niedersachsen, Germany
Joined: May 12, 2013
KitMaker: 128 posts
Armorama: 125 posts
Joined: May 12, 2013
KitMaker: 128 posts
Armorama: 125 posts
Posted: Thursday, May 23, 2013 - 10:27 AM UTC
Thanks guys I'm glad you like it, damn this modelling is addictive.