Hi everybody,
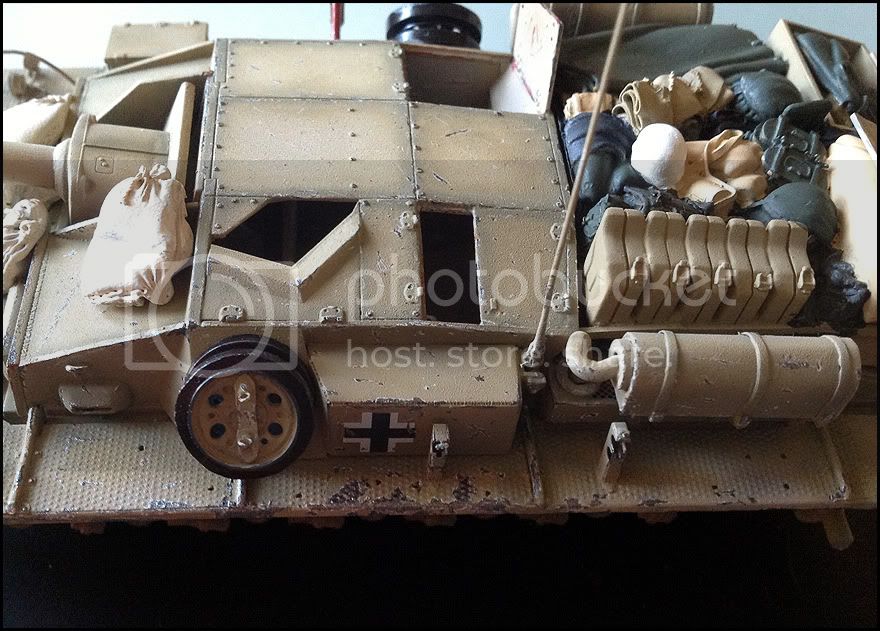
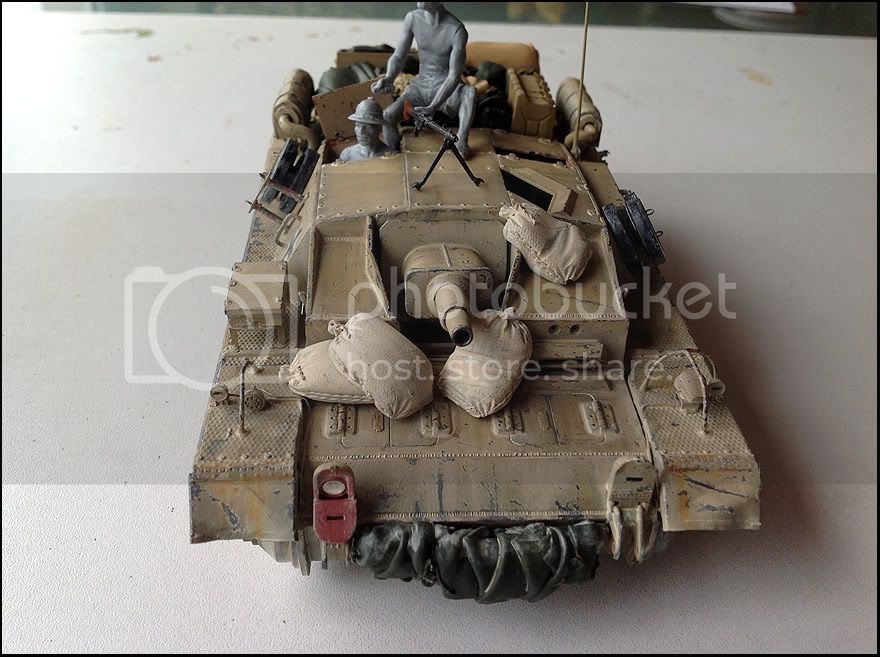
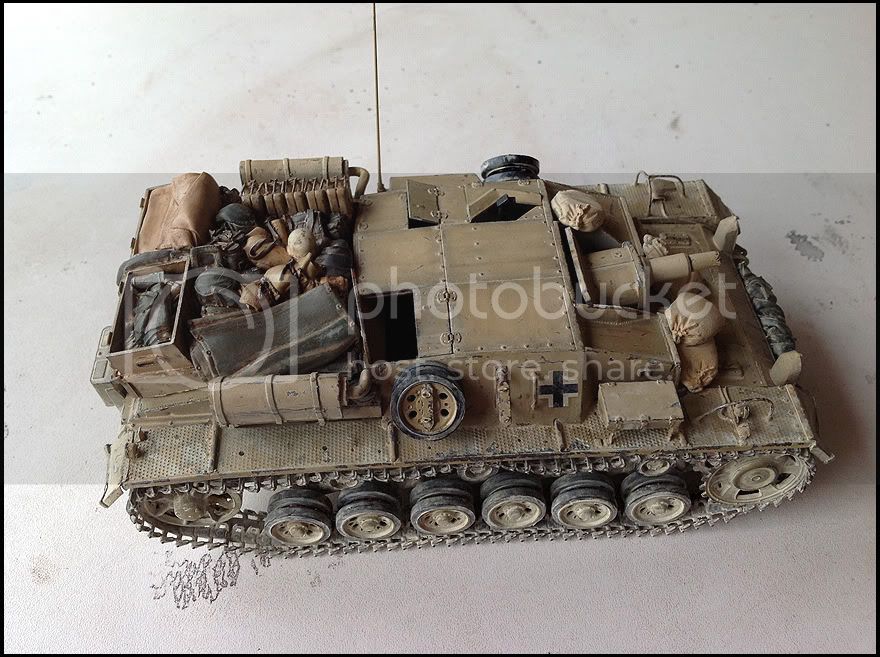
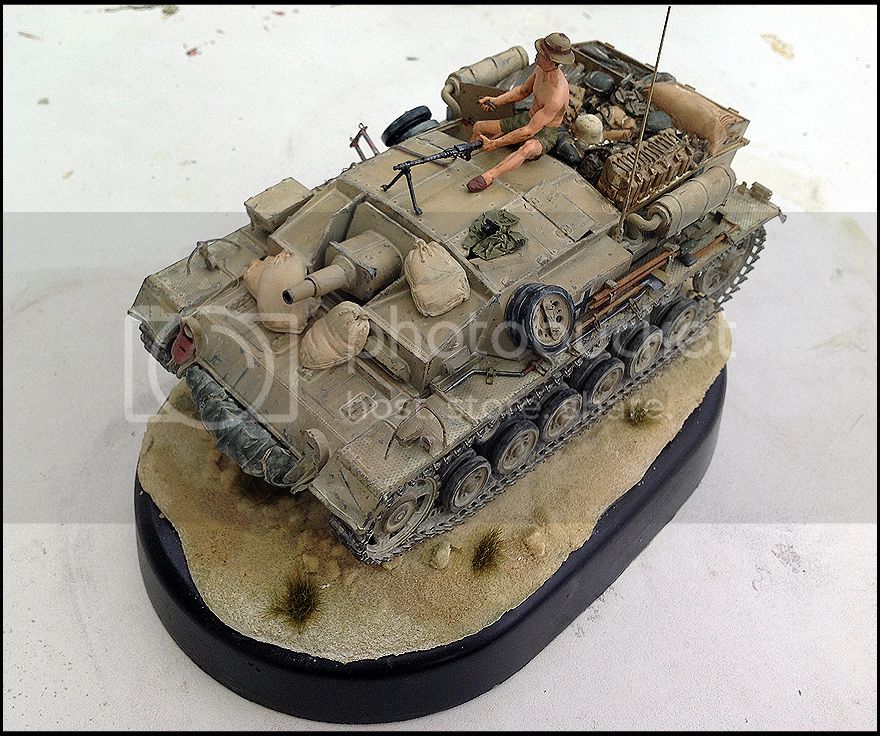
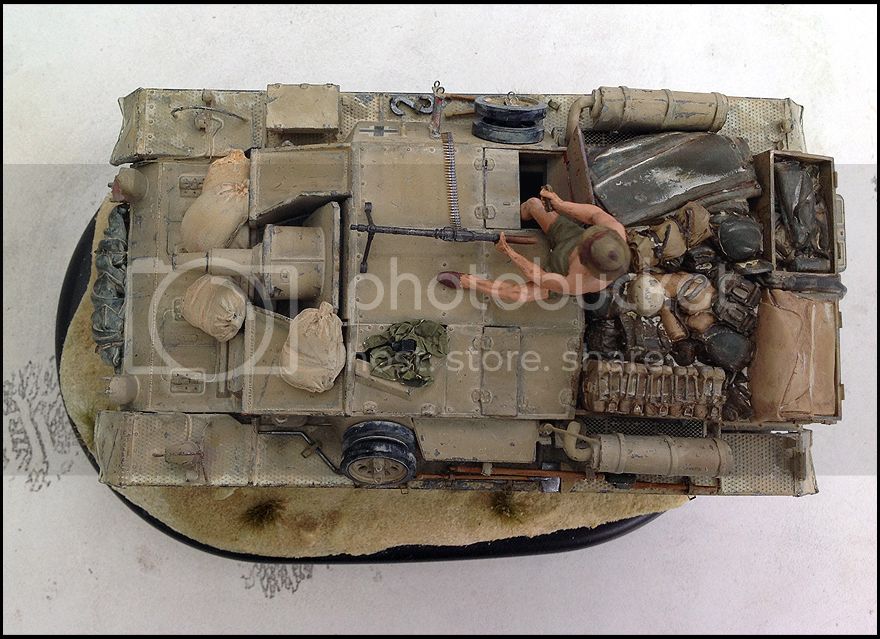
I gained the courage needed to post one of my ongoing WIP's -- Dragon's old StuG III C/D revamped into one of them elusive DAK short-barelled StuG's from z.V.B. 288.
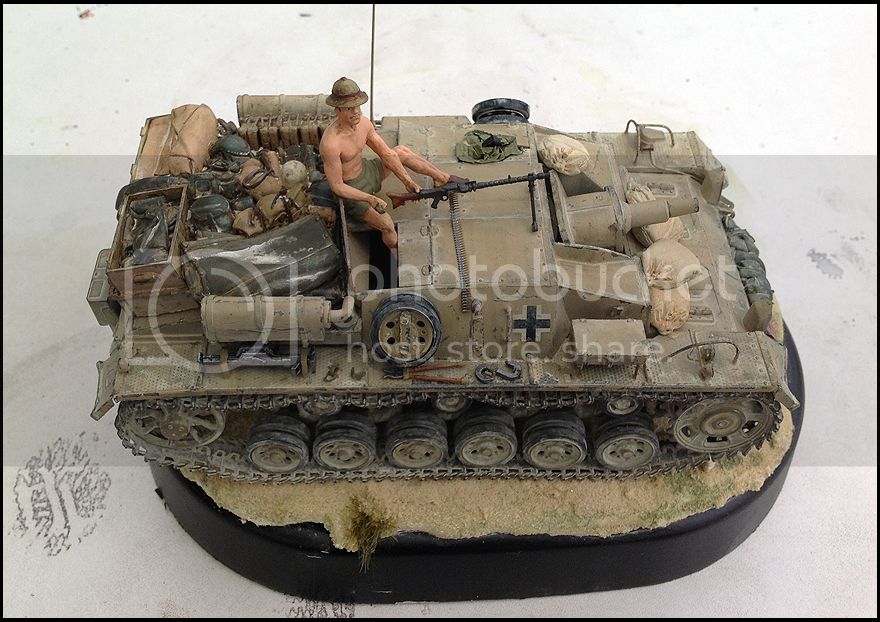
Besides the actual model itself, I used also Eduard's photo etch package, a metal barrel from RB, an antenna from RB, quite a bit of resin from Black Dog (primarily their StuG kurz package, a bit from their Pz.Kpfw. III stuff), and quite a bit of scratchbuilding. On the scratchbuilding side, I made out of thin metal and other assorted pieces the sand filters, the wiring of the headlights and their protection, and the points for attachment the extra roadwheels. Finally, I took one of the MiniArt DAK figures and an MG34 from another Dragon kit.
The project is in a pretty advanced stage, a few finishing things here and there (i.e. the neck of the figure, the luggage at the rear deck needs some more treatment, painting the stop lights, stuff like this). I'll also post a few earlier images, just to keep the story going.
So here's an early one, still assembling:
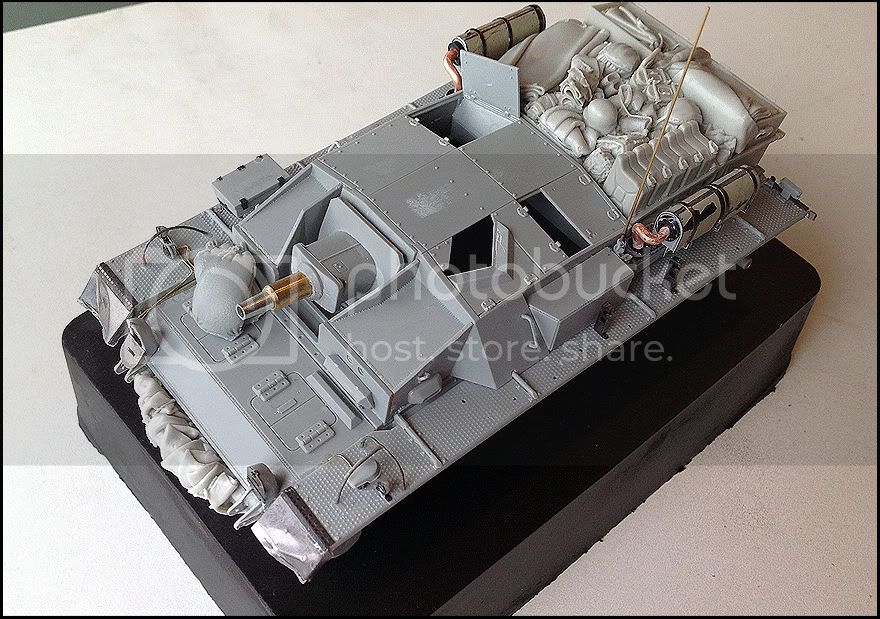
First painting pass and post-shading. I used Tamiya acrylics:
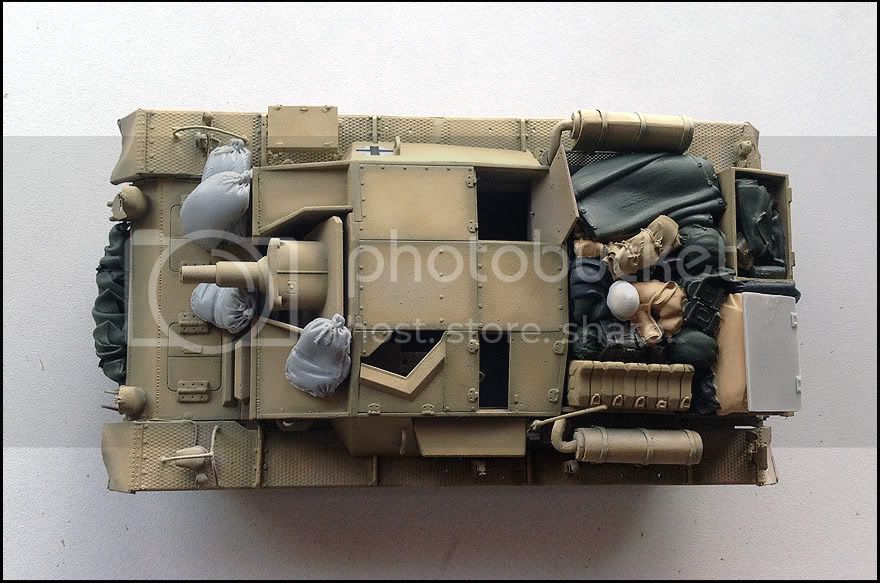
First test of the chipping -- all hand-painted:
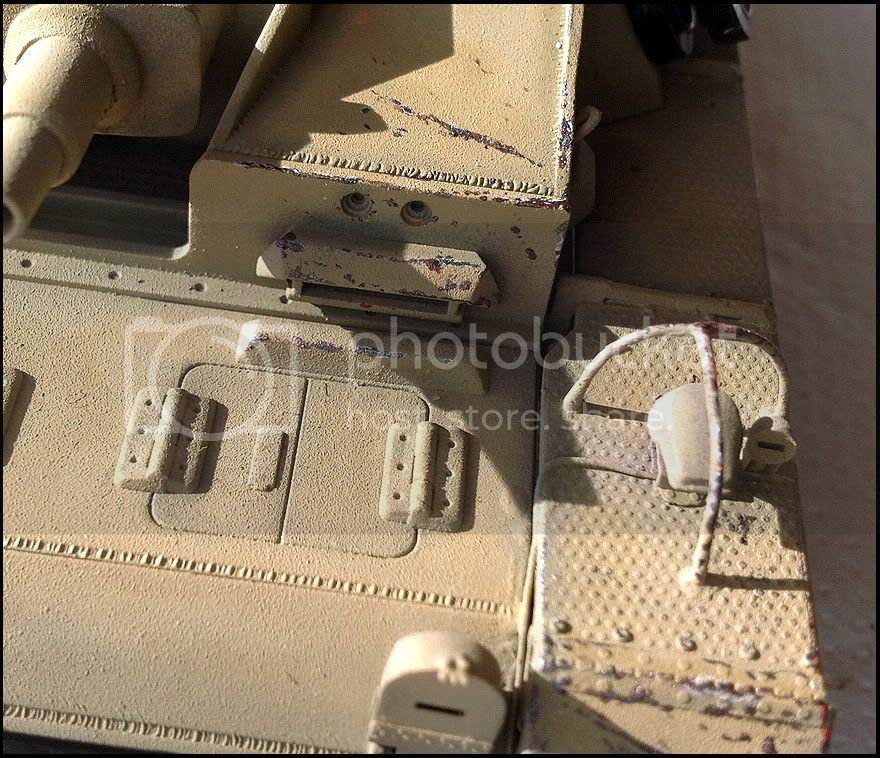
First weathering pass. At this point I was considering two figures, but as I am not particularly happy with my figure painting skills, I dropped one of them. For the weathering I used primarily AK/Mig filters and washes:
Second weathering pass, with the tracks on. This one was mainly AK/Mig pigments:
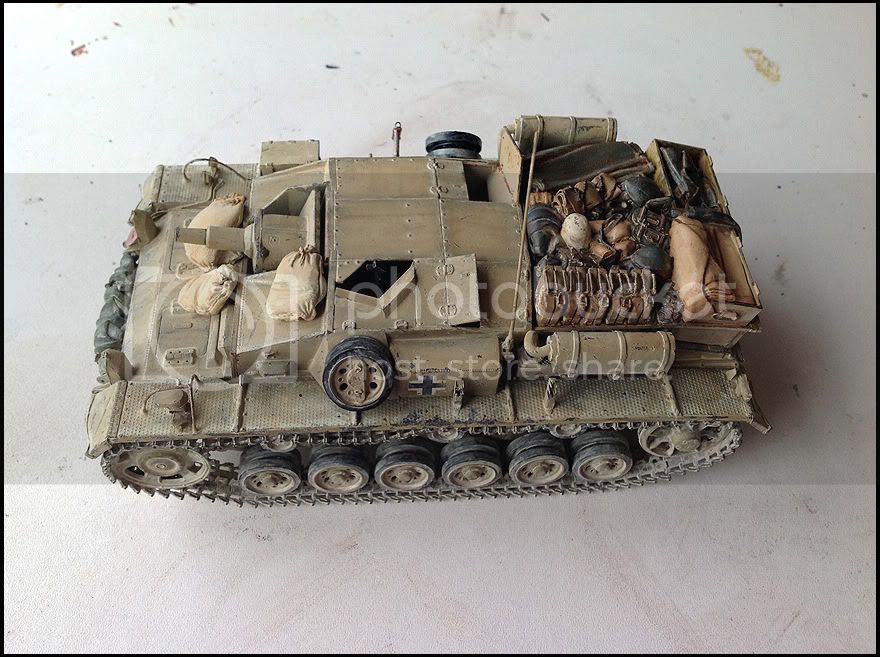
And finally, the current state of the project, with a small base for the model as well. The tools are also on:
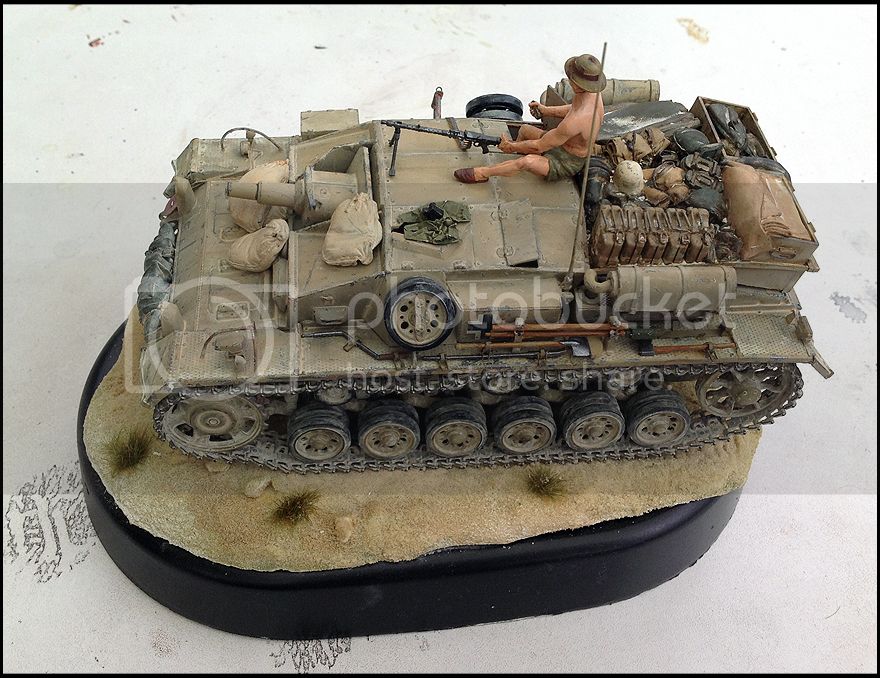
Thank you very much for your time and attention -- any and all comments would be most welcome! I still consider myself young and inexperienced in the hobby (alas, just in the hobby ) so all opinions and recommendations will be really appreciated.
Ivan/D4
Constructive Feedback
For in-progress or completed build photos. Give and get contructive feedback!
Hosted by Darren Baker, Dave O'Meara
StuG III Ausf.C/D DAK 1/35
Drone04
Sofiya, Bulgaria
Joined: July 03, 2010
KitMaker: 51 posts
Armorama: 48 posts
Joined: July 03, 2010
KitMaker: 51 posts
Armorama: 48 posts
Posted: Thursday, May 30, 2013 - 03:51 AM UTC
panzerconor
Massachusetts, United States
Joined: February 08, 2012
KitMaker: 1,271 posts
Armorama: 1,253 posts
Joined: February 08, 2012
KitMaker: 1,271 posts
Armorama: 1,253 posts
Posted: Thursday, May 30, 2013 - 05:49 AM UTC
This is awesome! Love how you painted it & the AK/Mig stuff really is great. And I wouldn't bash your figure painting skills hahaha. Looks great
-Conor
-Conor
Lateral-G
United States
Joined: November 25, 2007
KitMaker: 96 posts
Armorama: 89 posts
Joined: November 25, 2007
KitMaker: 96 posts
Armorama: 89 posts
Posted: Thursday, May 30, 2013 - 06:34 AM UTC
Very nice!
The figure looks fine. I was afraid of painting figures too. I just kept at it. Now they don't scare me as much as they used to.
Posted: Thursday, May 30, 2013 - 06:48 AM UTC
Very nice Ivan, the figs look fine to me.
Pete
Pete
Drone04
Sofiya, Bulgaria
Joined: July 03, 2010
KitMaker: 51 posts
Armorama: 48 posts
Joined: July 03, 2010
KitMaker: 51 posts
Armorama: 48 posts
Posted: Thursday, May 30, 2013 - 08:23 PM UTC
Thanks a lot for the kind words guys, it's really appreciated! Given the fantastic quality of the models posted on this great site, it's encouraging
Criticism and recommendations, however, would be just as welcome!
robw_uk
England - North East, United Kingdom
Joined: June 22, 2010
KitMaker: 1,224 posts
Armorama: 1,207 posts
Joined: June 22, 2010
KitMaker: 1,224 posts
Armorama: 1,207 posts
Posted: Thursday, May 30, 2013 - 10:32 PM UTC
oh very nice.. i have the Cyber Hobby Stug E next on the workbench.. they just look so "right" loaded up like this
Pytagoras
Møre og Romsdal, Norway
Joined: December 03, 2012
KitMaker: 300 posts
Armorama: 285 posts
Joined: December 03, 2012
KitMaker: 300 posts
Armorama: 285 posts
Posted: Friday, May 31, 2013 - 02:02 AM UTC
Looking good, Ivan!
Are the BlackDog accessories a big lump of detailed resin, or in different pieces of extra stowage?
Drone04
Sofiya, Bulgaria
Joined: July 03, 2010
KitMaker: 51 posts
Armorama: 48 posts
Joined: July 03, 2010
KitMaker: 51 posts
Armorama: 48 posts
Posted: Friday, May 31, 2013 - 02:24 AM UTC
Thanks guys!
Pytagoras, a bit of a mix between the two, but in general they tend to lump together quite a bit -- which sometimes makes painting a bit of a pain.
E.g. all the stowage on the rear deck (ALL of it) is one piece
Pytagoras, a bit of a mix between the two, but in general they tend to lump together quite a bit -- which sometimes makes painting a bit of a pain.
E.g. all the stowage on the rear deck (ALL of it) is one piece
retiredyank
Arkansas, United States
Joined: June 29, 2009
KitMaker: 11,610 posts
Armorama: 7,843 posts
Joined: June 29, 2009
KitMaker: 11,610 posts
Armorama: 7,843 posts
Posted: Friday, May 31, 2013 - 09:02 AM UTC
No criticism, here. Great job! The built up sand is very nice.
Panzer-Ole
Kobenhavn, Denmark
Joined: August 27, 2006
KitMaker: 155 posts
Armorama: 145 posts
Joined: August 27, 2006
KitMaker: 155 posts
Armorama: 145 posts
Posted: Sunday, June 02, 2013 - 06:14 AM UTC
Hi Ivan
That Stug is looking just great and you have done a good job by placeing it as a small vignette and to include a figure.
Thank you for sharing.
Br
Ole
That Stug is looking just great and you have done a good job by placeing it as a small vignette and to include a figure.
Thank you for sharing.
Br
Ole
Drone04
Sofiya, Bulgaria
Joined: July 03, 2010
KitMaker: 51 posts
Armorama: 48 posts
Joined: July 03, 2010
KitMaker: 51 posts
Armorama: 48 posts
Posted: Tuesday, June 04, 2013 - 02:32 AM UTC
Thank you very much guys! I am trying whenever I can to put a small vignette together for the respective vehicle, for me personally it really makes a difference to at least hint of the "natural habitat" of the machine. Puts a mood and a perspective to the model which is tougher to achieve by keeping the model stand-alone, out of an environment. Sometimes you can even tell a small story with a very compact vignette and the proper mood of the vehicle itself.
Gary401
Illinois, United States
Joined: March 11, 2013
KitMaker: 24 posts
Armorama: 24 posts
Joined: March 11, 2013
KitMaker: 24 posts
Armorama: 24 posts
Posted: Thursday, June 20, 2013 - 10:47 AM UTC
Just looked over four of your posts.... excellent work!
Looking forward to further work!
AFVFan
North Carolina, United States
Joined: May 17, 2012
KitMaker: 1,980 posts
Armorama: 1,571 posts
Joined: May 17, 2012
KitMaker: 1,980 posts
Armorama: 1,571 posts
Posted: Thursday, June 20, 2013 - 04:33 PM UTC
Hi Ivan - pretty nicely done StuG you got there. Since you're asking, I'd like to make a couple comments.
First, on your sandbag placement, I think the one on the upper superstructure bothers me the most. I just don't see it staying there very long once the tank started moving, and especially if the main gun was fired. On the same note, I have to wonder about the one by the driver's vision port. It's already sagging in that direction, how much vibration would it take to completely fall over partially blocking the port?
The other comment has to do with the paint. What did you use to do it with? The reason I ask is that, though the colors look great, the finish is really rough.
Drone04
Sofiya, Bulgaria
Joined: July 03, 2010
KitMaker: 51 posts
Armorama: 48 posts
Joined: July 03, 2010
KitMaker: 51 posts
Armorama: 48 posts
Posted: Thursday, June 20, 2013 - 10:16 PM UTC
Gary, thank you very much, I'll do my best not to disappoint with the future updates!
Bob, your comments are really appreciated, please keep them coming if you see something which is worth discussing! The sandbag placement was done primarily following photo references and adjusting the resin sandbags I had available as much as possible. Here's one of the ref photos, unfortunately I can't share the rest as they're in books:
Obviously there's a difference in the placement for some of the bags, but I had to do with what I had
And on the paint, you're touching a raw nerve I airbrushed the model last fall outdoors with Tamiya Acrylic paint. However, I didn't take into consideration the fact that it was pretty hot and sunny. As I use spirit (98%) to thin Tamiya paints, due to the hot weather, some of the paint droplets actually dried up in mid-air, before impacting on the model. Lesson learned for the next model In a pitiful attempt at defending this StuG, I'd have to say that due to the light direction and the simple phone camera I use the roughness is exaggerated, in reality on the model itself is nowhere that bad.
Thanks again,
Ivan
PanzerGeek
Alberta, Canada
Joined: February 10, 2008
KitMaker: 221 posts
Armorama: 217 posts
Joined: February 10, 2008
KitMaker: 221 posts
Armorama: 217 posts
Posted: Friday, June 21, 2013 - 03:25 AM UTC
Ivan the figure looks good, the more figures you do the better you get. The chipping is perfect and doesn't look over done like you see on some German stuff. Keep up the excellent work.
Cheers
Todd
Cheers
Todd
AFVFan
North Carolina, United States
Joined: May 17, 2012
KitMaker: 1,980 posts
Armorama: 1,571 posts
Joined: May 17, 2012
KitMaker: 1,980 posts
Armorama: 1,571 posts
Posted: Sunday, June 23, 2013 - 08:25 AM UTC
I know how you feel about the paint. The reason I asked is that I used to have the same problem back when I was painting with cans (thankfully, those days are long behind me).