Constructive Feedback
For in-progress or completed build photos. Give and get contructive feedback!
For in-progress or completed build photos. Give and get contructive feedback!
Hosted by Darren Baker, Dave O'Meara
German Tiger
06Coop

Joined: June 04, 2012
KitMaker: 14 posts
Armorama: 13 posts

Posted: Sunday, August 18, 2013 - 12:50 PM UTC
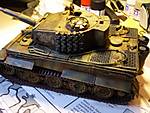
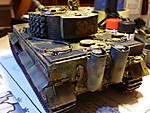
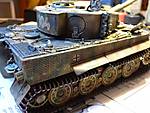
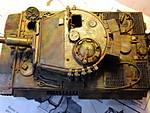
I have just completed my 3rd build of Armor, I used the Dragon 3-1 without zimmerit,I added Atak zimmerit kit and after reading 100's of articles on painting and weathering I think I am making some progress.Comments or recommendations please. I am still in the process of figures and diorama of some type Reposted pictures further in post. Coop


Tojo72

Joined: June 06, 2006
KitMaker: 4,691 posts
Armorama: 3,509 posts

Posted: Sunday, August 18, 2013 - 12:56 PM UTC
Pictures are small,but your methods look effective,it really looks grimy and worn.
The only thing I can mention is that I don't believe that the camo pattern would extend under the side skirts where they are missing.
I do think it looks great though
The only thing I can mention is that I don't believe that the camo pattern would extend under the side skirts where they are missing.
I do think it looks great though
Removed by original poster on 08/19/13 - 02:07:30 (GMT).
AFVFan

Joined: May 17, 2012
KitMaker: 1,980 posts
Armorama: 1,571 posts

Posted: Sunday, August 18, 2013 - 06:00 PM UTC
I agree with Anthony, the pics are too small to see anything. If you size your pics by pixel, make your long side between 600 and 800 pixels. That'll get you a nice forum sized pic.
As for the camo, I wouldn't worry about it. I've got a couple Tiger II pics that show the camo under the fenders.
As for the camo, I wouldn't worry about it. I've got a couple Tiger II pics that show the camo under the fenders.
06Coop

Joined: June 04, 2012
KitMaker: 14 posts
Armorama: 13 posts

Posted: Monday, August 19, 2013 - 12:54 AM UTC
why can't I get the new re sized pictures to post in my reply? I deleted the original post pictures and downloaded the resized pictures to my Gallery, only to have the original(smaller pictures) show up. Any help
andromeda673

Joined: July 30, 2013
KitMaker: 584 posts
Armorama: 525 posts

Posted: Monday, August 19, 2013 - 02:30 AM UTC
If you use photobucket then copy the link into the page, your picture will appear much larger and we will be able to see them better, looks good to me! Nice work!
AFVFan

Joined: May 17, 2012
KitMaker: 1,980 posts
Armorama: 1,571 posts

Posted: Monday, August 19, 2013 - 03:23 AM UTC
Quoted Text
why can't I get the new re sized pictures to post in my reply? I deleted the original post pictures and downloaded the resized pictures to my Gallery, only to have the original(smaller pictures) show up. Any help
Hi Doug, try this. Go to your gallery. Click on the thumb of the pic you want. When it opens to full size, you'll see a link under it. Copy and paste that link, as is, into your post. The thumb should appear in the post, but should open to full size when it is clicked on.
Like G, I started using Photobucket some time back after getting frustrated with the Kitmaker gallery's quirks.
Hope this helps.
06Coop

Joined: June 04, 2012
KitMaker: 14 posts
Armorama: 13 posts

Posted: Monday, August 19, 2013 - 08:29 AM UTC

Blackstoat

Joined: October 15, 2012
KitMaker: 568 posts
Armorama: 561 posts

Posted: Monday, August 19, 2013 - 09:11 AM UTC
Sounds like you're in the same situation as me Doug. I've just started my fourth kit. It's a steep learning curve, but the results keep getting better 
Tiger looks great mate. Which Dragon kit is that?

Tiger looks great mate. Which Dragon kit is that?
06Coop

Joined: June 04, 2012
KitMaker: 14 posts
Armorama: 13 posts

Posted: Monday, August 19, 2013 - 11:52 AM UTC
The Kit was Dragon kit #6406 3 in 1 late production. Biggest lesson I have learned is Not to glue the road wheels,What a nightmare!
AFVFan

Joined: May 17, 2012
KitMaker: 1,980 posts
Armorama: 1,571 posts

Posted: Monday, August 19, 2013 - 05:45 PM UTC
I can see! I can see!  Now that's much better. Good job there, Doug, but why the gap in the one track? Nice job applying the Atak.
 Now that's much better. Good job there, Doug, but why the gap in the one track? Nice job applying the Atak.
06Coop

Joined: June 04, 2012
KitMaker: 14 posts
Armorama: 13 posts

Posted: Tuesday, August 20, 2013 - 03:02 AM UTC
Plans are having broken track with German soldiers working on it. Maybe some sitting on fuel cans.
AFVFan

Joined: May 17, 2012
KitMaker: 1,980 posts
Armorama: 1,571 posts

Posted: Thursday, August 22, 2013 - 08:08 AM UTC
Quoted Text
Plans are having broken track with German soldiers working on it. Maybe some sitting on fuel cans.
Doug - a good idea, but (since this is the feedback forum and to bring up a point of realism) there's no way the track would be in that position to be worked on. It would be physically impossible to remove and reinstall the track pins there. The tank would have been backed up until the break was located between the lower front quadrant of the rear idler and the last road wheel. This would allow the room for the pin to come out and use the weight of the tank to keep the track from bouncing around too much while the pin was hammered out (from past experience with tracked equipment, I can tell you that it takes a lot of force to do it). The other thing to consider is that those links weigh about 60 lbs each. With the pins, that's almost 200 lbs for a 3 link section.
That said, I'm not telling you how to build your model. Just think of it as information for the future .... especially since you already have your tracks in place. A little artistic license never hurt anyone.

06Coop

Joined: June 04, 2012
KitMaker: 14 posts
Armorama: 13 posts

Posted: Monday, August 26, 2013 - 09:09 AM UTC
My Army experience was with the Hawk Missiles Systems in Air Defense and had no experience in track equipment.I appreciate the feedback. I have learned so much on this site and I am always open for suggestions. Thanks
 |


