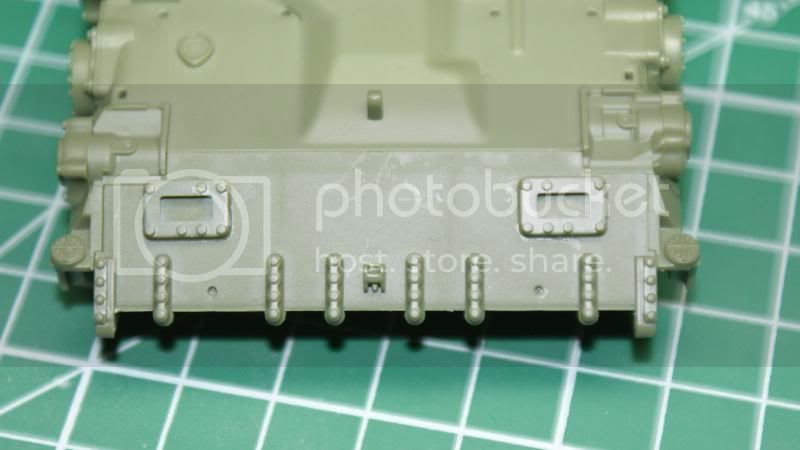
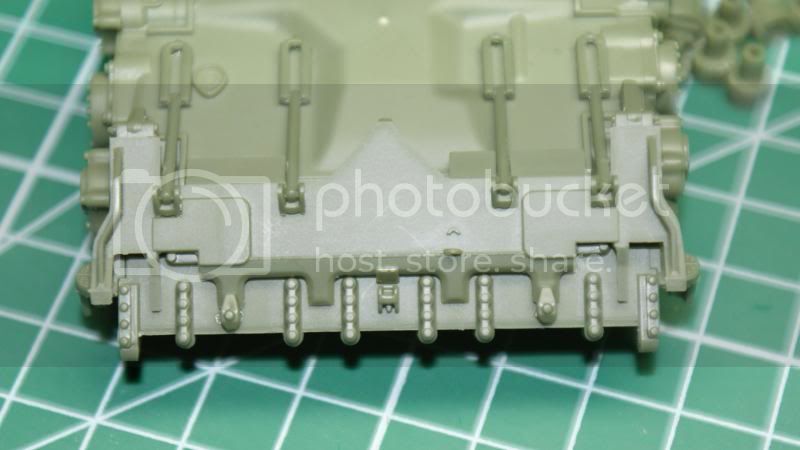
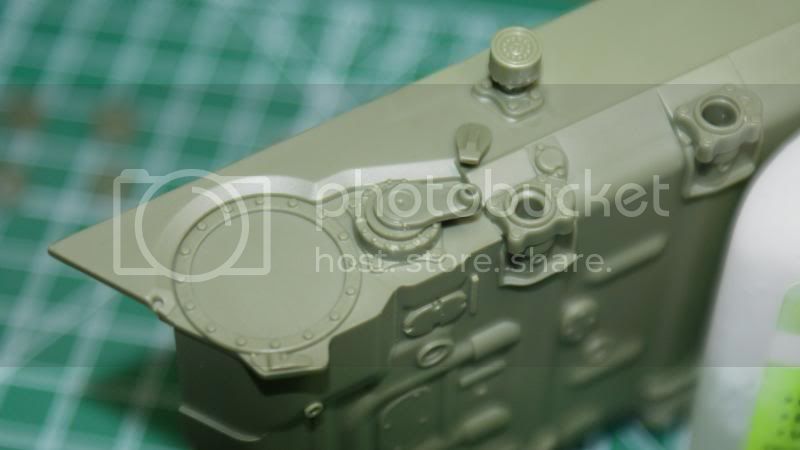
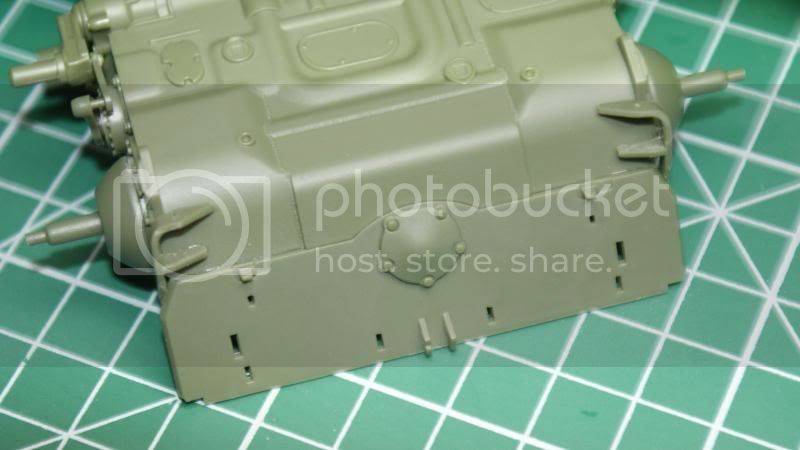
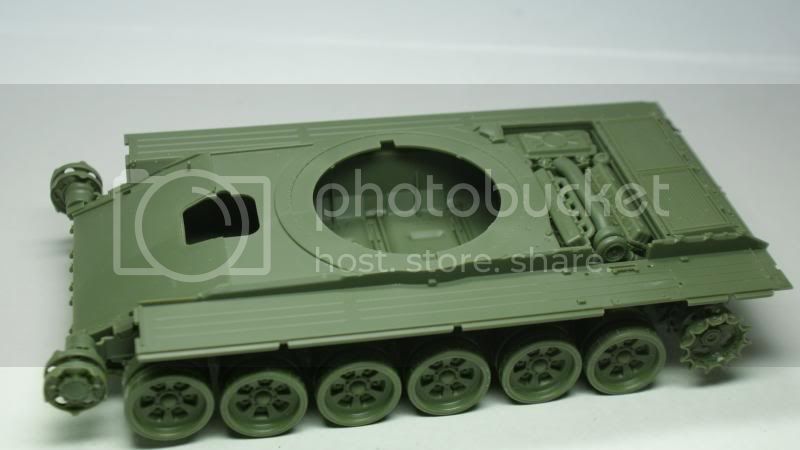
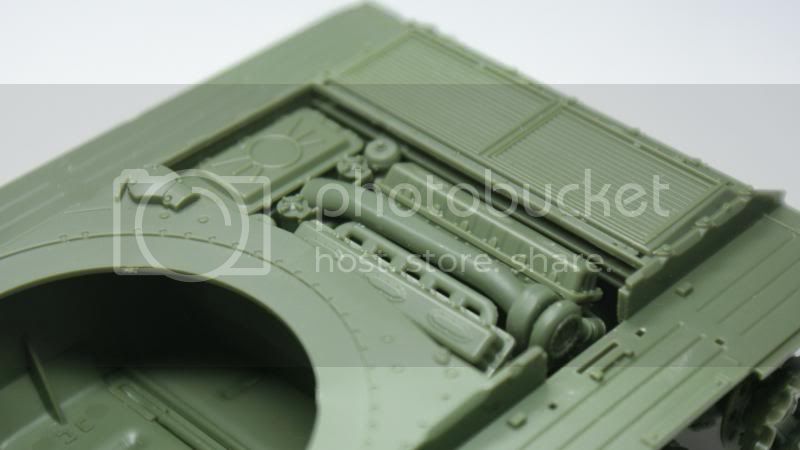
With my review of this about to be published I thought i'd kick off the accompanying build log:
I love the smell of fresh styrene!:
This will be built entirely out of the box! More to follow.....
Яusso-Soviэt Forum
Russian or Soviet vehicles/armor modeling forum.
Hosted by Darren Baker, Jacques Duquette
Meng Russian T-90A Full Build
afv_rob
England - East Anglia, United Kingdom
Joined: October 09, 2005
KitMaker: 2,556 posts
Armorama: 2,199 posts
Joined: October 09, 2005
KitMaker: 2,556 posts
Armorama: 2,199 posts
Posted: Thursday, September 19, 2013 - 02:36 AM UTC
ejasonk
Baden-Württemberg, Germany
Joined: October 14, 2007
KitMaker: 314 posts
Armorama: 226 posts
Joined: October 14, 2007
KitMaker: 314 posts
Armorama: 226 posts
Posted: Thursday, September 19, 2013 - 07:13 AM UTC
I have received my 2 of them and i have to say that i am a little bit disappointed. The plastic is too soft for such little parts as the T-90 has.
Tojo72
North Carolina, United States
Joined: June 06, 2006
KitMaker: 4,691 posts
Armorama: 3,509 posts
Joined: June 06, 2006
KitMaker: 4,691 posts
Armorama: 3,509 posts
Posted: Thursday, September 19, 2013 - 11:06 AM UTC
I have mine and will definitely follow along,gotta see how that track jig eorks
Posted: Thursday, September 19, 2013 - 12:43 PM UTC
Quoted Text
I have received my 2 of them and i have to say that i am a little bit disappointed. The plastic is too soft for such little parts as the T-90 has.
I was just reading the review that Rob sent in and i am a little confused that Rob said the plastic is hard and you said soft. Are you talking about the plastic itself or the detail?
blacksad
Quebec, Canada
Joined: September 07, 2009
KitMaker: 198 posts
Armorama: 192 posts
Joined: September 07, 2009
KitMaker: 198 posts
Armorama: 192 posts
Posted: Thursday, September 19, 2013 - 01:29 PM UTC
I'm building one right now and I think the styrene is pretty hard too; Can't complain about the details, they are pretty spot on !
acebatau
Colorado, United States
Joined: February 10, 2008
KitMaker: 730 posts
Armorama: 616 posts
Joined: February 10, 2008
KitMaker: 730 posts
Armorama: 616 posts
Posted: Thursday, September 19, 2013 - 02:56 PM UTC
Could be a interesting WIP, will follow....
CB1000h
Pennsylvania, United States
Joined: March 01, 2006
KitMaker: 358 posts
Armorama: 304 posts
Joined: March 01, 2006
KitMaker: 358 posts
Armorama: 304 posts
Posted: Thursday, September 19, 2013 - 03:27 PM UTC
I just started one as well plastic is soft and it it way over engineered for a plastic model, it's gimmicky with the working suspension. I just finished the suspension.
But that's just my opinion
Wayne
But that's just my opinion
Wayne
Posted: Thursday, September 19, 2013 - 03:47 PM UTC
I feel that a working suspension is a good thing as it allows the model to be accurately displayed on an uneven surface, That said I would lock the movement up once I decided on the display.
Cuny12
Australia
Joined: April 04, 2010
KitMaker: 378 posts
Armorama: 348 posts
Joined: April 04, 2010
KitMaker: 378 posts
Armorama: 348 posts
Posted: Thursday, September 19, 2013 - 08:28 PM UTC
I'm not a T 90 Expert but I found it one the best builds in a while the suspension isn't difficult by any means compared to the Engineering in the Dragon M1s it's pretty simple cheers Ben
Posted: Thursday, September 19, 2013 - 10:29 PM UTC
Rob- just saw your review- really excellent- its nice to see they haven't, as you pointed out, gone down the miniscule parts path of Bronco etc. Its also great to hear they have included the engine and some equipment for the interior of the turret. As I said- great review...and now a build log- looking forward to seeing this- good luck with it mate.
afv_rob
England - East Anglia, United Kingdom
Joined: October 09, 2005
KitMaker: 2,556 posts
Armorama: 2,199 posts
Joined: October 09, 2005
KitMaker: 2,556 posts
Armorama: 2,199 posts
Posted: Thursday, September 19, 2013 - 10:39 PM UTC
Quoted Text
I have received my 2 of them and i have to say that i am a little bit disappointed. The plastic is too soft for such little parts as the T-90 has.
I'm not really sure what you mean here, I found the plastic itself to be a little harder than usual. The actual detailing of parts though, I really cannot say its soft. Perhaps the wiring on the turret isnt ideal, but really the parts moulding is incredible, the engine deck detailing is the most complete i've seen on any styrene T-72/T-90.
afv_rob
England - East Anglia, United Kingdom
Joined: October 09, 2005
KitMaker: 2,556 posts
Armorama: 2,199 posts
Joined: October 09, 2005
KitMaker: 2,556 posts
Armorama: 2,199 posts
Posted: Thursday, September 19, 2013 - 10:42 PM UTC
Quoted Text
I just started one as well plastic is soft and it it way over engineered for a plastic model, it's gimmicky with the working suspension. I just finished the suspension.
But that's just my opinion
Wayne
Thanks for stopping in Wayne and sharing your thoughts. I have to disagree on the gimmicky comment though. The working suspension is a very useful feature and one that I wish more models featured, rather than say some of the pointless recoiling gun barrels we see elswhere. Given the iconic photo's of T-90's flying over concrete obstacles with the, I imagine many modellers will like the working suspension feature.
afv_rob
England - East Anglia, United Kingdom
Joined: October 09, 2005
KitMaker: 2,556 posts
Armorama: 2,199 posts
Joined: October 09, 2005
KitMaker: 2,556 posts
Armorama: 2,199 posts
Posted: Thursday, September 19, 2013 - 10:51 PM UTC
Thanks for your comments Karl.
Heres a link to the review for anyone who missed it:
http://www.armorama.co.uk/review/9457
Heres a link to the review for anyone who missed it:
http://www.armorama.co.uk/review/9457
UGBEAR
Canada
Joined: December 01, 2011
KitMaker: 248 posts
Armorama: 247 posts
Joined: December 01, 2011
KitMaker: 248 posts
Armorama: 247 posts
Posted: Friday, September 20, 2013 - 04:43 AM UTC
waitting for their first T-90 variant
dvarettoni
South Carolina, United States
Joined: September 28, 2005
KitMaker: 778 posts
Armorama: 763 posts
Joined: September 28, 2005
KitMaker: 778 posts
Armorama: 763 posts
Posted: Monday, September 30, 2013 - 08:22 AM UTC
just got mine over the weekend can't wait to start
dave
dave
afv_rob
England - East Anglia, United Kingdom
Joined: October 09, 2005
KitMaker: 2,556 posts
Armorama: 2,199 posts
Joined: October 09, 2005
KitMaker: 2,556 posts
Armorama: 2,199 posts
Posted: Monday, September 30, 2013 - 08:56 AM UTC
Time to start gluing some plastic I think! Apologies for the slow start on this, things have been a little hectic in my 'other' life, which has prevented me from getting any meaningful bench time in.
As one might expect, construction starts with the lower hull. I skipped the wheels to begin with as I could face the clean up and got right on with the hull assemblies.
First pieces:
And the beautifully detailed one piece lower hull:
The fit of the lower glacis plate isnt perfect, one will really have to force this down:
It does look very good with the separate blade in place:
Theres some neat little movable shock absorber parts. Be careful with the glue here as this part needs to rotate:
The torsion bars prior to some clean up:
Rear wall fitted:
Fantastic internal detailing on the wheels:
When I finally got around to the wheels I did feel the rubber mould texturing was a little heavy, this would ground down pretty much straight away. Nothing a bit of sanding cant fix:
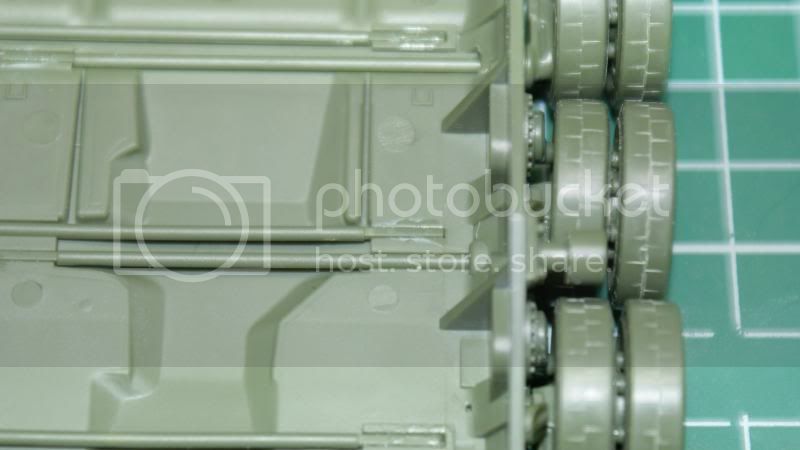
To make the torsion bars movable one just glues the end of them into slots on the inside hull, it works quite well:
And the completed lower hull, looking quote busy already:
Unfortunately the shock absorber arms dont really stay in place very well and cant be glued as this would prevent movement:
My initial thoughts at this stage are that this is surely a stunning kit which builds up fairly easily. The working suspension is a nice idea and the model sits fairly well without any movement. Certainly though if one wishes to position this over uneven terrain then additional weight will be required to force the torsion bars up/down, or of course glue them into the desired position once the correct articulation has been achieved.
Next up the engine........
BBD468
Texas, United States
Joined: March 08, 2010
KitMaker: 2,465 posts
Armorama: 2,383 posts
Joined: March 08, 2010
KitMaker: 2,465 posts
Armorama: 2,383 posts
Posted: Wednesday, October 02, 2013 - 03:59 AM UTC
Hello Rob,
This Meng is a sweet lookin kit! Im doin the Zvezda offering and i see alot of superior detail on the Meng. Great job so far fella.
I got a good price on my Zvezda kit at a local IPMS show last year. Had i to do over again i would waited for the Meng for sure!
Cheers,
Gary
This Meng is a sweet lookin kit! Im doin the Zvezda offering and i see alot of superior detail on the Meng. Great job so far fella.
I got a good price on my Zvezda kit at a local IPMS show last year. Had i to do over again i would waited for the Meng for sure!
Cheers,
Gary
dvarettoni
South Carolina, United States
Joined: September 28, 2005
KitMaker: 778 posts
Armorama: 763 posts
Joined: September 28, 2005
KitMaker: 778 posts
Armorama: 763 posts
Posted: Friday, October 04, 2013 - 03:00 AM UTC
hay Rob do you have any pic of the engine and the compartment thanks
dave
dave
steeds
Liaoning, China / 简体
Joined: May 13, 2009
KitMaker: 11 posts
Armorama: 8 posts
Joined: May 13, 2009
KitMaker: 11 posts
Armorama: 8 posts
Posted: Wednesday, October 09, 2013 - 01:47 AM UTC
Dear David,
Well done of the torsion bar,my kit wasn't well molded,the slots are lillte wider than the end of bars,I am afraid the hull would be lower than the real tank,so I use carbon fiber bar instead.
hugohuertas
Buenos Aires, Argentina
Joined: January 26, 2007
KitMaker: 1,024 posts
Armorama: 1,013 posts
Joined: January 26, 2007
KitMaker: 1,024 posts
Armorama: 1,013 posts
Posted: Wednesday, October 09, 2013 - 03:20 AM UTC
Quoted Text
Dear David,
Well done of the torsion bar,my kit wasn't well molded,the slots are lillte wider than the end of bars,I am afraid the hull would be lower than the real tank,so I use carbon fiber bar instead.
Quite annoying for a kit of this price, even more considering that the movable suspension is supposed to be a distinctive feature...
afv_rob
England - East Anglia, United Kingdom
Joined: October 09, 2005
KitMaker: 2,556 posts
Armorama: 2,199 posts
Joined: October 09, 2005
KitMaker: 2,556 posts
Armorama: 2,199 posts
Posted: Monday, October 21, 2013 - 07:45 PM UTC
Sorry for the delay guys, everything else always seems to get in the way of me getting any bench time!
I didnt have the same issue as Andy where the slots where too big for the suspension, however I will say that with the weight of plastic it does push the torsion bars down causing the tank to sit a little lower than i'd like. Naturally one could just glue the bars into their desired position.
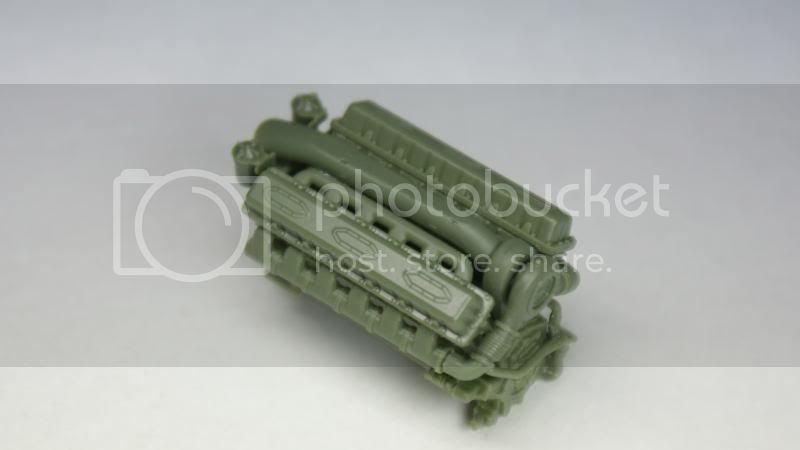
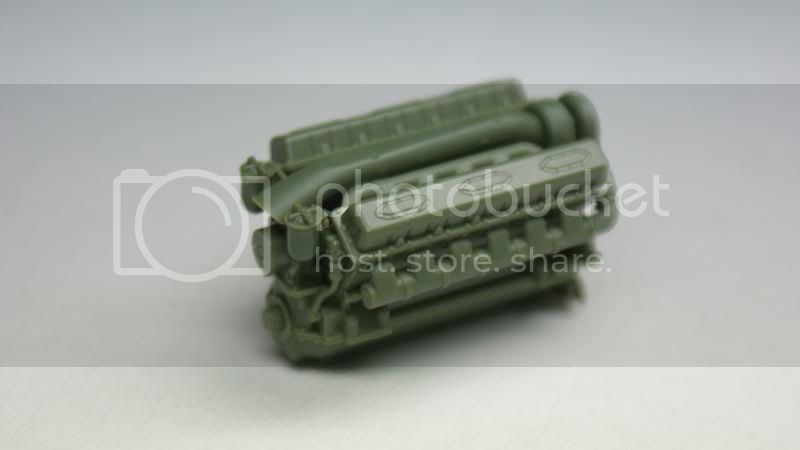
Anyway, skipping the tracks for the moment, I moved onto the engine, which is beautifully detailed and a real little work of art:
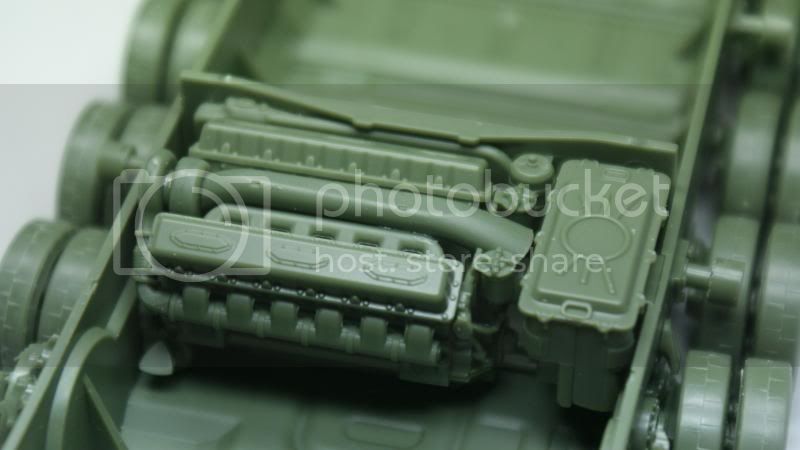
The engine compartment has just enough to be viewed through the hatch:
Theres no intakes or fan housings represented in the rear, however this area is pretty much blanked off when everything is in place.
The firewall does have to mould marks, these can be ignored as they arent visible with the engine in place:
Everything in place:
Heres the one-piece upper hull placed onto the lower hull, minus any of the fittings at this stage:
The visible engine looks nice and busy (please note I have left off some etch parts to allow easier painting of the engine)
More to follow......
hugohuertas
Buenos Aires, Argentina
Joined: January 26, 2007
KitMaker: 1,024 posts
Armorama: 1,013 posts
Joined: January 26, 2007
KitMaker: 1,024 posts
Armorama: 1,013 posts
Posted: Tuesday, October 22, 2013 - 12:20 AM UTC
Nice, Rob!!
I didn't start mine yet, so your build will be of great help.
I'll keep following your work with full attention!
I didn't start mine yet, so your build will be of great help.
I'll keep following your work with full attention!
dvarettoni
South Carolina, United States
Joined: September 28, 2005
KitMaker: 778 posts
Armorama: 763 posts
Joined: September 28, 2005
KitMaker: 778 posts
Armorama: 763 posts
Posted: Tuesday, October 22, 2013 - 12:44 AM UTC
nice work rob how come you did not ad the PE to the engine ????
dave
dave
afv_rob
England - East Anglia, United Kingdom
Joined: October 09, 2005
KitMaker: 2,556 posts
Armorama: 2,199 posts
Joined: October 09, 2005
KitMaker: 2,556 posts
Armorama: 2,199 posts
Posted: Tuesday, October 22, 2013 - 09:50 AM UTC
Thanks guys!
Its certainly not the easiest build in the world, and the plastic is a little hard to work with, but this its my opinion this is generally a very nice model and rather pleasing to build
I left that off for ease of painting the engine block.
Its certainly not the easiest build in the world, and the plastic is a little hard to work with, but this its my opinion this is generally a very nice model and rather pleasing to build
Quoted Text
nice work rob how come you did not ad the PE to the engine ????
dave
I left that off for ease of painting the engine block.
grunt136mike
Florida, United States
Joined: November 24, 2012
KitMaker: 1,896 posts
Armorama: 1,858 posts
Joined: November 24, 2012
KitMaker: 1,896 posts
Armorama: 1,858 posts
Posted: Tuesday, October 22, 2013 - 10:35 AM UTC
Hi;
The Engine looks Great, altho there is a lot of Wiring that has too be added. If only the others would do the engine compartment it sure would be nice.
This feature really makes building a vehicle a real plus in my way of thinking, and worth the extra money !
CHEERS; MIKE.
The Engine looks Great, altho there is a lot of Wiring that has too be added. If only the others would do the engine compartment it sure would be nice.
This feature really makes building a vehicle a real plus in my way of thinking, and worth the extra money !
CHEERS; MIKE.