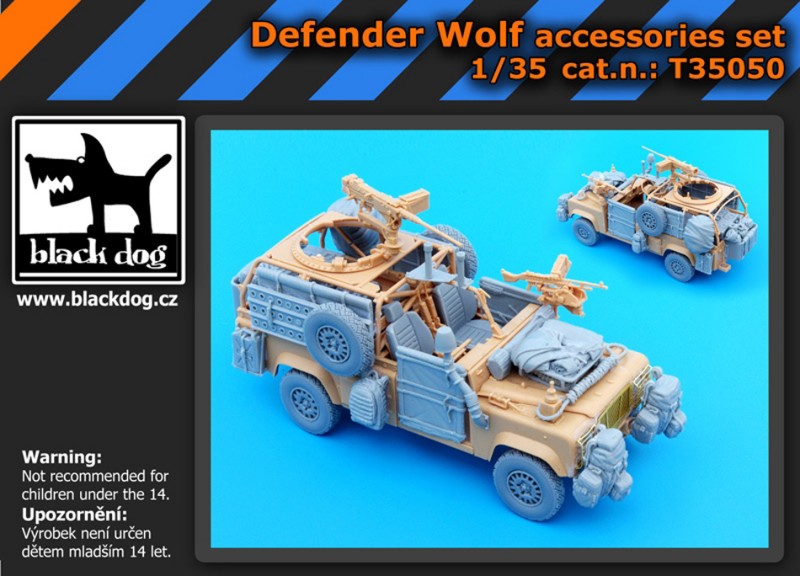
I am going to build something away from the campaigns so that I can pick my pace for the build. The Hobbyboss Defender XD ‘Wolf’ W.M.I.K is the kit I have chosen and I will be using a combination of Eduard photo etched set, The Blackdog Defender Wolf Accessories Set, and AC model WMIK crew. I may yet invest in in a turned 50cal barrel and SKP Model lenses and taillights set for the model. Reviews of the 4 items I am going to use at the moment can be found using the links below.
Defender XD ‘Wolf’ W.M.I.K
Defender Wolf Accessories Set
British WMIK crew in Afghanistan
PE set for the ‘Wolf’ W.M.I.K
Armor/AFV
For discussions on tanks, artillery, jeeps, etc.
Hosted by Darren Baker, Mario Matijasic
Defender XD ‘Wolf’ W.M.I.K build
Posted: Thursday, October 10, 2013 - 09:25 AM UTC
barny
England - East Anglia, United Kingdom
Joined: August 03, 2005
KitMaker: 273 posts
Armorama: 272 posts
Joined: August 03, 2005
KitMaker: 273 posts
Armorama: 272 posts
Posted: Thursday, October 10, 2013 - 10:15 AM UTC
Tagging along Darren have all of these and more in the stash ,looking forward to your build.
Posted: Thursday, October 10, 2013 - 02:35 PM UTC
Happy to have you follow along Terry.
The construction starts with a fairly detailed engine that goes together well and easily. If you are going to have the engine on show then along with the photo etched details in the Eduard product you will need to add the distributor on the front left hand side of the engine and the glow plug leads, you need to remember that the glow plug leads are metal and so the route they take is exact and the bends are abrupt rather than gradual. A word of caution here and that is that I found the plastic to be a little on the soft side, this means whatever tool you use to remove parts from the sprues must be sharp as tears and distortions could result otherwise.
The next step is assembly of the two main beams of the frame with each beam being made of two parts. I found the join very unsatisfactory and you can see an indication of the poor join by the amount of filler still visible after sanding. I had five spring loaded clamps holding each of these parts together while the glue cured which further shows how poor a join there is. The cross members of the chassis frame are added next and being a multi-part frame it is very important that the chassis is square or problems will follow later. I offer to suggestions here which are to make a jig to keep everything square, or the method I used which is to add the rear body to the frame dry fitted. The chassis has pins at six points which should ensure the chassis cures in the correct orientation.
Take care when adding the axles to the chassis as the instructions indicate to attach them at the wrong ends of the chassis, and if the cure at the wrong ends it will ruin your day. The drive shafts are also added at this stage and attached to the Transfer case, there is an issue here and that is that the Transfer case just floats with no attachment points, to get around this I attached the Transfer case to the gear box housing to ensure correct position and rotation. The only issue with this approach is that the rear drive shaft and axle cannot be secured in place until after the engine is fitted.
Posted: Thursday, October 10, 2013 - 10:42 PM UTC
Great choice of subject Darren- looking forward to seeing this coming together. The engine and chassis of the HB kit are brilliant- very well detailed and it goes together very quickly.
Posted: Friday, October 11, 2013 - 01:46 PM UTC
Glad to have you along for the ride Karl.
The chassis is now complete and I have added the front bumper from the AC Model set. The chassis parts supplied in the model are from as best as I can tell accurate and very complete, I do have one complaint with the exhaust as with it only having one connection point at the manifold end it just kind of hangs there with its route being the only other aspect holding it in place. The front bumper from AC Model looks good but I did have to do a little surgery to the attachment points as the gaps were too far apart. That said it is not difficult and the surgery cannot be seen as the elasticated recovery strap hides it. You could of course use the kit supplied bumper and if wanted scratch your own recovery strap.
Posted: Friday, October 18, 2013 - 03:44 AM UTC
The rear panel and door is next and I have utilised some photo etched parts from the Eduard set and the storage bin from the Blackdog set. The photo etched parts fit very well however it is difficult to get a clean fold on some of the parts due to some parts being folded over each other. The rear bin fits the model very well and I particularly like this part.
Posted: Friday, October 18, 2013 - 04:21 AM UTC
Good progress so far Darren, despite the obvious flaws your skills will turn this into a fine 'Wolf'. I'll follow this one, as I may soon be doing a few AA 'Wolfs', and I may have gone a bit rusty.
Edit to add a question, which may have been discussed before, but if you take the Kit, and the update kits, and add the cost, how does this path compare to building an Accurate Armour 'Wolf'?
Posted: Friday, October 18, 2013 - 05:16 AM UTC
The Eduard PE set and the Blackdog set without figures adds about £30 to the cost of the model, so all in about £50 total. I do intend using a set of SKP lenses and taillights as well but I need to order them yet, I am a big convert to SKP lenses and they only cost about £5.
Posted: Friday, October 18, 2013 - 06:00 AM UTC
Quoted Text
The Eduard PE set and the Blackdog set without figures adds about £30 to the cost of the model, so all in about £50 total. I do intend using a set of SKP lenses and taillights as well but I need to order them yet, I am a big convert to SKP lenses and they only cost about £5.
Thanks Darren. So this is somewhat cheaper than the AA Land Rovers, at least for the basic Wolf. Are there any after market kits for the Milan carrying Wolf?
Posted: Friday, October 18, 2013 - 06:06 AM UTC
A large portion if not all of the blackdog set can be used I believe, If you get the set with the crew they should also be acceptable for a crew not in action. I suspect that with the exception of the 50cal PE the Eduard set will also be fine. I am not aware at this time of any kit specific items. I understand that the Accurate Armour offerings are more accurate as there are a few issues with the hobbyboss kit, and from what I can see Accurate armour supply all of the needed items except the aerial mounts which are not included in all offers.
Posted: Sunday, October 20, 2013 - 06:46 AM UTC
Seeing that Accurate Armour made the Land Rover kits with full co-operation of Land Rover (including AIUI the use of factory drawings), it would not surprise me that they are accurate .
Looking forward to the next update on your project.
ArtyG37B
British Columbia, Canada
Joined: August 13, 2009
KitMaker: 420 posts
Armorama: 416 posts
Joined: August 13, 2009
KitMaker: 420 posts
Armorama: 416 posts
Posted: Sunday, October 20, 2013 - 08:00 AM UTC
Quoted Text
Are there any after market kits for the Milan carrying Wolf?
IIRC HB put out a Milan version.
Posted: Sunday, October 20, 2013 - 08:11 AM UTC
so a basic HB kit, with the milan launcher added?
17741907
Istanbul, Turkey / Türkçe
Joined: December 05, 2007
KitMaker: 953 posts
Armorama: 705 posts
Joined: December 05, 2007
KitMaker: 953 posts
Armorama: 705 posts
Posted: Sunday, October 20, 2013 - 10:01 AM UTC
Good luck Darren...I'm following...
Posted: Friday, October 25, 2013 - 03:13 AM UTC
Time for a quick update on the Wolf; First a look at the seats provided by Blackdog in resin and the HobbyBoss injection moulded offering, I think you will agree that the resin offering has a more pleasing look. However be aware that removing the pour plug on the seat is a right royal pain. The first pour plug I removed I laid the seat on its back to start cutting and promptly broke the head rest off, no major problem as it was a very clean break. The second seat was cut free with no issues as I rested it on its side, I attempted the same with the third seat only for the back to come away partially. So these seats are an exercise in patience but in my opinion well worth the effort.
I also started putting the rear bed together for the Wolf. Everything goes together very nicely with a very tight join that will stay together even without glue. The rear bed has two raised plastic areas which should be removed as if used to mount the rear seat it will be on the wrong side of the vehicle. By removing these two lugs it also allows for improvements to be made to the seat mounts which I will tackle in the next update.
airborne1
Queensland, Australia
Joined: April 15, 2006
KitMaker: 915 posts
Armorama: 797 posts
Joined: April 15, 2006
KitMaker: 915 posts
Armorama: 797 posts
Posted: Sunday, October 27, 2013 - 10:30 PM UTC
Nice build Darren
Keep them images coming.
The AC crew will bring the defender to life.
Have this set and the legends accessory ,resin tyres and I am watching your build .
Good work so far
Thanks
Keep them images coming.
The AC crew will bring the defender to life.
Have this set and the legends accessory ,resin tyres and I am watching your build .
Good work so far
Thanks
clarkent
Tel Aviv-Yafo, Israel
Joined: January 15, 2006
KitMaker: 21 posts
Armorama: 21 posts
Joined: January 15, 2006
KitMaker: 21 posts
Armorama: 21 posts
Posted: Monday, October 03, 2016 - 05:45 AM UTC
Hi, what happened to this build? I am curious to see the progress/result...
zorrolobo
Distrito Federal, Mexico
Joined: May 31, 2013
KitMaker: 1,457 posts
Armorama: 1,440 posts
Joined: May 31, 2013
KitMaker: 1,457 posts
Armorama: 1,440 posts
Posted: Monday, October 03, 2016 - 05:59 AM UTC
Me too!
terminators
France
Joined: February 20, 2012
KitMaker: 1,932 posts
Armorama: 1,907 posts
Joined: February 20, 2012
KitMaker: 1,932 posts
Armorama: 1,907 posts
Posted: Monday, October 03, 2016 - 10:32 PM UTC
Great built I like WMIK.
Not sure the combination rim/tire of blackdog conversion is right.
Klaus-Adler
Campaigns Administrator
Scotland, United Kingdom
Joined: June 08, 2015
KitMaker: 1,505 posts
Armorama: 840 posts
Joined: June 08, 2015
KitMaker: 1,505 posts
Armorama: 840 posts
Posted: Monday, October 03, 2016 - 11:16 PM UTC
I have partiality built this kit but had a gap issue with the bonnet assembly when I was attaching it to the chassis so I'm curious as to how you deal with this