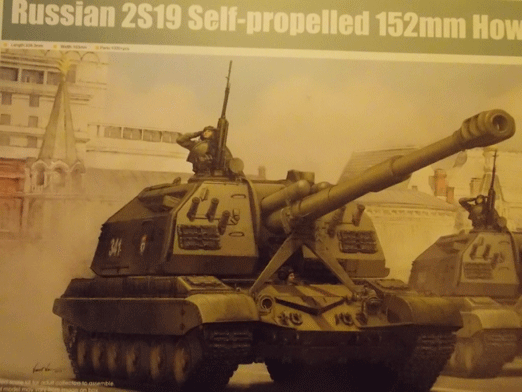
Just got this one in. Not the best lighting but here it is.
You get the plain green camo with parade markings and this tri color camo.
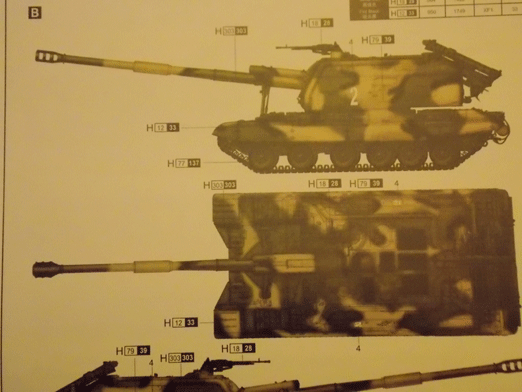
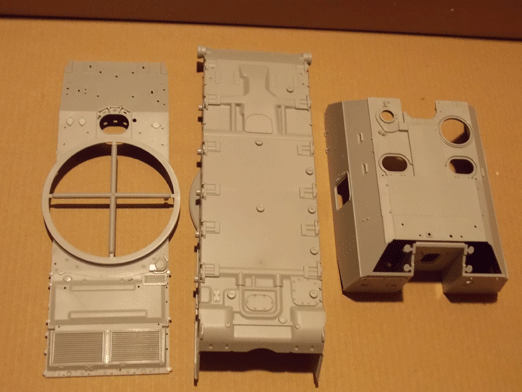
Little sample of the kit.
Яusso-Soviэt Forum
Russian or Soviet vehicles/armor modeling forum.
Hosted by Darren Baker, Jacques Duquette
Trumpeter 2S19
Posted: Thursday, February 06, 2014 - 05:52 PM UTC
Posted: Monday, February 10, 2014 - 06:39 PM UTC
Working that late shift last few days so I haven't had that much time for working on it. Here's what I got so far.
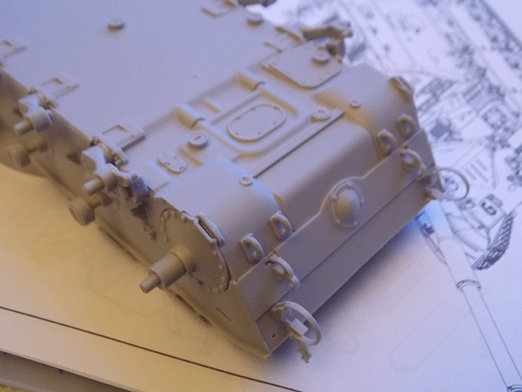
Have the first two steps done. You can see there's a bit of a gap between the rear plate and the hull tub (mostly on the sides). The ties for the unditching log are pretty fragile so take some care here, and wouldn't you know it, have to remove some tabs on the inside of it.
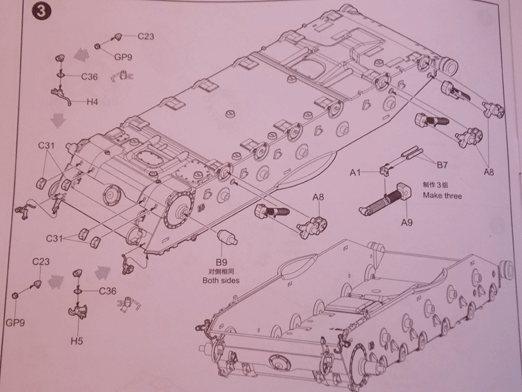
Moved on to step 3, dealing mostly with the underside and suspension.
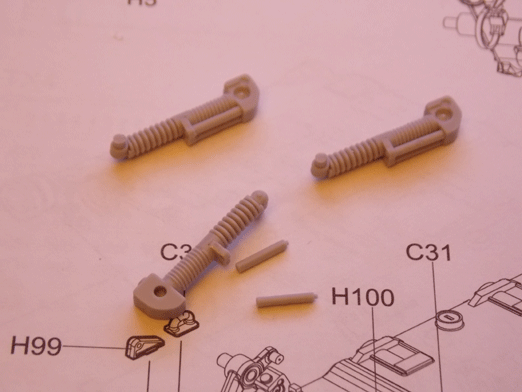
Looks like there's going to be lots of tiny parts......
Should make some progress over the next two days.
Posted: Thursday, February 13, 2014 - 03:54 PM UTC
Not as much done as I would have liked, but what are you gonna do?
Lower rear done.
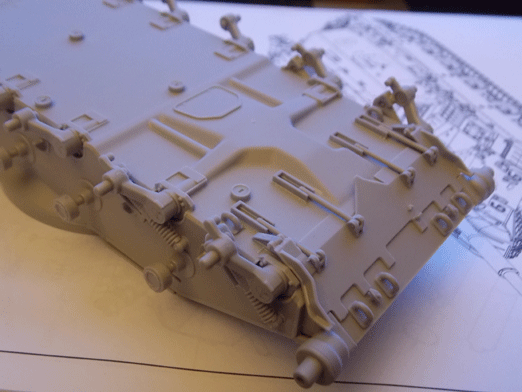
Lower front finished. Also added the return rollers and suspension arms.
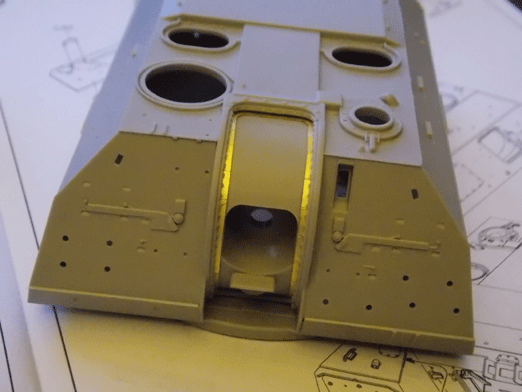
Glued the top in place and started on the top front. Formation lights are clear plastic. Periscopes are clear plastic too, haven't put those on yet.
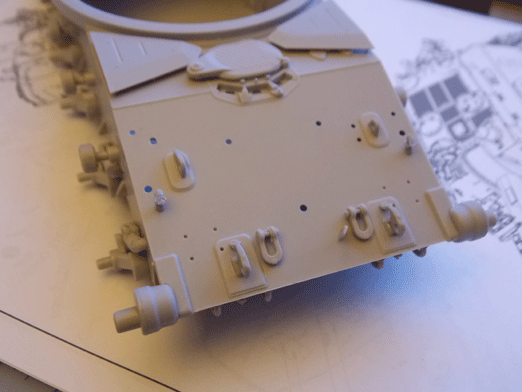
I've run into a little something. Instructions tell us to place part H49 which would connect to the right formation light.
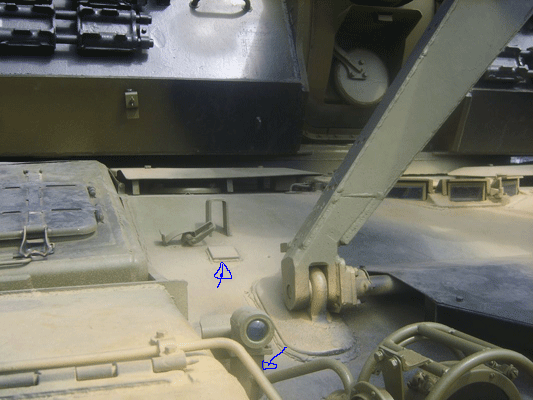
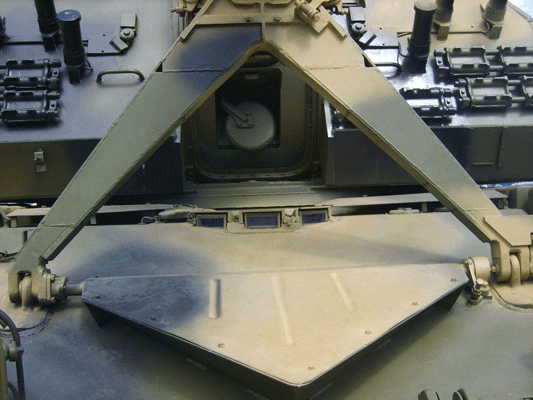
But from looking for pics of the formation lights, I saw this.
Where I would place that part is just a flat surface, and the wiring goes from the formation light to the headlights/horn. Also part G20 is supposed to go next to H49, which I have seen from other pictures is actually a hammer?
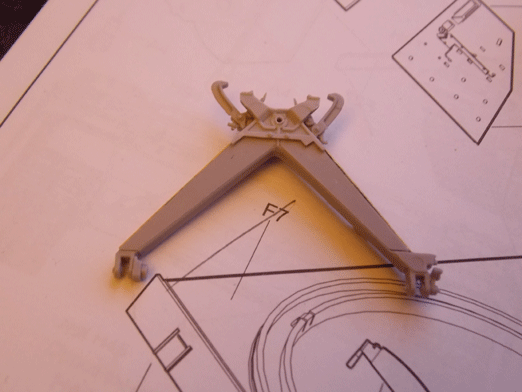
So watch out when painting that one. The saw has to "teeth" either so cut those out from the kit part or replace it with PE. One picture I saw had the saw wrapped up in a tarp, so that might work too.
Have some of the rear done. Couple of really fragile rails and some tiny parts here.
And that's what where I'm up to now, back to building....
laikneth
Singapore / 新加坡
Joined: September 24, 2013
KitMaker: 75 posts
Armorama: 63 posts
Joined: September 24, 2013
KitMaker: 75 posts
Armorama: 63 posts
Posted: Thursday, February 13, 2014 - 04:51 PM UTC
Have to go slow. many small parts took me three straight days of work.
Posted: Wednesday, February 19, 2014 - 05:31 PM UTC
Oh yeah, slows how it goes.
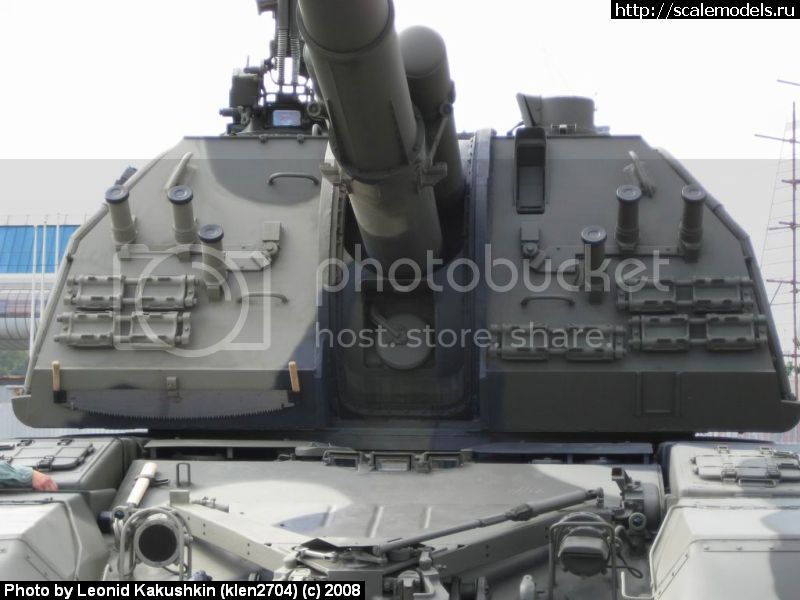
Did some work on the gun lock. Still a few parts to add. Fit was a little rough, but looking at this:
Don't have to worry to much. To fill in some of the gaps I got, going to replicate those seam lines and add the little plate on the bottom right. Which works out fine since there's a sink hole there.
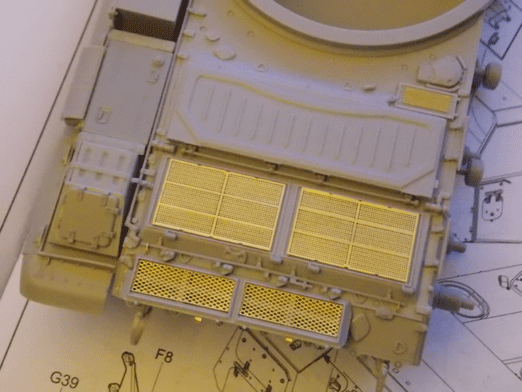
Finished up the engine deck and added the PE grills.
Instructions for the PE bits on the back weren't very clear, but looking at pictures they are hook shaped and hold the tow ropes in place. Bent those pieces around one of my small drill bits.
Built and added some brass to the head lights. They were pretty fussy. Lights are held up by a single piece on one side just like the real thing. Decided to use CA glue on these parts, just couldn't get them to stay in place with plastic cement. Got the stowage boxes mostly done and dry fitted. Some gaps to fill and then add the PE loops to finish it up. Going to glue the skirts/fenders after I paint the hull, still haven't started the tracks yet.
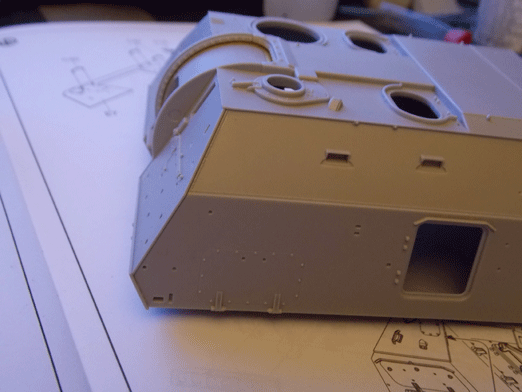
Started the turret. Have the basic structure done.
Some small gaps in various places, not a real problem, more weld lines to re-do.
And that's where I'm at now.
andymacrae
Scotland, United Kingdom
Joined: September 01, 2005
KitMaker: 409 posts
Armorama: 402 posts
Joined: September 01, 2005
KitMaker: 409 posts
Armorama: 402 posts
Posted: Thursday, February 20, 2014 - 12:34 AM UTC
Quoted Text
Not as much done as I would have liked, but what are you gonna do?
Lower rear done.
Lower front finished. Also added the return rollers and suspension arms.
Glued the top in place and started on the top front. Formation lights are clear plastic. Periscopes are clear plastic too, haven't put those on yet.
I've run into a little something. Instructions tell us to place part H49 which would connect to the right formation light.
But from looking for pics of the formation lights, I saw this.
Where I would place that part is just a flat surface, and the wiring goes from the formation light to the headlights/horn. Also part G20 is supposed to go next to H49, which I have seen from other pictures is actually a hammer?
So watch out when painting that one. The saw has to "teeth" either so cut those out from the kit part or replace it with PE. One picture I saw had the saw wrapped up in a tarp, so that might work too.
Have some of the rear done. Couple of really fragile rails and some tiny parts here.
And that's what where I'm up to now, back to building....
Part H49 is on the one (Possibly the prototype?) in the Central Artillery Museum:
http://www.net-maquettes.com/pictures/self-propelled-howitzer-2c19-msta-s-walkaround/?afg8_page_id=4#afg-8
Perhaps only on early or prototype versions?
HTH
Andy
retiredyank
Arkansas, United States
Joined: June 29, 2009
KitMaker: 11,610 posts
Armorama: 7,843 posts
Joined: June 29, 2009
KitMaker: 11,610 posts
Armorama: 7,843 posts
Posted: Thursday, February 20, 2014 - 10:13 AM UTC
I've been looking at this kit, since it was released. I'll be following, closely. I'm really hoping that it is within acceptable accuracy limits. Great job, so far. I do enjoy step-by-step builds.
Posted: Thursday, February 20, 2014 - 02:20 PM UTC
[/quote]
Part H49 is on the one (Possibly the prototype?) in the Central Artillery Museum:
http://www.net-maquettes.com/pictures/self-propelled-howitzer-2c19-msta-s-walkaround/?afg8_page_id=4#afg-8
Perhaps only on early or prototype versions?
HTH
Andy[/quote]
Possibly early. I've seen that picture, but looking around some more, I did not see anymore like that. So for now I've decided to not use H49.
I knew I had to have it when I saw it listed while browsing for a lot of KV-1's from a HK shop. So far she looks good, though I'm not to familiar with this particular vehicle.
Part H49 is on the one (Possibly the prototype?) in the Central Artillery Museum:
http://www.net-maquettes.com/pictures/self-propelled-howitzer-2c19-msta-s-walkaround/?afg8_page_id=4#afg-8
Perhaps only on early or prototype versions?
HTH
Andy[/quote]
Possibly early. I've seen that picture, but looking around some more, I did not see anymore like that. So for now I've decided to not use H49.
Quoted Text
I've been looking at this kit, since it was released. I'll be following, closely. I'm really hoping that it is within acceptable accuracy limits. Great job, so far. I do enjoy step-by-step builds.
I knew I had to have it when I saw it listed while browsing for a lot of KV-1's from a HK shop. So far she looks good, though I'm not to familiar with this particular vehicle.
karel1974
Karelia, Russia
Joined: March 30, 2014
KitMaker: 37 posts
Armorama: 37 posts
Joined: March 30, 2014
KitMaker: 37 posts
Armorama: 37 posts
Posted: Sunday, March 30, 2014 - 06:12 AM UTC
Hallo , friends , excuse to my bad english .
connection to builds Msta .
Det. H49 put in only early mashins .
addition in disrepair on model trumpeter -
http://fotki.yandex.ru/users/alexeigalkin74/view/735784/ .
http://fotki.yandex.ru/users/alexeigalkin74/view/747208/ .
http://fotki.yandex.ru/users/alexeigalkin74/view/751158/ .
http://fotki.yandex.ru/users/alexeigalkin74/view/756121/ .
My model in scratchbuild interior .
full build in http://panzer35.ru/forum/45-12727-1 .
and http://fotki.yandex.ru/users/alexeigalkin74/album/398272/ .
...
karel1974
Karelia, Russia
Joined: March 30, 2014
KitMaker: 37 posts
Armorama: 37 posts
Joined: March 30, 2014
KitMaker: 37 posts
Armorama: 37 posts
Posted: Sunday, March 30, 2014 - 09:33 AM UTC
karel1974
Karelia, Russia
Joined: March 30, 2014
KitMaker: 37 posts
Armorama: 37 posts
Joined: March 30, 2014
KitMaker: 37 posts
Armorama: 37 posts
Posted: Friday, April 04, 2014 - 08:29 AM UTC
on real tank do not use detail C43 and C45 .
box F3 and F5 probably broad on 3 mm .
no cover FVU - pic.
http://fotki.yandex.ru/users/alexeigalkin74/view/761264/ .
http://fotki.yandex.ru/users/alexeigalkin74/view/761265/ ...
box F3 and F5 probably broad on 3 mm .
no cover FVU - pic.
http://fotki.yandex.ru/users/alexeigalkin74/view/761264/ .
http://fotki.yandex.ru/users/alexeigalkin74/view/761265/ ...
karel1974
Karelia, Russia
Joined: March 30, 2014
KitMaker: 37 posts
Armorama: 37 posts
Joined: March 30, 2014
KitMaker: 37 posts
Armorama: 37 posts
Posted: Tuesday, May 13, 2014 - 09:27 PM UTC
Model is ready .
My first model color airbrush .
foto -
http://fotki.yandex.ru/users/alexeigalkin74/view/785003 .
http://fotki.yandex.ru/users/alexeigalkin74/view/785006?p=4 .
http://fotki.yandex.ru/users/alexeigalkin74/view/785005?p=4 .
http://fotki.yandex.ru/users/alexeigalkin74/view/785009?p=5 .
http://fotki.yandex.ru/users/alexeigalkin74/view/785012?p=5 .
http://fotki.yandex.ru/users/alexeigalkin74/view/785014?p=5 .
http://fotki.yandex.ru/users/alexeigalkin74/view/776497?p=4 .
Model is full scratchbuild interier .
all foto in album http://fotki.yandex.ru/users/alexeigalkin74/album/398272/ .
...
retiredyank
Arkansas, United States
Joined: June 29, 2009
KitMaker: 11,610 posts
Armorama: 7,843 posts
Joined: June 29, 2009
KitMaker: 11,610 posts
Armorama: 7,843 posts
Posted: Tuesday, May 13, 2014 - 10:36 PM UTC
That is one ugly beast. Excellent work! The fan blades seem to be out of scale. Maybe, one of the manufacturers has noticed this and intends to provide some in an am set. Of course, on your build you won't be able to see it. Where did you come up with the camo pattern/colors?
karel1974
Karelia, Russia
Joined: March 30, 2014
KitMaker: 37 posts
Armorama: 37 posts
Joined: March 30, 2014
KitMaker: 37 posts
Armorama: 37 posts
Posted: Wednesday, May 14, 2014 - 06:03 AM UTC
retiredyank
Arkansas, United States
Joined: June 29, 2009
KitMaker: 11,610 posts
Armorama: 7,843 posts
Joined: June 29, 2009
KitMaker: 11,610 posts
Armorama: 7,843 posts
Posted: Wednesday, May 14, 2014 - 05:05 PM UTC
This particular got me a virus.
karel1974
Karelia, Russia
Joined: March 30, 2014
KitMaker: 37 posts
Armorama: 37 posts
Joined: March 30, 2014
KitMaker: 37 posts
Armorama: 37 posts
Posted: Wednesday, May 14, 2014 - 07:38 PM UTC
ok .
search google -
Russia Arms Expo 2013 Vitaly V. Kuzmin .
Is it walkaround in exhibition .
search google -
Russia Arms Expo 2013 Vitaly V. Kuzmin .
Is it walkaround in exhibition .