_GOTOBOTTOM
Armor/AFV
For discussions on tanks, artillery, jeeps, etc.
Egyptian M4A4/A2 FL10 Question
gastec
Visit this Community
Auckland, New Zealand
Joined: February 03, 2014
KitMaker: 1,042 posts
Armorama: 871 posts
Posted: Tuesday, June 03, 2014 - 10:25 AM UTC
I'm working on a Egyptian M4A4/A2 Sherman using Tasca parts along with a Hobby Boss turret from their FL10 Armoured Car kit. Plenty of decent reference photos on the net but there are a couple of things I've been unable to work out so here's hoping someone here will know


First up - Exhaust shield....
This is show mounted on the rear plate....


Is this the 'in use' position or is it designed to swing down to somehow cover the exhaust outlet?

Secondly - brackets...


Any idea what the two triangular gusset type brackets are for below the cut down access doors?

And WIP to date...


Base kit is Tasca VC Firefly with other parts from my spares box.

Gary
Removed by original poster on 05/14/19 - 00:14:39 (GMT).
gastec
Visit this Community
Auckland, New Zealand
Joined: February 03, 2014
KitMaker: 1,042 posts
Armorama: 871 posts
Posted: Wednesday, June 04, 2014 - 06:16 AM UTC
Thanks Matt. Pretty much along the lines of what I was thinking. References of these 'external' shields is just about non existent

As for that lower bracket, further thought has me wondering if it's something the Israelis added when they pressed them into IDF service?

Gary
Removed by original poster on 05/14/19 - 00:14:52 (GMT).
tanknick22
Visit this Community
United States
Joined: February 19, 2009
KitMaker: 1,139 posts
Armorama: 1,100 posts
Posted: Wednesday, June 04, 2014 - 08:09 AM UTC

Quoted Text

I'm working on a Egyptian M4A4/A2 Sherman using Tasca parts along with a Hobby Boss turret from their FL10 Armoured Car kit. Plenty of decent reference photos on the net but there are a couple of things I've been unable to work out so here's hoping someone here will know


First up - Exhaust shield....
This is show mounted on the rear plate....


Is this the 'in use' position or is it designed to swing down to somehow cover the exhaust outlet?

Secondly - brackets...


Any idea what the two triangular gusset type brackets are for below the cut down access doors?

And WIP to date...


Base kit is Tasca VC Firefly with other parts from my spares box.

Gary


Gary
The m4a4 was a Brtish Sherman, those brackets were left over from the towing pintle
gastec
Visit this Community
Auckland, New Zealand
Joined: February 03, 2014
KitMaker: 1,042 posts
Armorama: 871 posts
Posted: Wednesday, June 04, 2014 - 09:45 AM UTC
Nick

Yes and no. Yes, the M4A4 was the British version (Sherman V), but no, the towing pintle brackets were completely different. They were placed either side of the engine access doors with a leaf spring tow bar assembly mounted between them. The brackets shown above are a post WW2 addition.


Matt

Not seen images of these with a mine roller attached. Given the lack of attachment points up front, then I'd say it was highly unlikely.
It may be something completely innocuous like a towing bracket - especially as the standard M4A4 one would have to have been removed due to the new exhaust set up?

Gary
MajorPete
Visit this Community
North Carolina, United States
Joined: March 27, 2005
KitMaker: 56 posts
Armorama: 49 posts
Posted: Wednesday, June 04, 2014 - 12:41 PM UTC
Nice build so far
gastec
Visit this Community
Auckland, New Zealand
Joined: February 03, 2014
KitMaker: 1,042 posts
Armorama: 871 posts
Posted: Wednesday, June 04, 2014 - 09:30 PM UTC
Thanks Pete. Couple of WIP shots....


Hobby Boss turret isn't the greatest and needs a fair bit of TLC to bring it up to a decent standard. The joys of modelling

Gary
Removed by original poster on 05/14/19 - 00:15:09 (GMT).
gastec
Visit this Community
Auckland, New Zealand
Joined: February 03, 2014
KitMaker: 1,042 posts
Armorama: 871 posts
Posted: Thursday, June 05, 2014 - 09:39 PM UTC
Cheers Matt.

More work on the turret this evening. Ammo loading hatches are replaced with styrene strip to gain correct shape. Kit grab handles are rails are replaced with brass wire while more missing welds seams are added along with some texture to the cast cupola...


Also had a little visitor too this evening....


Gary
bison126
Visit this Community
Correze, France
Joined: June 10, 2004
KitMaker: 5,329 posts
Armorama: 5,204 posts
Posted: Friday, June 06, 2014 - 04:12 AM UTC
Nice job Gary. The ventilator dome is ill located by HB. You have to first cut a straight edge at the front then move it forward nearly in contact with the stiffening rib behind the TC cupola.

Here is mine on the Heller turret.

Olivier
gastec
Visit this Community
Auckland, New Zealand
Joined: February 03, 2014
KitMaker: 1,042 posts
Armorama: 871 posts
Posted: Friday, June 06, 2014 - 11:14 AM UTC
Thank you Olivier. Major schoolboy error on my part as I relied on Hobby Boss having done their homework. Major mistake Unfortunately, due to other raised details surrounding the area, simply slicing off the original part was not an option due to he risk of collateral damage so I simply hacked the original off and made a new one from styrene sheet and put it where I should have done in the first place


I noted looing at some reference shots that some FL10 turrets had casting numbers and some didn't. Given that I have some Archer casting numbers etc in my stash, it would have been remiss of me not to include them...


Gary
Removed by original poster on 05/14/19 - 00:15:32 (GMT).
gastec
Visit this Community
Auckland, New Zealand
Joined: February 03, 2014
KitMaker: 1,042 posts
Armorama: 871 posts
Posted: Friday, June 06, 2014 - 02:16 PM UTC
Thanks Matt.

Unfortunately, my visitor was only interested if there were any aphids around

Not a rude question. However, I don't know the definitive answer. Like the brackets on the rear, they remain a bit of a mystery to me. They were present on the initial Egyptian builds and can only assume they are some form of stowage rack?

Gary
Kharkov
Joined: April 09, 2011
KitMaker: 181 posts
Armorama: 175 posts
Posted: Saturday, June 07, 2014 - 07:41 AM UTC

A makeshift stowage rack for a large amount of ammo boxes? the engine deck is a good place for things like that, or as you say, just general stowage, very curious indeed.


panamadan
Visit this Community
Minnesota, United States
Joined: July 20, 2004
KitMaker: 1,513 posts
Armorama: 1,449 posts
Posted: Tuesday, June 10, 2014 - 05:58 AM UTC
I'd like to follow along Gary.
Dan
gastec
Visit this Community
Auckland, New Zealand
Joined: February 03, 2014
KitMaker: 1,042 posts
Armorama: 871 posts
Posted: Wednesday, June 11, 2014 - 08:13 PM UTC
Welcome along Dan

Reference photos show two round 'stubs' on the turret ring base on the Latrun version, but not on the standard AMX 13. My educated guess is that these are essentially travel stops to prevent the rear of the turret catching on the turret splash ring at full elevation. I added them using styrene rod....


The small door at the rear of the turret (spent shell ejection port?) was added next - upgrading the details as per ref shots with Evergreen styrene....


There is what appears to be a form of cradle at the leading edge of the upper section of the lower half turret - a couple of small triangles of styrene with weld seams are used. Also, the horizontal plane elevation/depression mounts on either side of the turret are just plain round prominences on the kit. There is a separate rod in the centre and to represent this, I just drilled out a hole and inserted a piece of styrene rod....


I also added a couple of PE brackets to the rear which, while included in the HB kit, need to be 'upgraded' by drilling out a small hole on each one as per the real thing....


I've also added some more Mr Surfacer to some surfaces. While the steel isn't cast, it still has a slightly rough texture on the real thing.

Gary
gastec
Visit this Community
Auckland, New Zealand
Joined: February 03, 2014
KitMaker: 1,042 posts
Armorama: 871 posts
Posted: Wednesday, June 11, 2014 - 08:57 PM UTC
If you look at most AMX13s, you'll see a canvas shield around the join between the turret sections, but his wasn't always the case. When first produced, a rubberised strip was fitted and relied on friction with the upper half to keep out dust, sand, dirt etc. Combat action, especially in Egypt, soon showed that this set up wasn't sufficient and as a result, a canvas section replaced the initial set up.

As this is a vehicle depicted during the Suez Crisis, a rubberised strip is required. I've simply replicated this using a strip of lead sheet folded into a 90 deg section and then 'moulded' into shape and fixed to the base with superglue. The upper section of the turret is added and a blunt carving tool is used to press the strip into the required shape. Here's the first side complete....


Gary
panamadan
Visit this Community
Minnesota, United States
Joined: July 20, 2004
KitMaker: 1,513 posts
Armorama: 1,449 posts
Posted: Thursday, June 12, 2014 - 04:44 AM UTC
Great attention to detail Gary.
By the way, on your top pic that looks to be a exhaust deflector from a M4A4.
Dan
gastec
Visit this Community
Auckland, New Zealand
Joined: February 03, 2014
KitMaker: 1,042 posts
Armorama: 871 posts
Posted: Thursday, June 12, 2014 - 08:26 PM UTC
Thanks Dan. Yes, it certainly looks very similar.


Both sides done along with the jerry can holder - left over from the M51 build...


However, something was bugging me about the dust strip and after some further searching on the net, I found out why. It was too small :roll: So I pulled off the first one, remade a new strip using a wider section of lead and fixed it in place - this time making 3 separate parts per side and added some spare PE detail....


I won't lose sleep worrying about this now

Gary

helkaissy
Visit this Community
Al Qahirah, Egypt / لعربية
Joined: October 06, 2013
KitMaker: 244 posts
Armorama: 180 posts
Posted: Thursday, June 12, 2014 - 09:14 PM UTC
That build looks great so far Gary.
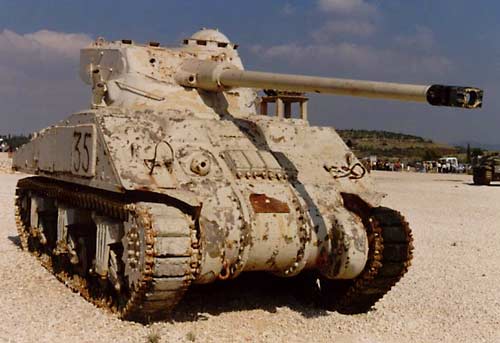
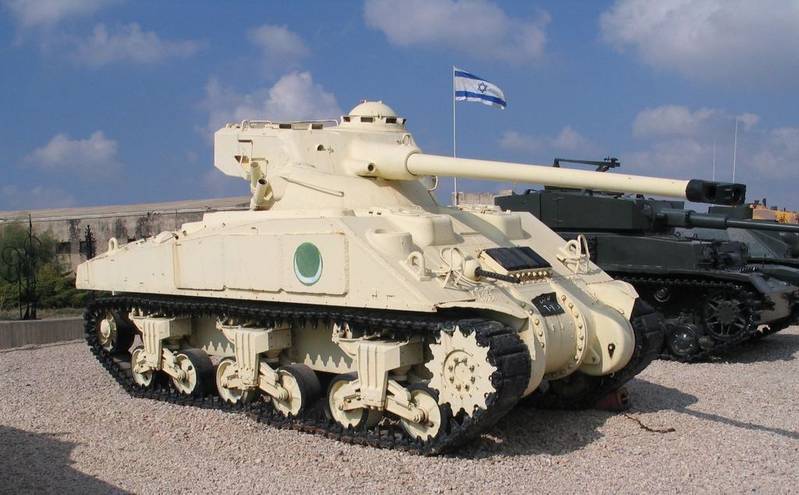
Indeed the M4A4 is a rare bird and even we as Egyptians haven't seen it except in museums
I have found only a couple of reference photos, one is from Israel but might be good for reference as well:


gastec
Visit this Community
Auckland, New Zealand
Joined: February 03, 2014
KitMaker: 1,042 posts
Armorama: 871 posts
Posted: Thursday, June 12, 2014 - 10:36 PM UTC
Thanks Hussein. Haven't seen that first pic before. Very useful photo

Both the commander and gunner get a 'manual' sight mounted on the front of the turret. While these are provided with the HB kit, they are photo etch parts and as a result, a totally unrealistic flat profile. So, I simply used some brass tube, 5 gm gold wire (from a fly fishing tackle shop) and some spare PE. All soldered together to make this...


Gary
Removed by original poster on 05/14/19 - 00:15:50 (GMT).
gastec
Visit this Community
Auckland, New Zealand
Joined: February 03, 2014
KitMaker: 1,042 posts
Armorama: 871 posts
Posted: Friday, June 13, 2014 - 09:40 AM UTC
Thanks Matt

Gunner's hatch is spruced up a little along with some travel stops for the hatch....


Gary
gastec
Visit this Community
Auckland, New Zealand
Joined: February 03, 2014
KitMaker: 1,042 posts
Armorama: 871 posts
Posted: Friday, June 13, 2014 - 07:11 PM UTC
Commanders hatch has a very rough cast surface so I just used a burr on a Dremel set at low speed to replicate this effect. New handle is added using fuse wire. I kept with the moulded on locking tabs - just thinned the plastic and drilled out the required holes. Periscope covers are then fitted after being thinned and welds around their edges are added using stretched sprue. Bizarre that HB don't actually include any periscopes with their kit!? Will need to dig through my spares box or make some up myself...


Gary
 _GOTOTOP