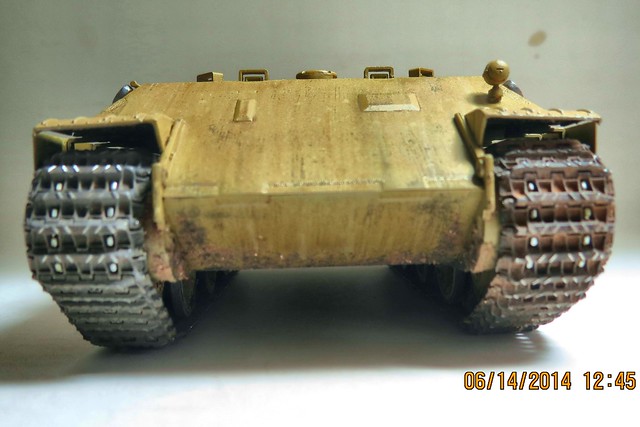
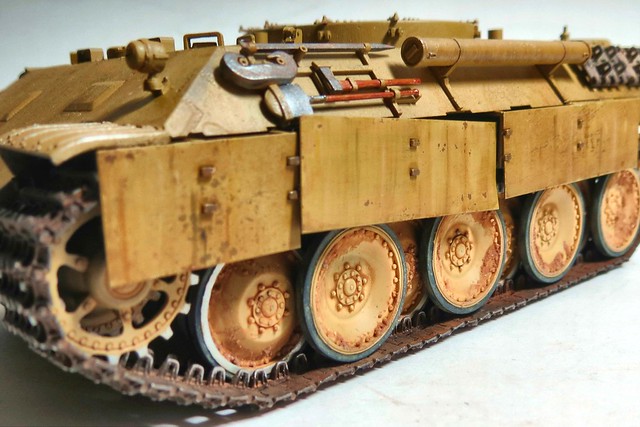
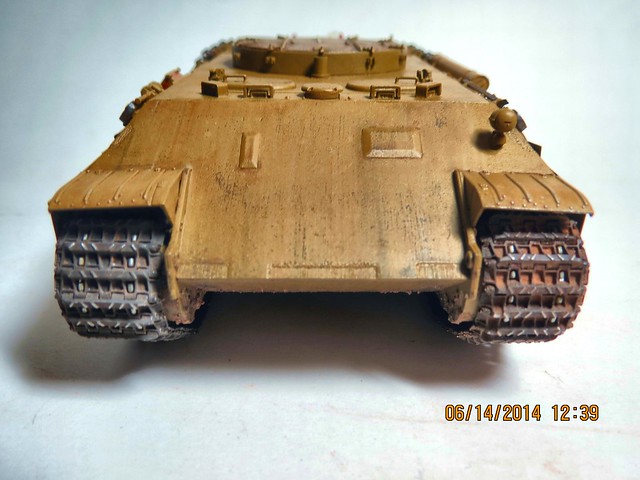
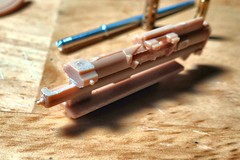
Trying to stay true to myself after AMPS this past April, I am building. I didnt want to bore anyone with the same old German build so here I am at this point. The kit is HobbyBoss, standard panther build with Fruil tracks. I will post the gun build/paint/weather and mount. Everything to this point has not been dullcoated and no pigments applied yet. Washes and oil paint dots for streaks have been applied. I am toning down the mufflers and still have the vision blocks to be painted. the missing skirt is on purpose, the tilted skirt is because I didnt attach the bracket correct. But I like the look. Also the paint is Tamiya Dark Yellow, rattle can on the wheels out of the bottle into my airbrush for the hull and skirts, different isnt it?
Constructive Feedback
For in-progress or completed build photos. Give and get contructive feedback!
Hosted by Darren Baker, Dave O'Meara
Flak Bergepanther
fireontheway
Pennsylvania, United States
Joined: May 17, 2006
KitMaker: 370 posts
Armorama: 368 posts
Joined: May 17, 2006
KitMaker: 370 posts
Armorama: 368 posts
Posted: Saturday, June 14, 2014 - 05:21 AM UTC
210cav
Virginia, United States
Joined: February 05, 2002
KitMaker: 6,149 posts
Armorama: 4,573 posts
Joined: February 05, 2002
KitMaker: 6,149 posts
Armorama: 4,573 posts
Posted: Saturday, June 14, 2014 - 08:38 AM UTC
Tim-- what brand and color did you use on your tools as shown in photo 4 and 5
thanks
DJ
thanks
DJ
fireontheway
Pennsylvania, United States
Joined: May 17, 2006
KitMaker: 370 posts
Armorama: 368 posts
Joined: May 17, 2006
KitMaker: 370 posts
Armorama: 368 posts
Posted: Saturday, June 14, 2014 - 08:49 AM UTC
DJ, Vallejo "old wood" then Windsor & Newton "burnt sienna" oil paint thinned and brushed over top. It kind of gives a wood grain look.
fireontheway
Pennsylvania, United States
Joined: May 17, 2006
KitMaker: 370 posts
Armorama: 368 posts
Joined: May 17, 2006
KitMaker: 370 posts
Armorama: 368 posts
Posted: Sunday, June 29, 2014 - 01:35 PM UTC
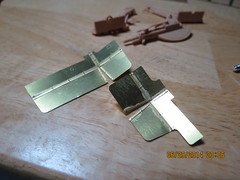
Vacation is over so back to it. Started assembling the gun. using an Aber barrel so cut the old one off and have to mount it. Using the PE gun shields. Hoping the gun assembly phase goes uneventful.
It appears Flickr is up to its old tricks again so sorry for the small size. Cant seem to vies my pics on there in various sizes and copy and paste bigger ones here, sorry
Removed by original poster on 06/30/14 - 23:00:42 (GMT).
fireontheway
Pennsylvania, United States
Joined: May 17, 2006
KitMaker: 370 posts
Armorama: 368 posts
Joined: May 17, 2006
KitMaker: 370 posts
Armorama: 368 posts
Posted: Monday, June 30, 2014 - 11:02 AM UTC
" BORDER="0">
OK trying to figure Flickr out, worese than working with PE
Removed by original poster on 06/30/14 - 23:05:21 (GMT).
fireontheway
Pennsylvania, United States
Joined: May 17, 2006
KitMaker: 370 posts
Armorama: 368 posts
Joined: May 17, 2006
KitMaker: 370 posts
Armorama: 368 posts
Posted: Monday, June 30, 2014 - 11:06 AM UTC
" BORDER="0">
" BORDER="0">
" BORDER="0">
fireontheway
Pennsylvania, United States
Joined: May 17, 2006
KitMaker: 370 posts
Armorama: 368 posts
Joined: May 17, 2006
KitMaker: 370 posts
Armorama: 368 posts
Posted: Sunday, July 13, 2014 - 09:49 AM UTC
OK I had 2 parts not completely molded so I did 2 very rudimentary repairs
" BORDER="0">
" BORDER="0">
" BORDER="0">
The rest are progressive build pics of the gun
" BORDER="0">
" BORDER="0">
" BORDER="0">
" BORDER="0">
" BORDER="0">
" BORDER="0">
" BORDER="0">
" BORDER="0">
The rest are progressive build pics of the gun
" BORDER="0">
" BORDER="0">
" BORDER="0">
" BORDER="0">
" BORDER="0">
fireontheway
Pennsylvania, United States
Joined: May 17, 2006
KitMaker: 370 posts
Armorama: 368 posts
Joined: May 17, 2006
KitMaker: 370 posts
Armorama: 368 posts
Posted: Saturday, July 26, 2014 - 05:17 AM UTC
Yep I'm still at it. Now its getting crunch time. The trailer mount doesnt fit well into the mounts on the hull. I am going to have to sand the pins down to get them to fit. The gunshields were a pain also fit wise. If I would have used the plastic ones they might have fit better but I chose the PE. This is the point where all the previous work may be lost if I cant pull off the fit.
" BORDER="0">
" BORDER="0">
" BORDER="0">
" BORDER="0">
" BORDER="0">
" BORDER="0">
" BORDER="0">
" BORDER="0">
" BORDER="0">
" BORDER="0">
" BORDER="0">
" BORDER="0">
HEINE-07
Ohio, United States
Joined: February 28, 2007
KitMaker: 392 posts
Armorama: 198 posts
Joined: February 28, 2007
KitMaker: 392 posts
Armorama: 198 posts
Posted: Saturday, July 26, 2014 - 06:25 AM UTC
DANG! That is cool!
fireontheway
Pennsylvania, United States
Joined: May 17, 2006
KitMaker: 370 posts
Armorama: 368 posts
Joined: May 17, 2006
KitMaker: 370 posts
Armorama: 368 posts
Posted: Tuesday, August 26, 2014 - 07:13 AM UTC
Just when you had hoped I had gone away I'm back. Finally I got some paint on the gun. I also cut 1 of the back mounting legs off and moved it slightly forward to better fit the corresponding holes. I base coated with Vallejo Burnt Sienna, then hairspray then Polly Scale Panzer Dark Grey. I will add Mig Blue filter for Panzer Grey next. Did some lite chipping where I thought wear and tear would be, will have to touch up though.
" BORDER="0">
" BORDER="0">
" BORDER="0">
" BORDER="0">
" BORDER="0">
" BORDER="0">
" BORDER="0">
" BORDER="0">
" BORDER="0">
" BORDER="0">
" BORDER="0">
" BORDER="0">
fireontheway
Pennsylvania, United States
Joined: May 17, 2006
KitMaker: 370 posts
Armorama: 368 posts
Joined: May 17, 2006
KitMaker: 370 posts
Armorama: 368 posts
Posted: Monday, September 15, 2014 - 10:09 AM UTC
And yes I am still at this one. Finish line is in sight. Some more painting and weathering on the gun. Still very little work/paint on the hull to do.
" BORDER="0">
" BORDER="0">
" BORDER="0">
" BORDER="0">
" BORDER="0">
" BORDER="0">
" BORDER="0">
" BORDER="0">
" BORDER="0">
" BORDER="0">
" BORDER="0">
" BORDER="0">
" BORDER="0">
" BORDER="0">
" BORDER="0">
" BORDER="0">
" BORDER="0">
" BORDER="0">
panzerman1
Maryland, United States
Joined: September 30, 2010
KitMaker: 430 posts
Armorama: 291 posts
Joined: September 30, 2010
KitMaker: 430 posts
Armorama: 291 posts
Posted: Monday, September 15, 2014 - 01:15 PM UTC
Nice build. Combines 2 of my favorite subjects....Berge panthers and Flak. Enjoy the rest of the build.
Bill.
Bill.
fireontheway
Pennsylvania, United States
Joined: May 17, 2006
KitMaker: 370 posts
Armorama: 368 posts
Joined: May 17, 2006
KitMaker: 370 posts
Armorama: 368 posts
Posted: Tuesday, September 16, 2014 - 03:35 AM UTC
Thanks Bill, with my fingers crossed I hope this wraps up enjoyable. It's been less than that at times but that's been my fault.
bizzychicken
Wales, United Kingdom
Joined: September 06, 2008
KitMaker: 967 posts
Armorama: 842 posts
Joined: September 06, 2008
KitMaker: 967 posts
Armorama: 842 posts
Posted: Tuesday, September 16, 2014 - 04:52 AM UTC
Nice Build Tim, also two of my Fav's Panther and Flak's. I was thinking of getting this kit, what do you think of it? Any issues with the hull, what are the Tracks like? How does it compare to a Dragon Panther? Cheers Geraint
fireontheway
Pennsylvania, United States
Joined: May 17, 2006
KitMaker: 370 posts
Armorama: 368 posts
Joined: May 17, 2006
KitMaker: 370 posts
Armorama: 368 posts
Posted: Tuesday, September 16, 2014 - 07:09 AM UTC
Hi Geraint, the kit itself is pretty good. The torsion bar suspension needs some work (fit issues) but nothing that can be addressed because it isnt in view. Fit overall on the hull is good. The sideskirt supports have to be positioned correctly in order to get the skirts to hang properly. I inadvertently installed 1 angled but I think it allows the skirt to hang in more of a bent more natural look as if it was damaged. The PE skirts have a slight fit issue again depending on how you install the supports. I didnt use the kit tracks I replaced them with Fruil, so I cant help you there. I replaced the barrel with an Aber one, the gun shields being PE need care to install. The 3 leg mounts did not line up with the hull so I had to cut 1 leg and move it slightly forward so that all 3 fit in the respective holes. The driver weather shield which I am installing now doesnt appear to have the necessary holes drilled in the top of the hull behind the hatches but looking over the directions I might have missed this, something doesnt appear right anyway. Overall some fit issues, nothing major, I like the look of the vehicle, its unique.