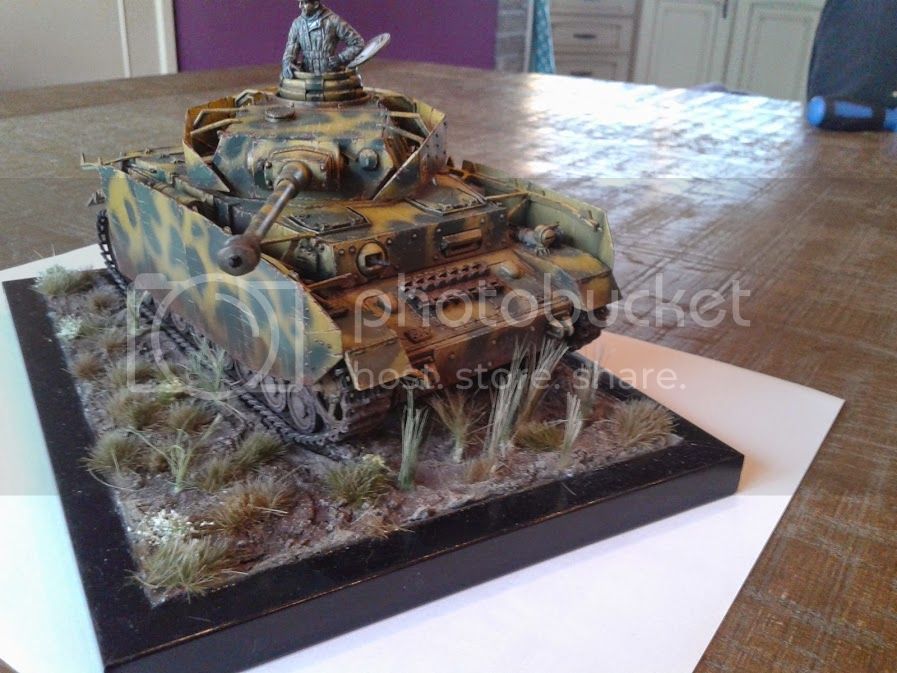
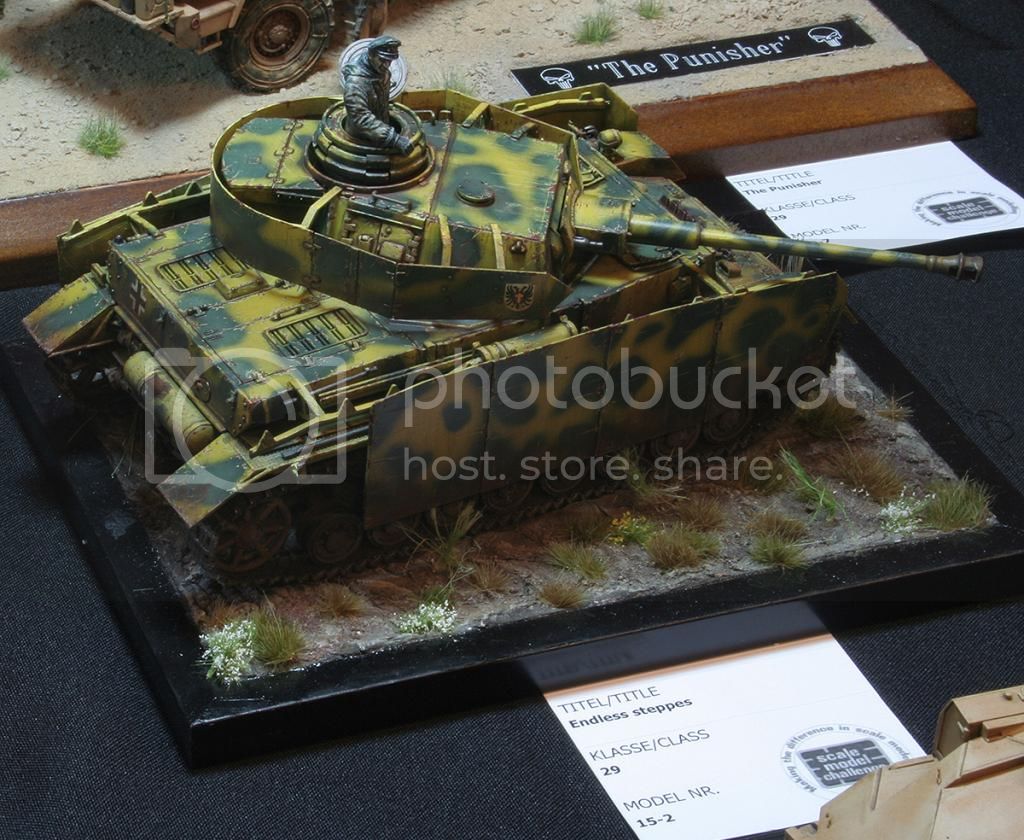
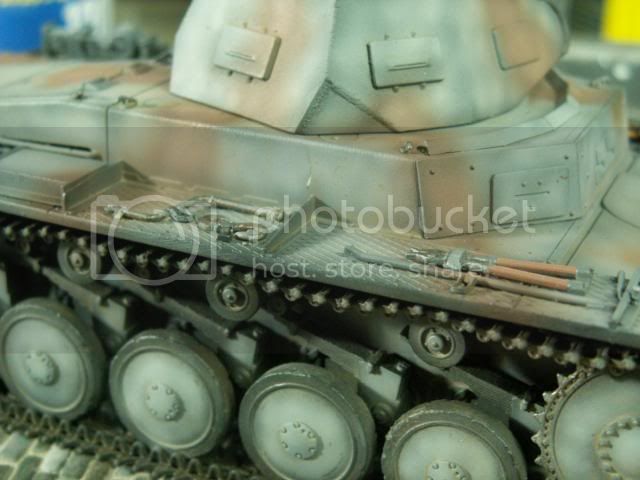
After years of neglecting this side of the hobby(I switched to Warhammer & 40k 12 years ago), I longed to try my hand at an historical topic.
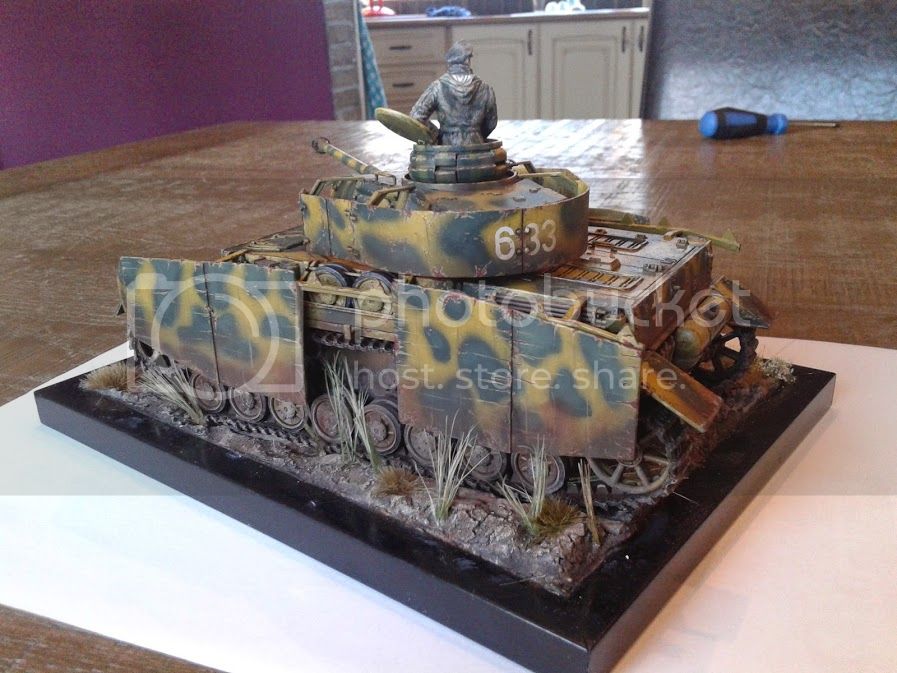
My interest ha been retriggered and my head is floating with different ideas to do the next project. But I'd like to gather some feedback & pointers from you guys on this out-of-the-box build of Tamiya's panzer IV ausf H
Constructive Feedback
For in-progress or completed build photos. Give and get contructive feedback!
Hosted by Darren Baker, Dave O'Meara
PZ IV ausf H out-of-the-box
vargunge
Belgium
Joined: October 15, 2014
KitMaker: 13 posts
Armorama: 13 posts
Joined: October 15, 2014
KitMaker: 13 posts
Armorama: 13 posts
Posted: Thursday, October 23, 2014 - 11:19 PM UTC
retiredyank
Arkansas, United States
Joined: June 29, 2009
KitMaker: 11,610 posts
Armorama: 7,843 posts
Joined: June 29, 2009
KitMaker: 11,610 posts
Armorama: 7,843 posts
Posted: Friday, October 24, 2014 - 12:06 AM UTC
The weathering and camo are done very well. The decals look perfect. The spare tracks should be weathered black, instead of red oxide. There appears to be too much of shine to it, similar to semi-gloss. This is very apparent on the barrel, in the last two photos. The open periscopes don't appear to have any "glass". This are all minor issues, the worst being the sheen. And, they don't detract from a well done build, too much.
vargunge
Belgium
Joined: October 15, 2014
KitMaker: 13 posts
Armorama: 13 posts
Joined: October 15, 2014
KitMaker: 13 posts
Armorama: 13 posts
Posted: Friday, October 24, 2014 - 12:45 AM UTC
Thanks for the feedback. I've been pondering covering the complete tank with a matte varnish after fixing the decals. I decided against it....but I should have
And the vision blocks........I completely forgot about those. You are right they should have had some shine.
Can you elaborate on the black weathering of the spare tracks? I supposed them to be bare metal.
In general....my historic research could have been better
And the vision blocks........I completely forgot about those. You are right they should have had some shine.
Can you elaborate on the black weathering of the spare tracks? I supposed them to be bare metal.
In general....my historic research could have been better
retiredyank
Arkansas, United States
Joined: June 29, 2009
KitMaker: 11,610 posts
Armorama: 7,843 posts
Joined: June 29, 2009
KitMaker: 11,610 posts
Armorama: 7,843 posts
Posted: Friday, October 24, 2014 - 01:22 AM UTC
Germany painted tracks enamel black. I'm not sure that they even received a red oxide primer. Like I said, an easy fix. The most difficult would be the periscopes. But, you can always paint the slot black gloss or black with a gloss coat.
Bravo1102
New Jersey, United States
Joined: December 08, 2003
KitMaker: 2,864 posts
Armorama: 2,497 posts
Joined: December 08, 2003
KitMaker: 2,864 posts
Armorama: 2,497 posts
Posted: Friday, October 24, 2014 - 01:36 AM UTC
It's a cold wet morning and there's condensation around. Therefore the tank would be shiny. Add some tiny gloss patches where water would collect.
AFVFan
North Carolina, United States
Joined: May 17, 2012
KitMaker: 1,980 posts
Armorama: 1,571 posts
Joined: May 17, 2012
KitMaker: 1,980 posts
Armorama: 1,571 posts
Posted: Friday, October 24, 2014 - 02:19 AM UTC
There's a constant debate going on about the inside of the hatch colors. There is photo evidence that at least a few vehicles had interior colored hatches. With that said, I can overlook the light color you chose, however, the head cushion pad generally would be a brownish/blackish leather color.
Another point that caught my eye was on the muffler. You show the exhaust pipe totally rusted, yet there's no other sign of rust on the muffler, itself - or maybe I'm just not seeing it.
Overall though, you've done a pretty nice job. How did it do in the show?
Another point that caught my eye was on the muffler. You show the exhaust pipe totally rusted, yet there's no other sign of rust on the muffler, itself - or maybe I'm just not seeing it.
Overall though, you've done a pretty nice job. How did it do in the show?
vargunge
Belgium
Joined: October 15, 2014
KitMaker: 13 posts
Armorama: 13 posts
Joined: October 15, 2014
KitMaker: 13 posts
Armorama: 13 posts
Posted: Friday, October 24, 2014 - 02:30 AM UTC
I love this.... I'm learning a lot of new stuff. T(h)anks guys....and keep the feedback coming. Praises are nice but comments (even when negative) is what you learn from.
And I've got a nice thick skin ;-)
thebear
Quebec, Canada
Joined: November 15, 2002
KitMaker: 3,960 posts
Armorama: 3,579 posts
Joined: November 15, 2002
KitMaker: 3,960 posts
Armorama: 3,579 posts
Posted: Friday, October 24, 2014 - 04:02 AM UTC
Hi Gert... Great job on your Pz IV .. You've got some good tips so far.. As for the spare tracks, I assume you wanted to show them rusted which makes sence but as Matt said they were painted black at the factory to help against the rust . so next time you might want to go with a black base coat and then add rust color washes to show the inevidable rust starting to take over..
Another possibility is to paint them the base color which also happened very often at the factory .
Another thing I did notice is the coaxle MG .. The armored cover was part of the mantlet so it should be the base color and not gun metal.
For the exhaust , I'd go for more rust as well .. you can leave some paint on but it did burn off fast enough.. The other smaller muffler seemed to keep its paint longer but I added a thick rust colored wash to show the beginning of the rust coming through.
Lastly and this is only my opinion .. I get what you were trying to do with the lightening of the green to show fading .. but it contrasts a bit too much almost looking like a different color.. This happens when we lighten colors like green with white (it grays the color ) next time lighten with yellow or sand colors .. If this is what you did it might just have been to light . I also use this technique but I don't stay so in between the lines and there can be darker colors in the middle as well to show the wear is not just in the middle od the color..
I hope the pictures help show what I'm talking about ..
Welcome back to armor modelling and this is a great site to get all the tips you need ..stick around .. you'll like it.
Rick
vargunge
Belgium
Joined: October 15, 2014
KitMaker: 13 posts
Armorama: 13 posts
Joined: October 15, 2014
KitMaker: 13 posts
Armorama: 13 posts
Posted: Sunday, October 26, 2014 - 08:14 PM UTC
Quoted Text
There's a constant debate going on about the inside of the hatch colors. There is photo evidence that at least a few vehicles had interior colored hatches. With that said, I can overlook the light color you chose, however, the head cushion pad generally would be a brownish/blackish leather color.
Another point that caught my eye was on the muffler. You show the exhaust pipe totally rusted, yet there's no other sign of rust on the muffler, itself - or maybe I'm just not seeing it.
Overall though, you've done a pretty nice job. How did it do in the show?
Alas no result at all. I entered it in the beginners category of 1/48 and bigger, but didn't get a medal.
I did score a silver medal in fatasy figures advanced:
But That's a bit off topic
yeahwiggie
Dalarnas, Sweden
Joined: March 24, 2006
KitMaker: 2,093 posts
Armorama: 1,359 posts
Joined: March 24, 2006
KitMaker: 2,093 posts
Armorama: 1,359 posts
Posted: Sunday, October 26, 2014 - 11:25 PM UTC
Some good tips for my Italeri Pz.Kpfw.IV!
AFVFan
North Carolina, United States
Joined: May 17, 2012
KitMaker: 1,980 posts
Armorama: 1,571 posts
Joined: May 17, 2012
KitMaker: 1,980 posts
Armorama: 1,571 posts
Posted: Monday, October 27, 2014 - 03:50 PM UTC
Quoted Text
Alas no result at all. I entered it in the beginners category of 1/48 and bigger, but didn't get a medal.
I did score a silver medal in fatasy figures advanced
Excellent job on the figure. Congrats on the award!
GeraldOwens
Florida, United States
Joined: March 30, 2006
KitMaker: 3,736 posts
Armorama: 3,697 posts
Joined: March 30, 2006
KitMaker: 3,736 posts
Armorama: 3,697 posts
Posted: Monday, October 27, 2014 - 04:13 PM UTC
Quoted Text
Germany painted tracks enamel black. I'm not sure that they even received a red oxide primer. Like I said, an easy fix. The most difficult would be the periscopes. But, you can always paint the slot black gloss or black with a gloss coat.
Actually it was the Soviets in the postwar period who painted tracks with a bituminous black paint. There is a debate as to whether German tank tracks were delivered in red oxide primer or bare metal. In any case, the high manganese content meant that they wouldn't rust heavily (manganese steel is dark and slightly brownish), though manganese was in short supply in the final year of the war. It's possible late tracks might have been more prone to rust.
In reality, though, tank tracks are usually so covered with filth that the issue of their "real" color is academic.