_GOTOBOTTOM
Constructive Feedback
For in-progress or completed build photos. Give and get contructive feedback!
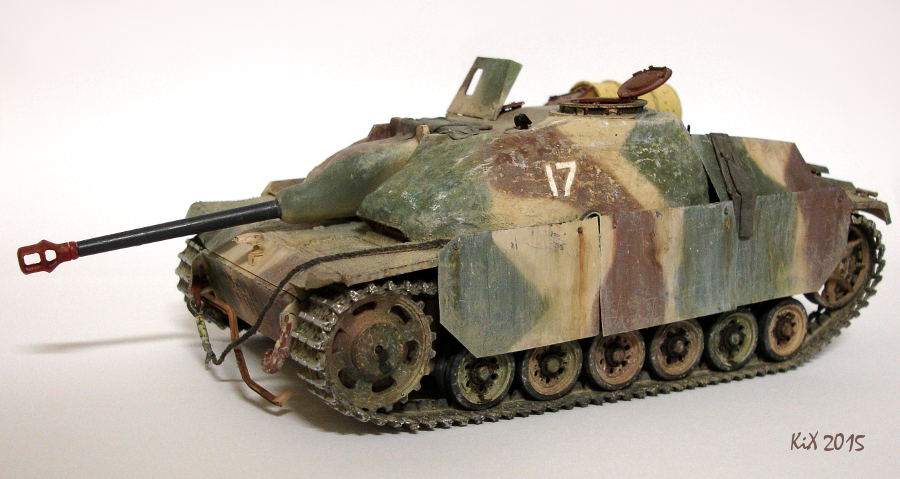
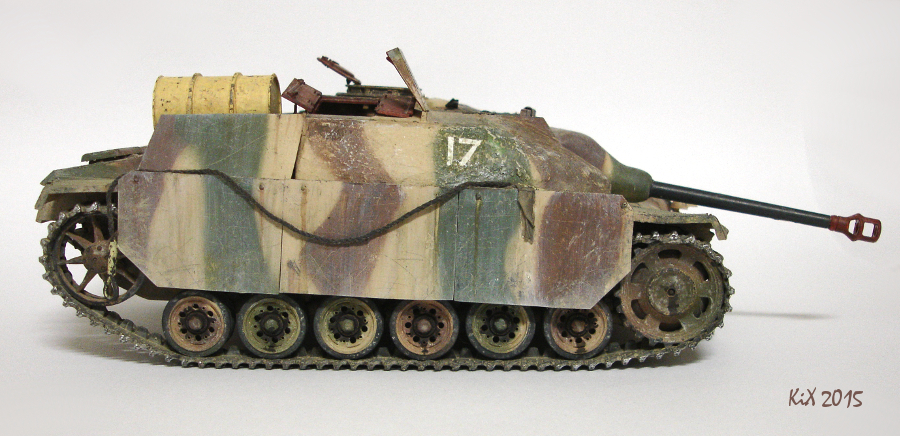
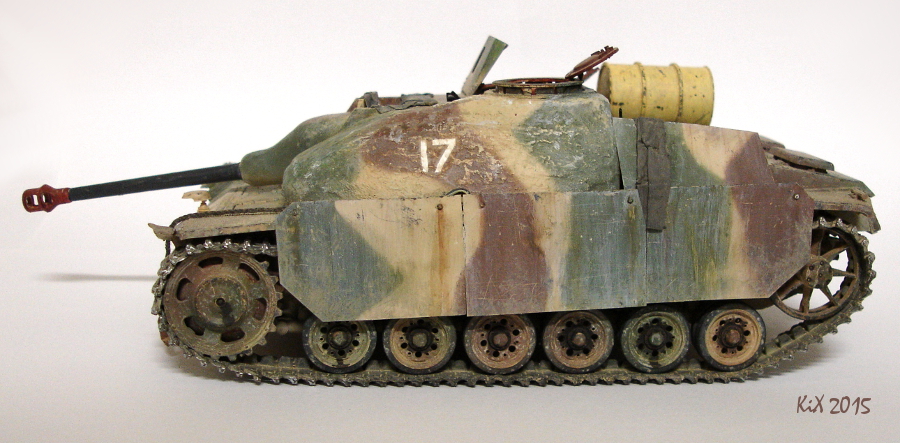
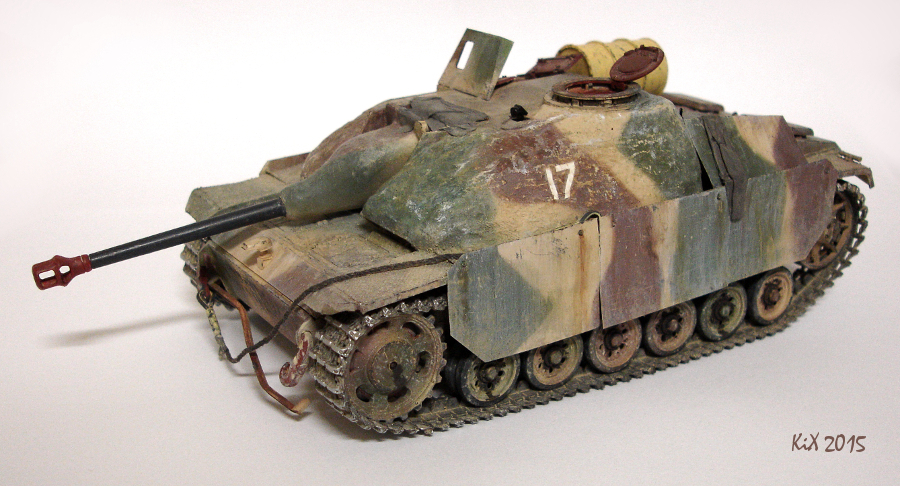
StuG Ausf.G Wreck
KuKLiNsKi
Visit this Community
Croatia Hrvatska
Joined: April 18, 2010
KitMaker: 106 posts
Armorama: 103 posts
Posted: Monday, January 12, 2015 - 06:28 AM UTC
1/35 Tamiya (Finnish box)
abandoned StuG III Ausf.G - West Germany '45

hope you like it


obg153
Visit this Community
Texas, United States
Joined: April 07, 2009
KitMaker: 1,063 posts
Armorama: 1,049 posts
Posted: Monday, January 12, 2015 - 06:53 AM UTC
Very nice work, Richard!. I really like the camo colors & pattern, and the running gear & tracks are especially well done. Are there plans for a dio or even just a base? Might give the "abandoned" idea some more context.
AFVFan
Visit this Community
North Carolina, United States
Joined: May 17, 2012
KitMaker: 1,980 posts
Armorama: 1,571 posts
Posted: Monday, January 12, 2015 - 07:52 AM UTC
Overall, so nice work there. I like that you collapsed the front torsion bars. The paint and finish are good, too, barring two points (discussed below).

That said, I have to agree with Jack's sentiments that the vehicle really doesn't have that "abandoned" look (unless it just happened). I worked around tracked equipment for a lot of years and can tell you that if a piece isn't moved for a few days rust will start forming on all of the bare metal surfaces. After a couple weeks, all shine has disappeared. The second thing that kind of bothers me is the relative cleanliness of the barrel. It looks like it was just wiped down with a damp cloth. The final thing, and this is getting kind of trivial, is that you painted over the rear convoy lamp.

Hope this helps.
JPTRR
Staff MemberManaging Editor
RAILROAD MODELING
#051
Visit this Community
Tennessee, United States
Joined: December 21, 2002
KitMaker: 7,772 posts
Armorama: 2,447 posts
Posted: Monday, January 12, 2015 - 08:19 AM UTC
Richard,

Great looking model! I like how you modeled concrete for extra armor. It looks nose heavy - did you do that on purpose to simulate the weight of the concrete?

I concur that, aside from the missing MG, there isn't anything that says, "abandoned".
salmonflytyer
Visit this Community
Canada
Joined: February 08, 2008
KitMaker: 51 posts
Armorama: 49 posts
Posted: Monday, January 12, 2015 - 09:17 AM UTC
I really like the cammo job you did for the stug other than the what appears to be unweathered replacement barrel. One thing being nit picky is that the mg shield is magically held up. The forward section of the hatch is what supports the shield. It should be laying flat forward in the way you have it. Otherwise I like it, plus the sagging suspension looks good
retiredyank
Visit this Community
Arkansas, United States
Joined: June 29, 2009
KitMaker: 11,610 posts
Armorama: 7,843 posts
Posted: Monday, January 12, 2015 - 11:36 AM UTC
The concrete armor really changes the look. Excellent weathering, as well.
KuKLiNsKi
Visit this Community
Croatia Hrvatska
Joined: April 18, 2010
KitMaker: 106 posts
Armorama: 103 posts
Posted: Monday, January 12, 2015 - 02:54 PM UTC
obg153 - yes, small base with one or two MP/engineers was the original plan but my ultra tight budget always puts all that in "maybe one day" section..


AFVFan - i like your way of thinking, i agree with everything you said but..
I didn't mean abandoned as discovered in russian tundra after years. Vehicle was abandoned by it's crew in fight due to artillery or airraid damage and later captured by US forces. So it is max. week or two.
Gun is dirty but contrast from wtihe paper with bright light hides it. I didn't weather it as much since it is replacement gun and it's not something you walk on and firing from it shakes most of dust of (my logics..)

Original idea was to make it more Mad Max-ish with unpainted concrete and rusty bare metal plates but most of my works get comments about "overdoing" it so this time i decited not to go that way. But that doesn't mean it's not planed for one of future projects


JPTRR - that would be battle damage not concrete weight

salmonflytyer - my bad! i tought it's in laying position ony when gunner pushes it forward
crucial_H
Visit this Community
Södermanland, Sweden
Joined: January 15, 2008
KitMaker: 150 posts
Armorama: 147 posts
Posted: Monday, January 12, 2015 - 05:13 PM UTC
I really like the look of the concrete armour. I was just a bit curious, did you have any reference picture for the concrete or did you use some "artistic licence"? Not any critique at all, just curious.

About the clean barrel, maybe put some pigments on it to make it blend in a little bit more with the rest of the model.
AFVFan
Visit this Community
North Carolina, United States
Joined: May 17, 2012
KitMaker: 1,980 posts
Armorama: 1,571 posts
Posted: Monday, January 12, 2015 - 08:09 PM UTC

Quoted Text

AFVFan - i like your way of thinking, i agree with everything you said but..
I didn't mean abandoned as discovered in russian tundra after years. Vehicle was abandoned by it's crew in fight due to artillery or airraid damage and later captured by US forces. So it is max. week or two.
Gun is dirty but contrast from wtihe paper with bright light hides it. I didn't weather it as much since it is replacement gun and it's not something you walk on and firing from it shakes most of dust of (my logics..)

Original idea was to make it more Mad Max-ish with unpainted concrete and rusty bare metal plates but most of my works get comments about "overdoing" it so this time i decited not to go that way. But that doesn't mean it's not planed for one of future projects


That was why I added the "unless it just happened" in my comment. Without a more detailed back story it's sometimes hard to discern what the builder is shooting for - but now you've cleared that up.

As Henrik just mentioned, a light dusting of pigment powder (just enough to knock the shine off) would go a long way toward blending the barrel in with the rest of the vehicle.
KuKLiNsKi
Visit this Community
Croatia Hrvatska
Joined: April 18, 2010
KitMaker: 106 posts
Armorama: 103 posts
Posted: Monday, January 12, 2015 - 08:38 PM UTC
crucial_H - i always use real reference pictures but never copy one vehicle 100% since i don't think there's enough pics of any single vehicle from WWII. So i try to combine multiple pics in to personalized but still realistic model.
my "artistic" touch here is concrete extension up to commanders cupola in one piece and engine deck schurzen's. They were seen only in pack covering whole upper deck like this:
http://i49.photobucket.com/albums/f264/mcevoyi/ra4z5u.jpg

AFVFan - i had hard time with pigments/pastels sticking to gun - i painted it with Vallejo (camo is Revell enamel) and it is just not tough enough for my enamel weathering with brush that i do. Since i use single action foot pump AB it's really not economic to mix whole bottle of dusty color for one barrel... will see what i can do
AFVFan
Visit this Community
North Carolina, United States
Joined: May 17, 2012
KitMaker: 1,980 posts
Armorama: 1,571 posts
Posted: Monday, January 12, 2015 - 11:24 PM UTC

Quoted Text

AFVFan - i had hard time with pigments/pastels sticking to gun - i painted it with Vallejo (camo is Revell enamel) and it is just not tough enough for my enamel weathering with brush that i do. Since i use single action foot pump AB it's really not economic to mix whole bottle of dusty color for one barrel... will see what i can do


Hey Richard, just kind of scrub on some pigment powder. It should leave a dusty residue on the barrel. One thing, though, after doing it, do not try to spray a top coat on it. That'll just make the dusting disappear. Try it out on a piece of scrap plastic first to get a feel for the pigment amount and pressure used.
 _GOTOTOP