Correze, France
Joined: June 10, 2004
KitMaker: 5,329 posts
Armorama: 5,204 posts
Posted: Friday, April 17, 2015 - 01:44 PM UTC
Hello all,
a while ago I started a
topic about the Trumpeter PT-76/BTR-50 separate links set discrepancies.
I managed to find a solution and meanwhile I also found the PE headlight protections were useless. Wrong shape, wrong dimensions needed to be addressed. I first started by using styrene rods but the 0.5mm diameter I used was too large. So I decided to use some copper wire and here is the result, not perfect but closer to the actual parts.
The Trumpeter PE part (left)

My protections
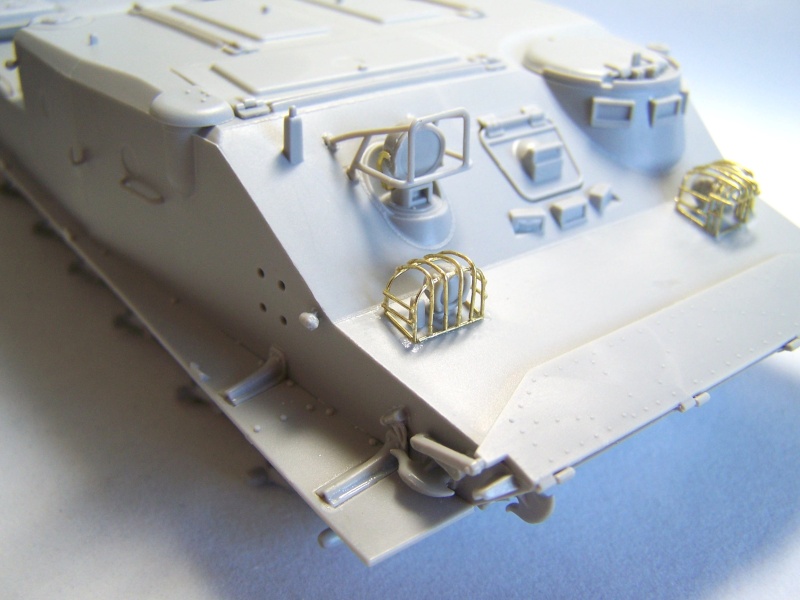
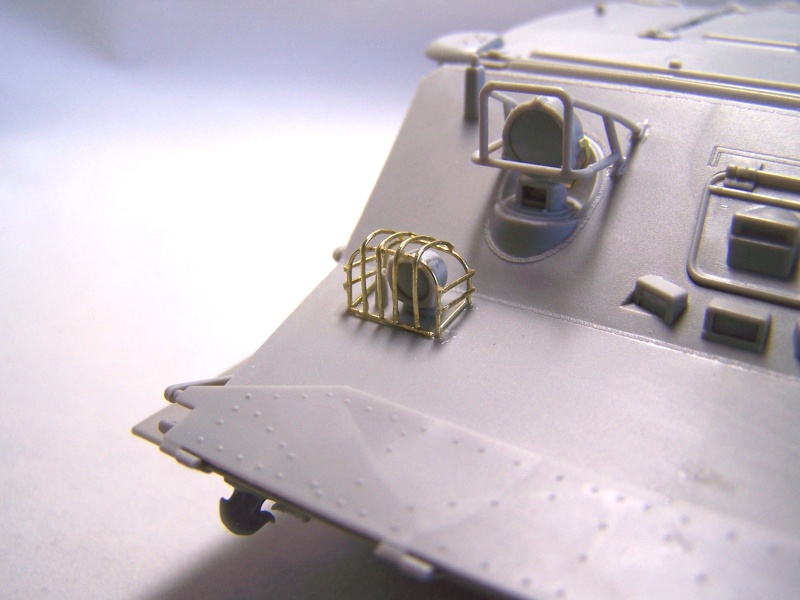
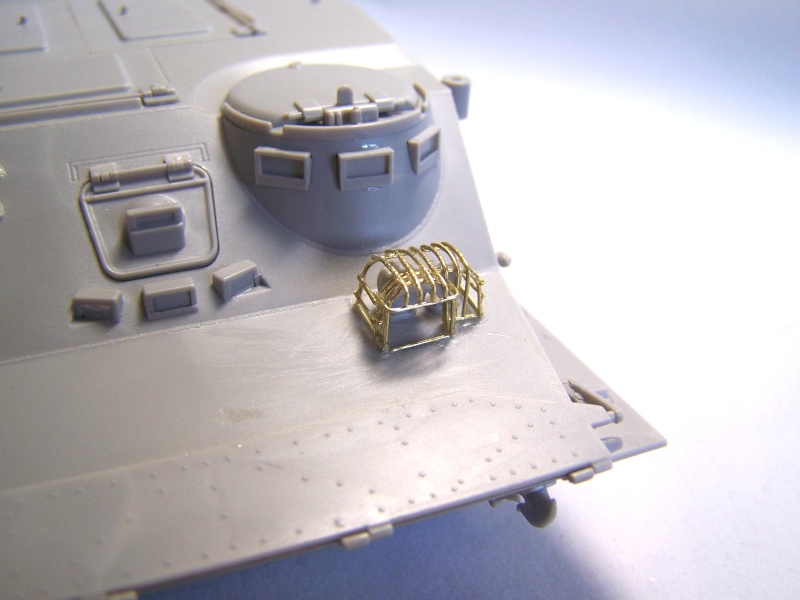

The rounded shape at least is depicted.
Olivier
Visit my site Click the banner
"La reine des batailles, j'ai nommé l'infanterie"
Napoléon
Kuwait / لعربية
Joined: February 09, 2009
KitMaker: 467 posts
Armorama: 392 posts
Posted: Friday, April 17, 2015 - 03:14 PM UTC
excellent Olivier !! that looks very intricate work - it looks superb
best
Mark
http://krasnyaarme.blogspot.com/
"In the Soviet army it takes more courage to retreat than advance"
Joseph Stalin

#284
Northern Ireland, United Kingdom
Joined: October 04, 2006
KitMaker: 3,094 posts
Armorama: 2,942 posts
Posted: Friday, April 17, 2015 - 03:24 PM UTC
Yes that is really stellar work there Olivier- many thanks for sharing it with us. What dimension was the copper wire you used?
On The Bench:
Ethiopian BMP-1 (Trumpeter 1/35)
AMX-13/75 (Takom 1/35)
Correze, France
Joined: June 10, 2004
KitMaker: 5,329 posts
Armorama: 5,204 posts
Posted: Friday, April 17, 2015 - 07:48 PM UTC
Thanks for the comments!
Karl, the wire is 0.35mm diameter.
Olivier
Visit my site Click the banner
"La reine des batailles, j'ai nommé l'infanterie"
Napoléon

#284
Northern Ireland, United Kingdom
Joined: October 04, 2006
KitMaker: 3,094 posts
Armorama: 2,942 posts
Posted: Saturday, April 18, 2015 - 03:12 PM UTC
Thanks for the info Olivier!
On The Bench:
Ethiopian BMP-1 (Trumpeter 1/35)
AMX-13/75 (Takom 1/35)
Correze, France
Joined: June 10, 2004
KitMaker: 5,329 posts
Armorama: 5,204 posts
Posted: Sunday, May 24, 2015 - 03:01 PM UTC
Visit my site Click the banner
"La reine des batailles, j'ai nommé l'infanterie"
Napoléon

#284
Northern Ireland, United Kingdom
Joined: October 04, 2006
KitMaker: 3,094 posts
Armorama: 2,942 posts
Posted: Sunday, May 24, 2015 - 03:10 PM UTC
I wouldn't say the running gear is over-done- it looks good to me.
On The Bench:
Ethiopian BMP-1 (Trumpeter 1/35)
AMX-13/75 (Takom 1/35)
Loire-Atlantique, France
Joined: October 09, 2004
KitMaker: 2,433 posts
Armorama: 2,325 posts
Posted: Sunday, May 24, 2015 - 09:22 PM UTC
Olivier,
I think the roadwheels weathering is not consistent IMVHO.
Cheers,
Christophe
Correze, France
Joined: June 10, 2004
KitMaker: 5,329 posts
Armorama: 5,204 posts
Posted: Sunday, May 24, 2015 - 10:10 PM UTC
Quoted Text
Olivier,
I think the roadwheels weathering is not consistent IMVHO.
Cheers,
Christophe
What would you suggest to improve it? I'm not that satisfied with it too.
Visit my site Click the banner
"La reine des batailles, j'ai nommé l'infanterie"
Napoléon
Limburg, Netherlands
Joined: November 18, 2003
KitMaker: 894 posts
Armorama: 643 posts
Posted: Sunday, May 24, 2015 - 10:49 PM UTC
the roadwheels are muddy as if it just drove through a verry muddy pond, but the tracks themselves are too clean at the right front side. It could also be that it has been driving a while after it went through the pond, but then I would remove the dirt form the surface of the roadwheels where they touch the track.
It is not required to add more dirt I think, this actually looks more realistic than most models with a ton of dust/dirt and streaking. This looks perfectly like a vehicle that took a first round around the tank track after a rainy night.
"We don't know anything about their race, history, or culture, but one thing's for sure. They stand for everything we stand against."
Zapp Brannigan from the cartoon series "Futurama"
Correze, France
Joined: June 10, 2004
KitMaker: 5,329 posts
Armorama: 5,204 posts
Posted: Monday, May 25, 2015 - 12:28 AM UTC
So Mat, if I got you right, I should tone down the rubber bands either on the contact surface with the track and the sides in contact with the guide horns.
Olivier
Visit my site Click the banner
"La reine des batailles, j'ai nommé l'infanterie"
Napoléon
Limburg, Netherlands
Joined: November 18, 2003
KitMaker: 894 posts
Armorama: 643 posts
Posted: Monday, May 25, 2015 - 01:22 AM UTC
Hi Olivier,
yes indeed. I guess you used pigments, so I would use a moist stiff brush, and just trace it in circular motion around the wheel, cleaning it often on some paper towel. It provides a nice contrast with your great splatter pattern on the rims, I would not change that. Perhaps you can apply a hint of metallic grey on the idler wheel. (You can also go for the full mud option, but then you have to make it look more wet). If you want to make the sides less monotone, you could add a very limited amount of larger mud spots in a slightly lighter color, also on the top-front part. Apply them in such that it apperas they were moving backwards. I always do this with the old-brush-soaked-in-wet-pigments-technique and my AB
"We don't know anything about their race, history, or culture, but one thing's for sure. They stand for everything we stand against."
Zapp Brannigan from the cartoon series "Futurama"
Florida, United States
Joined: November 24, 2012
KitMaker: 1,896 posts
Armorama: 1,858 posts
Posted: Tuesday, May 26, 2015 - 01:28 AM UTC
Hi Guys;
Stellar Work Olivier; IMHO if you did just A little more Weathering on the Upper Hull it would Balance out the lower hull and make it less Stark in Contrask. I really like the job that you did with the lite guards, "Well Done" My Friend !!!!
CHEERS; MIKE.

Correze, France
Joined: June 10, 2004
KitMaker: 5,329 posts
Armorama: 5,204 posts
Posted: Tuesday, May 26, 2015 - 10:41 AM UTC
Thanks for the advice Mat and Mike. I intended to keep the upper hull cleaner so I brushed away some of the pigments on the roadwheels. I'll post pics later today to see if you think it's better.
Mike, the light guards were tedious but not that hard to replicate in fact. It's a pity that Trumpeter's PE parts are totally wrong both in size and shape. They should have done them in plastic.
Olivier
Visit my site Click the banner
"La reine des batailles, j'ai nommé l'infanterie"
Napoléon
Correze, France
Joined: June 10, 2004
KitMaker: 5,329 posts
Armorama: 5,204 posts
Posted: Tuesday, May 26, 2015 - 09:40 PM UTC
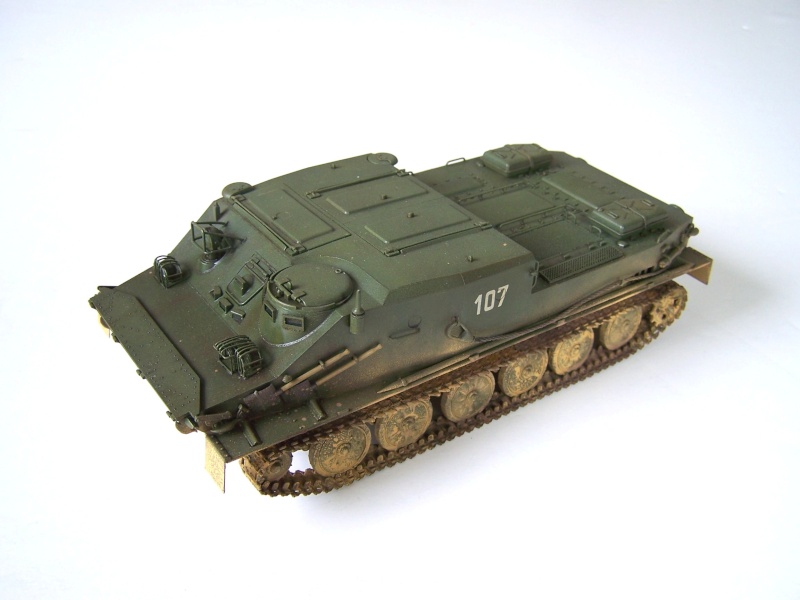
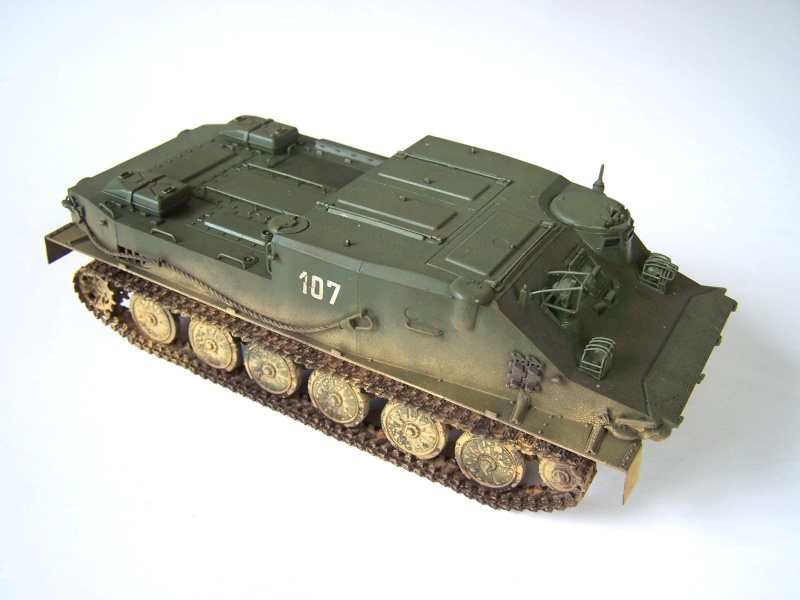
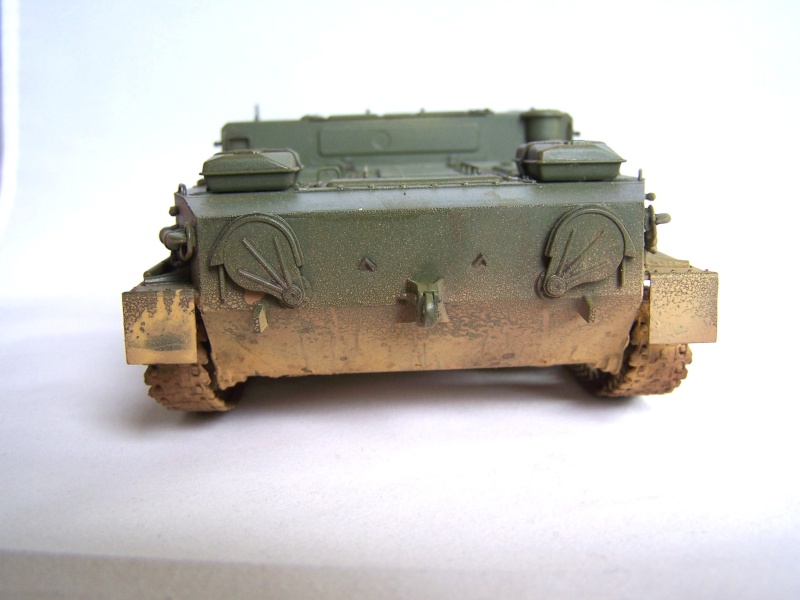
Here are the pictures of the running gear with less mud and dust on the roadwheels.


Olivier
Visit my site Click the banner
"La reine des batailles, j'ai nommé l'infanterie"
Napoléon
Correze, France
Joined: June 10, 2004
KitMaker: 5,329 posts
Armorama: 5,204 posts
Posted: Thursday, May 28, 2015 - 09:08 PM UTC
Hi all,
I call this one done.
Here are some pictures


The full story is available on my site.
Enjoy the visit.
Olivier
Visit my site Click the banner
"La reine des batailles, j'ai nommé l'infanterie"
Napoléon


