England - South East, United Kingdom
Joined: February 16, 2016
KitMaker: 4 posts
Armorama: 4 posts
Posted: Tuesday, February 16, 2016 - 06:29 AM UTC
Hello,
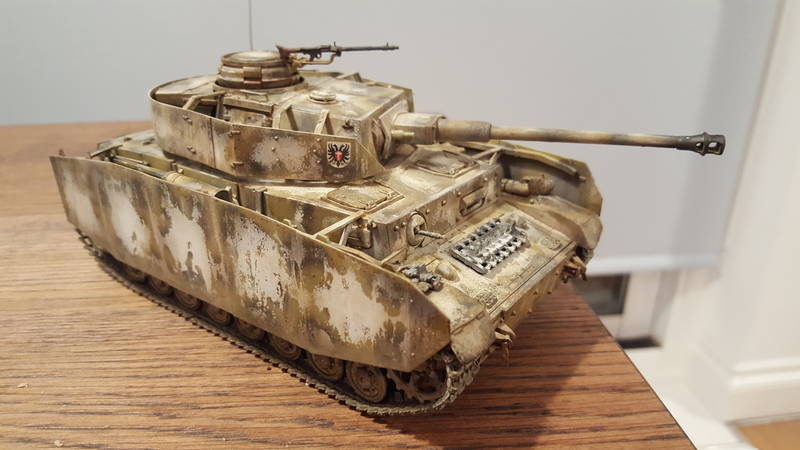
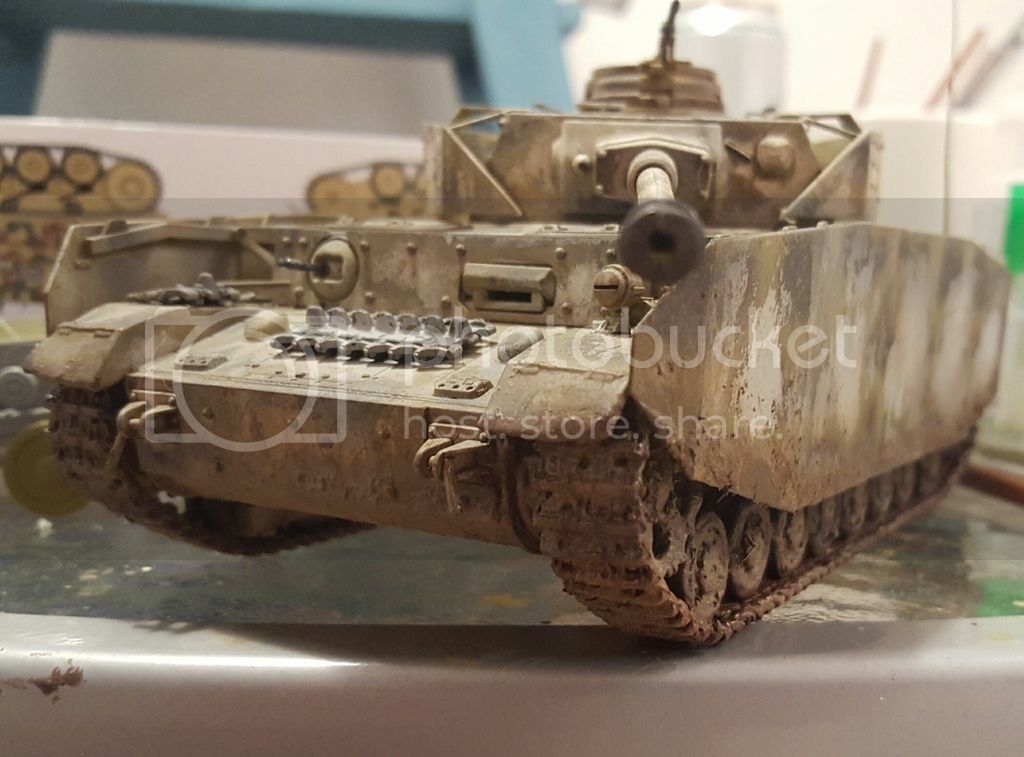
I have just joined and would like to show off my very second tank model for your constructive feedback! The idea was to depict heavily washed winter camouflage on Panzerkapmfwagern IV Ausf H Early Version by Tamiya.
Photos:


Thanks!
Pawel
Alberta, Canada
Joined: August 20, 2008
KitMaker: 1,295 posts
Armorama: 1,191 posts
Posted: Tuesday, February 16, 2016 - 07:00 AM UTC
Looks much better than my second build Pawel. Well done. Thanks for sharng.

Do what you love, and love what you do... then everything else is simply an extension of that which drives your heart.
ColinEdm
 Associate Editor
Alberta, Canada
Joined: October 15, 2013
KitMaker: 1,355 posts
Armorama: 1,229 posts
Posted: Tuesday, February 16, 2016 - 07:01 AM UTC
Very well done for only your second effort! Welcome to the site!
The voices are back.....excellent....
Pennsylvania, United States
Joined: April 09, 2015
KitMaker: 1,063 posts
Armorama: 1,000 posts
Posted: Tuesday, February 16, 2016 - 07:01 AM UTC
Welcome to Armorama.
Very nice. The worn winter whitewash is not easy to do but you have executed it nicely. Hard to believe that you are new to the hobby.
"No plan survives contact with the enemy." Helmuth von Moltke the Elder

#084
Quebec, Canada
Joined: September 14, 2005
KitMaker: 2,485 posts
Armorama: 743 posts
Posted: Tuesday, February 16, 2016 - 07:06 AM UTC
Super paint job and weathering!
It is all well balanced.
Cheers,
Joe

#192
Kentucky, United States
Joined: November 25, 2009
KitMaker: 1,383 posts
Armorama: 1,281 posts
Posted: Tuesday, February 16, 2016 - 07:33 AM UTC
Great job! More photos please
North Carolina, United States
Joined: May 17, 2012
KitMaker: 1,980 posts
Armorama: 1,571 posts
Posted: Tuesday, February 16, 2016 - 07:05 PM UTC
Hi Pawel, nicely done, especially for your second try. The only thing that caught my eye was the paint on the co-ax and hull MG barrels. Both probably would have been removed when the tank was painted, since the paint on the barrel would have contributed to heat buildup.
Arkansas, United States
Joined: June 29, 2009
KitMaker: 11,610 posts
Armorama: 7,843 posts
Posted: Tuesday, February 16, 2016 - 07:14 PM UTC
Impressive! I wish my second tank looked that good.
Ideals are peaceful. History is violent.
England - South East, United Kingdom
Joined: February 16, 2016
KitMaker: 4 posts
Armorama: 4 posts
Posted: Tuesday, February 16, 2016 - 11:00 PM UTC
Thank you for your comments. It actually helps that I am a civil engineer and so I am trying to replicate real life weathering effects. My next challenge is learning how to use pigments. In this model I have only used Tamiya weathering kits for those last touches. My first tank was 1:25 Panther which I got as a gift. I did zimmerit coating on it from putty - great fun and great effect but the whole tank was not that great. I did not have airbrush then and I tried to replicate the effect with cotton buds but I did not thin those pigment heavy Tamiya paints and so the end effect was not that great. Now that I have an airbrush I absolutely love it. Marder II Early Version from Dragon is next!
Quoted Text
Great job! More photos please
I have added 3 more


Quoted Text
The only thing that caught my eye was the paint on the co-ax and hull MG barrels. Both probably would have been removed when the tank was painted, since the paint on the barrel would have contributed to heat buildup.
Pardon my ignorance but what is co-ax? As for the machine gun barrel - so basically repaint it with gun metal, right?

#084
Quebec, Canada
Joined: September 14, 2005
KitMaker: 2,485 posts
Armorama: 743 posts
Posted: Wednesday, February 17, 2016 - 12:29 AM UTC
Quoted Text
Pardon my ignorance but what is co-ax? As for the machine gun barrel - so basically repaint it with gun metal, right?
The co axial mg is the one mounted on the mantel and shares the same axis as the main gun.
Yes repaint the co axial and hull mg gun metal.
Cheers,
Joe
North Carolina, United States
Joined: May 17, 2012
KitMaker: 1,980 posts
Armorama: 1,571 posts
Posted: Wednesday, February 17, 2016 - 01:55 AM UTC
Yeah, what Joe said.

On the co-axial gun, the fat part towards the back is an armored shield. Leave that like it is. Just repaint the skinny front part.
England - South East, United Kingdom
Joined: February 16, 2016
KitMaker: 4 posts
Armorama: 4 posts
Posted: Wednesday, February 17, 2016 - 04:40 AM UTC
Thanks for the explanation. Both barrels now repainted.
Removed by original poster on 02/18/16 - 02:25:44 (GMT).
Removed by original poster on 02/18/16 - 02:37:08 (GMT).
North Carolina, United States
Joined: May 17, 2012
KitMaker: 1,980 posts
Armorama: 1,571 posts
Posted: Wednesday, February 17, 2016 - 07:38 AM UTC
Quoted Text
Thanks for the explanation. Both barrels now repainted.
Pawel, if you want to post full sized photos, here's how to do it:
Right click on the full sized photo in your gallery and click on "copy image address"
In your post, click on the "img" tab under the text box.
Delete everything between the 2 "img" tags and insert the copied image address. It should come out like this:

Oklahoma, United States
Joined: September 30, 2015
KitMaker: 2,493 posts
Armorama: 2,344 posts
Posted: Thursday, February 18, 2016 - 05:22 PM UTC
Beautiful work on that Pz. Welcome!
"Only the dead have seen the end of war." - Plato
United States
Joined: August 28, 2015
KitMaker: 319 posts
Armorama: 308 posts
Posted: Thursday, February 18, 2016 - 10:52 PM UTC
England - South East, United Kingdom
Joined: February 16, 2016
KitMaker: 4 posts
Armorama: 4 posts
Posted: Saturday, February 20, 2016 - 09:57 PM UTC
Ok. I've just worked out how to use Photobucket. I will update on my next project soon. Thanks for all the feedback!
With mud added:


#460
California, United States
Joined: September 16, 2014
KitMaker: 1,156 posts
Armorama: 1,024 posts
Posted: Monday, February 29, 2016 - 06:45 AM UTC
I too am impressed by how good your work is for only your second effort. I look forward to seeing what your next effort looks like.
Vintage Paul
I'd happily live in the past but for air conditioning, the internet, mobile phones, modern medicine & dentistry and, and, and . . .
New Jersey, United States
Joined: September 22, 2006
KitMaker: 1,081 posts
Armorama: 1,066 posts
Posted: Wednesday, February 08, 2017 - 12:45 AM UTC
wow excellent start !! welcome


