_GOTOBOTTOM
Constructive Feedback
For in-progress or completed build photos. Give and get contructive feedback!
Nearing completion of Asuka Firefly VC
Chaman911
Visit this Community
United States
Joined: August 28, 2015
KitMaker: 319 posts
Armorama: 308 posts
Posted: Thursday, February 18, 2016 - 11:11 PM UTC
Hi everyone.
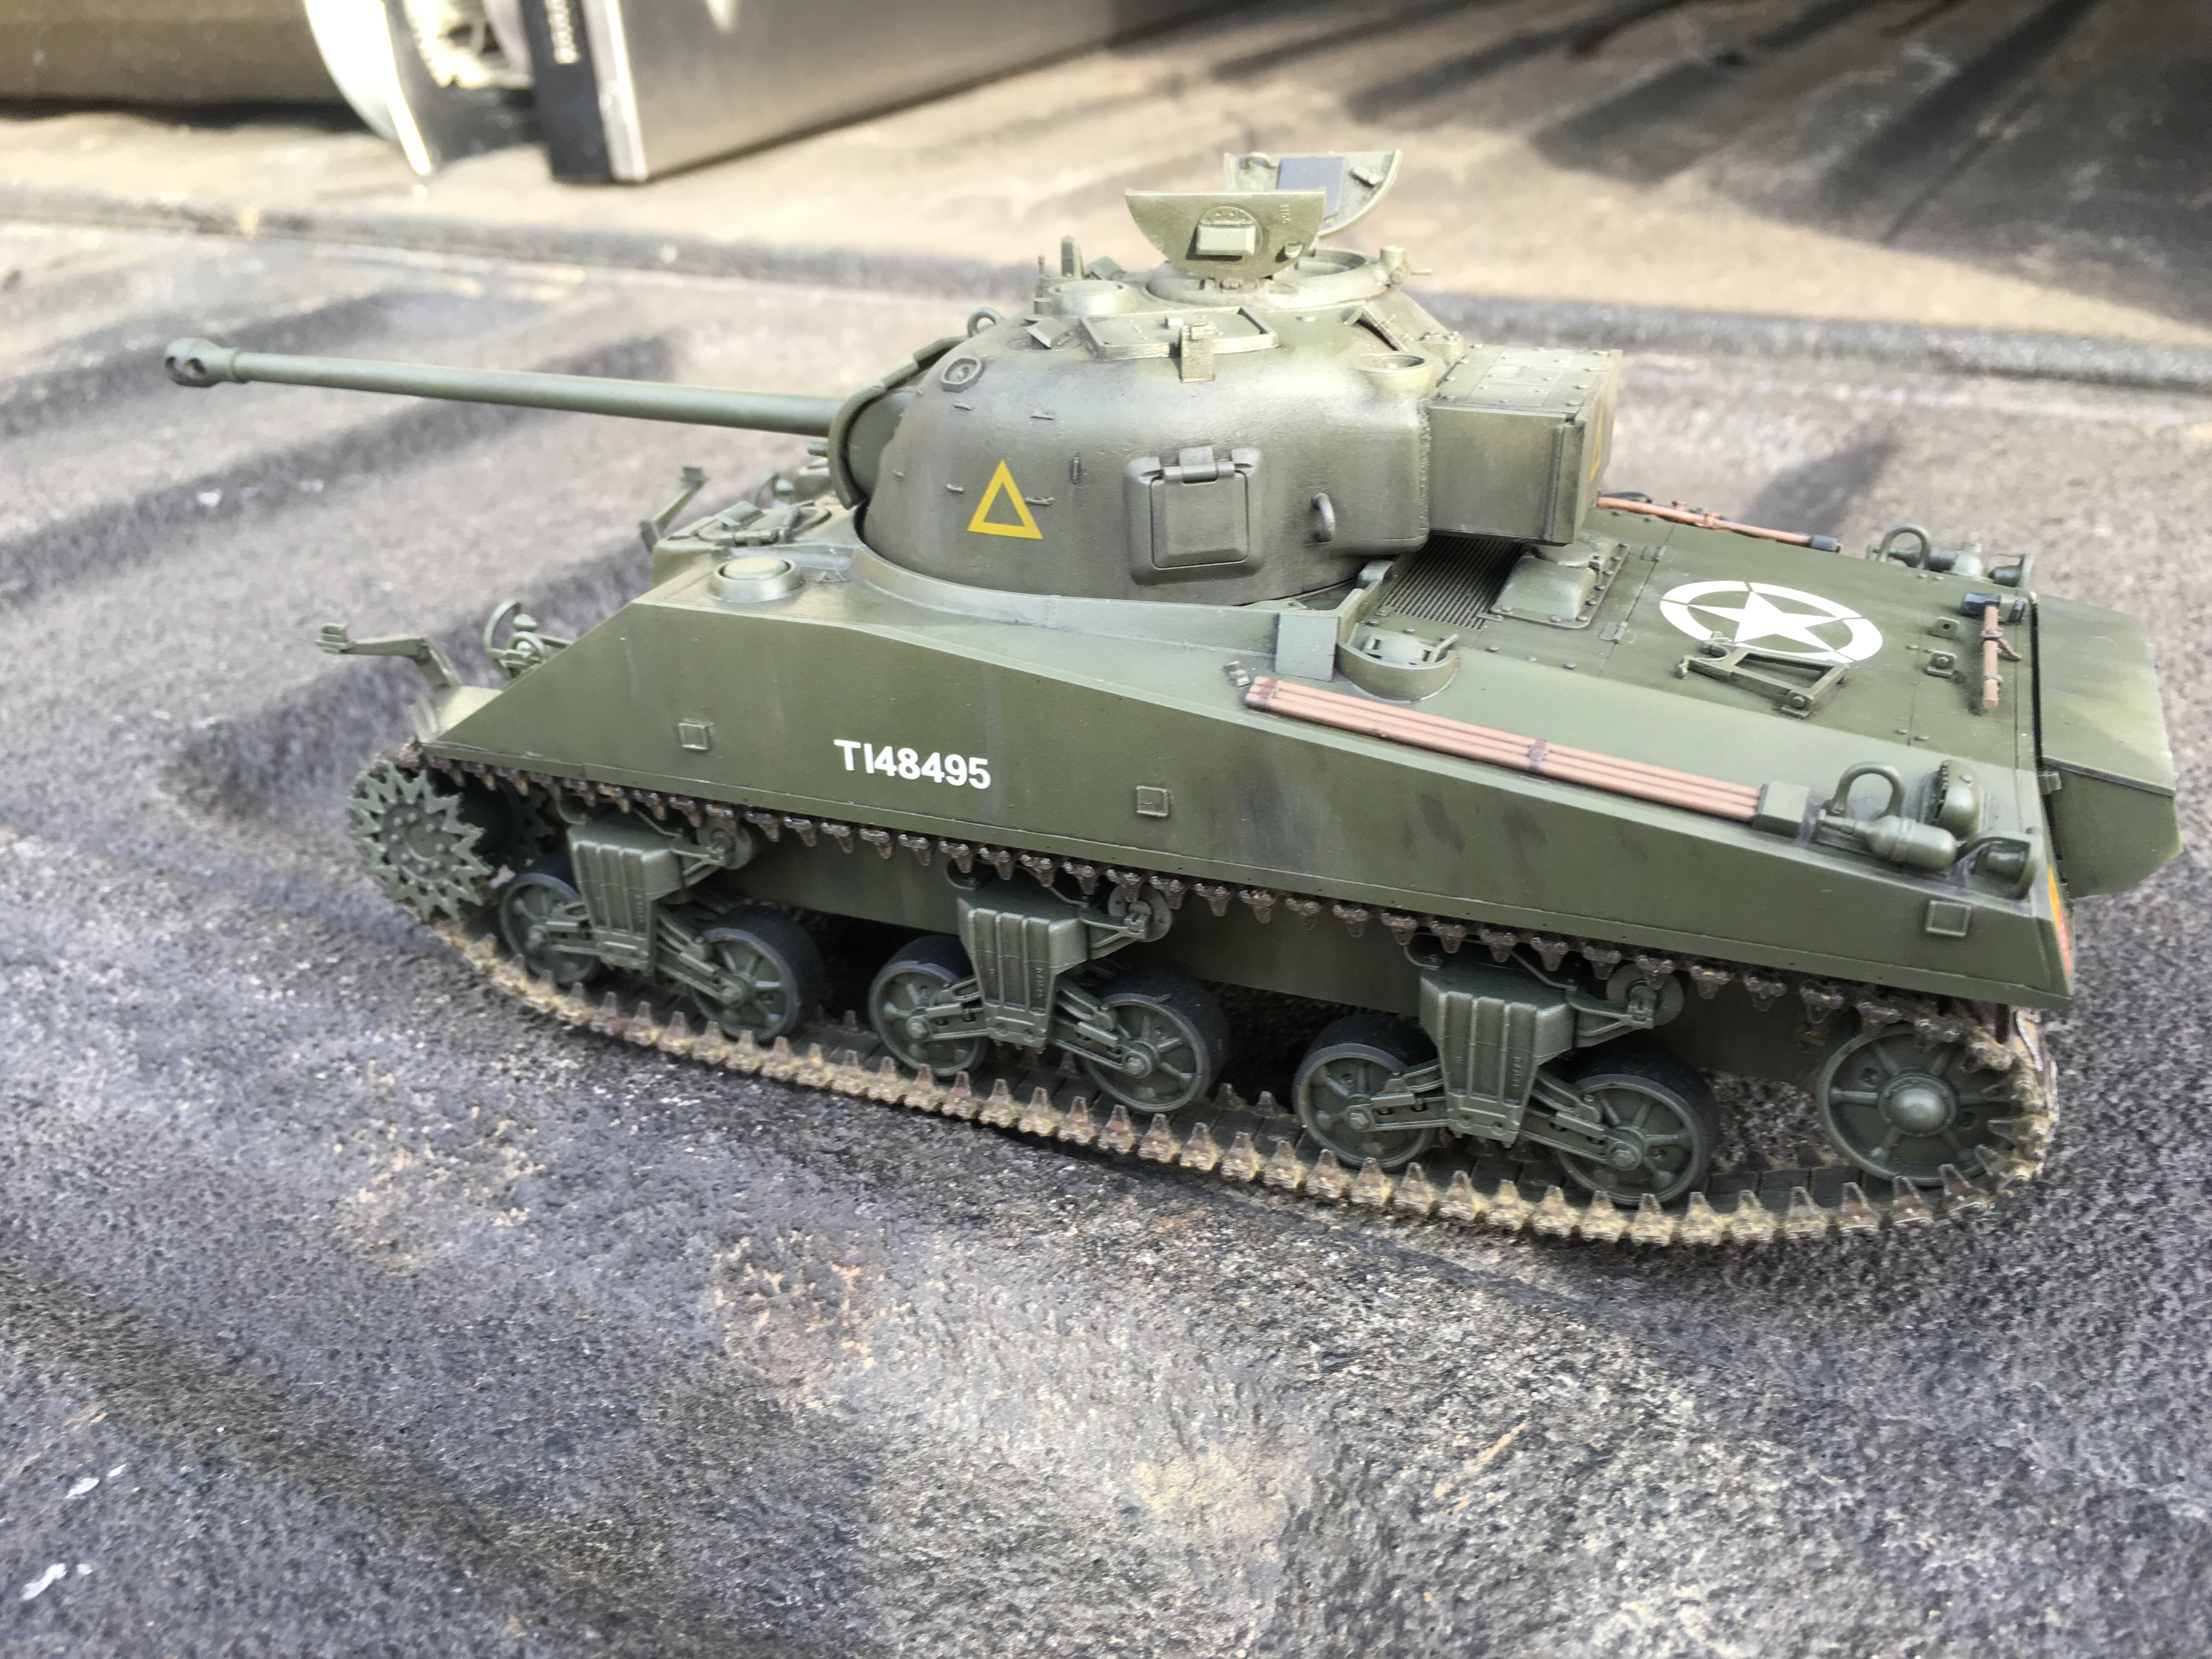
So I am nearing completion of my third build and before I clear coat or do any final weathering I wanted some feedback on what I can do to make a better finished model.
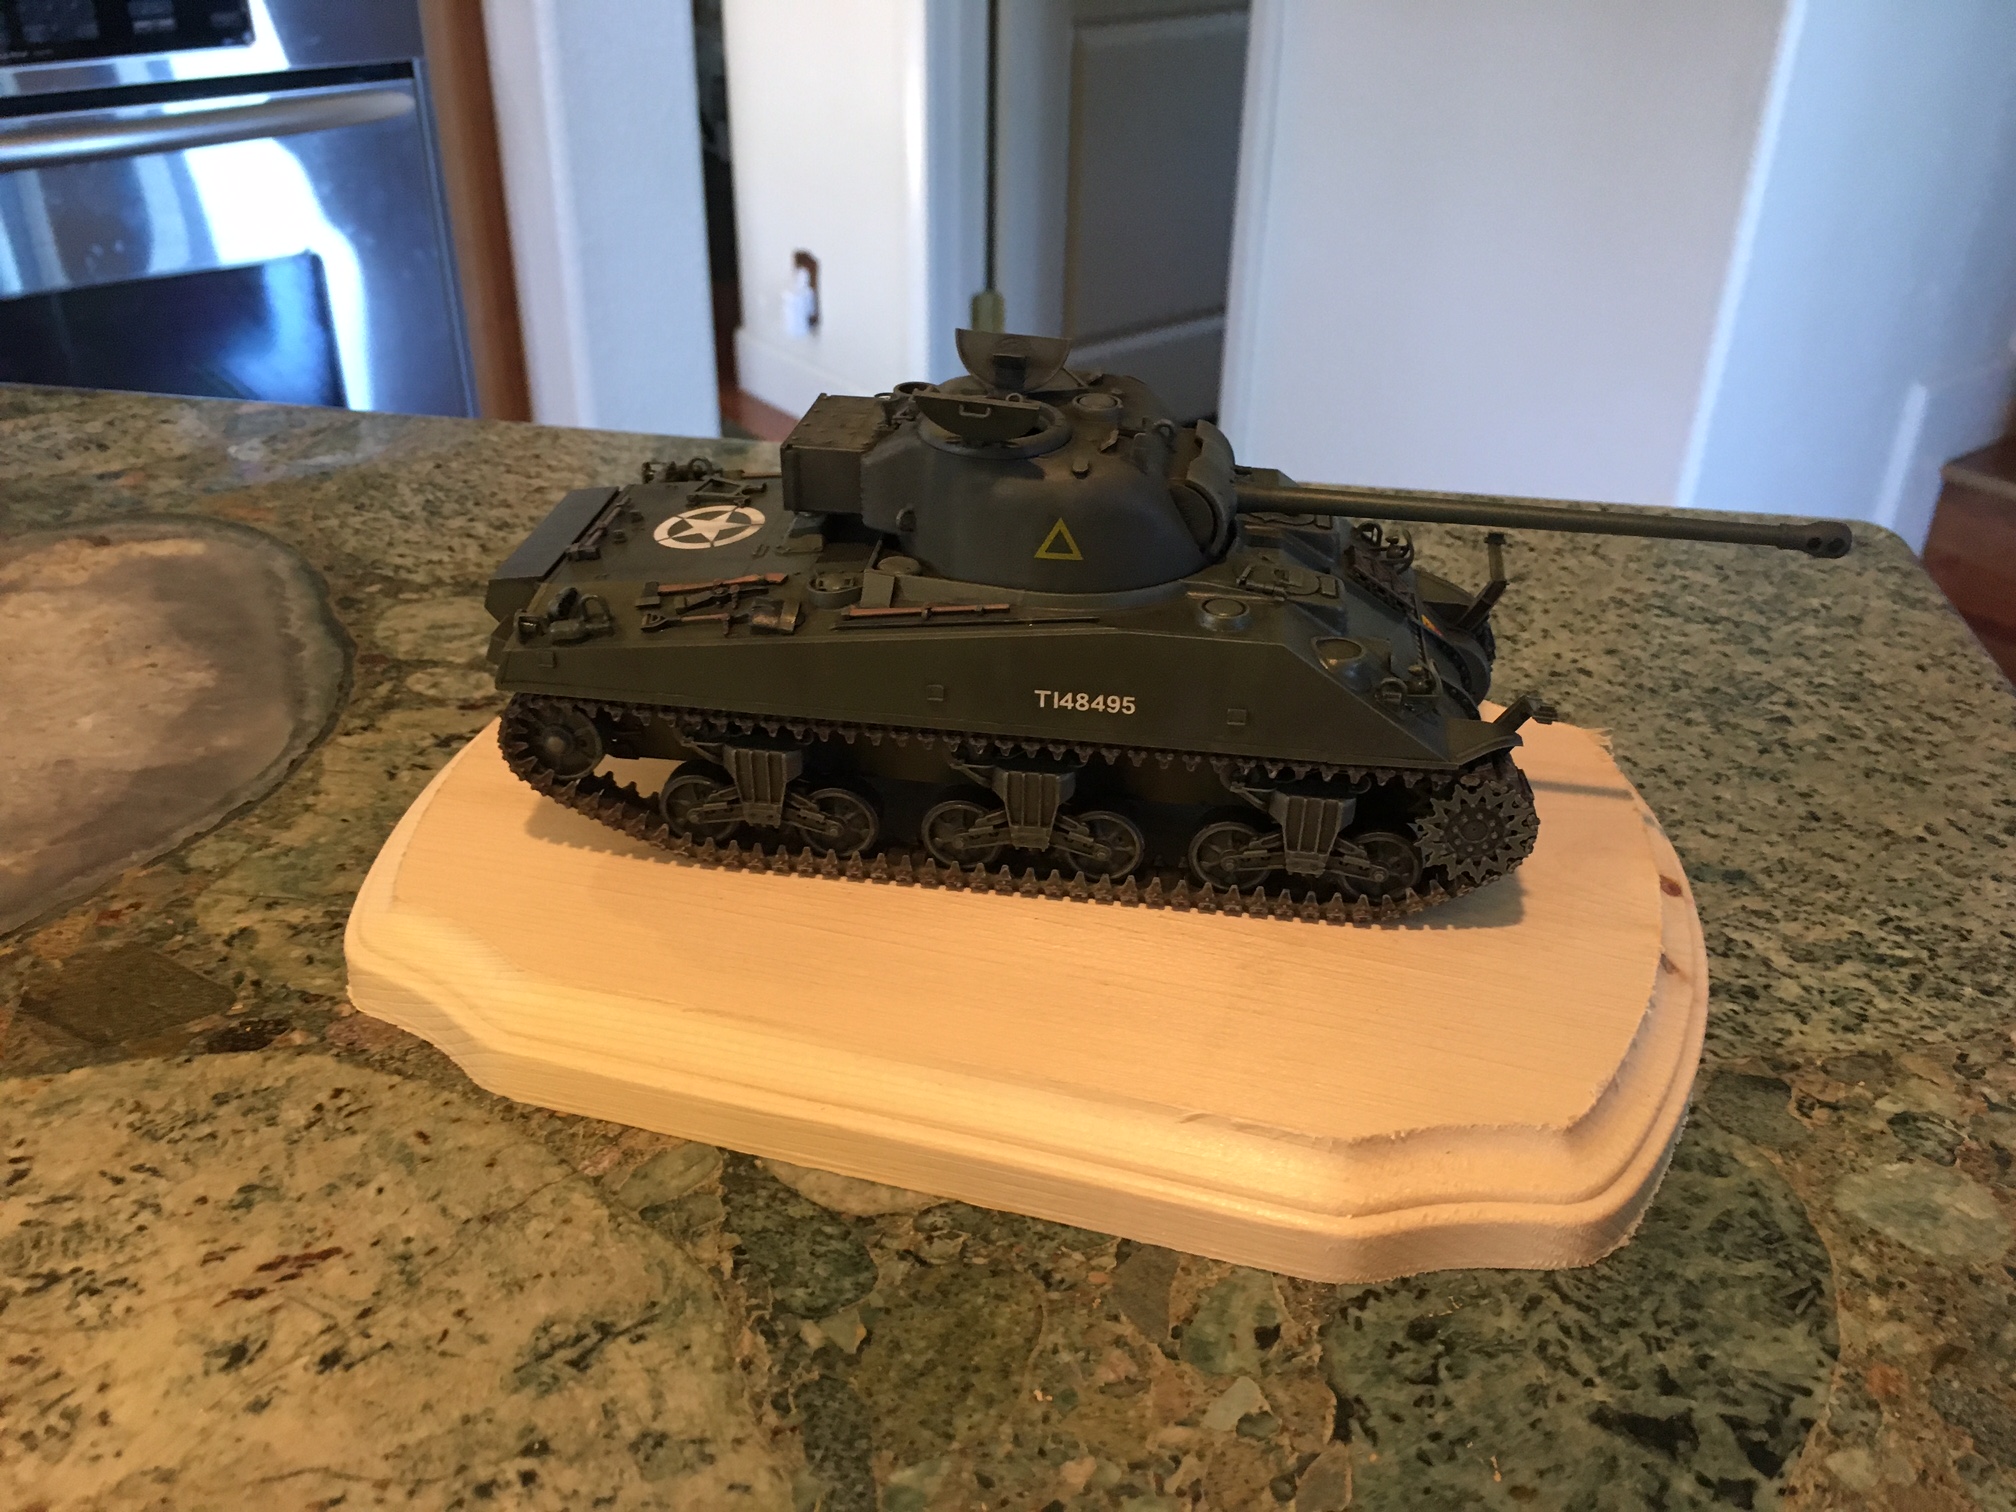
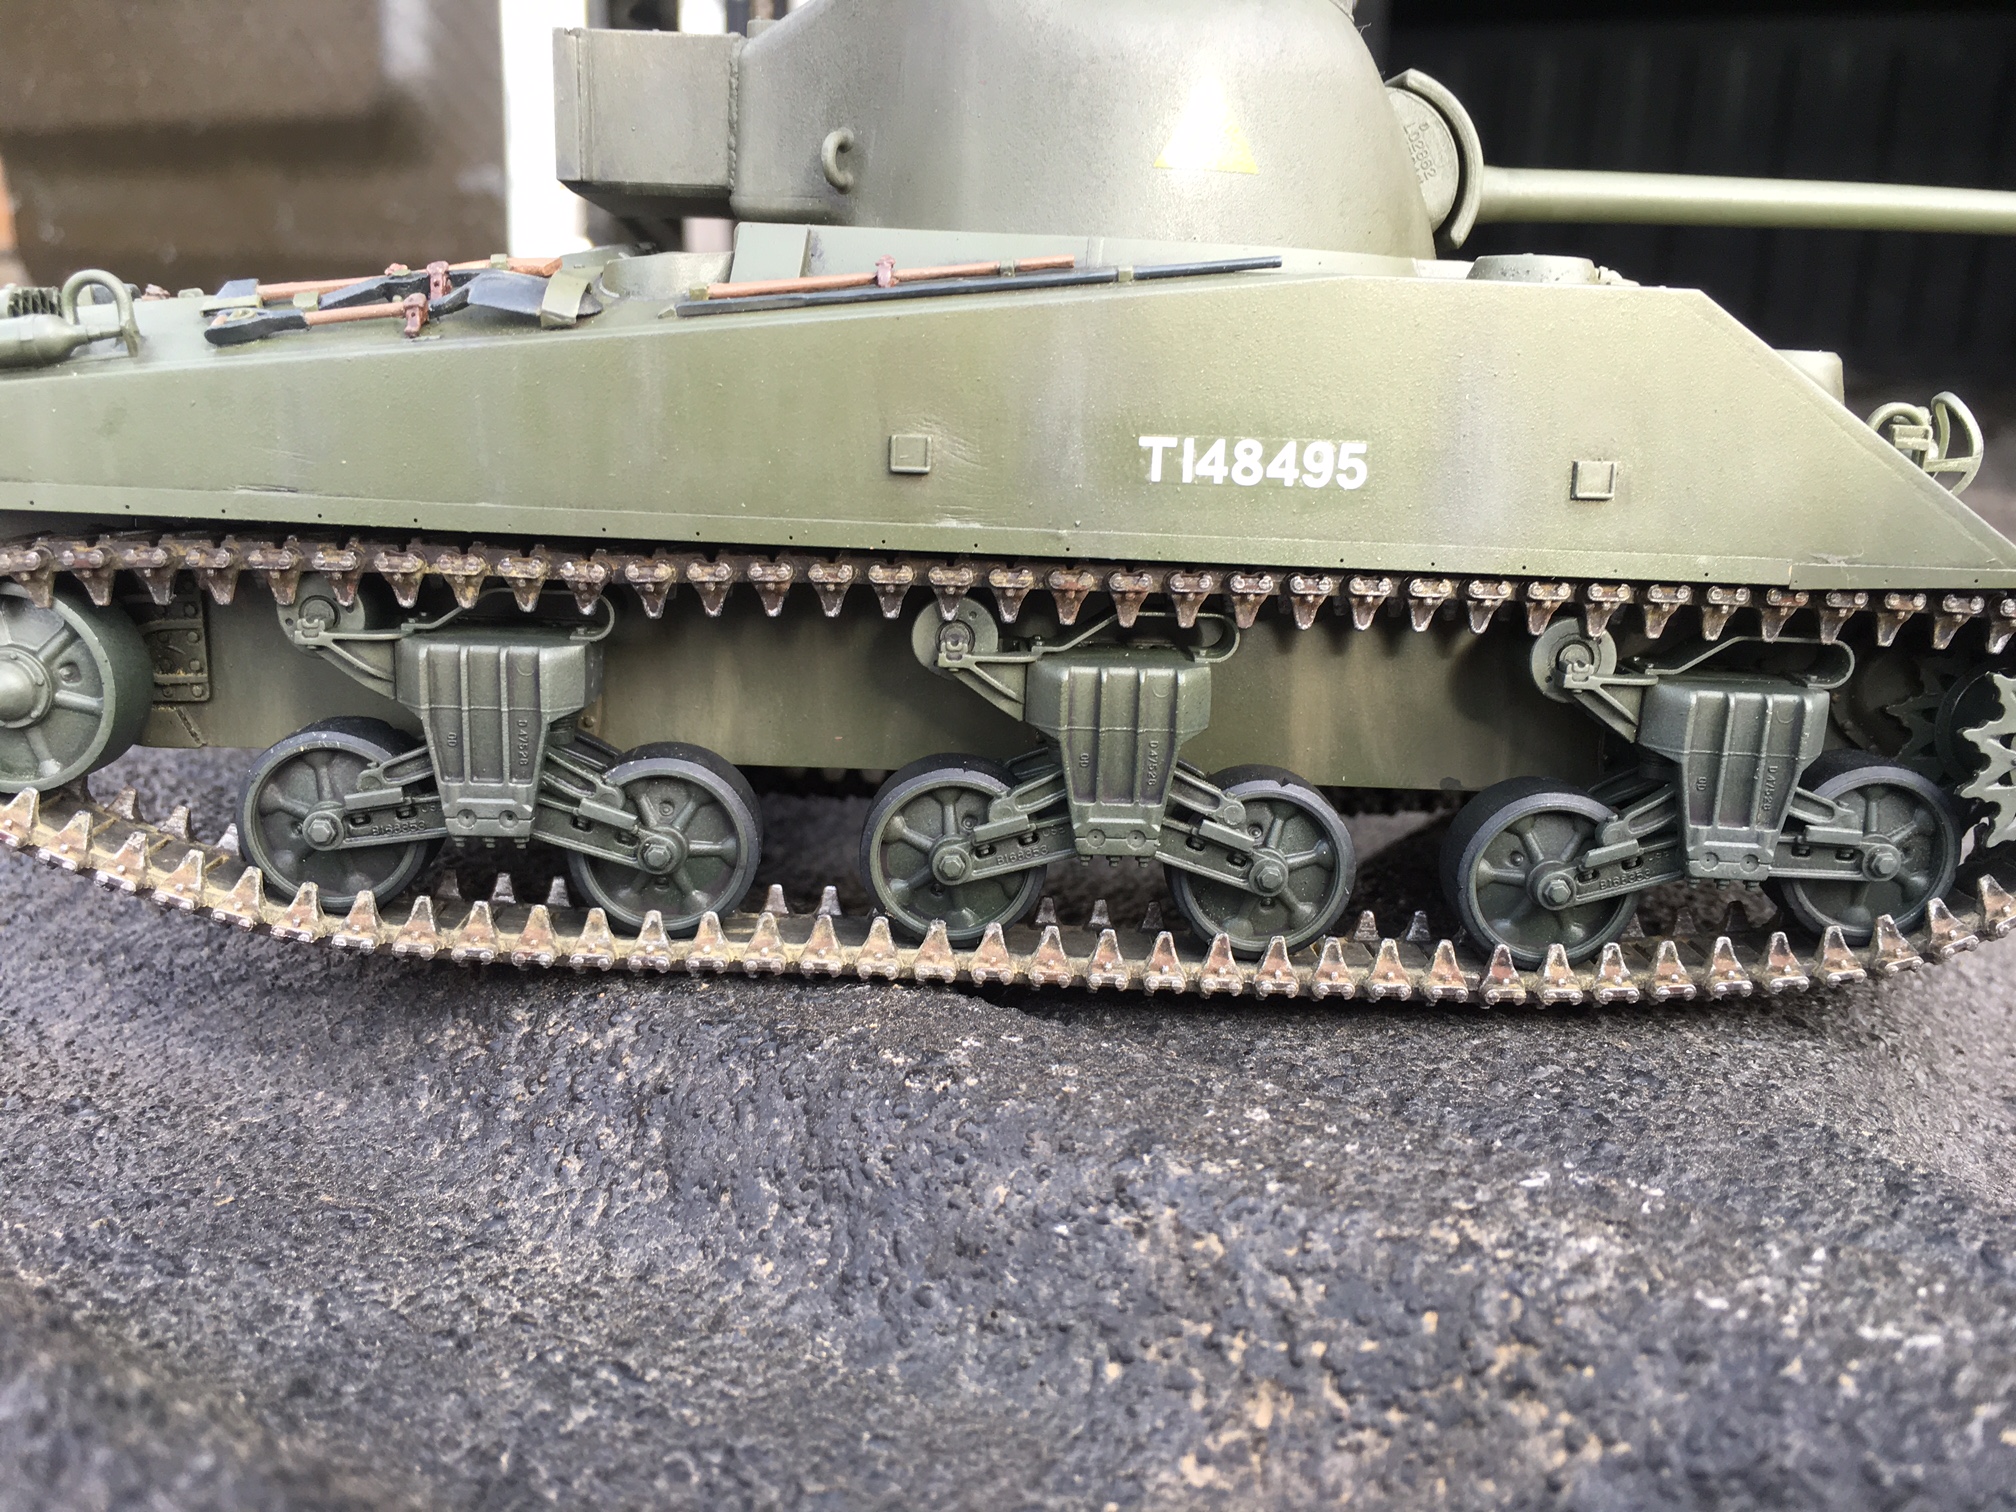
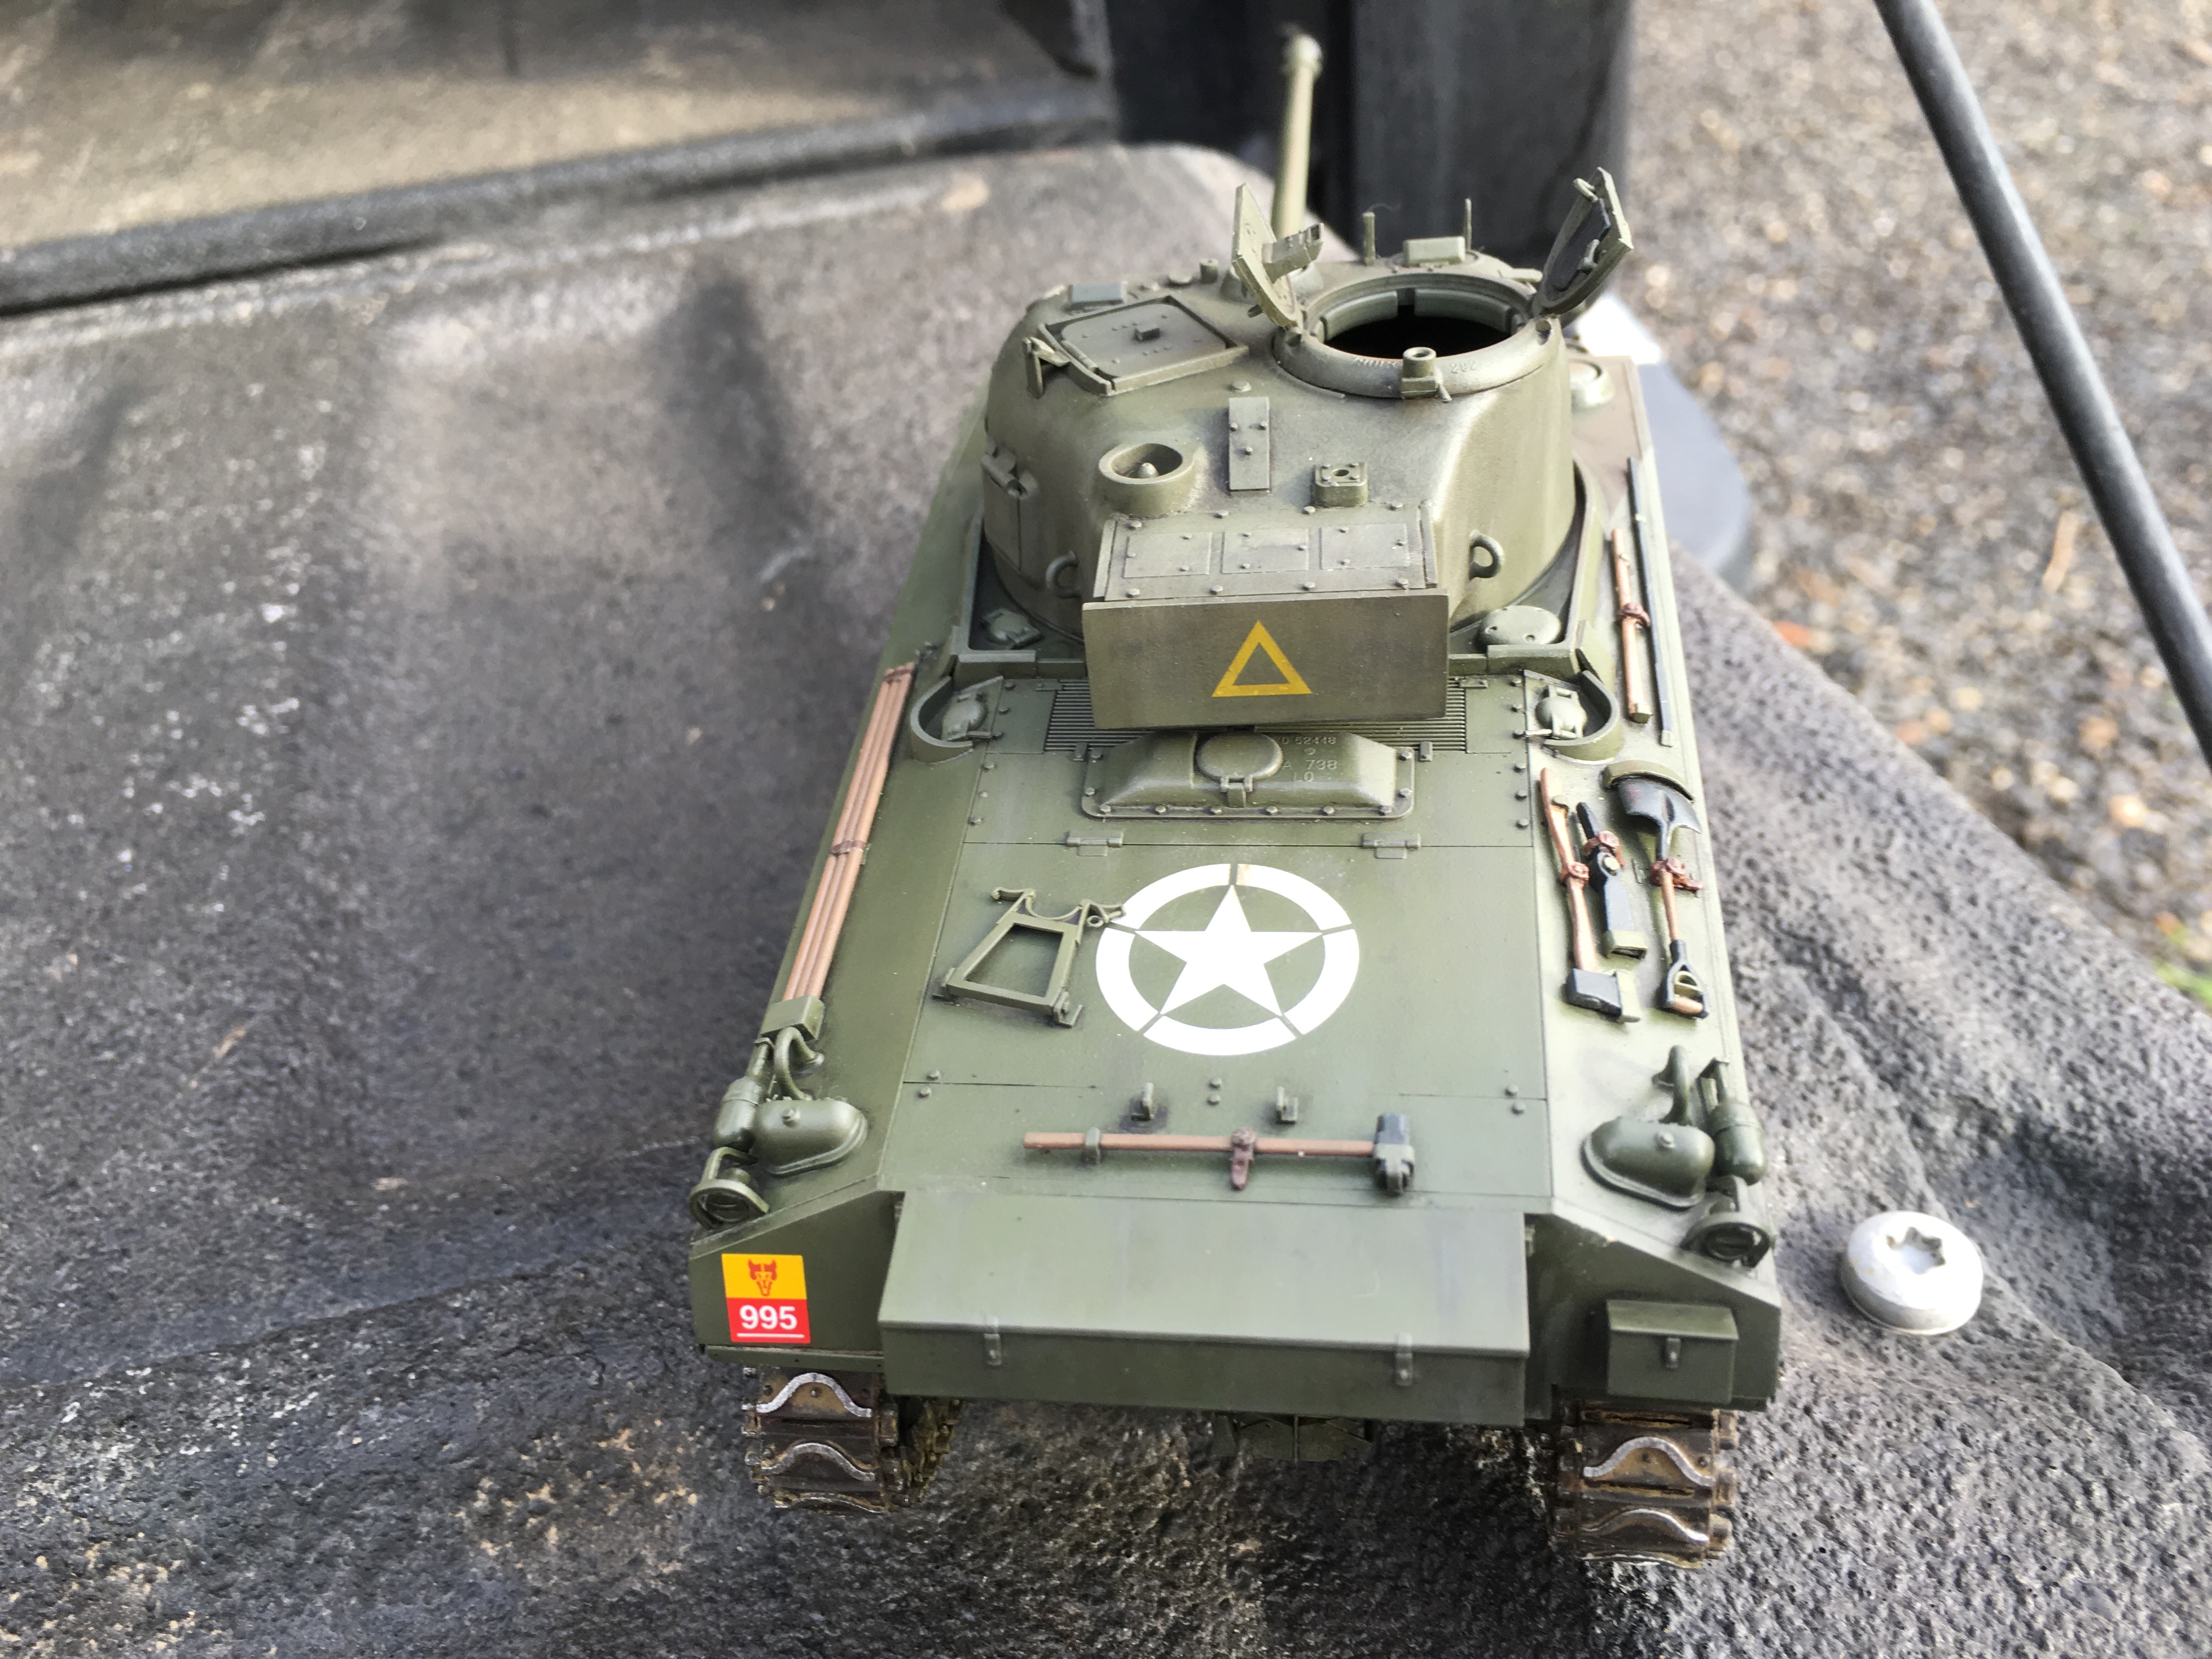
I tried a few new things with this kit. I tried doing some color modulation with my air brush on the hull and wheel bogies, it is subtle but hopefully noticeable. I created weld lines between the radio box and turret, and experimented with pigments on the tracks. I think I will do some final weathering with pigments as well. Obviously I still need to add the commander and radio antennas. Also I am curious, is the track supposed to rest on the return rollers/guides? You can see in the pic my track hovers over them so I may need to glue it down. When I took the pics it was the first time I had taken the model outside into sunlight and realized I should probably blend the streaking on the hull better, especially the black. I think I will order some stowage to add as well. Please offer any advice or comments that can help me out. You guys rock!

minas-ithil
#110
Visit this Community
Florida, United States
Joined: September 20, 2005
KitMaker: 248 posts
Armorama: 224 posts
Posted: Friday, February 19, 2016 - 12:24 AM UTC
Bryan,
Nice work on the Firefly. In answer to your question, yes, the tracks need to rest on the return rollers - nothing worse that the incredible floating track links! Nice job on the weathering, subtle, but noticeable. Personally, I try and avoid the trend of heavy rust, chips, scrapes, etc. Is it me, or is the turret a more drab olive than the hull? It seems that way to me, but it may be just the lighting or such. Real nice, I have an Asuka Firefly in the stash that I would like to build up sometime soon.

Thanks,
Stephen
KuKLiNsKi
Visit this Community
Croatia Hrvatska
Joined: April 18, 2010
KitMaker: 106 posts
Armorama: 103 posts
Posted: Friday, February 19, 2016 - 03:35 AM UTC
also put something heavy on top of tank to push it down and glue movable suspension parts

rubber tracks are pulling first and last wheel up
Chaman911
Visit this Community
United States
Joined: August 28, 2015
KitMaker: 319 posts
Armorama: 308 posts
Posted: Friday, February 19, 2016 - 05:01 AM UTC
Ahh! Good call on the tracks! Thanks for the replies
Chaman911
Visit this Community
United States
Joined: August 28, 2015
KitMaker: 319 posts
Armorama: 308 posts
Posted: Monday, February 22, 2016 - 07:35 PM UTC
Steven and Richard thank you for your input. I glued the suspension, cleaned up the weathering, and did a little dry brushing. I still need to add stowage and dust effects. I added the antenna after I took these pics. Steven you are right about the turret being more olive than the hull. For some reason I decided to paint the two parts separately. As luck would have it when I started on the turret my airbrush began acting funny and spraying a really coarse texture so I was unable to do any modulation highlights. I hope I have managed to hide the difference in the two a bit better. Anyway let me know what you think. All comments welcome. This is my third tank so I am looking for tips. Thank you


KuKLiNsKi
Visit this Community
Croatia Hrvatska
Joined: April 18, 2010
KitMaker: 106 posts
Armorama: 103 posts
Posted: Tuesday, February 23, 2016 - 02:40 AM UTC
you can add some dust to it.. some pastel chalk on lower part
sand those edges on wooden display and paint it with nice clear:
http://www.militaryminiatureshq.com/wp-content/uploads/2014/06/British-Sherman-Firefly-by-Royal-Model-1.jpg

it's your model so do with it anything you think will look good
Chaman911
Visit this Community
United States
Joined: August 28, 2015
KitMaker: 319 posts
Armorama: 308 posts
Posted: Tuesday, March 01, 2016 - 12:55 PM UTC
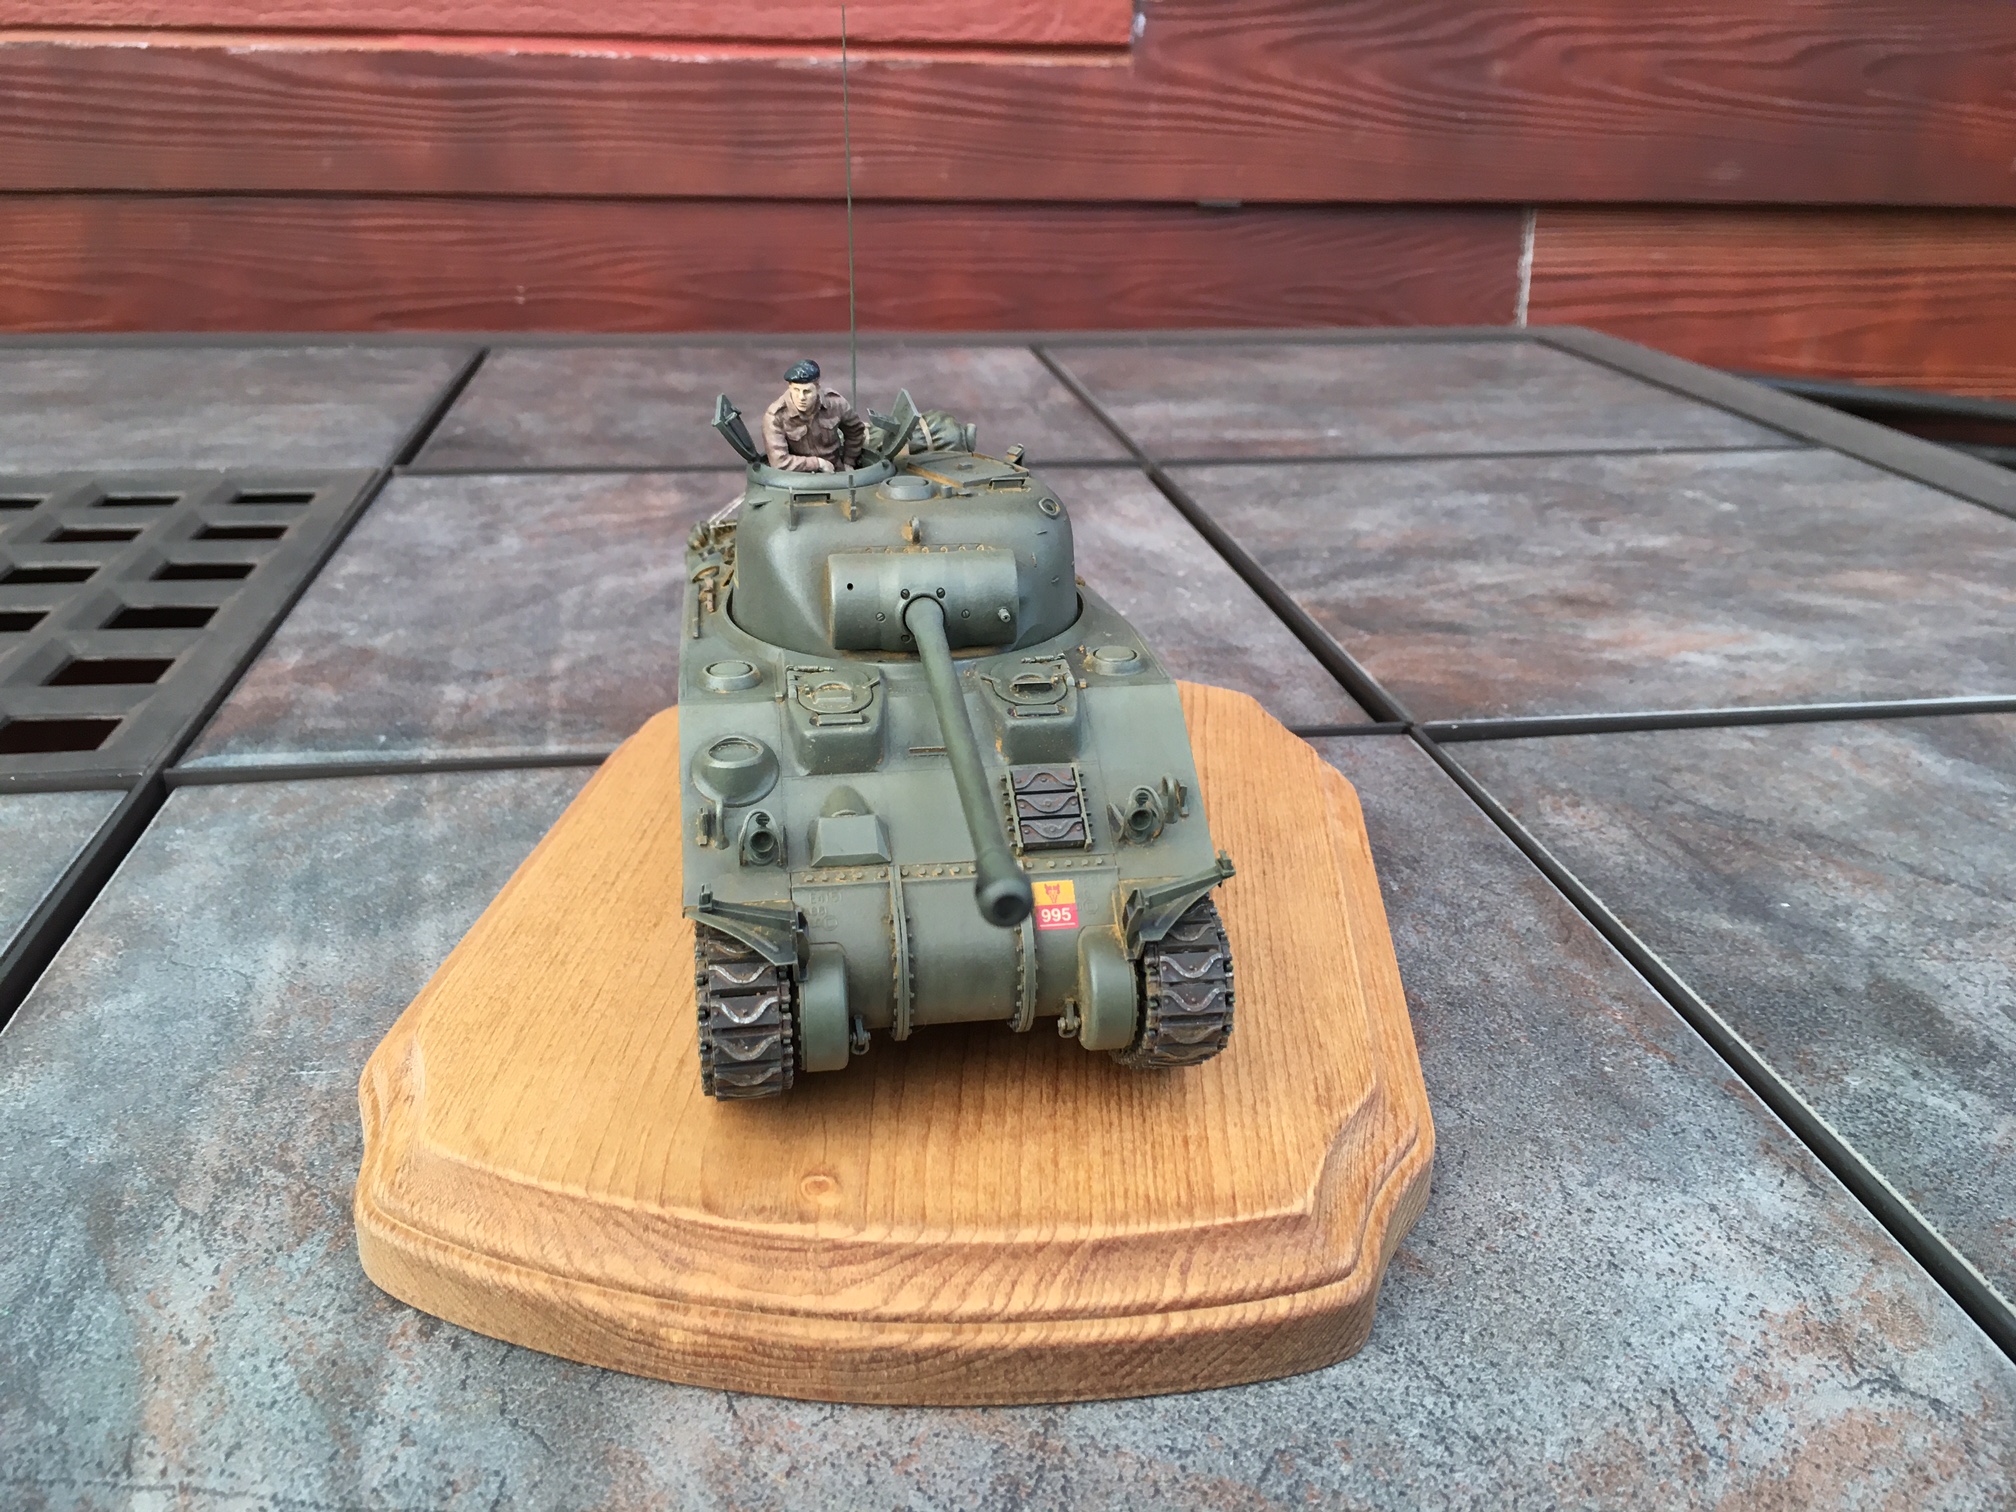
Ok, made some improvements. Need to finish the base and add the head lights. Any glaring mistakes let me know. This is my third model since I was a teenager so constructive feedback is very welcome as I am trying to improve my skills.First time using photo etch and pigments as well. Thank you everyone who has provided suggestions. Comments are welcome as well. Cheers!


48thscale
Visit this Community
Limburg, Netherlands
Joined: January 31, 2009
KitMaker: 229 posts
Armorama: 109 posts
Posted: Tuesday, March 01, 2016 - 01:31 PM UTC
Looks very good indeed...no need for more "dirt" IMHO, this is enough to show an excellent model.
It's the Firefly you're showing, not where it's been, right?

GazzaS
#424
Visit this Community
Queensland, Australia
Joined: April 23, 2015
KitMaker: 4,648 posts
Armorama: 2,248 posts
Posted: Tuesday, March 01, 2016 - 01:47 PM UTC
I think it looks great, too!
KuKLiNsKi
Visit this Community
Croatia Hrvatska
Joined: April 18, 2010
KitMaker: 106 posts
Armorama: 103 posts
Posted: Thursday, March 03, 2016 - 02:34 AM UTC
i think your skills are really good
most of my models get heavy weathering (some kind of fetish i guess) but i think that your Firefly look just like it should
dtniedert
Visit this Community
Kentucky, United States
Joined: December 11, 2014
KitMaker: 152 posts
Armorama: 139 posts
Posted: Thursday, March 03, 2016 - 04:47 AM UTC
Very nice work indeed! What are the 2 antenna like things on the front shirts?
acebatau
Visit this Community
Colorado, United States
Joined: February 10, 2008
KitMaker: 730 posts
Armorama: 616 posts
Posted: Thursday, March 03, 2016 - 05:17 AM UTC
Nicely built, always loved this tank
Chaman911
Visit this Community
United States
Joined: August 28, 2015
KitMaker: 319 posts
Armorama: 308 posts
Posted: Thursday, March 03, 2016 - 07:11 AM UTC
Thank you for the kind words. I didn't want to weather the tank too much as it represents a Firefly from early in the Normandy invasion. It was pretty dry and dusty at the time from what I understand. Dtniedert, the antenna like bits on the front as well as the little squares on the sides are part of something called a "houseboat fitting". The crew could erect a mock structure that would make the tank look like a cargo truck from afar or from the air. I'm pretty sure the turret had to be traversed and the cannon placed in the travel lock then the structure could be put up. I was also told they were rarely used as the Allies had air superiority and it was a PIA to put it up and down all the time. As always if anyone sees any area that need improvement please tell me. This is my third model since I was a teenager so I do need some critiquing to improve.
Thanks for posting!
Modelrob
Visit this Community
Arizona, United States
Joined: October 20, 2015
KitMaker: 304 posts
Armorama: 293 posts
Posted: Thursday, March 03, 2016 - 03:24 PM UTC
Great looking tank there. The weathering is very effective.
 _GOTOTOP