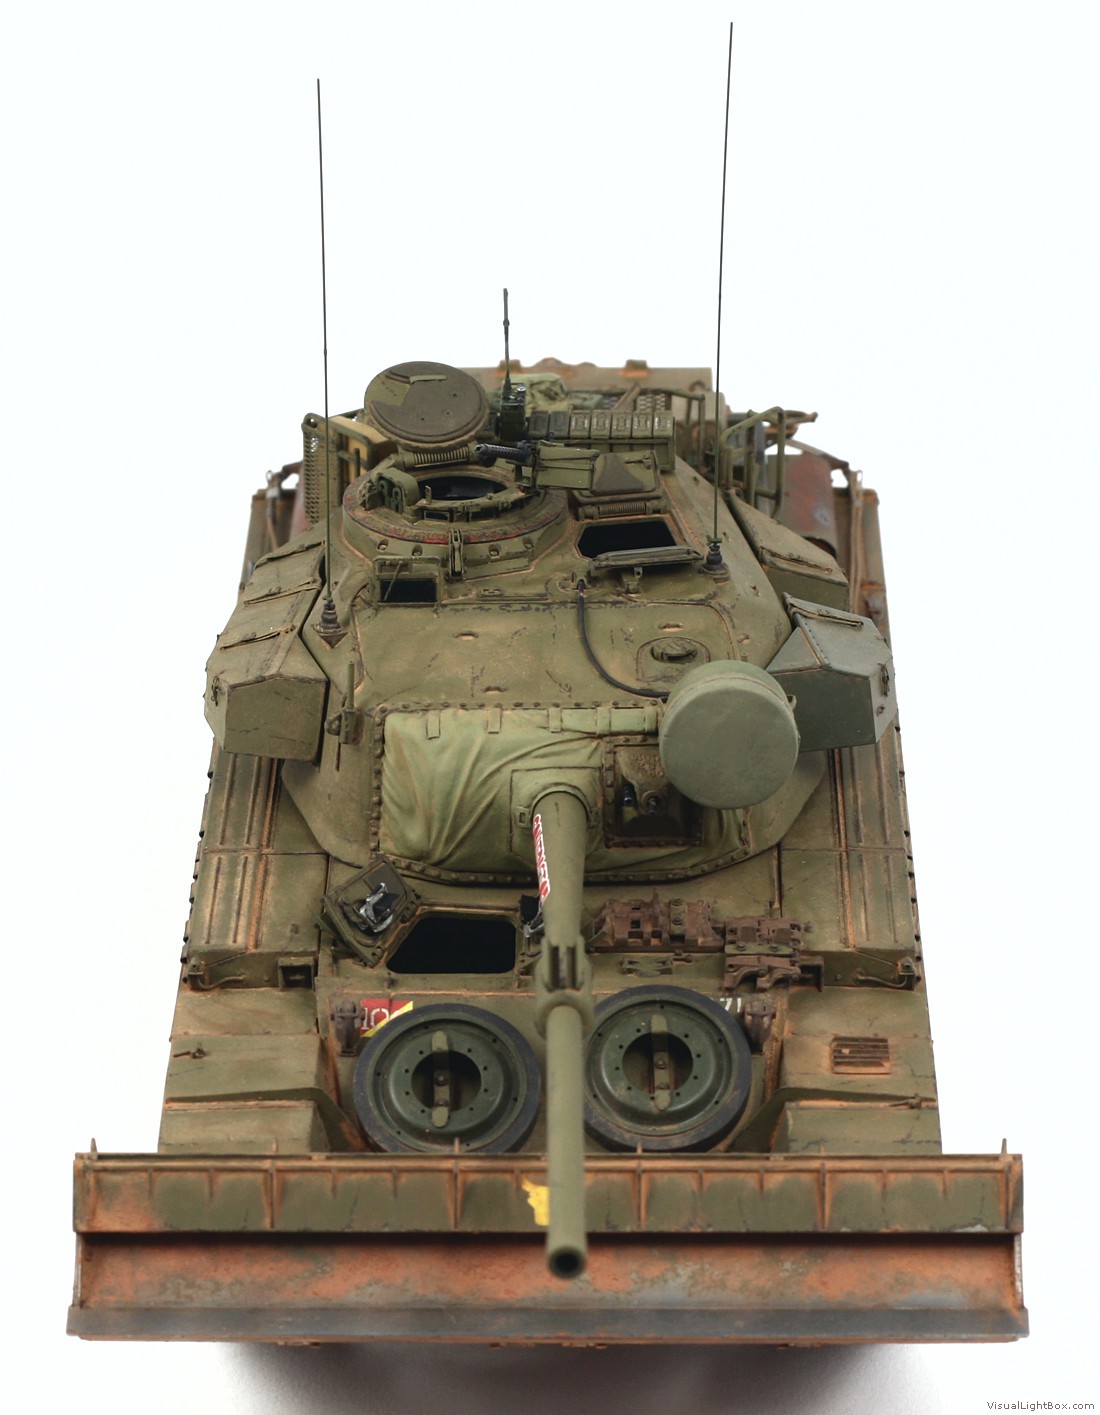
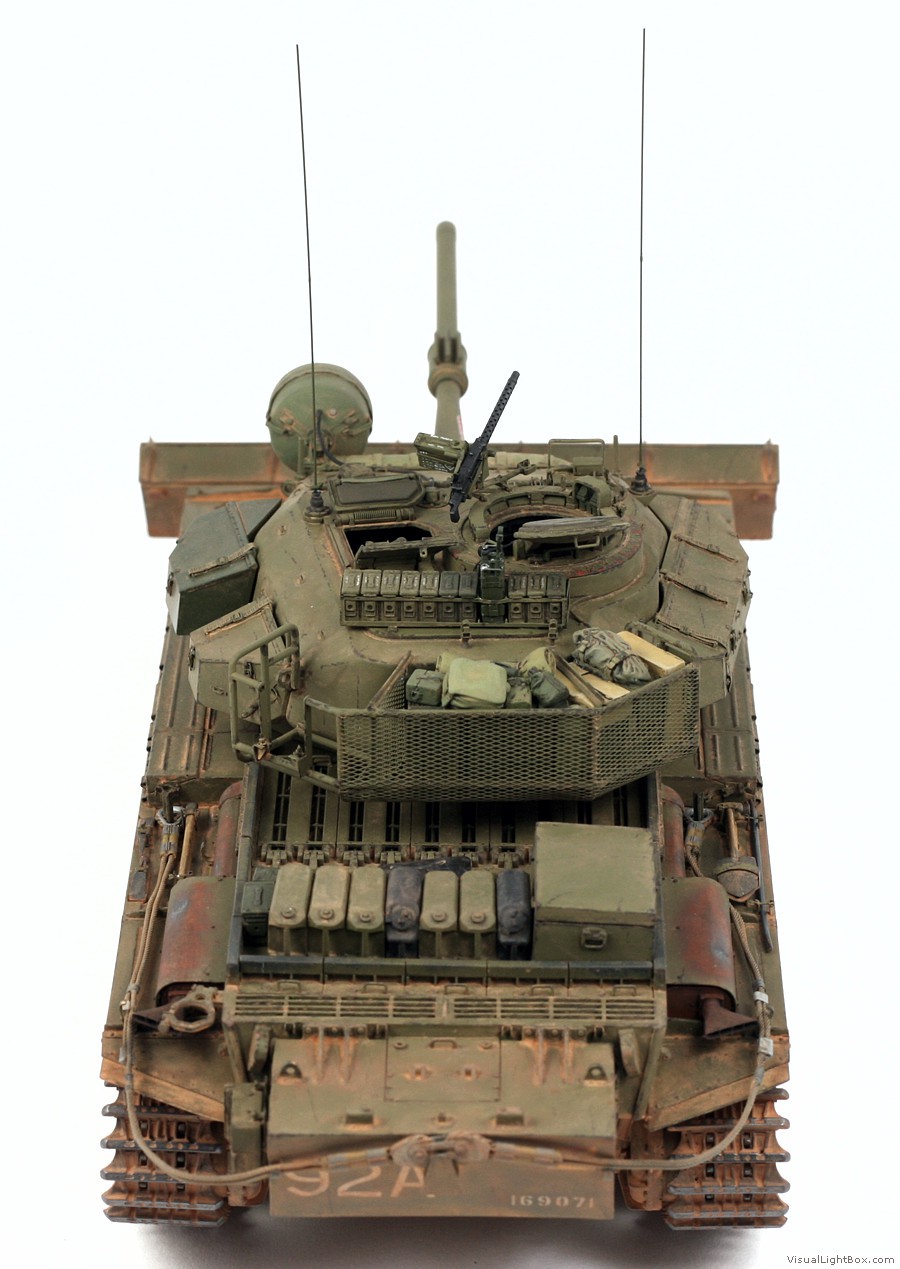
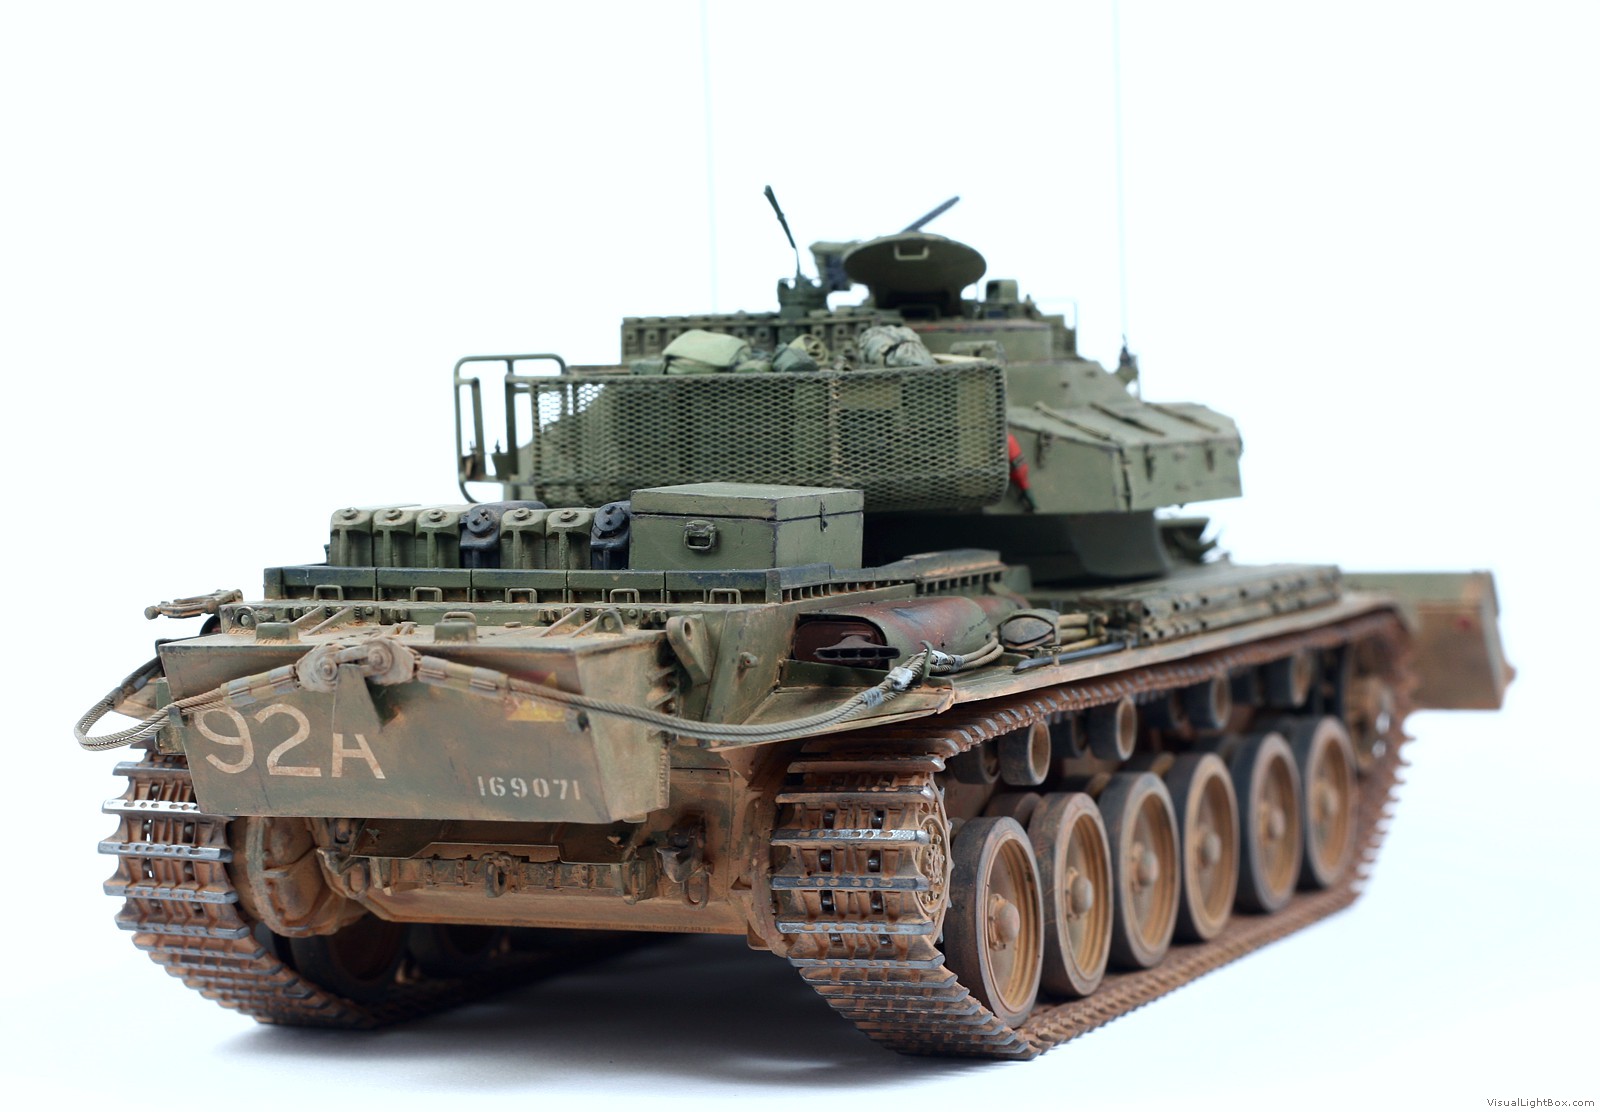
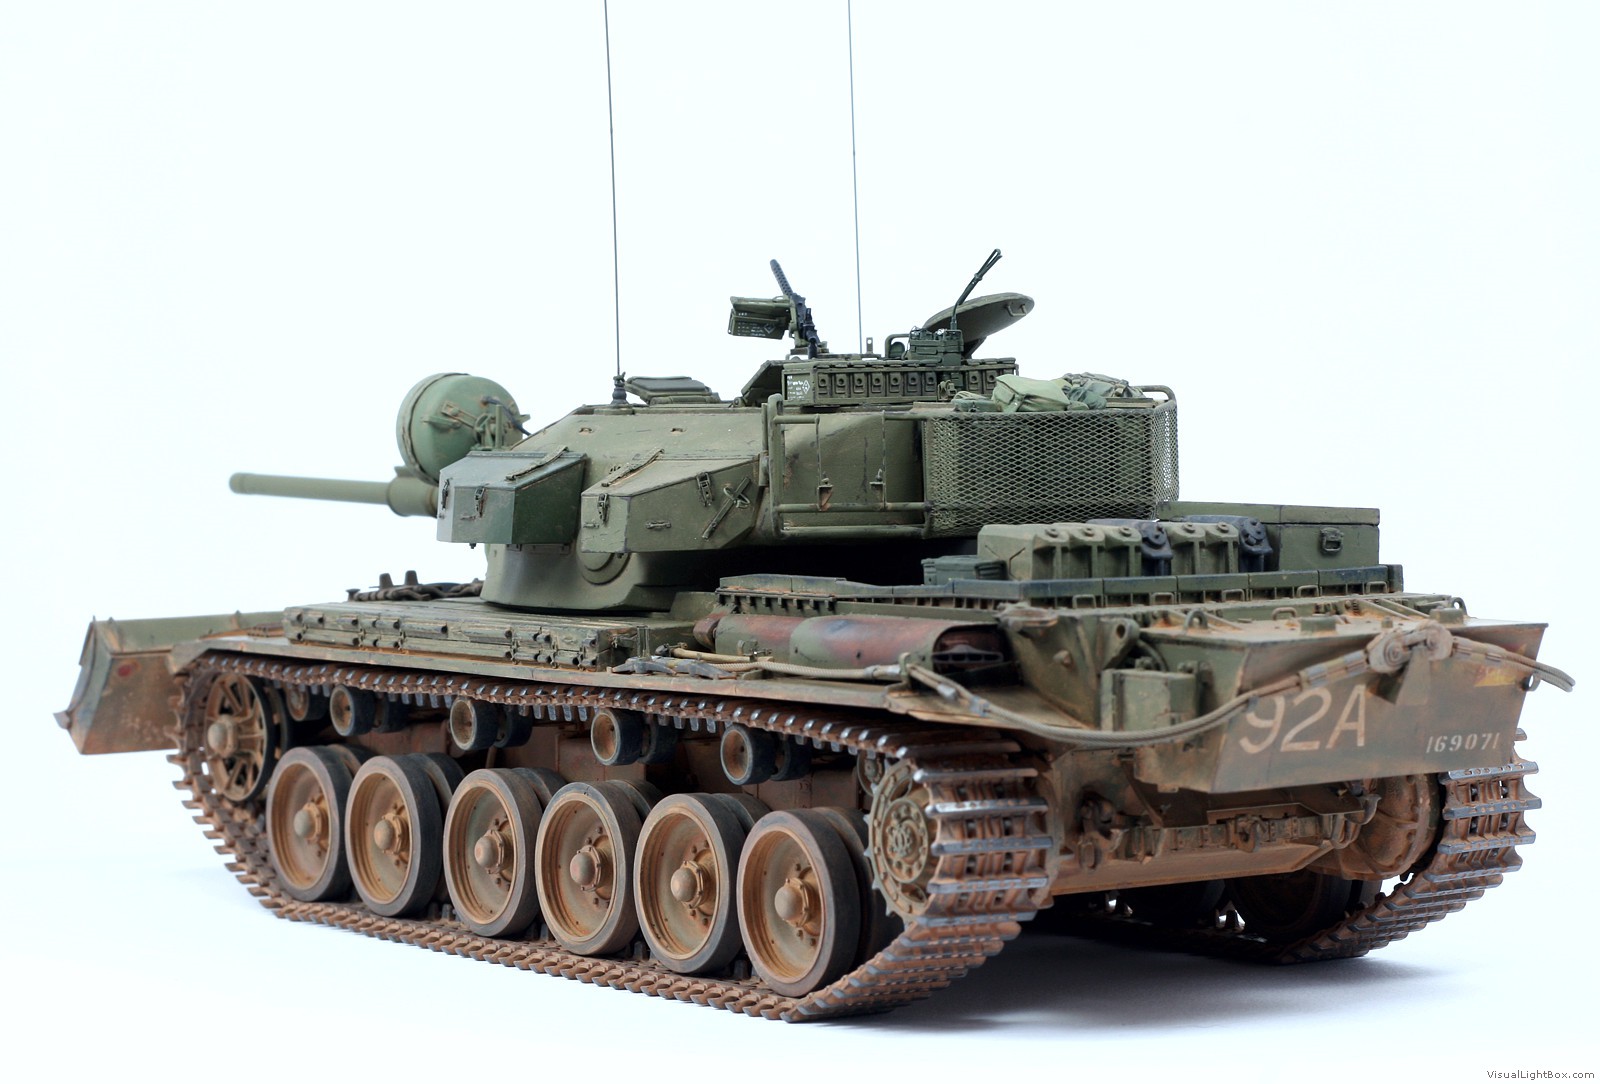
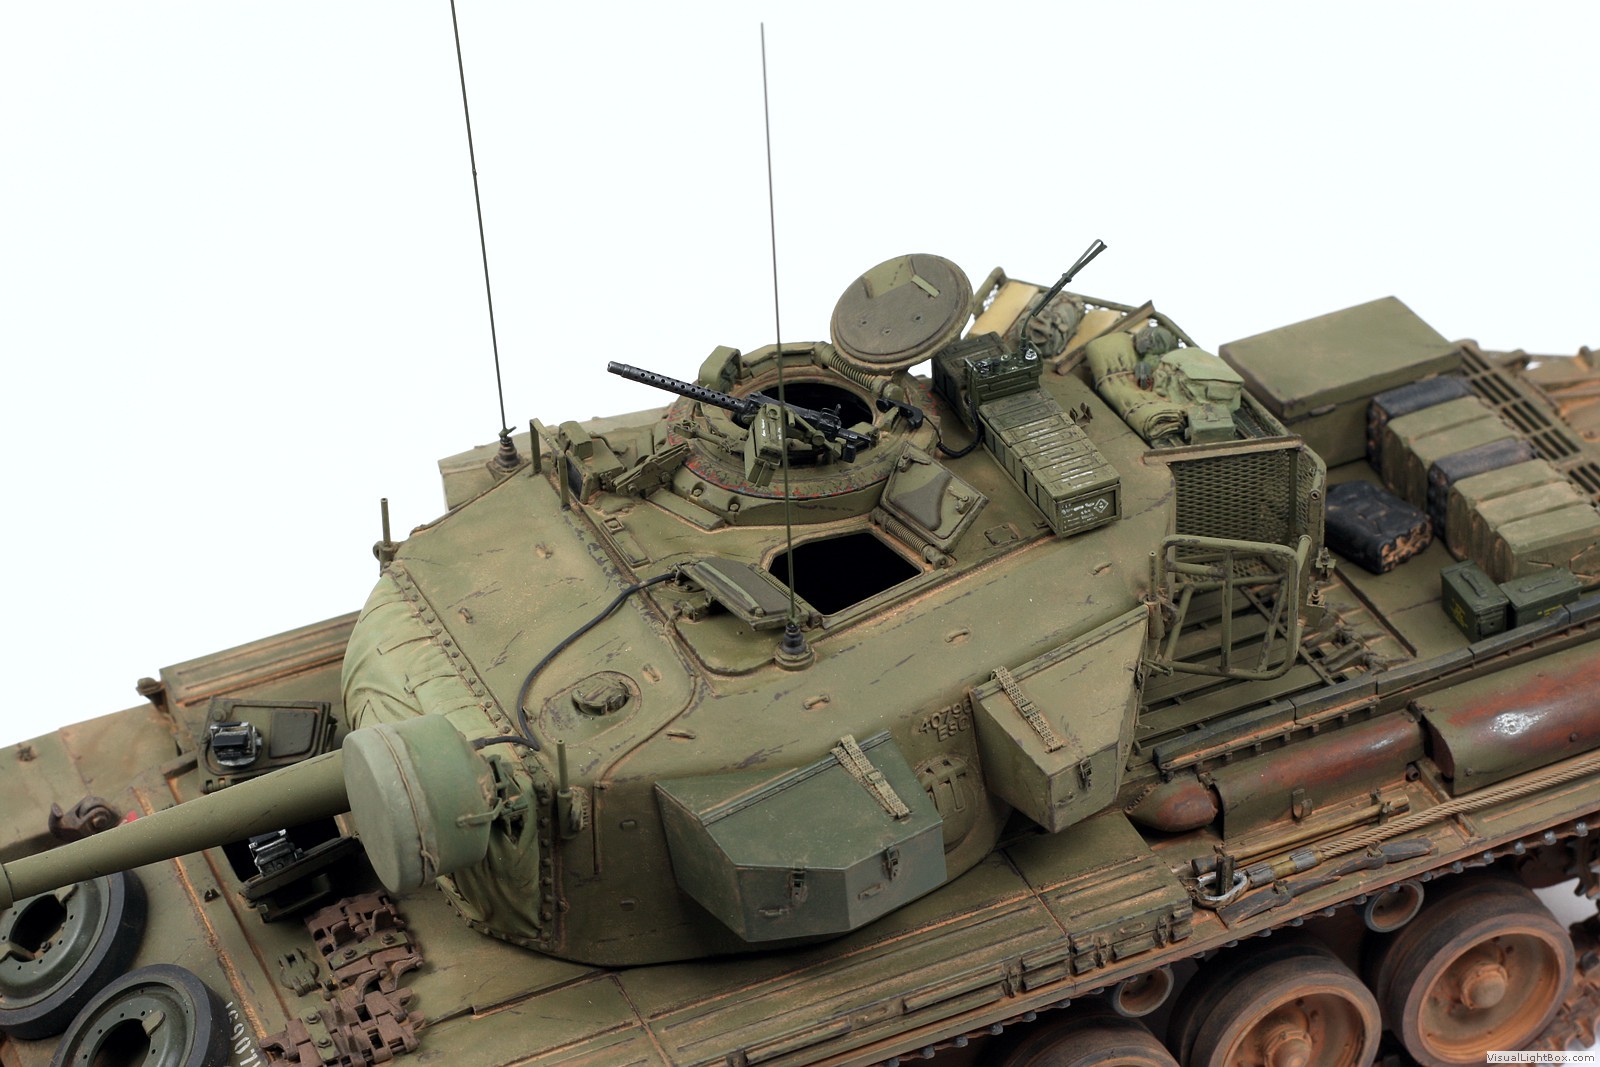
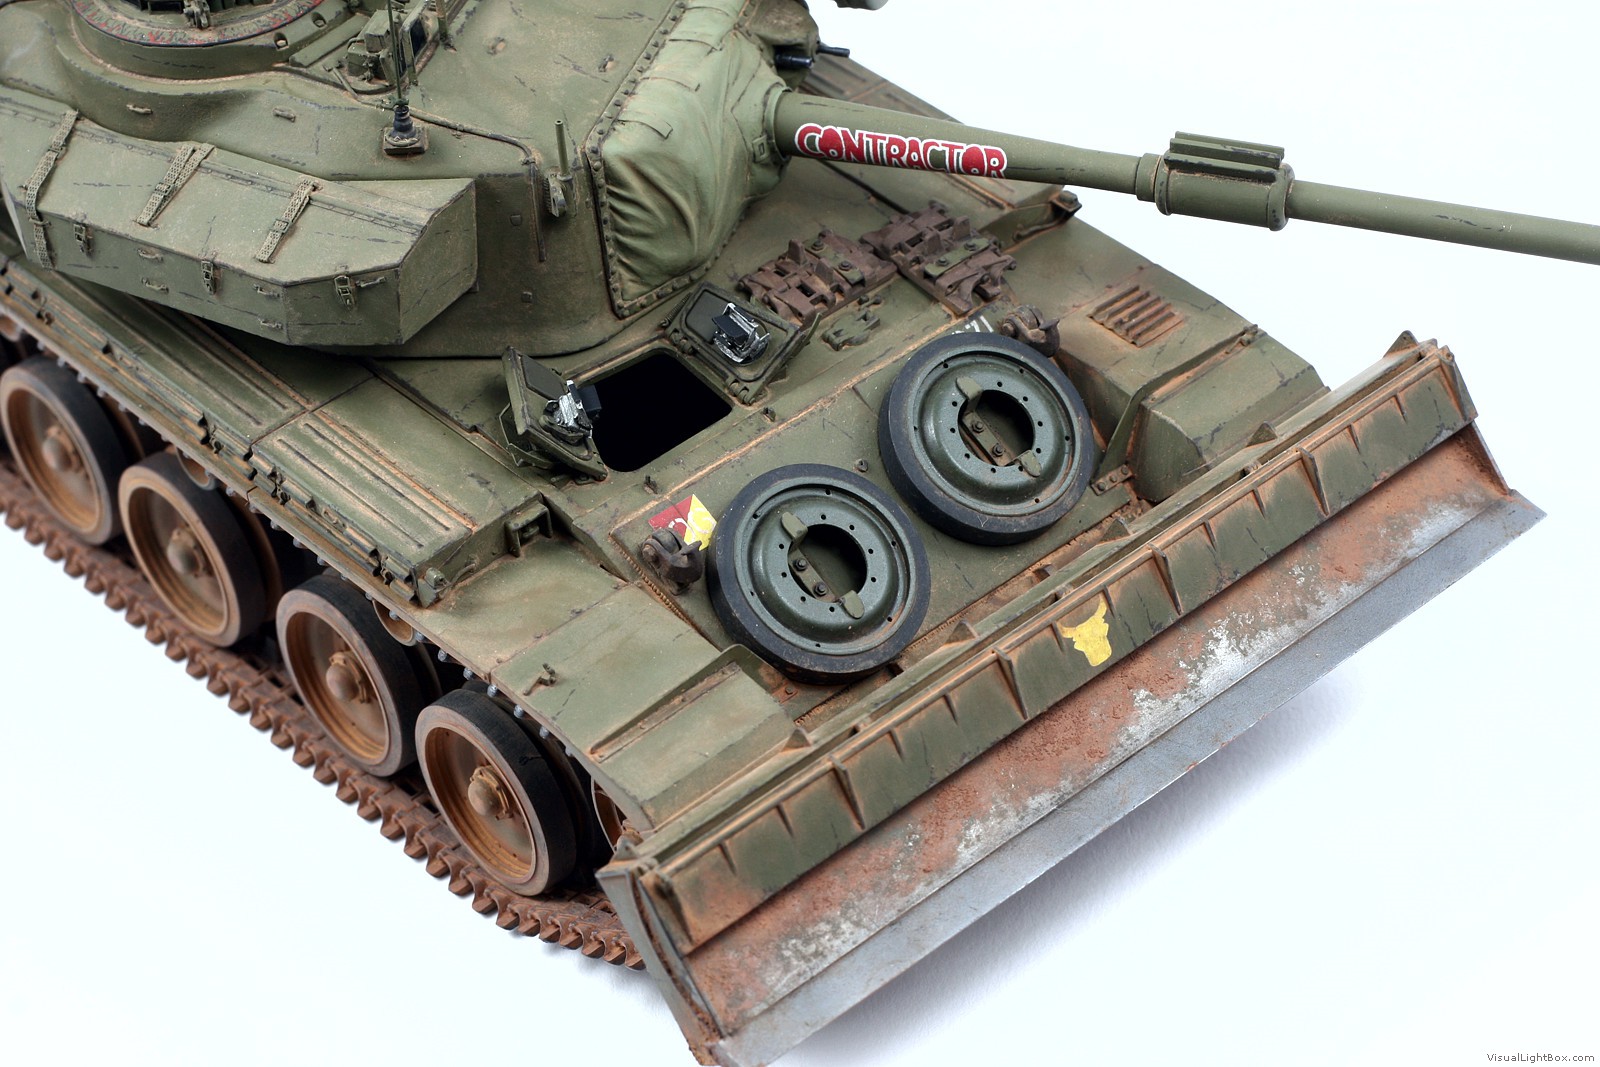
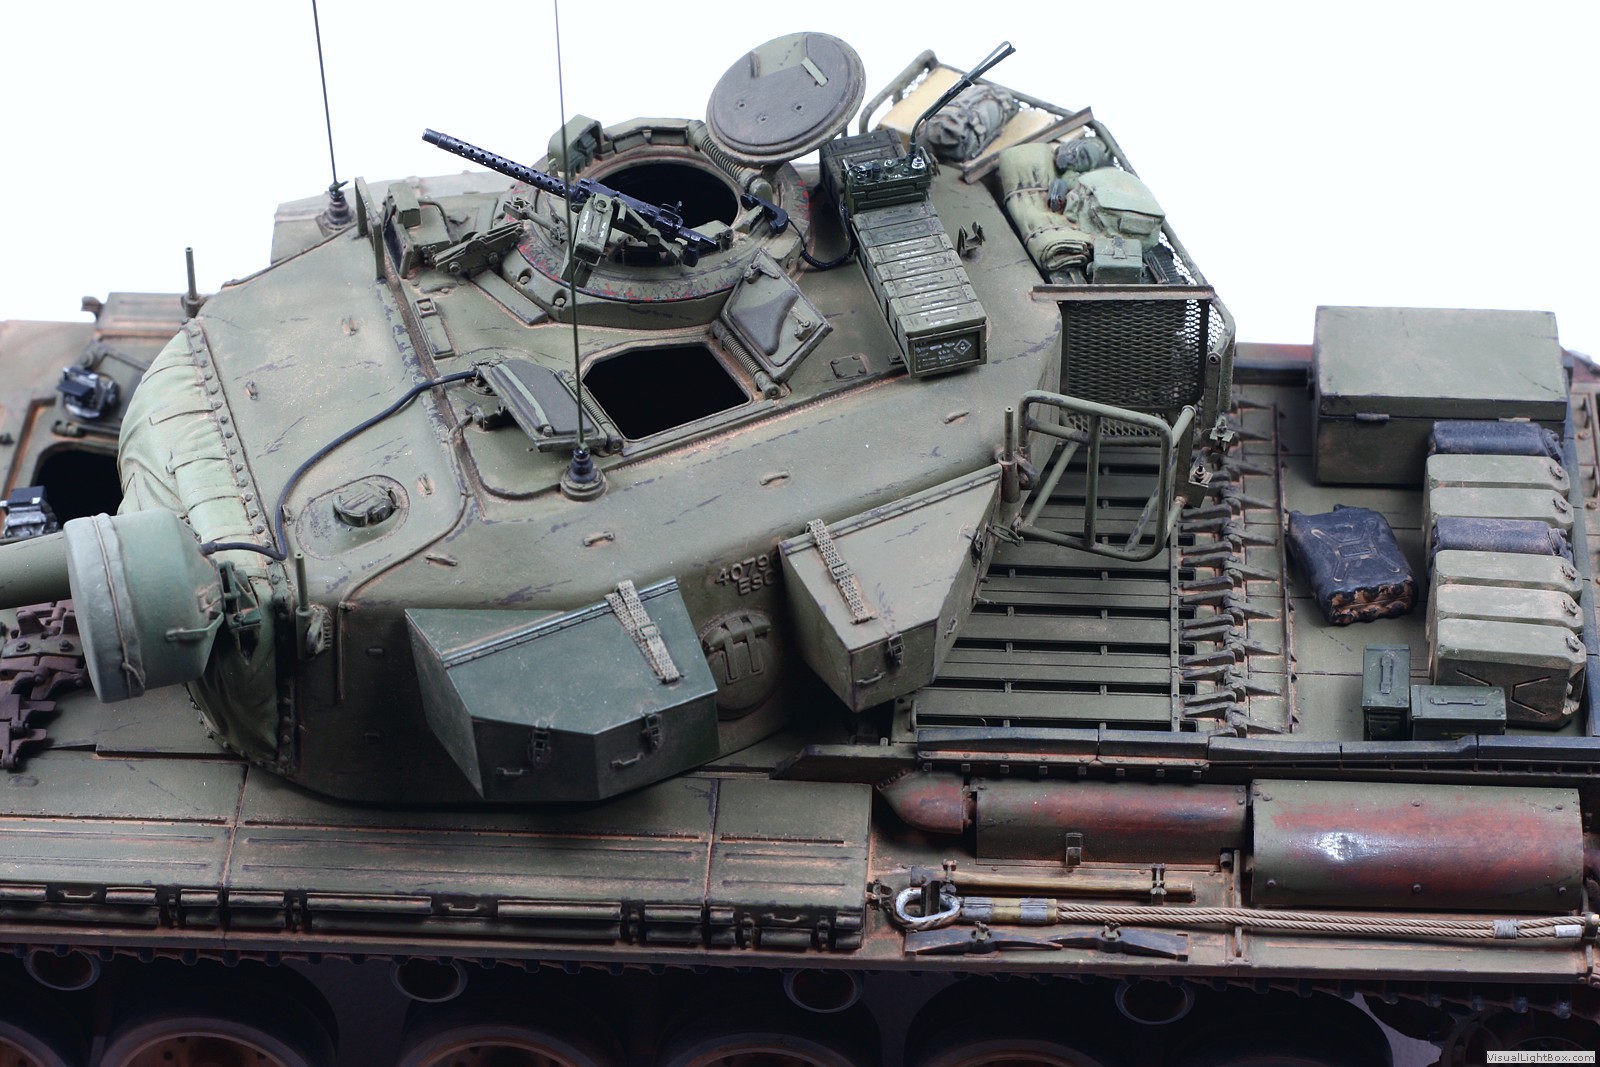
I finally finished the model that I was working on for about six years. Of course most of that time the model spent half built on a shelf. The actual build time could probably be "compressed" to a few weeks, but various factors made me abandon the project temporarily a few times. Anyway, it's finally done.
The model is based on AFV Club RAAC Centurion Mk 5/1 kit with dozer blade parts from their Centurion Mk 5 kit. Indi link tracks also came from AFV Club. I used a lot of various resin detail parts from Firestorm Models, white metal idler wheels, storage items and decals from Mouse House, PE parts from Eduard and Voyager and M1919 MG barrel from RB Models (shortened slightly, as their part is too long). I used small items from other sources as well (radio from Legend, antenna from Live Resin etc.). I also scratch built a lot of details.
Please note that it was never my plan to represent a specific RAAC tank. I always focus on engineering aspects in my models, so my goal was to include all the modifications Australians made to their tanks in Vietnam, not to be strictly historically accurate for any specific vehicle at a specific moment during the war. While I used Mouse House decals for the "Contractor" dozer tank, I have no idea what modifications that particular tank had, so my model is unlikely to represent that specific tank properly. I also used a little artistic license applying the markings, as I moved the bull head symbol from the left turret stowage box to the dozer blade center. Some other tank(s) had similar (although white) symbol in this location, but probably not this tank. I painted the turret stowage box as one replaced with a new spare part still in British DBG color, so putting the Aussie symbol on it didn't fit my concept.
Any comments and questions are welcome.
Constructive Feedback
For in-progress or completed build photos. Give and get contructive feedback!
Hosted by Darren Baker, Dave O'Meara
RAAC Centurion dozer tank (Vietnam)
Vodnik
Warszawa, Poland
Joined: March 26, 2003
KitMaker: 4,342 posts
Armorama: 3,938 posts
Joined: March 26, 2003
KitMaker: 4,342 posts
Armorama: 3,938 posts
Posted: Wednesday, July 20, 2016 - 03:04 PM UTC
JSSVIII
Massachusetts, United States
Joined: March 28, 2007
KitMaker: 1,169 posts
Armorama: 1,067 posts
Joined: March 28, 2007
KitMaker: 1,169 posts
Armorama: 1,067 posts
Posted: Wednesday, July 20, 2016 - 03:27 PM UTC
That's a fantastic build Pawel, may I ask what color/brand of paint you used for the RAAC color in this build? Also did you use the Firestorm wheels by any chance, and if so what did you think, I am thinking of getting a set myself.
Vodnik
Warszawa, Poland
Joined: March 26, 2003
KitMaker: 4,342 posts
Armorama: 3,938 posts
Joined: March 26, 2003
KitMaker: 4,342 posts
Armorama: 3,938 posts
Posted: Wednesday, July 20, 2016 - 03:48 PM UTC
Quoted Text
That's a fantastic build Pawel, may I ask what color/brand of paint you used for the RAAC color in this build? Also did you use the Firestorm wheels by any chance, and if so what did you think, I am thinking of getting a set myself.
I used WEM Colorcoats Australian Lusterless Olive Drab paint.
No, the road wheels are original kit parts with vinyl "tires". I had some small problems with paint adhesion, but nothing serious. But I will consider getting resin replacements for my next Centurion.
JSSVIII
Massachusetts, United States
Joined: March 28, 2007
KitMaker: 1,169 posts
Armorama: 1,067 posts
Joined: March 28, 2007
KitMaker: 1,169 posts
Armorama: 1,067 posts
Posted: Wednesday, July 20, 2016 - 03:56 PM UTC
Rats, I was hoping to finally get a review of those resin replacements for the vinyl outer road wheels. I think I'm going to try the Quickwheel set as it comes with one piece wheels and one of their excellent masks.
Vodnik
Warszawa, Poland
Joined: March 26, 2003
KitMaker: 4,342 posts
Armorama: 3,938 posts
Joined: March 26, 2003
KitMaker: 4,342 posts
Armorama: 3,938 posts
Posted: Wednesday, July 20, 2016 - 04:03 PM UTC
Quoted Text
Rats, I was hoping to finally get a review of those resin replacements for the vinyl outer road wheels. I think I'm going to try the Quickwheel set as it comes with one piece wheels and one of their excellent masks.
I don't like one thing about Quickwheel Cent wheels. There is a ring small holes around the rim on real wheels and they are well represented in kit wheels. In QW wheels these holes are too big. It is particularly noticable in spare wheels where these holes are almost the same size or even larger than holes for bolts around the center, while they should be smaller.
RLlockie
United Kingdom
Joined: September 06, 2013
KitMaker: 1,112 posts
Armorama: 938 posts
Joined: September 06, 2013
KitMaker: 1,112 posts
Armorama: 938 posts
Posted: Wednesday, July 20, 2016 - 04:57 PM UTC
Very nice, Pavel. I particularly appreciate that you modified the turret roof rack to accommodate the PRC-25, which hardly anyone seems to catch. Did you omit the bogus aux gen exhaust on the right? AFV Club evidently assumed that it was on both sides but it was only on one.
Vodnik
Warszawa, Poland
Joined: March 26, 2003
KitMaker: 4,342 posts
Armorama: 3,938 posts
Joined: March 26, 2003
KitMaker: 4,342 posts
Armorama: 3,938 posts
Posted: Wednesday, July 20, 2016 - 05:09 PM UTC
Quoted Text
Very nice, Pavel. I particularly appreciate that you modified the turret roof rack to accommodate the PRC-25, which hardly anyone seems to catch. Did you omit the bogus aux gen exhaust on the right? AFV Club evidently assumed that it was on both sides but it was only on one.
Yes, I have it only on the left side of the tank
exgrunt
Massachusetts, United States
Joined: December 17, 2013
KitMaker: 301 posts
Armorama: 301 posts
Joined: December 17, 2013
KitMaker: 301 posts
Armorama: 301 posts
Posted: Saturday, July 30, 2016 - 06:36 PM UTC
Great job! My only suggestion would be to add tie-downs for the ammo and fuel cans. Just about everything stored on an AFV is secured.
Removed by original poster on 07/31/16 - 15:41:02 (GMT).
JSSVIII
Massachusetts, United States
Joined: March 28, 2007
KitMaker: 1,169 posts
Armorama: 1,067 posts
Joined: March 28, 2007
KitMaker: 1,169 posts
Armorama: 1,067 posts
Posted: Saturday, July 30, 2016 - 08:43 PM UTC
Not necessarily true:
Vodnik
Warszawa, Poland
Joined: March 26, 2003
KitMaker: 4,342 posts
Armorama: 3,938 posts
Joined: March 26, 2003
KitMaker: 4,342 posts
Armorama: 3,938 posts
Posted: Saturday, July 30, 2016 - 11:29 PM UTC
Quoted Text
Not necessarily true:
Exactly. Centurion engine deck is pretty convenient and safe shelf for all kinds of stuff
jasegreene
Florida, United States
Joined: October 21, 2013
KitMaker: 751 posts
Armorama: 751 posts
Joined: October 21, 2013
KitMaker: 751 posts
Armorama: 751 posts
Posted: Sunday, July 31, 2016 - 12:27 AM UTC
Everything looks great to me.I always enjoy seeing other allied armor in Vietnam next to U.S. and South Vietnamese.Always need to remember those how served.
jasmils
Queensland, Australia
Joined: December 23, 2003
KitMaker: 1,016 posts
Armorama: 745 posts
Joined: December 23, 2003
KitMaker: 1,016 posts
Armorama: 745 posts
Posted: Sunday, July 31, 2016 - 04:40 AM UTC
This would have to be one of the best RAAC Cents I have seen Pawal.
Very, very well done. Apart from one thing. Not a biggy, the ".30 cal" on the crew commanders hole.
AFV Club included a Browning M37. We didn't use this version. We used the L3A3/4 versions.
Again, very nice job.
Very, very well done. Apart from one thing. Not a biggy, the ".30 cal" on the crew commanders hole.
AFV Club included a Browning M37. We didn't use this version. We used the L3A3/4 versions.
Again, very nice job.
JSSVIII
Massachusetts, United States
Joined: March 28, 2007
KitMaker: 1,169 posts
Armorama: 1,067 posts
Joined: March 28, 2007
KitMaker: 1,169 posts
Armorama: 1,067 posts
Posted: Sunday, July 31, 2016 - 05:01 AM UTC
"AFV Club included a Browning M37. We didn't use this version. We used the L3A3/4 versions."
How do the two versions differ Jason?
LeoCmdr
Alberta, Canada
Joined: January 19, 2005
KitMaker: 4,085 posts
Armorama: 3,917 posts
Joined: January 19, 2005
KitMaker: 4,085 posts
Armorama: 3,917 posts
Posted: Sunday, July 31, 2016 - 05:07 AM UTC
Quoted Text
"AFV Club included a Browning M37. We didn't use this version. We used the L3A3/4 versions."
How do the two versions differ Jason?
The most obvious feature on the M37 is the extended cocking handle on the right side of the receiver.
jasmils
Queensland, Australia
Joined: December 23, 2003
KitMaker: 1,016 posts
Armorama: 745 posts
Joined: December 23, 2003
KitMaker: 1,016 posts
Armorama: 745 posts
Posted: Sunday, July 31, 2016 - 05:24 AM UTC
griffontech
Canada
Joined: November 21, 2007
KitMaker: 237 posts
Armorama: 231 posts
Joined: November 21, 2007
KitMaker: 237 posts
Armorama: 231 posts
Posted: Sunday, July 31, 2016 - 06:45 AM UTC
Awesome work! I like your theories on modelling too. Exactly how I think about doing my models.
Vodnik
Warszawa, Poland
Joined: March 26, 2003
KitMaker: 4,342 posts
Armorama: 3,938 posts
Joined: March 26, 2003
KitMaker: 4,342 posts
Armorama: 3,938 posts
Posted: Sunday, July 31, 2016 - 11:52 AM UTC
Quoted Text
Apart from one thing. Not a biggy, the ".30 cal" on the crew commanders hole.
If the only inaccurate thing you can find is a wrong version of the .30 cal machine gun, then I think I did a pretty good job
Thanks!
And of course I will try to remove the extended handle - at least the part protruding behind the rear of the receiver - and add a regular handle on the side. Just to make it look more like L3 type gun from the distance
jasmils
Queensland, Australia
Joined: December 23, 2003
KitMaker: 1,016 posts
Armorama: 745 posts
Joined: December 23, 2003
KitMaker: 1,016 posts
Armorama: 745 posts
Posted: Sunday, July 31, 2016 - 02:02 PM UTC
Oh, it's a fanatic kit, no doubt about it. This is just the first time I have noticed the gun.
BruceJ8365
Kansas, United States
Joined: December 25, 2012
KitMaker: 441 posts
Armorama: 441 posts
Joined: December 25, 2012
KitMaker: 441 posts
Armorama: 441 posts
Posted: Monday, August 01, 2016 - 08:43 AM UTC
Very nice! Lots of detail, tie downs, empty fire extinguisher bracket, and I like the replaced parts with less faded paint. The dust ressesed is great too.
Curious - I'm not a centurion expert - what are the wires for that come down from the turret roof to the front of the turret? Also curious what the short pipes are for by the front lifting rings on the turret?
Vodnik
Warszawa, Poland
Joined: March 26, 2003
KitMaker: 4,342 posts
Armorama: 3,938 posts
Joined: March 26, 2003
KitMaker: 4,342 posts
Armorama: 3,938 posts
Posted: Monday, August 01, 2016 - 09:58 AM UTC
Quoted Text
Very nice! Lots of detail, tie downs, empty fire extinguisher bracket, and I like the replaced parts with less faded paint.
Paint is not less faded - it is a different color. During Vietnam War Australian Centurions were painted in Lusterless Olive Drab, but most spares came in British gloss Deep Bronze Green.
Quoted Text
Curious - I'm not a centurion expert - what are the wires for that come down from the turret roof to the front of the turret?
The black one is obviously a power cable for the searchlight. The ones on sides are conduits for smoke grenade launcher cables - but Australians often removed the launchers from their Centurions during the Vietnam War.
Quoted Text
Also curious what the short pipes are for by the front lifting rings on the turret?
Supports for the sunshade:
Posted: Monday, August 01, 2016 - 01:19 PM UTC
Hi all. Certified armor noob (but military history nut) here, hope you don't mind me posting these images of a Centurion on display and under restoration that I cam across on a work trip in regional New South Wales (Moama RSL for those down under).
Hopefully next time I go past it will be done and I can get some better shots.
BTW, awesome build Pawel, love the detail and weathering. I have been looking over the images for at least 30 minutes now!
Cheers, D
Hopefully next time I go past it will be done and I can get some better shots.
BTW, awesome build Pawel, love the detail and weathering. I have been looking over the images for at least 30 minutes now!
Cheers, D
Posted: Monday, August 01, 2016 - 01:44 PM UTC
Pawal,
Excellent! The dust effects look very convincing. Thank you for sharing!
Gaz
Excellent! The dust effects look very convincing. Thank you for sharing!
Gaz