Hey all,
Just want to check before I begin to build but does the F6F Hellcat qualify for this campaign??
Thanks
Dave
Campaigns
Where Armorama group builds can be discussed, organized, and updates posted.
Where Armorama group builds can be discussed, organized, and updates posted.
Hosted by Darren Baker, Richard S.
Animals Campaign
Posted: Wednesday, November 02, 2016 - 08:51 AM UTC

Bluestab

Joined: December 03, 2009
KitMaker: 2,160 posts
Armorama: 1,906 posts

Posted: Wednesday, November 02, 2016 - 08:57 AM UTC
Starter picture. I'll be doing Meng's Whippit Mk A Tank...it's the MG version. A whippit is a dog, related to the greyhound. I should be getting started this weekend.


Posted: Wednesday, November 02, 2016 - 08:09 PM UTC
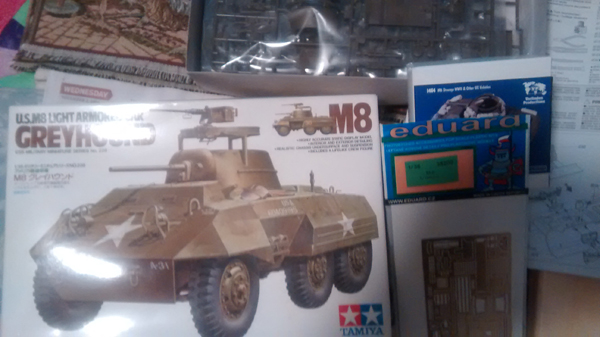
Ok, I'm ready for this puppy! A greyhound is a dog, related to the whippet ;-)...



jimb

Joined: August 25, 2006
KitMaker: 2,539 posts
Armorama: 238 posts

Posted: Sunday, November 06, 2016 - 07:29 AM UTC
Looking forward to this Group Build. Going to do a 1978 Chevrolet Bison:

Well, it's not a dog. Hoping to get it started by the end of the month.
Jim

Well, it's not a dog. Hoping to get it started by the end of the month.
Jim
Bravo1102

Joined: December 08, 2003
KitMaker: 2,864 posts
Armorama: 2,497 posts

Posted: Sunday, November 06, 2016 - 01:36 PM UTC
Finally a non-canine! 
I started painting my F-111 just haven't had the opportunity to upload pictures.

I started painting my F-111 just haven't had the opportunity to upload pictures.
Posted: Monday, November 07, 2016 - 05:26 AM UTC
All entrants look good. Since I started this I better find a suitable choice for this campaign. Probably an aircraft and not named after a canine either.
Nito74

Joined: March 04, 2008
KitMaker: 5,386 posts
Armorama: 4,727 posts

Posted: Tuesday, November 08, 2016 - 06:42 PM UTC
Thirian24

Joined: September 30, 2015
KitMaker: 2,493 posts
Armorama: 2,344 posts

Posted: Wednesday, November 09, 2016 - 03:53 AM UTC

jimb

Joined: August 25, 2006
KitMaker: 2,539 posts
Armorama: 238 posts

Posted: Wednesday, November 09, 2016 - 04:24 AM UTC
Interesting tank destroyer. What's a Nashorn?
Jim
Jim
Posted: Wednesday, November 09, 2016 - 05:14 AM UTC
It's a rhinoceros, which is not related to either the whippet nor the greyhound....;-)

jimb

Joined: August 25, 2006
KitMaker: 2,539 posts
Armorama: 238 posts

Posted: Wednesday, November 09, 2016 - 05:25 AM UTC
ltb073

Joined: March 08, 2010
KitMaker: 3,662 posts
Armorama: 3,078 posts

Posted: Friday, November 25, 2016 - 01:13 AM UTC
Thirian24

Joined: September 30, 2015
KitMaker: 2,493 posts
Armorama: 2,344 posts

Posted: Friday, November 25, 2016 - 01:45 AM UTC
Bravo1102

Joined: December 08, 2003
KitMaker: 2,864 posts
Armorama: 2,497 posts

Posted: Friday, November 25, 2016 - 06:06 AM UTC
I have actually finished my F-111 but it didn't come out so well. When I can get to my PC I will post pictures.
Bravo1102

Joined: December 08, 2003
KitMaker: 2,864 posts
Armorama: 2,497 posts

Posted: Sunday, November 27, 2016 - 07:05 PM UTC
And here is the start picture for the F-111 Aardvark. I got this kit over 20 years ago when it was still timely.

The first build picture. The underside has some inserts that don't fit quite right, or I screwed up the assembly order so I could get the nose weight in.


camouflaged and waiting for decals. I hand paint since there is no room for an airbrush set up anymore.


The first build picture. The underside has some inserts that don't fit quite right, or I screwed up the assembly order so I could get the nose weight in.


camouflaged and waiting for decals. I hand paint since there is no room for an airbrush set up anymore.


PasiAhopelto

Joined: October 01, 2016
KitMaker: 514 posts
Armorama: 171 posts

Posted: Monday, November 28, 2016 - 11:13 PM UTC
Last change to take a photo of my mollusc's wheelhouse interior and control panel:

So far I'm pleased with the kit's design, and everything is built out of box without any issues.
So far I'm pleased with the kit's design, and everything is built out of box without any issues.

Monte

Joined: December 08, 2002
KitMaker: 833 posts
Armorama: 601 posts

Posted: Tuesday, November 29, 2016 - 07:47 AM UTC
OK. I'm in.


BigSmitty

Joined: October 01, 2008
KitMaker: 597 posts
Armorama: 439 posts

Posted: Tuesday, November 29, 2016 - 10:49 PM UTC
Hello all,
I've enlisted in this campaign, and have plenty of options, but one I was wondering about (maybe get a group ruling) is the A-10... since it's technically the Thunderbolt II, but everyone calls it the "Warthog" would it qualify for this campaign?
I've enlisted in this campaign, and have plenty of options, but one I was wondering about (maybe get a group ruling) is the A-10... since it's technically the Thunderbolt II, but everyone calls it the "Warthog" would it qualify for this campaign?


Monte

Joined: December 08, 2002
KitMaker: 833 posts
Armorama: 601 posts

Posted: Wednesday, November 30, 2016 - 08:20 AM UTC
I have no problem with it.
Posted: Wednesday, November 30, 2016 - 06:48 PM UTC
Quoted Text
Hello all,
I've enlisted in this campaign, and have plenty of options, but one I was wondering about (maybe get a group ruling) is the A-10... since it's technically the Thunderbolt II, but everyone calls it the "Warthog" would it qualify for this campaign?
I have no problem with it either. Go for it.

Bluestab

Joined: December 03, 2009
KitMaker: 2,160 posts
Armorama: 1,906 posts

Posted: Tuesday, December 06, 2016 - 04:33 AM UTC
Update time on the Meng Whippet mk1...."cry havoc and let slip the dogs of war!"
The kit looks nice. The all-important rivet detail is nice and crisp. There's actually a bit less to this kit than I had expected. Instructions look okay...there's some interesting bits of engineering for the upper hull. But we'll see how those work out in actual construction. The instructions include a nice little write-up on the Whippet...it's nice to see these in kits.
We begin with the lower hull. Meng has the hull underside open, with a seperate bottom piece to form the bottom. Most of the hull is assembled. The first addition are the rear plate parts.

Rear parts added. The instructions then jump to the fighting compartment. Meng has molded some of the parts flat and scored the inside. The builder is to end these parts. A scaled down illustration is given to give the builder an idea how much to bend them.

I used the kit's adjacent parts to determine the angles to bend. For example, I used the roof plate as a jig for the rear plates assembly. The fighting compartment instructions are a bit wacky and jumping around to get parts to test angles may make it wackier.
Some of the interior sdes of the fighting compartment pieces have some detail to them. I'm wondering if Meng had planned on providing an interior.
Anyway, here are the ste-by-step assembly pictures of the fighting compartment. There are alot of pieces and care should be taken to keep parts organized. Angles are important and a small deviation will require work to get them all to fit.


When finished, I used some creative clamping to get the fighting compartment to fit. I had to play with the fit to get everything to line up. I worked with one or two edges at a time to make sure everything was fitting as well as I could.
Once that dries, I'll add the hull underside.

Hull underside added. Clamped.
Next up the parts for the front nose assembly.

For the front, Meng includes two tubes to act as support inside the nose assemble. I think it would work without them but their addition was a nice touch that probably reduces verbal outbursts.
Next up are the sspension components. There's a lot of them...they will need some cleanup... so I went ahead and assembled them.

I placed the wheels to the mounts. I went ahead and gave the suspension assemblies a coat of dark green. I felt that it could be a bit tricky to try to get paint up there after assembly.

Wheels and mud shoots added. One suspension unit was left open for the picture to give you a look inside. The suspesion halves went together pretty easy. I really expected to have a bit of a struggle with them. Once together, they were clamped and left to dry.

Suspension together. I also sprayed the underside and around the areas were the suspension mounts to the hull. I taped off the mount points. By the way, test fitting showed the openings are a tad small so I'll open them up a bit.

The suspension assemblies are mounted but I am taking a brief break to decide if I want to add Celluclay or Sculptamold mud. So far, this is a nice little kit.
Woof woof!
The kit looks nice. The all-important rivet detail is nice and crisp. There's actually a bit less to this kit than I had expected. Instructions look okay...there's some interesting bits of engineering for the upper hull. But we'll see how those work out in actual construction. The instructions include a nice little write-up on the Whippet...it's nice to see these in kits.
We begin with the lower hull. Meng has the hull underside open, with a seperate bottom piece to form the bottom. Most of the hull is assembled. The first addition are the rear plate parts.

Rear parts added. The instructions then jump to the fighting compartment. Meng has molded some of the parts flat and scored the inside. The builder is to end these parts. A scaled down illustration is given to give the builder an idea how much to bend them.

I used the kit's adjacent parts to determine the angles to bend. For example, I used the roof plate as a jig for the rear plates assembly. The fighting compartment instructions are a bit wacky and jumping around to get parts to test angles may make it wackier.
Some of the interior sdes of the fighting compartment pieces have some detail to them. I'm wondering if Meng had planned on providing an interior.
Anyway, here are the ste-by-step assembly pictures of the fighting compartment. There are alot of pieces and care should be taken to keep parts organized. Angles are important and a small deviation will require work to get them all to fit.


When finished, I used some creative clamping to get the fighting compartment to fit. I had to play with the fit to get everything to line up. I worked with one or two edges at a time to make sure everything was fitting as well as I could.
Once that dries, I'll add the hull underside.

Hull underside added. Clamped.
Next up the parts for the front nose assembly.

For the front, Meng includes two tubes to act as support inside the nose assemble. I think it would work without them but their addition was a nice touch that probably reduces verbal outbursts.
Next up are the sspension components. There's a lot of them...they will need some cleanup... so I went ahead and assembled them.

I placed the wheels to the mounts. I went ahead and gave the suspension assemblies a coat of dark green. I felt that it could be a bit tricky to try to get paint up there after assembly.

Wheels and mud shoots added. One suspension unit was left open for the picture to give you a look inside. The suspesion halves went together pretty easy. I really expected to have a bit of a struggle with them. Once together, they were clamped and left to dry.

Suspension together. I also sprayed the underside and around the areas were the suspension mounts to the hull. I taped off the mount points. By the way, test fitting showed the openings are a tad small so I'll open them up a bit.

The suspension assemblies are mounted but I am taking a brief break to decide if I want to add Celluclay or Sculptamold mud. So far, this is a nice little kit.
Woof woof!
Posted: Tuesday, December 06, 2016 - 06:57 AM UTC
Great start, Alex, those "bended" parts are something I haven't had the 'pleasure' of seeing yet in my modeling days...;-)
Bravo1102

Joined: December 08, 2003
KitMaker: 2,864 posts
Armorama: 2,497 posts

Posted: Tuesday, December 06, 2016 - 08:14 AM UTC
Great start. Score and bend were a big feature in Eastern European kits of the 1990s. Some kits still feature them because for simple folds. IMO you get better molded details making it flat and Diy folds than multiple part molds.

Bluestab

Joined: December 03, 2009
KitMaker: 2,160 posts
Armorama: 1,906 posts

Posted: Tuesday, December 06, 2016 - 11:40 AM UTC
Clayton & Bravo, Meng did a pretty nice job on the scored & bend parts. They actually score it for you and they bend clean and easy. The fit is pretty good. Both bended parts really could have been molded that way. Some of the parts, including other parts for the fighting compartment, are molded as angled sections. It does look a bit cheap though, but it does work.

Monte

Joined: December 08, 2002
KitMaker: 833 posts
Armorama: 601 posts

Posted: Saturday, December 17, 2016 - 01:44 AM UTC
Some progress on Das Tiger while I wait for the AM parts to show.


 |


