_GOTOBOTTOM
Armor/AFV
For discussions on tanks, artillery, jeeps, etc.
M4A1 based early M50 Sherman - Asuka
Pedro
Visit this Community
Wojewodztwo Pomorskie, Poland
Joined: May 26, 2003
KitMaker: 1,208 posts
Armorama: 1,023 posts
Posted: Tuesday, August 30, 2016 - 11:21 PM UTC
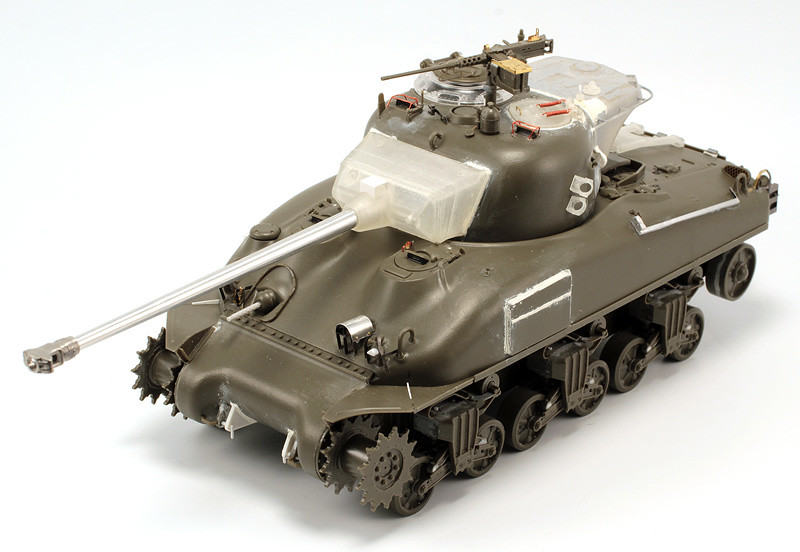
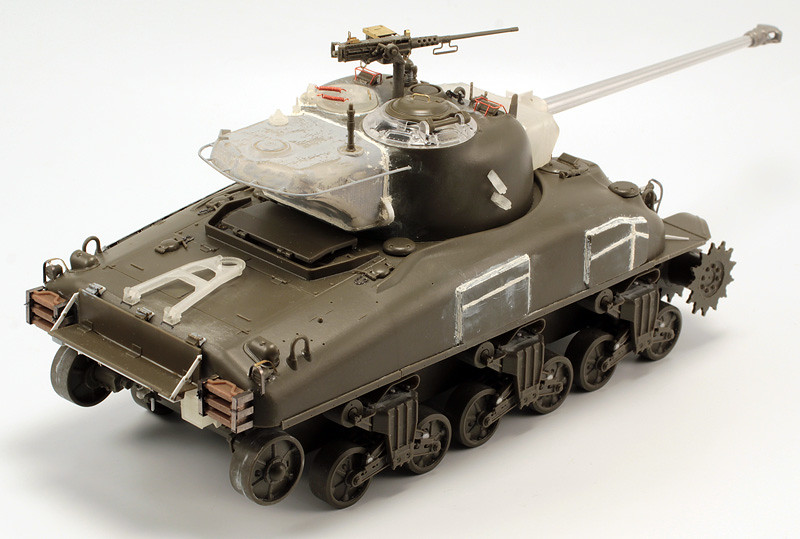
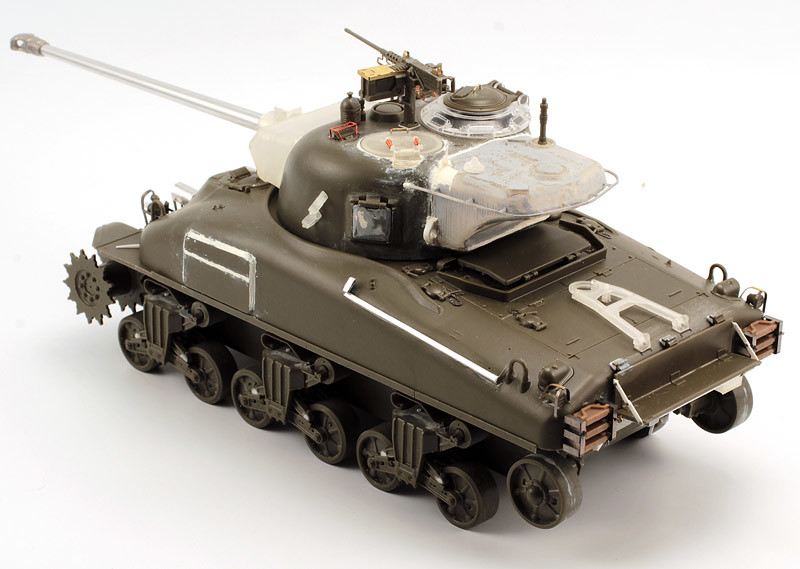
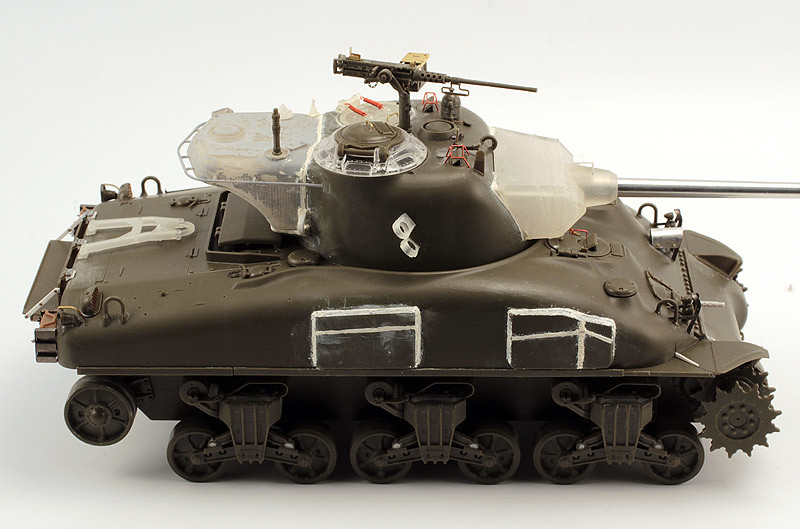
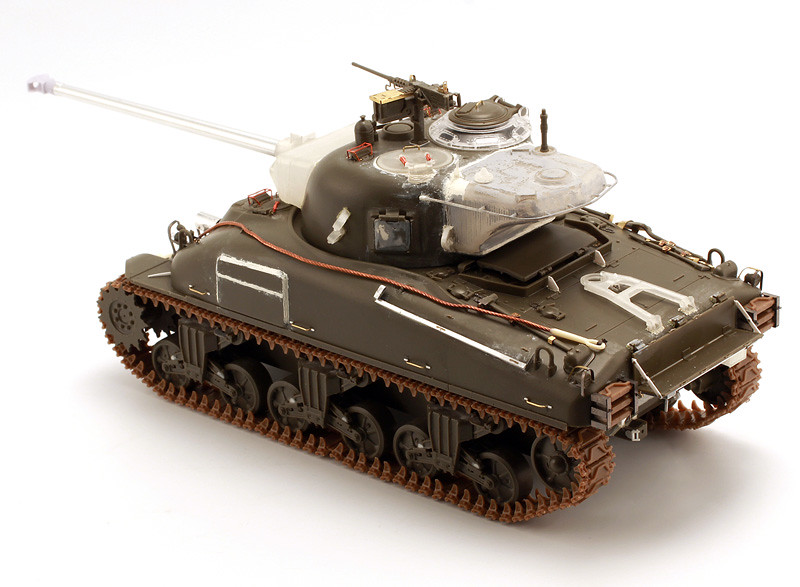
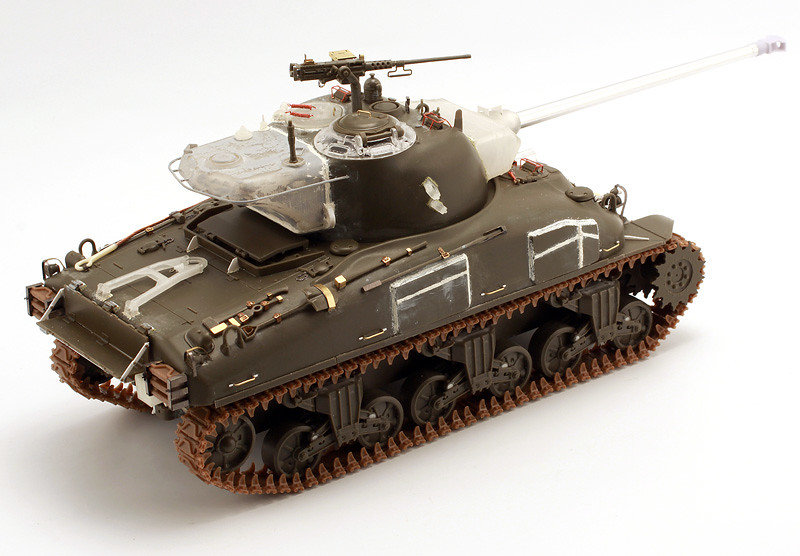
Hi, this will be a blog about creating a M4A1 based early M50 sherman.

As the base kit I used Eduard's boxing of former Tasca M4A1 sprues, as it is my favourite sherman type and a joy to build. It also helps that this type of intermediate M4A1 was a base for many early M50's.

The M50 specific parts were designed by me, at first as an upgrade for late model M50 from MP models, but then it evolved into an idea to be able to make an M50 with virtually any sherman kit that has 75mm turret. For reference I used drawings and photos from dr. Manasherob's Lioness and Lion of the Line vol.2 book.

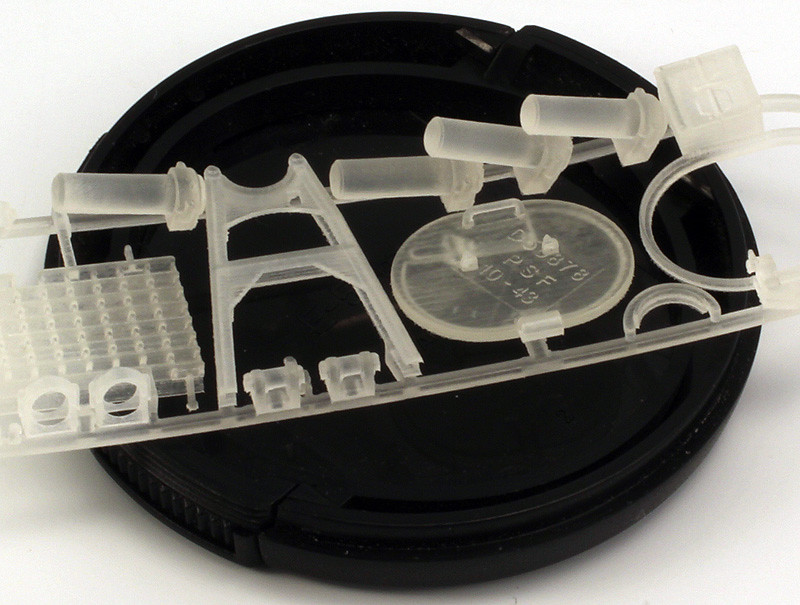
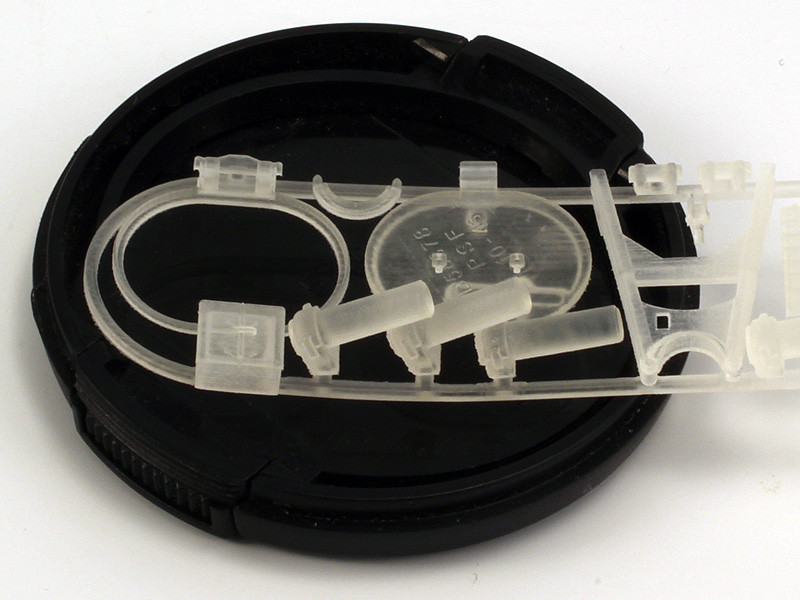
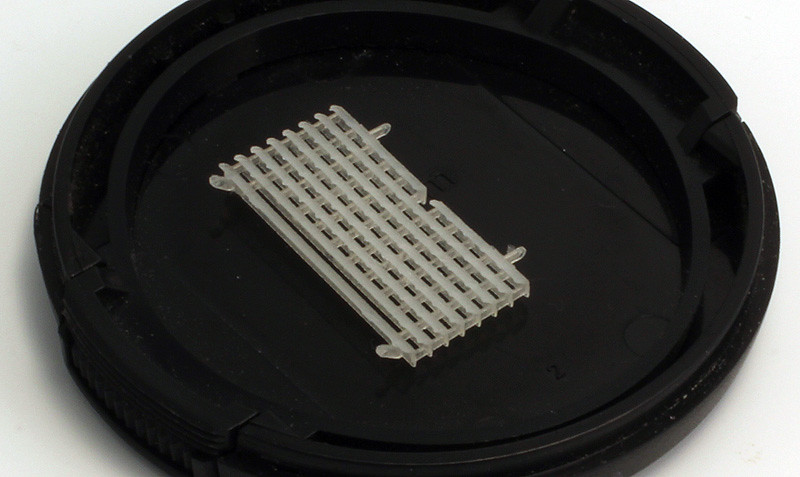
Parts were printed via shapeways in their frosted ultra detail resin.

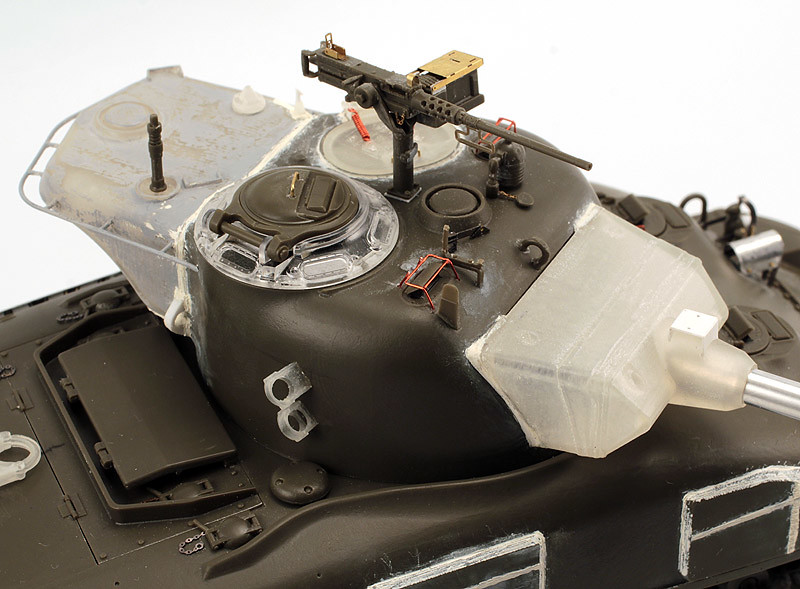
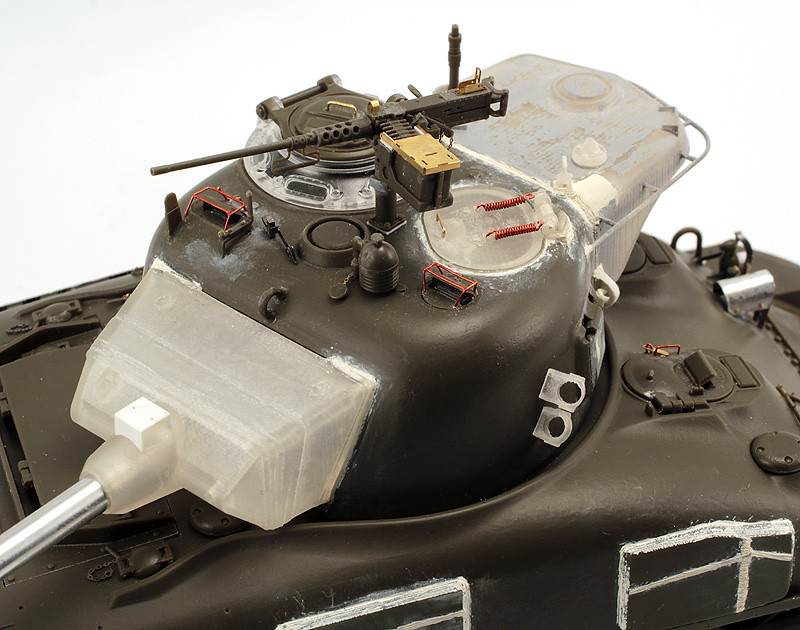
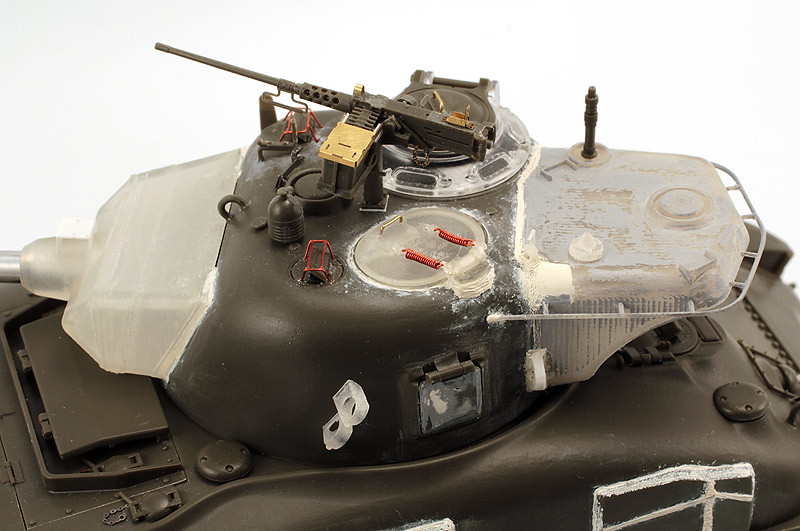
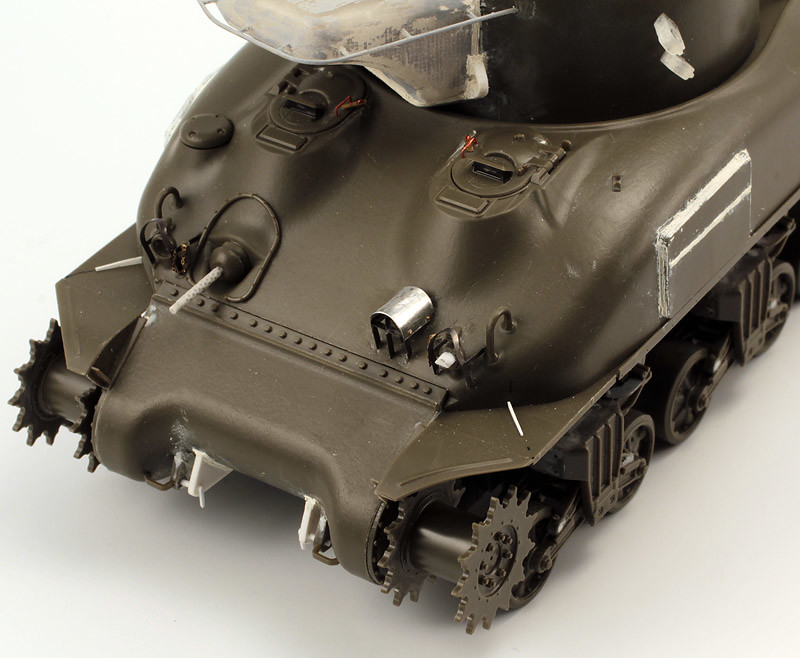
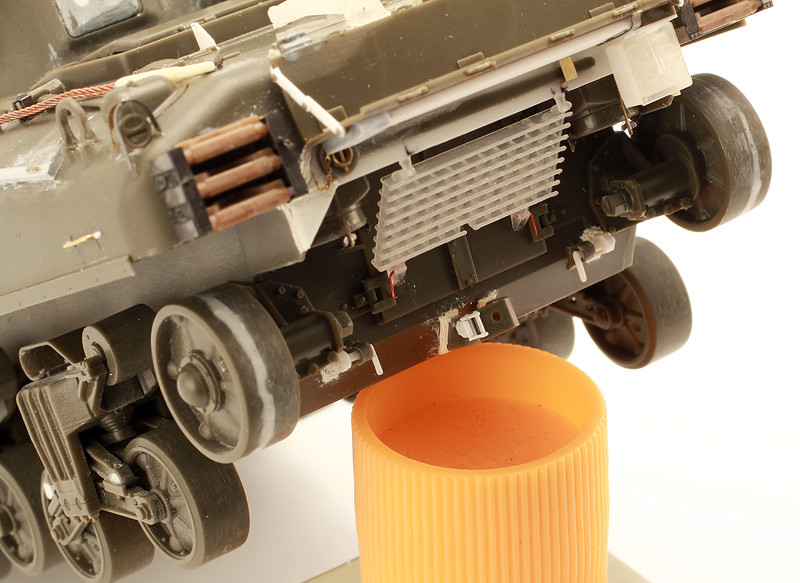
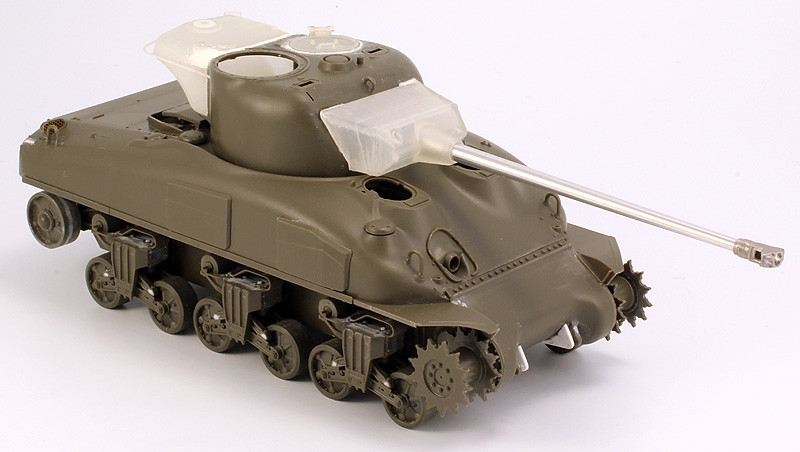
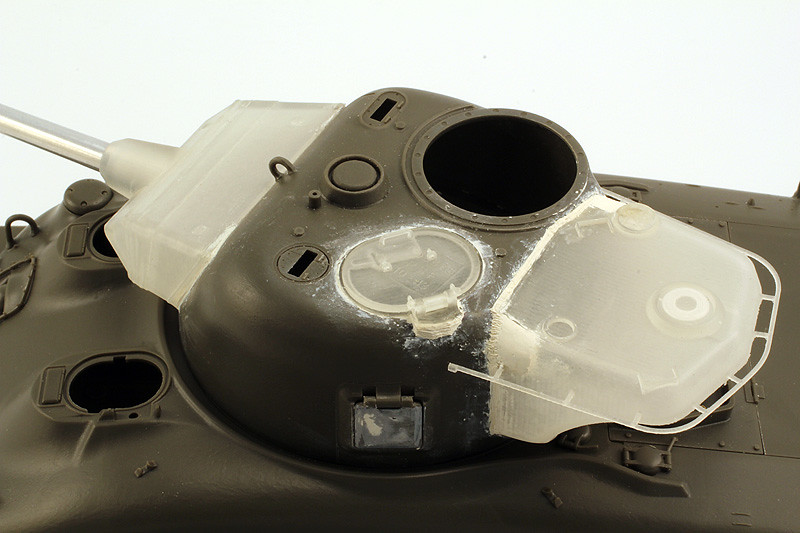
3D M50 conversion includes mantlet, bustle extension, gun travel lock, remanufactured loaders hatch, smoke dischargers as well as empty mounts seen on very early photos of M50s, early infantry telephone box and exhaust deflector. Last part may not be exactly suitable for this type of medium as one of my examples got warped, the other one is ok but it is still on its sprue.

There was also some trial and error around the fillets that meet the original leftover bustle and lower edge of the butle conversion and these details I had to redo with Millput.

Bulk of the sherman is built, now I'm adding small details, welds and so on. To complete the build I will use some pe from old Eduard's PE set for italeri M4A1, commander's all-around vision cupola (preferably bought as a sprue from Asuka) and Bronco's T54E1 tracks.

The resin that the conversion was printed in is semi translucent, so untill I shoot it with primer, it is a little hard to photograph, so bear with me please.

IMG_3303 by Grzegorz Ziecina, on Flickr
IMG_3305 by Grzegorz Ziecina, on Flickr
IMG_3310 by Grzegorz Ziecina, on Flickr
IMG_3277 by Grzegorz Ziecina, on Flickr

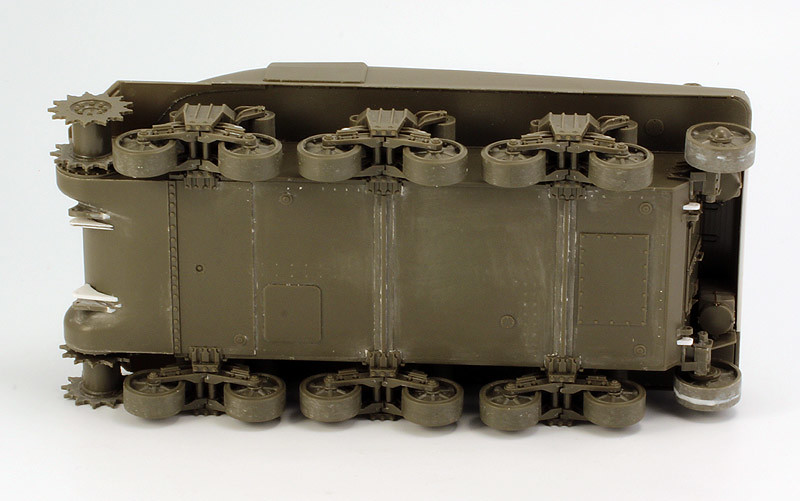
I shaved off al the rivets from the lower hull bottom, but I couldn't be bothered with redoing the reinforcement profiles to the welded style, too much work with visibility on the completed model close to 0.
IMG_3279 by Grzegorz Ziecina, on Flickr
IMG_3285 by Grzegorz Ziecina, on Flickr
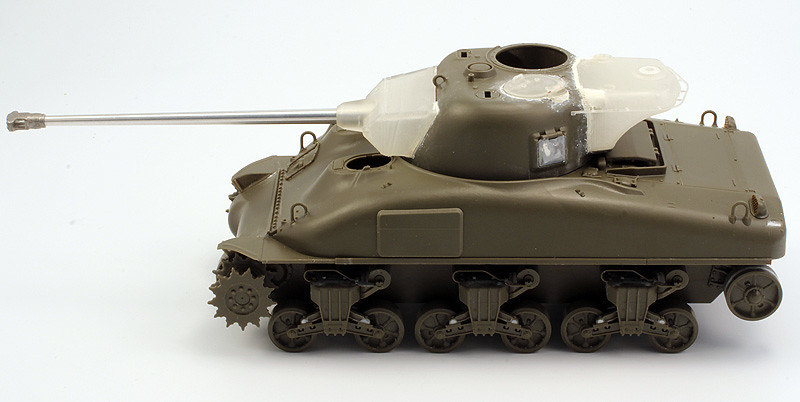
IMG_3273 by Grzegorz Ziecina, on Flickr
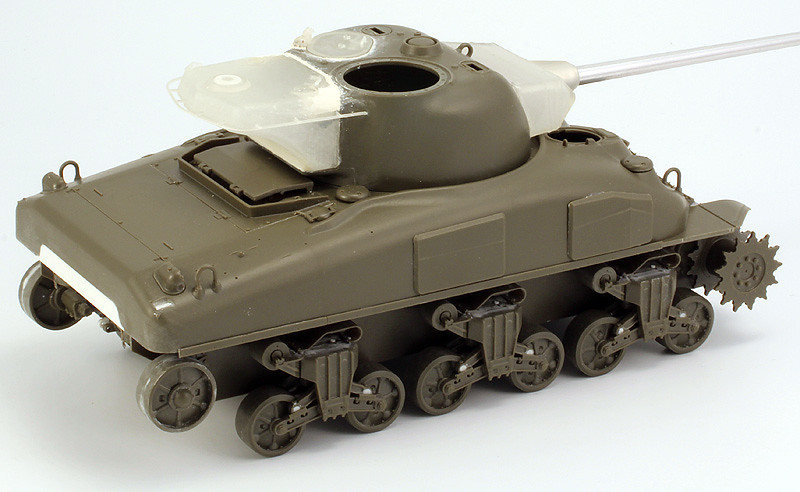
IMG_3275 by Grzegorz Ziecina, on Flickr
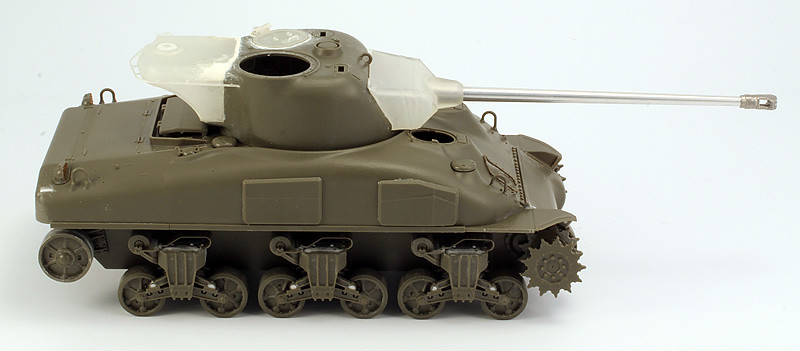
IMG_3276 by Grzegorz Ziecina, on Flickr
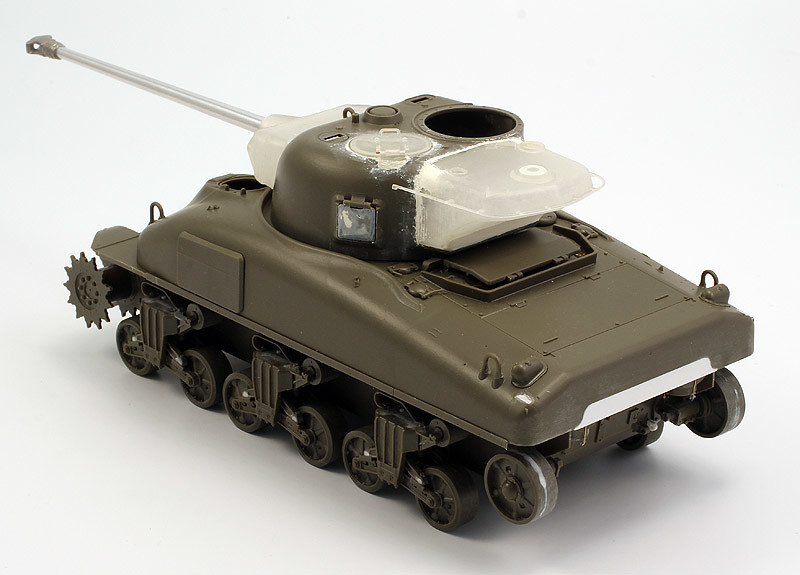
IMG_3272 by Grzegorz Ziecina, on Flickr

Cheers,
Greg
Cookiescool2
Visit this Community
Georgia, United States
Joined: May 09, 2014
KitMaker: 273 posts
Armorama: 270 posts
Posted: Tuesday, August 30, 2016 - 11:56 PM UTC
Glad to see 3D printed parts are getting some love! It looks great so far, can't wait to see how it turns out!
Pedro
Visit this Community
Wojewodztwo Pomorskie, Poland
Joined: May 26, 2003
KitMaker: 1,208 posts
Armorama: 1,023 posts
Posted: Wednesday, August 31, 2016 - 12:07 AM UTC
Yes Alan, I think that 3D printig is the future, with the improvement in materials and printers there is a lot to look forward to.

Besides I find 3d modelling less tedious than scratchbuilding, even if in the end it takes more time to complete.

Greg
Cantstopbuyingkits
Visit this Community
European Union
Joined: January 28, 2015
KitMaker: 2,099 posts
Armorama: 1,920 posts
Posted: Wednesday, August 31, 2016 - 01:33 AM UTC
Weren't all the VVSS M50s converted from M4A4 hulls?
Pedro
Visit this Community
Wojewodztwo Pomorskie, Poland
Joined: May 26, 2003
KitMaker: 1,208 posts
Armorama: 1,023 posts
Posted: Wednesday, August 31, 2016 - 01:53 AM UTC

Quoted Text

Weren't all the VVSS M50s converted from M4A4 hulls?


No Timothy, they were not all M4a4 based.
IIRC M4A4 and M4A1 were the earliest, then there where M4 composites, M4 late (large hatch) and even M4A1 Large hatch, basically they used what they could get for the conversions.
All of the above can be seen in photos in Lioness and Lion of the line books.

Cheers,
Greg
m4sherman
Visit this Community
Arizona, United States
Joined: January 18, 2006
KitMaker: 1,866 posts
Armorama: 1,808 posts
Posted: Wednesday, August 31, 2016 - 08:51 AM UTC
Looking good. I think I'll be getting back to my M50's in a month at the earliest. I've got all the parts, only a few other projects are on the table now.
Pedro
Visit this Community
Wojewodztwo Pomorskie, Poland
Joined: May 26, 2003
KitMaker: 1,208 posts
Armorama: 1,023 posts
Posted: Wednesday, August 31, 2016 - 03:09 PM UTC
Thanks Randy, you know that you are the godfather of this project

Good luck with your M50 fleet!

Cheers,
Greg
srmalloy
Visit this Community
United States
Joined: April 15, 2012
KitMaker: 336 posts
Armorama: 298 posts
Posted: Wednesday, August 31, 2016 - 04:53 PM UTC

Quoted Text

Besides I find 3d modelling less tedious than scratchbuilding, even if in the end it takes more time to complete.


Being able to render your model and be able to see that this component you just added is out of proportion to the rest of the model, then being able to just resize it rather than starting over making a new component can be a timesaver, too.
Pedro
Visit this Community
Wojewodztwo Pomorskie, Poland
Joined: May 26, 2003
KitMaker: 1,208 posts
Armorama: 1,023 posts
Posted: Thursday, August 17, 2017 - 09:14 PM UTC
Got some more work done on my M50!

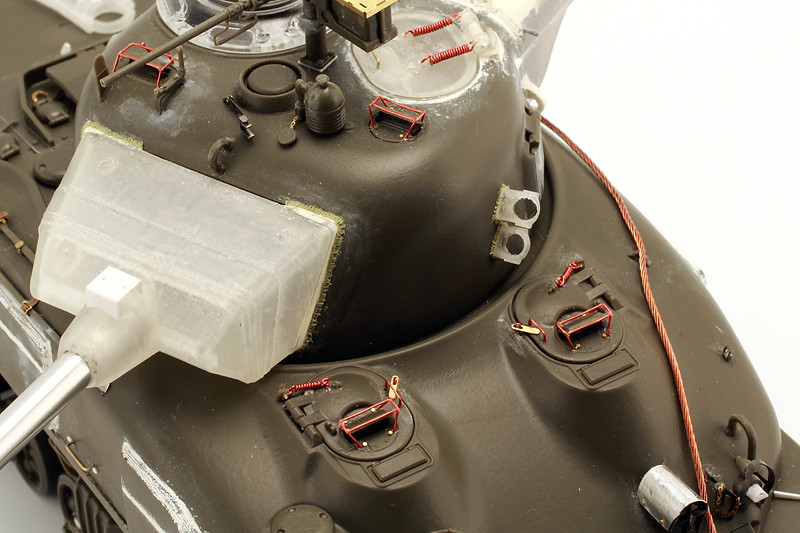
The turret's almost finished now, just needs welds around mantlet sealing strips and bolts for loaders periscope brush guard. All around vision cupola comes from Tasca sprues purchased separately, these sprues also had the searchlight, FDA steps, rear pintle mount etc. I broke off the 3D printed loaders hatch securing hook, so a replacement was fabricated and placed on a printed base.

IMG_5096 by Grzegorz Ziecina, on Flickr

IMG_5097 by Grzegorz Ziecina, on Flickr

IMG_5098 by Grzegorz Ziecina, on Flickr

The hull got a bit more neglected, but I'm catching up on that also. Most work left is located around the engine deck: all the OVM and such. I also have to dress up front hatches and it'll be ready for primer!

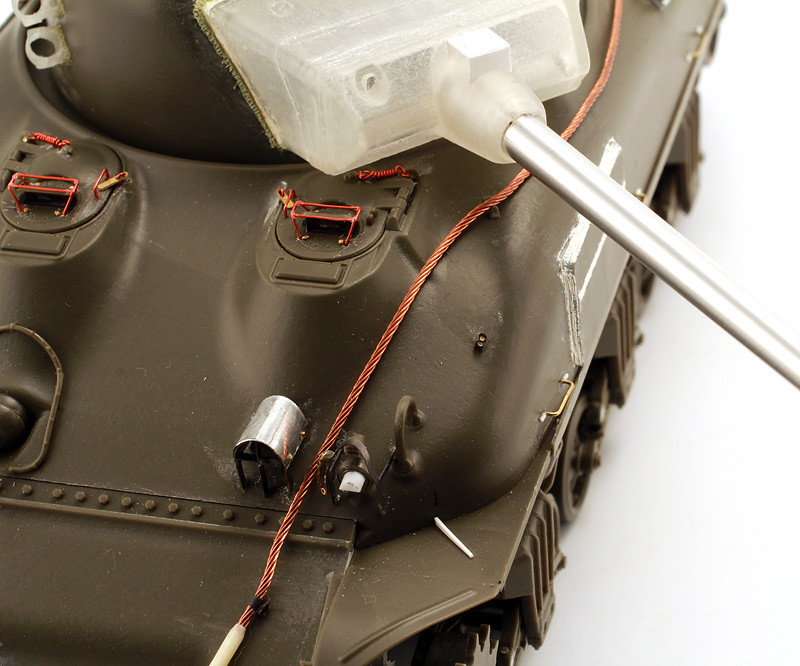
Lights and horn brush guards come frome an old Eduard PE set dedicated to Tamiya's M4A3. cover for the horn is thin aluminium foil with four lovely PE bolt heads from old Mig prod. set (without the connectors!). Resin MG barrel is from Eureka XXL.
IMG_5099 by Grzegorz Ziecina, on Flickr

IMG_5101 by Grzegorz Ziecina, on Flickr

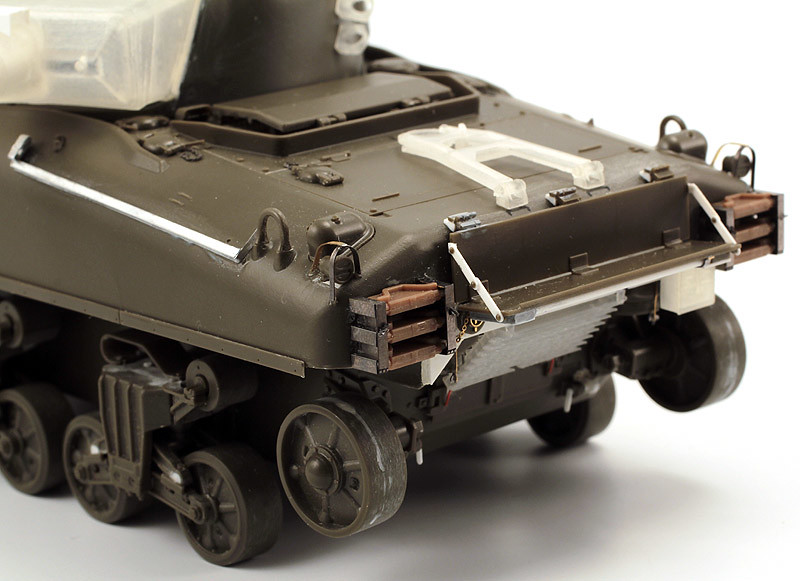
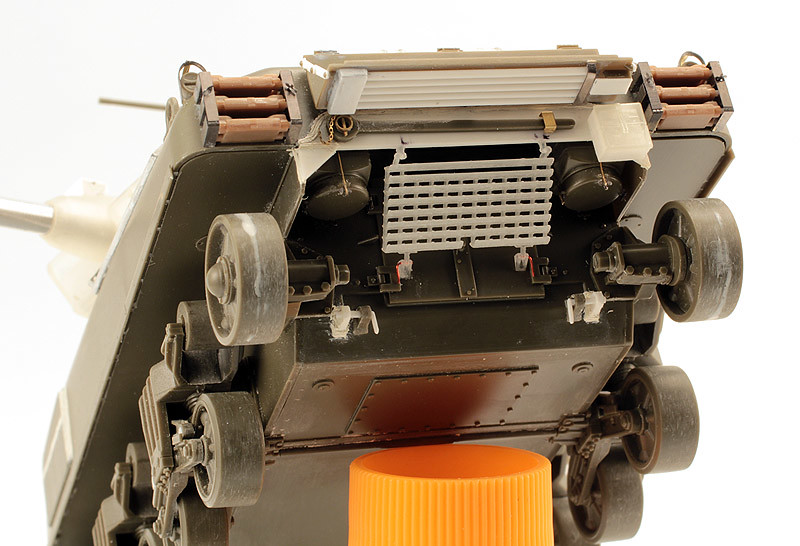
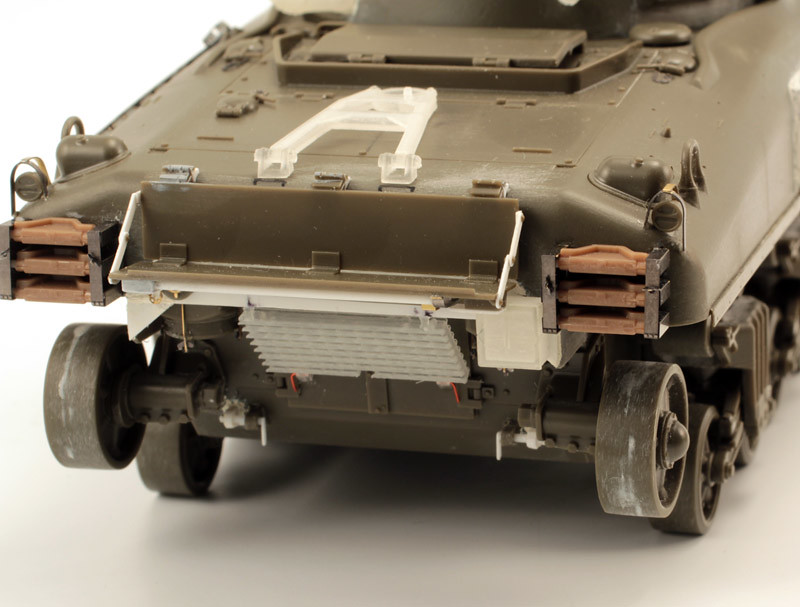
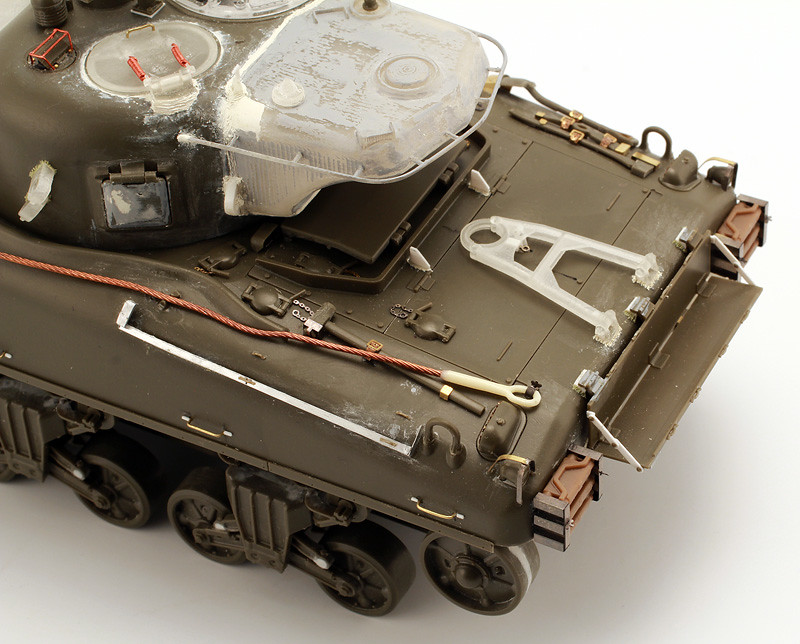
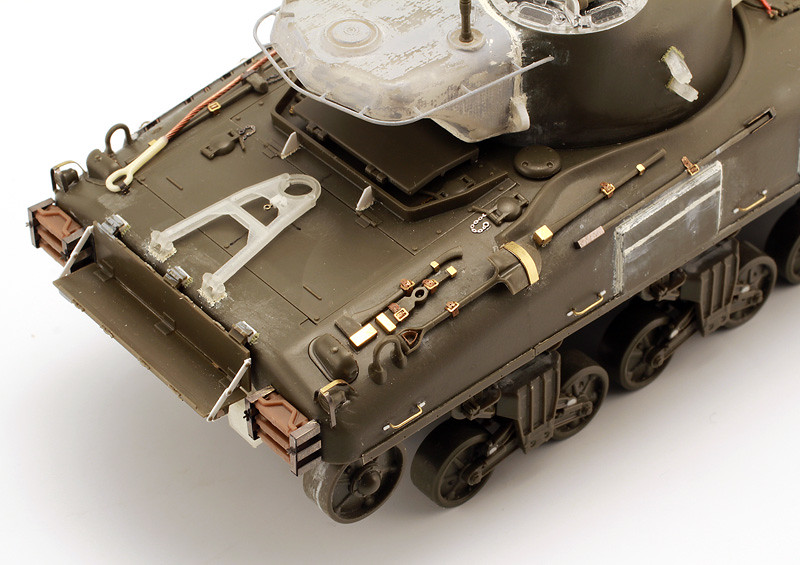
Rear hull was also detailed: 3D printed infantry phone box, exhaust deflector and gun crutch. Rear stowage tray comes from aforementioned sprue from some late Tasca Sherman, it lacks some details, so these had to be scratchbuilt, together with gun cleaning rods which arangement differs from original as there were 5 segments for French CN 75-50 gun cleaning rod instead of four segments for US 76mm M1A1 gun.

Blanked off cutout in rear upper hull got welds from milliput, though not much of these is visible with remaining details in place.

Spare track brackets again come from Eduard's PE set, track links ale from Bronco workable set I built for this M50.

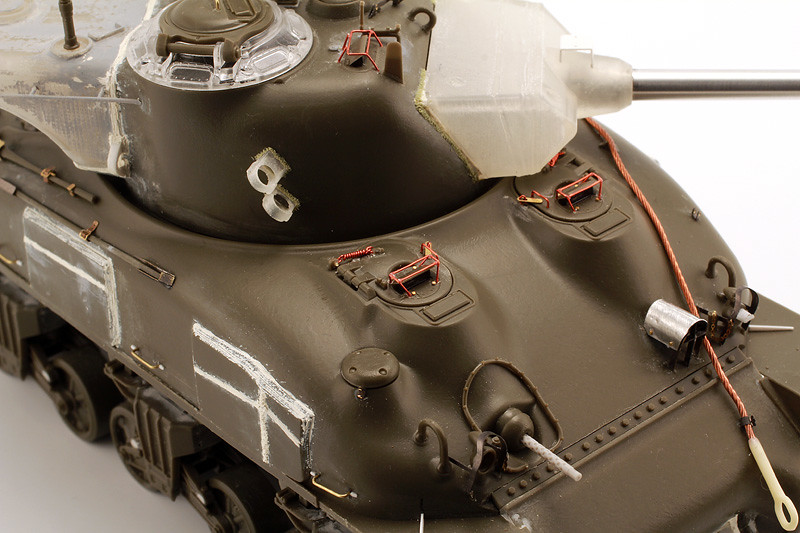
On the left sponson aft of the turret there is a gun cleaning rod bracket normally mounted on M4 105mm and M4A3 105mm howitzer tanks. I have no Idea why, but most early IDF M4A1 based M50's seem to have this fixture. Also it took me a while to actually find out what it was that I saw in the photos.
IMG_5102 by Grzegorz Ziecina, on Flickr

IMG_5103 by Grzegorz Ziecina, on Flickr

IMG_5104 by Grzegorz Ziecina, on Flickr

Aaaand some general shots to close this post:


IMG_5089 by Grzegorz Ziecina, on Flickr

IMG_5091 by Grzegorz Ziecina, on Flickr

IMG_5093 by Grzegorz Ziecina, on Flickr

IMG_5094 by Grzegorz Ziecina, on Flickr

Cheers,
Greg
Steven000
Visit this Community
Antwerpen, Belgium
Joined: August 07, 2016
KitMaker: 191 posts
Armorama: 120 posts
Posted: Thursday, August 17, 2017 - 09:22 PM UTC
Cool project Greg,
Love the detail work on this one

Kind regards
Steven
Pedro
Visit this Community
Wojewodztwo Pomorskie, Poland
Joined: May 26, 2003
KitMaker: 1,208 posts
Armorama: 1,023 posts
Posted: Friday, August 18, 2017 - 03:04 AM UTC
Thanks Steven! There are still some interesting details to add to this, which I'll be doing shortly. Here's to hoping it won't be another year before next update

Greg
m4sherman
Visit this Community
Arizona, United States
Joined: January 18, 2006
KitMaker: 1,866 posts
Armorama: 1,808 posts
Posted: Friday, August 18, 2017 - 03:21 AM UTC
Greg,

Where did that year go? Your tank is looking great, nice job on the added details. I'll save some pictures so I know what to do when I get back to my M50's.

I've been side tracked by earning a living and some Syrian war projects.
gastec
Visit this Community
Auckland, New Zealand
Joined: February 03, 2014
KitMaker: 1,042 posts
Armorama: 871 posts
Posted: Friday, August 18, 2017 - 03:43 AM UTC
Impressive work indeed

Gary
JSSVIII
Visit this Community
Massachusetts, United States
Joined: March 28, 2007
KitMaker: 1,169 posts
Armorama: 1,067 posts
Posted: Friday, August 18, 2017 - 03:55 AM UTC
Nice work Grzegorz, thats going to look great with some color on! I have not used any 3D printed parts yet, I noticed some faint lines on the parts in your photos, do they disappear under a coat of paint, or do you have to sand them a bit?
m4sherman
Visit this Community
Arizona, United States
Joined: January 18, 2006
KitMaker: 1,866 posts
Armorama: 1,808 posts
Posted: Friday, August 18, 2017 - 06:23 AM UTC
Greg,

Should there be welds on the barrel clamp bases? Or were those bolted on?
ReluctantRenegade
Visit this Community
Wien, Austria
Joined: March 09, 2016
KitMaker: 2,408 posts
Armorama: 2,300 posts
Posted: Friday, August 18, 2017 - 02:55 PM UTC
Looks great, Greg!
Scarred
Visit this Community
Washington, United States
Joined: March 11, 2016
KitMaker: 1,792 posts
Armorama: 1,186 posts
Posted: Friday, August 18, 2017 - 07:10 PM UTC
Outstanding work
Pedro
Visit this Community
Wojewodztwo Pomorskie, Poland
Joined: May 26, 2003
KitMaker: 1,208 posts
Armorama: 1,023 posts
Posted: Friday, August 18, 2017 - 09:06 PM UTC

Quoted Text

Greg,

Where did that year go? Your tank is looking great, nice job on the added details. I'll save some pictures so I know what to do when I get back to my M50's.

I've been side tracked by earning a living and some Syrian war projects.


Thanks Randy, good to hear from you!
In 2 weeks my son will be 1 year old, so I know where my year went

Barrel clamp bases should be welded as far as I know. It's just that I thought I'll get away with leaving the smallest of welds (for example around smoke dischargers brackets)
I guess I'll have to break out the greenstuff and weld it all... I find it difficult to work with such small amounts of milliput, it just doesen't stick.


Quoted Text

Nice work Grzegorz, thats going to look great with some color on! I have not used any 3D printed parts yet, I noticed some faint lines on the parts in your photos, do they disappear under a coat of paint, or do you have to sand them a bit?


Thank you John!
Yes, the parts should mostly be sanded a bit, it may depend wether it represents cast part (you'll add texture anyway so why bother?) or rolled plate or sheet metal which should be smoother. I think that with a bit of sanding and mr. surfacer the parinted parts will look good enough.

Thank you for your kind words Gary, Israel and Patrick!

Regards,
Greg
m4sherman
Visit this Community
Arizona, United States
Joined: January 18, 2006
KitMaker: 1,866 posts
Armorama: 1,808 posts
Posted: Friday, August 18, 2017 - 09:46 PM UTC
Greg,

I spend a lot of time with a friends 18 month old, so I know you have your hands full! Elli just got big enough to reach to the near center of my desk so I have to put everything away when she's visiting.

I pay the extra to get the extra fine printing. A little less finishing work.
Das_Abteilung
Visit this Community
United Kingdom
Joined: August 31, 2010
KitMaker: 365 posts
Armorama: 351 posts
Posted: Tuesday, August 22, 2017 - 04:58 AM UTC
I bought some of these Shapeways sets in low and high bustle versions and an assorted bunch of Sherman kits with a view to doing some of the early M50 configurations too. I think they look very nice.
Pedro
Visit this Community
Wojewodztwo Pomorskie, Poland
Joined: May 26, 2003
KitMaker: 1,208 posts
Armorama: 1,023 posts
Posted: Sunday, September 10, 2017 - 03:59 PM UTC
Randy, I'll go and try the finer option for printing next time I order!

Thanks Peter, glad you liked the sets!

This time gyus, you didn't have to wait for the update a whole year fortunately!!!

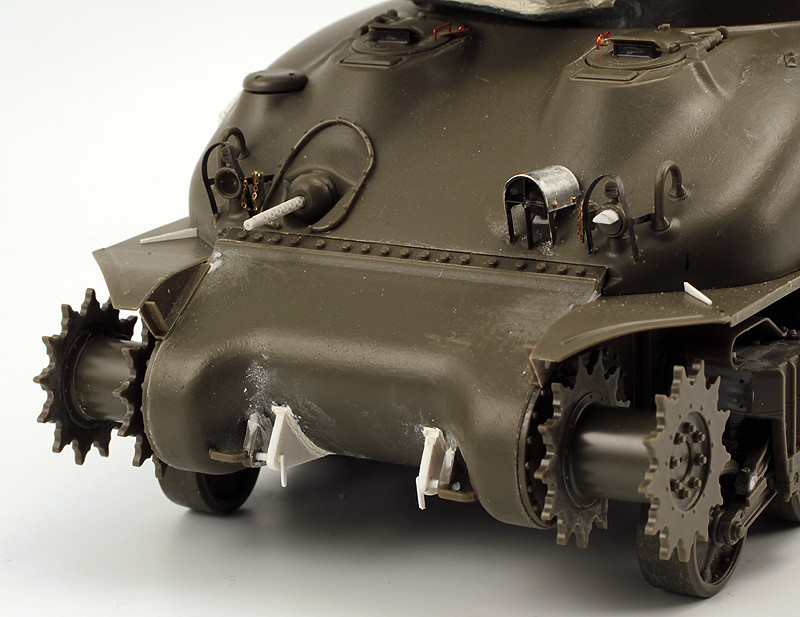
I regard the build finished, added a bunch of welds, minor details and OVM. Might have to add some rolled tarps, a duffel and some backpacks along the road.

I'll sculpt most of it from milliput, but does anyone know if WWII vintage standard US backpack will do on an early IDF sherman?


Added the towing pintle bracket, had to scratchbuild the latchy kind of thingy for it and add welds. Stowage rack got some tidown loops made of stretched sprue.

IMG_5363 by Grzegorz Ziecina, on Flickr

Dressed up the driver's and co-driver's hatches with 0.3 wire and old PE bolt heads grom MIG sets without connectors. Welds were added to sealing strips around the mantlet and smoke dicharger brackets. Also added some rear view mirror hinge parts that are on most of the early IDF M50's. Small, tiny detail barely visible in photos, I'm glad I could identify it at all.

IMG_5356 by Grzegorz Ziecina, on Flickr

IMG_5361 by Grzegorz Ziecina, on Flickr

IMG_5360 by Grzegorz Ziecina, on Flickr

Added all of the OVM, mostly using PE that came with Eduard's Sherman. I also made missing welds on the rear deck and attached towing line, which required the second clamp to be repositioned so the line would not interfere with 105mm cleaning rods rack below it.

IMG_5357 by Grzegorz Ziecina, on Flickr

IMG_5359 by Grzegorz Ziecina, on Flickr

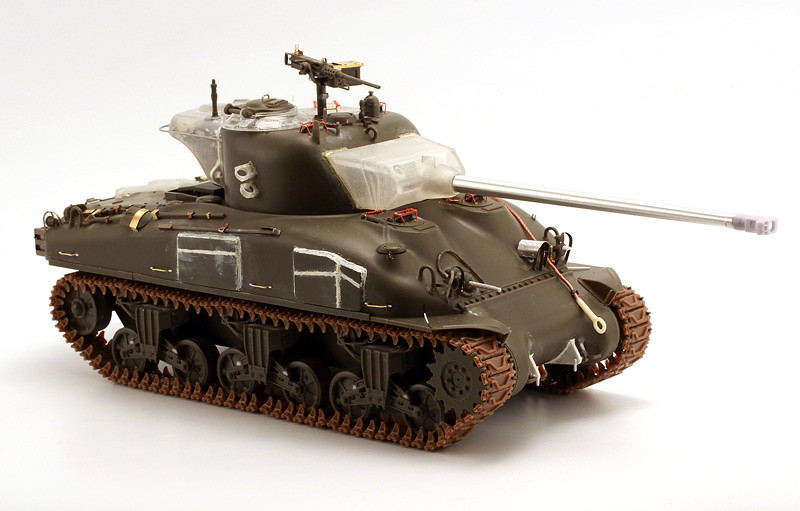
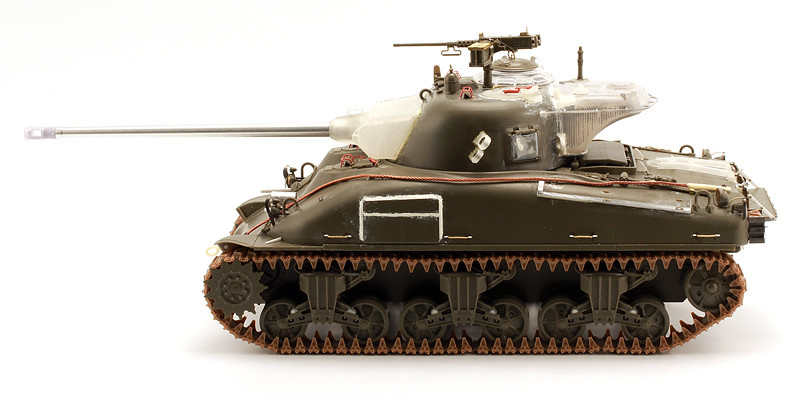
Last but not the least, M50 dressed up in Bronco's tracks general shots. I changed the main gun barrel to a DEF model item , I liked muzzle break's sharpness more than on the Barrel Depot item.

IMG_5384 by Grzegorz Ziecina, on Flickr

IMG_5381 by Grzegorz Ziecina, on Flickr

IMG_5377 by Grzegorz Ziecina, on Flickr

IMG_5376 by Grzegorz Ziecina, on Flickr


Next up: priming, cleanup of prints? and painting!

Cheers,
Greg
Cantstopbuyingkits
Visit this Community
European Union
Joined: January 28, 2015
KitMaker: 2,099 posts
Armorama: 1,920 posts
Posted: Sunday, September 10, 2017 - 10:13 PM UTC
What would cleaning rods for a 105mm be doing on a M50?
Pedro
Visit this Community
Wojewodztwo Pomorskie, Poland
Joined: May 26, 2003
KitMaker: 1,208 posts
Armorama: 1,023 posts
Posted: Sunday, September 10, 2017 - 10:55 PM UTC

Quoted Text

What would cleaning rods for a 105mm be doing on a M50?


Timothy, I haven't got a slightest clue! Maybe they used it for something else? Maybe it was fited by previous owners for another reason?

But they are there in the pictures, always empty though.

Greg
JSSVIII
Visit this Community
Massachusetts, United States
Joined: March 28, 2007
KitMaker: 1,169 posts
Armorama: 1,067 posts
Posted: Monday, September 11, 2017 - 04:30 AM UTC
How do you make your periscope guards Grzegorz? They all seem so perfect! Do use a jig to bend the shapes, and do you solder them or just glue? Excellent job, bring on the paint!

Pedro
Visit this Community
Wojewodztwo Pomorskie, Poland
Joined: May 26, 2003
KitMaker: 1,208 posts
Armorama: 1,023 posts
Posted: Tuesday, September 12, 2017 - 12:41 AM UTC

Quoted Text

How do you make your periscope guards Grzegorz? They all seem so perfect! Do use a jig to bend the shapes, and do you solder them or just glue? Excellent job, bring on the paint!


Thanks John!
Periscope guards are quite easy to make actually! They were glued together with Cyanoacrylate.
Here's how I made them:
First I drilled 4 small holes in the discs that contain the periscope. they mostly have 4 indentations around the periscope, but the ones to make, must be outward of the existing ones. Now would be a good moment to add 4 bolt heads in place of the existing holes (I did that at the end but now it will be easier)
I bend the side elements to fit in the holes (did that by the eye, once I had shape that I liked I bent more parts to match the first one. A jig for this step would be most helpful I think).
Now the sides can be glued in the holes with just a drop of CA. Last thing to do is cut straight sections of wire and attach them between the side trapezoids. (I might have made a mistake here and glued them too far apart, in reality the horizontal bars seem to be closer to eachother. There also might've been more than one design for that part)

Cheers,
Greg
 _GOTOTOP