_GOTOBOTTOM
Constructive Feedback
For in-progress or completed build photos. Give and get contructive feedback!
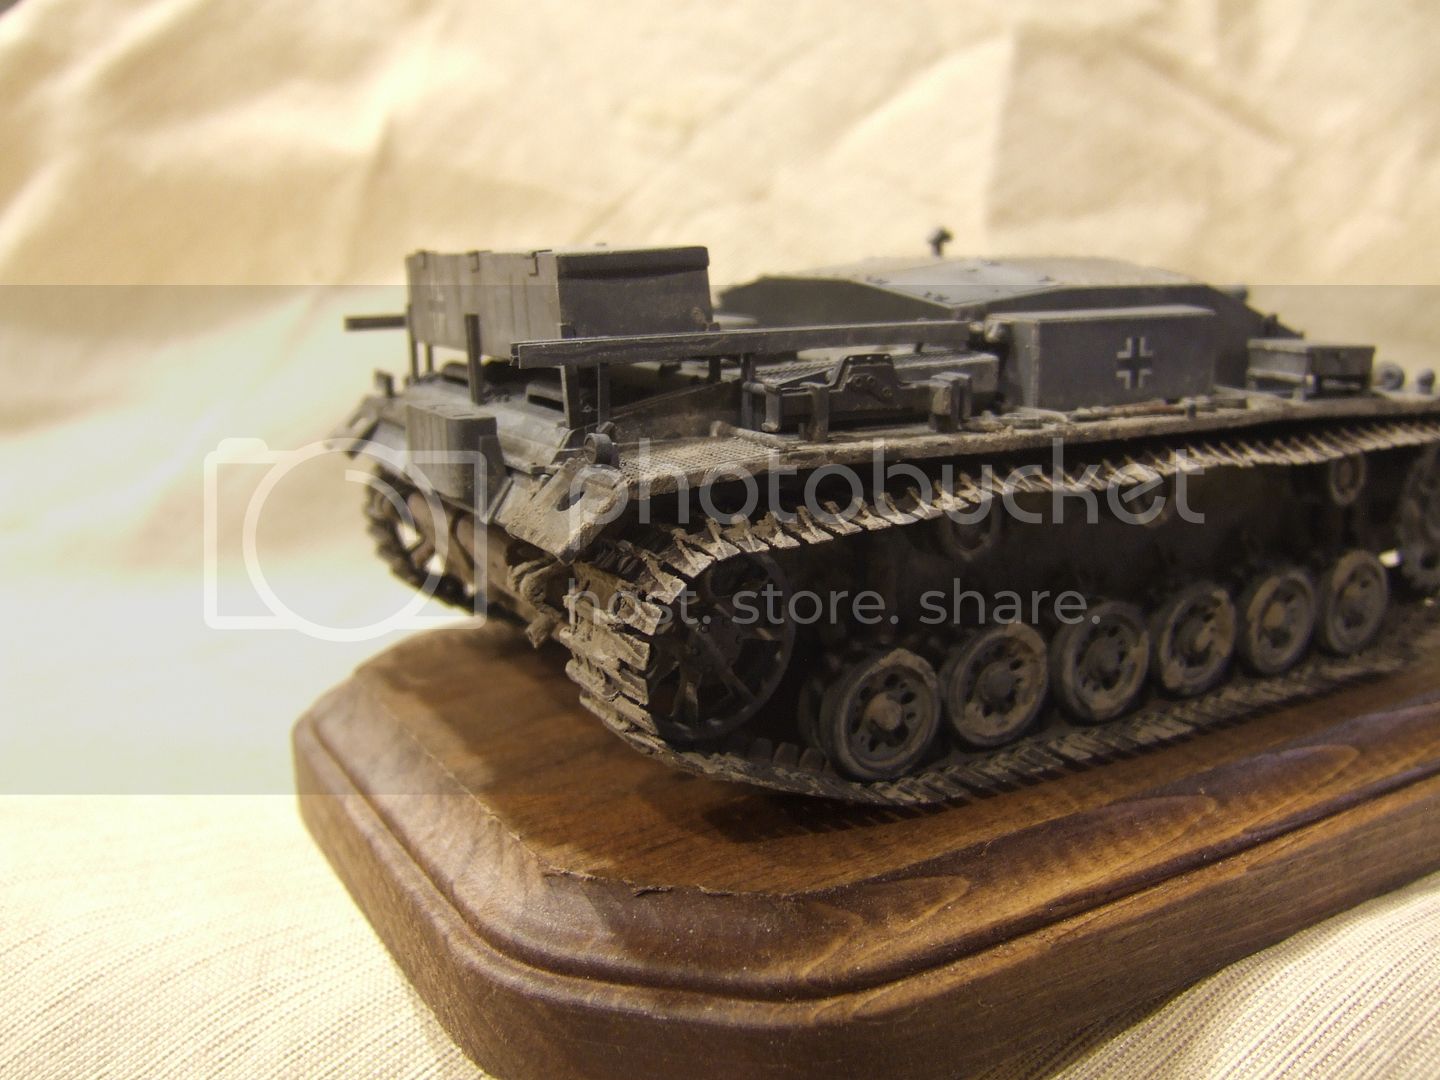
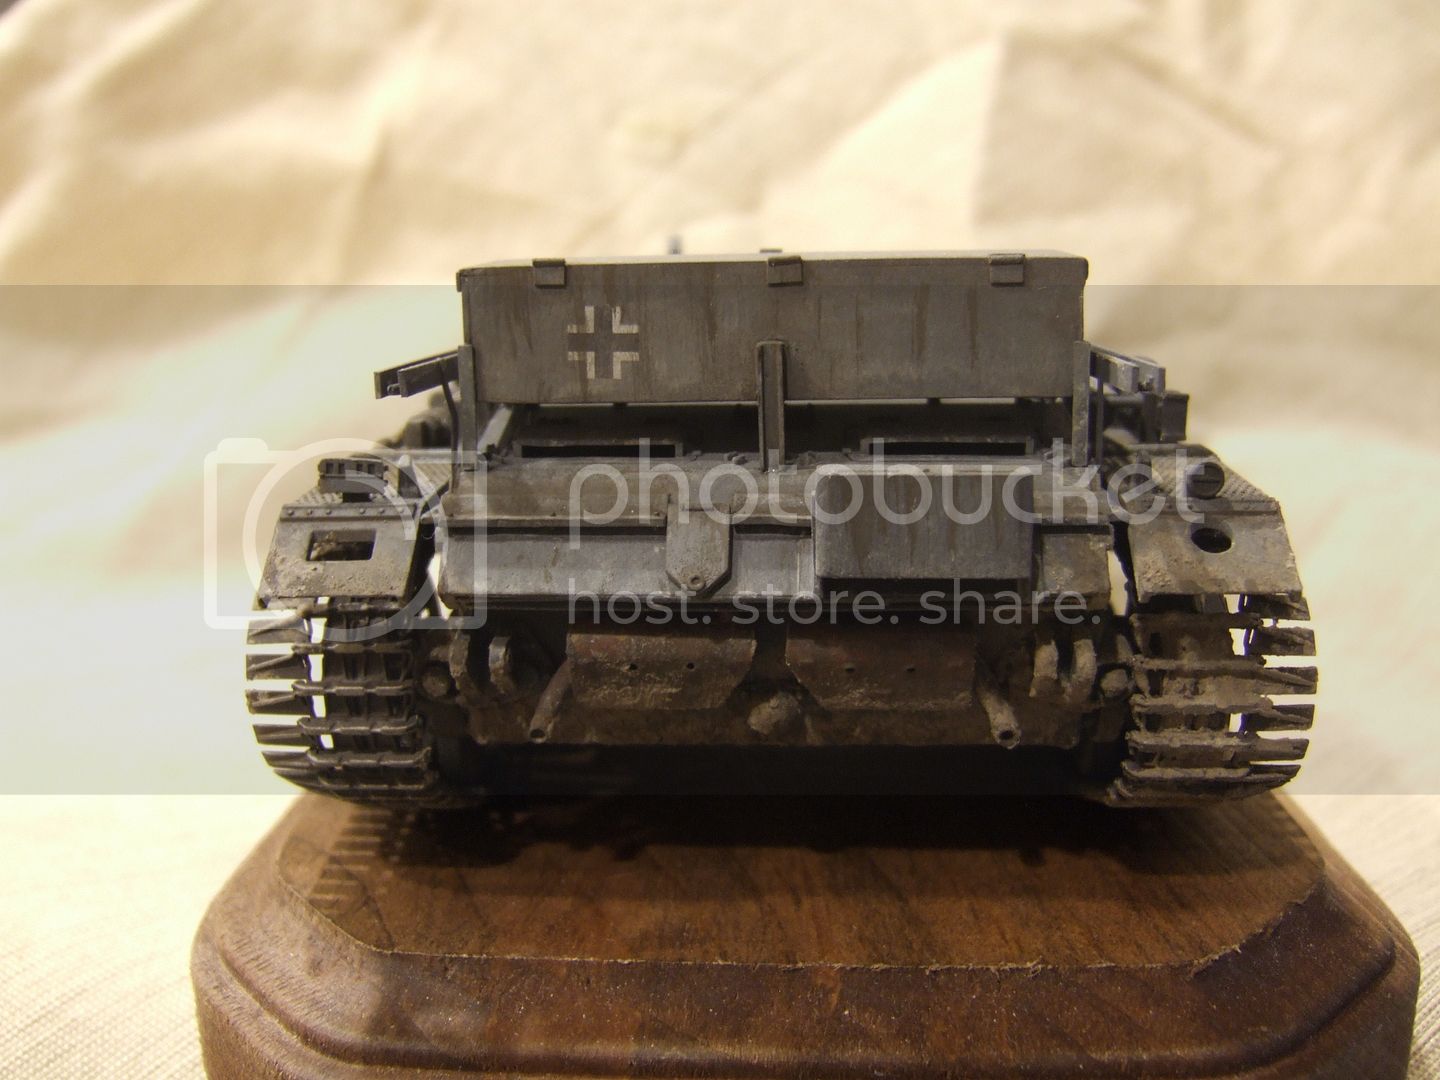
Experiments in weathering.
AgentG
Visit this Community
Nevada, United States
Joined: December 21, 2008
KitMaker: 1,109 posts
Armorama: 1,095 posts
Posted: Monday, October 31, 2016 - 03:59 AM UTC
I used an old DML "Imperial Series" StuG III E that I bought partially assembled. I used five different shades of gray to modulated the finish. Mud is Hydrocal and craft acrylic accented with oils, enamels and lots of pigments.

I scratchbuilt the stowage box and antenna guides. Tracks are a set of "winterketten" I had in my spares. I did google images and came up with shots of E models wearing them in Russia.


I wasn't going for technical accuracy with the vehicle, just trying new ideas.
Tojo72
Visit this Community
North Carolina, United States
Joined: June 06, 2006
KitMaker: 4,691 posts
Armorama: 3,509 posts
Posted: Monday, October 31, 2016 - 04:20 AM UTC
Very nice work G with the faded gray,nicely done.
obg153
Visit this Community
Texas, United States
Joined: April 07, 2009
KitMaker: 1,063 posts
Armorama: 1,049 posts
Posted: Monday, October 31, 2016 - 04:28 AM UTC
Really looks the part of a well-traveled Stug! I might have left off 2 or 3 of the kettens to further show wear & tear, but your version is great as it is. Thanks for sharing.
joepanzer
Visit this Community
North Carolina, United States
Joined: January 21, 2004
KitMaker: 803 posts
Armorama: 740 posts
Posted: Monday, October 31, 2016 - 06:33 AM UTC
Seconds on the Gray. Very Nice
I love treatment of the hatches—like the dust would "clang" off every time they opened/closed
Dioramartin
Visit this Community
New South Wales, Australia
Joined: May 04, 2016
KitMaker: 1,476 posts
Armorama: 1,463 posts
Posted: Tuesday, November 01, 2016 - 04:35 PM UTC
Hi Wayne,

wow very nice! Some thoughts/suggestions;

1) You’ve totally nailed the greys/grays, wouldn’t mind more detail on exactly how you built up the tones i.e in what order/dilutions? I could learn something, it’s really excellent.

2) Not so convinced by the mud on the wheels, I don’t think it would cling in thick chunks in some places but not at all in others around the rim. Suggest far more dilute mud & spread it more evenly, with mild variations of course. In the front-on shot (in particular the r/h track) it’s also a bit too caked, the mud would have been mostly shaken off as the links progressed from the rear to the front. Suggest just use the point of a knife to open up the holes where the sprocket teeth engage. But the mud on the hull side walls is perfect.

3) The drive sprocket teeth constantly rubbed against the track plates as they rotated, so even if the vehicle had just gone through a swamp those teeth would be shiny steel again in seconds. Similarly the rims of the rear idlers where they contact the track plates should also be bare steel, and the track guide horns wouldn’t stay muddy for long either.

4) I’m not sure where the fuel ports were, but if they’re visible some dilute-black pools/puddles of spills would be authentic. I usually also drop some oil-stains around the engine hatches where mechanics rested their lube containers. Same for the front transmission access hatches. And signs of dirty boots where the crew climbed in through their hatches.

5) You might want to experiment with pastels – with a few sticks of browns/yellow/black & use a blade to scrape some small piles of fine powder of varying mud shades. Sparingly apply with a small soft brush & experiment. It’s quite liberating to use something that has none of the perils of liquid, it’s easy to brush off if it goes wrong or needs moderating but clings really well – sneezing won’t ruin it. Nothing gives a true dusty look better. It’s best as an augmentation to painted-on mud – rather like your greys/grays were built up in layers (presumably), so should the weathering. Too many kits look like they came out of the factory and fell into one bog.

6) Paint-chipping – I remember 10 or more years ago in Tamiya’s magazine a Panther paint job by Mirko Bayerl pioneering paint-chipping; it was a sheer masterpiece and suddenly everyone did/over-did it and some still do. I’m not a fan, because while it can look very convincing I go back to look at original photos of AFVs and I struggle to identify much chipping at all. However certain edges like on mudguards and other places scraped by passing trees/hedges/bricks/stones/other vehicles etc would have been scratched and/or had the paint taken off (and dented if non- armour-plated), revealing either bare steel or rusting bare steel... but not over every square millimeter of every panel. Yours doesn’t need much of it, but a little would be great.

Anyway congratulations,it’s a beauty & if you’ve seen any of my stuff in the photo-features you’ll know why I support your approach to weathering 100%.

Cheers, Tim
AgentG
Visit this Community
Nevada, United States
Joined: December 21, 2008
KitMaker: 1,109 posts
Armorama: 1,095 posts
Posted: Tuesday, November 01, 2016 - 11:25 PM UTC
Thank you all!
Tim, re #1 and #2:
Valid points there mate. I wasn't sure about the wheels, now I have your contributions. I'll play with this some more.
#3: I'm embarrassed to admit I simply forgot that step. I even set out my favorite choice of paint to depict that detail!
#4: I again have to admit I am unaware of the Pz III's fuel ports. I was under the assumption they were under the engine deck hatch covers. I'll now have to research that!
#5 and #6: I used three different earth tone pigments for this. For some reason they just didn't cooperate as I have come to expect. The humidity was way up on the days I applied them and I'm wondering if that effected their use. I will dig out my pastels again and give them a go.
The base is Tamiya German Gray, XF-63. I went and added a few drops of Neutral Gray XF-53 and began shading the various panels. To that I added a drop or two of Medium gray XF-20. I finished by adding a drop of Sky Gray, XF-19 and spraying the highest points. The overall effect looked cartoonish, but after weathering became a well unified finish.
I actually used Vallejo "Black-Gray" to add random chips, scuffs and scrapes over the entire vehicle. They became lost in the weathering as did the oil paint shading and enamel filters.
Oh well, live and learn!

G
Dioramartin
Visit this Community
New South Wales, Australia
Joined: May 04, 2016
KitMaker: 1,476 posts
Armorama: 1,463 posts
Posted: Thursday, November 03, 2016 - 07:57 AM UTC
Thanks for those details sir,

salted away for the next time I try a pre ’43 AFV! I usually mix my own colours (being a sometime landscape artist helps)so it was your process I was most interested in. Bummer the Vallejo chips disappeared although as per earlier comments maybe small loss, I’m not convinced black/gray is the right colour for damaged paintwork anyway. Under the base coat of German AFVs was supposedly reddish primer and below that steel, so where’s black?

It seems the fuel caps were towards the rear ends of the hull side-walls (I now dimly remember covering them in mud...) which must have been fun to fill if no hose was available.

I'm just finishing off MiniArt's SU122 with pastels now & maybe will post here or on the Soviet site...if the result gets past the self-censor! Looking forward to seeing how yours progresses. Cheers, T
DocEvan
Visit this Community
California, United States
Joined: August 09, 2014
KitMaker: 180 posts
Armorama: 180 posts
Posted: Thursday, November 03, 2016 - 09:04 AM UTC
Nicely done!
 _GOTOTOP