Armor/AFV
For discussions on tanks, artillery, jeeps, etc.
For discussions on tanks, artillery, jeeps, etc.
Hosted by Darren Baker, Mario Matijasic
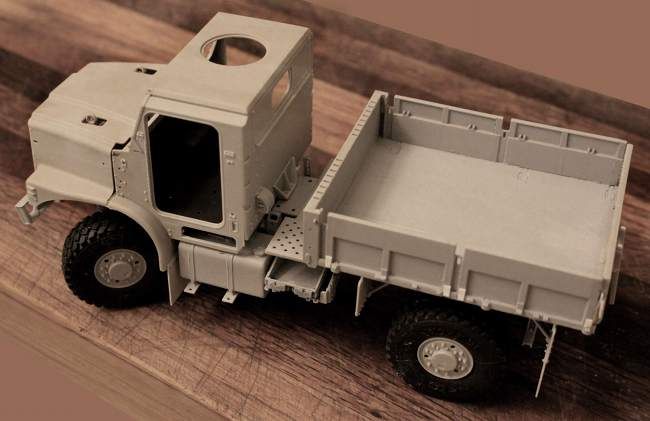
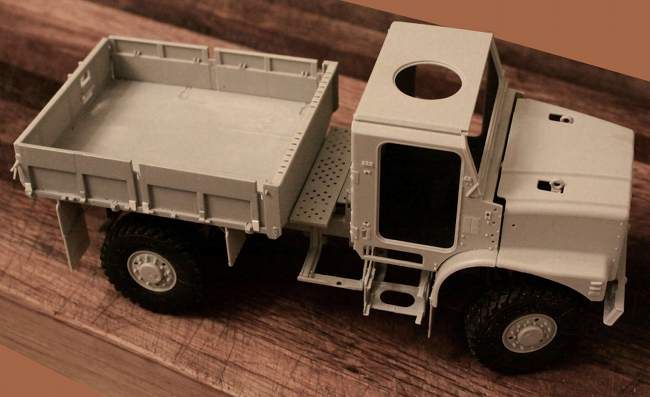
Converting a Mk23 MTVR 6x6 to a 4x4
Posted: Wednesday, February 01, 2017 - 07:10 AM UTC
Posted: Wednesday, February 01, 2017 - 07:56 AM UTC
Thirian24

Joined: September 30, 2015
KitMaker: 2,493 posts
Armorama: 2,344 posts

Posted: Wednesday, February 01, 2017 - 08:27 AM UTC
So jealous. Great job.
Posted: Wednesday, February 01, 2017 - 08:31 AM UTC
Posted: Wednesday, February 01, 2017 - 08:40 AM UTC
Posted: Wednesday, February 01, 2017 - 08:48 AM UTC
Posted: Wednesday, February 01, 2017 - 08:32 PM UTC
Posted: Thursday, February 02, 2017 - 01:45 AM UTC
Michael, you really know how to crank out a quality product. I really love to follow your builds. They are so inspiring. You also seem to be a master at doing research.
Regards,
Eric
Regards,
Eric
Posted: Thursday, February 02, 2017 - 02:02 AM UTC
Thank you Sir. I have been running sort of a model chop shop ever since I was in grade school. (Some years ago!) Combining multiple model kits to produce a vehicle I could not have gotten otherwise.
As to my research; Until the internet came along research usually came in the form of large "coffee table" books $$$ but now that has all changed, I am glad to say.
As to my research; Until the internet came along research usually came in the form of large "coffee table" books $$$ but now that has all changed, I am glad to say.
Taylornic

Joined: January 10, 2005
KitMaker: 337 posts
Armorama: 332 posts

Posted: Thursday, February 02, 2017 - 08:50 PM UTC
Looks really great!
Posted: Friday, February 03, 2017 - 02:48 AM UTC
Another small detail that I just "HAD" to add to both the 8x8 and the 4x4:
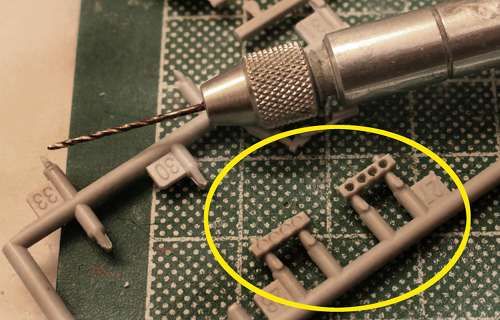
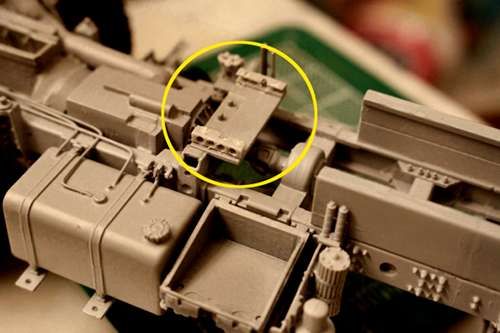
The two mounting brackets under the hydraulic oil reservoir (just behind the cab) are supposed to be perforated. I think Trumpeter really should have added these two pieces to the PE fret.
I used a twist drill to give myself a starting hole and then finished by carefully rotating a #11 X-acto blade in the hole to enlarge it.


Posted: Friday, February 03, 2017 - 02:55 AM UTC
For the finished tank I also needed to add the missing filler cap. A piece of sprue and a little bit of plastic rod did the job.
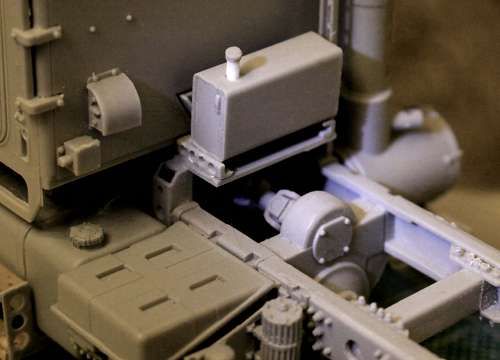
There will be input and outflow hoses added to the reservoir as well - more on this later.
Footnote: That small detail on each end of the reservoir is a sight glass for checking the fluid level.

There will be input and outflow hoses added to the reservoir as well - more on this later.
Footnote: That small detail on each end of the reservoir is a sight glass for checking the fluid level.
Posted: Friday, February 03, 2017 - 09:02 PM UTC
Posted: Saturday, February 04, 2017 - 12:06 AM UTC
Posted: Saturday, February 04, 2017 - 06:30 AM UTC
Posted: Monday, February 06, 2017 - 11:07 PM UTC
Posted: Wednesday, February 08, 2017 - 05:36 AM UTC
Posted: Thursday, February 09, 2017 - 03:34 AM UTC
Posted: Tuesday, February 14, 2017 - 02:53 AM UTC
Posted: Tuesday, February 14, 2017 - 02:57 AM UTC
Another of my hard to see (I admit it!) added details: The tool/storage drawer between the frame rails under the Mark 23 loadbox floor.
(It is a pet peeve of mine that hardly any model manufacture has ever included this semi-obvious detail in any of their cargo truck models. The one exception is the otherwise beautiful but flawed new Deuce and a Half offering from HobbyBoss.)
Scratch built tool drawer now installed in my MTVR 4x4 bobber:

A similar scratch tool drawer I built under my Diamond T Wrecker:

HobbyBoss provides this tool drawer on their large series of Deuce and a halves:

(It is a pet peeve of mine that hardly any model manufacture has ever included this semi-obvious detail in any of their cargo truck models. The one exception is the otherwise beautiful but flawed new Deuce and a Half offering from HobbyBoss.)
Scratch built tool drawer now installed in my MTVR 4x4 bobber:

A similar scratch tool drawer I built under my Diamond T Wrecker:

HobbyBoss provides this tool drawer on their large series of Deuce and a halves:

Posted: Tuesday, February 14, 2017 - 02:58 AM UTC
A detail that Trumpeter got wrong on the Mk 23 instruction sheet:

CORRECTION TO FOLLOW:

CORRECT: and makes the most sense!


I feel I should point out that while Trumpeter includes all the mounting points for them, they fail to include any of the roof ribs for the loadbox as seen here stowed behind the cab.

CORRECTION TO FOLLOW:

CORRECT: and makes the most sense!


I feel I should point out that while Trumpeter includes all the mounting points for them, they fail to include any of the roof ribs for the loadbox as seen here stowed behind the cab.
Posted: Monday, February 27, 2017 - 11:35 PM UTC
Posted: Wednesday, March 01, 2017 - 08:42 AM UTC

HeavyArty


Joined: May 16, 2002
KitMaker: 17,694 posts
Armorama: 13,742 posts

Posted: Wednesday, March 01, 2017 - 06:18 PM UTC
The doors are looking good. Nice job.
Posted: Wednesday, March 01, 2017 - 06:33 PM UTC
Thanks Gino -- I appreciate it!
_____________________________________________________________________________________________
CORRECTION FROM EARLIER:


CORRECTION FROM EARLIER:
I originally thought this ladder was some sort of folding affair so I blindly followed the Trumpeter instructions as written. However, something just did not feel right. Later photo discoveries of the actual Oshkosh truck revealed this to be a simple, FIXED, ladder attached to the INSIDE of the loadbox gate.
Perhaps a pain in the A$$ when trying to cube out the entire load area but otherwise a simple, low cost solution to the overall problem of physically climbing up into this very tall loadbox.


(Bottom three photos - Oshkosh Defense)
_____________________________________________________________________________________________
CORRECTION FROM EARLIER:


CORRECTION FROM EARLIER:
I originally thought this ladder was some sort of folding affair so I blindly followed the Trumpeter instructions as written. However, something just did not feel right. Later photo discoveries of the actual Oshkosh truck revealed this to be a simple, FIXED, ladder attached to the INSIDE of the loadbox gate.
Perhaps a pain in the A$$ when trying to cube out the entire load area but otherwise a simple, low cost solution to the overall problem of physically climbing up into this very tall loadbox.


(Bottom three photos - Oshkosh Defense)
 |


