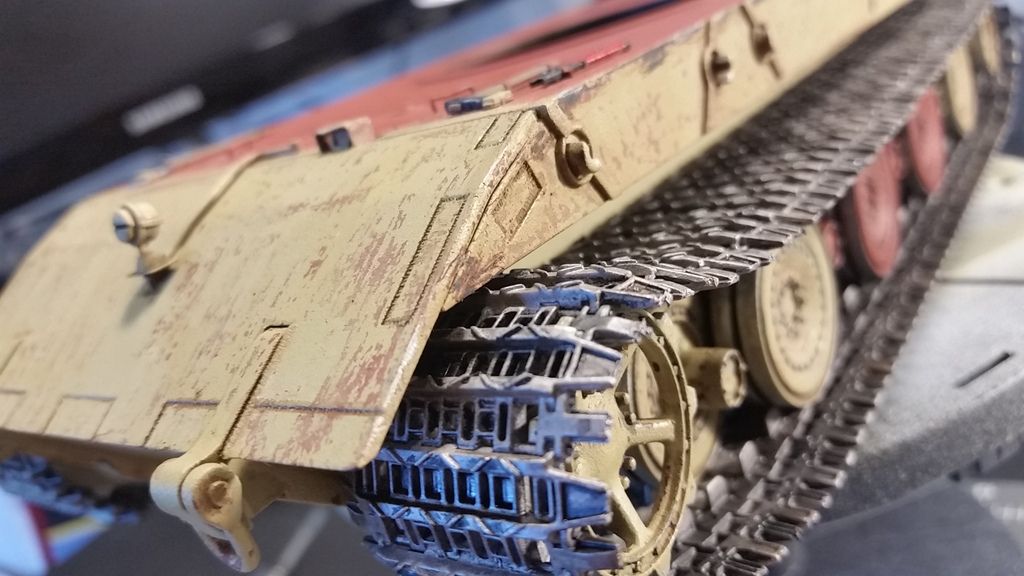
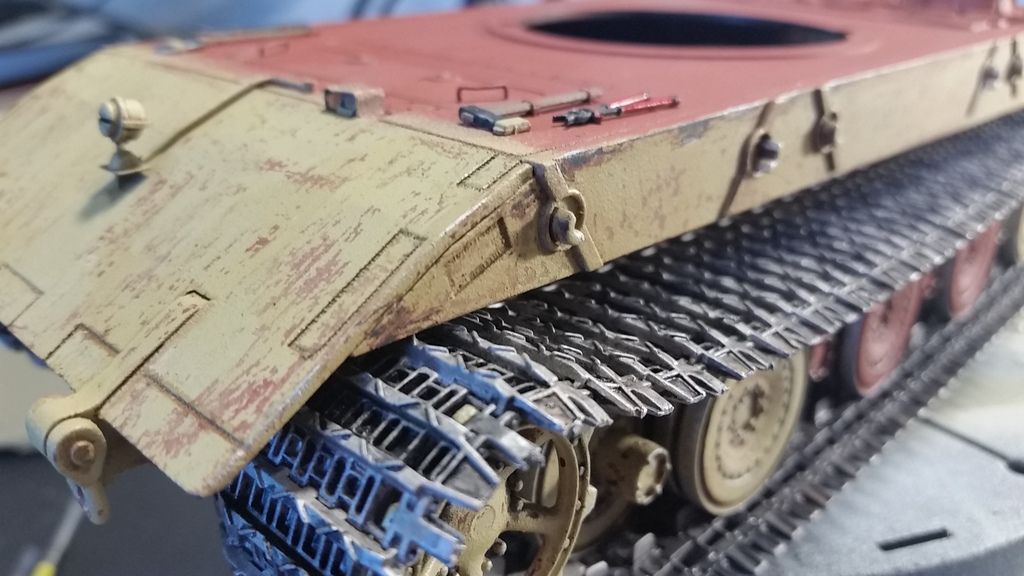
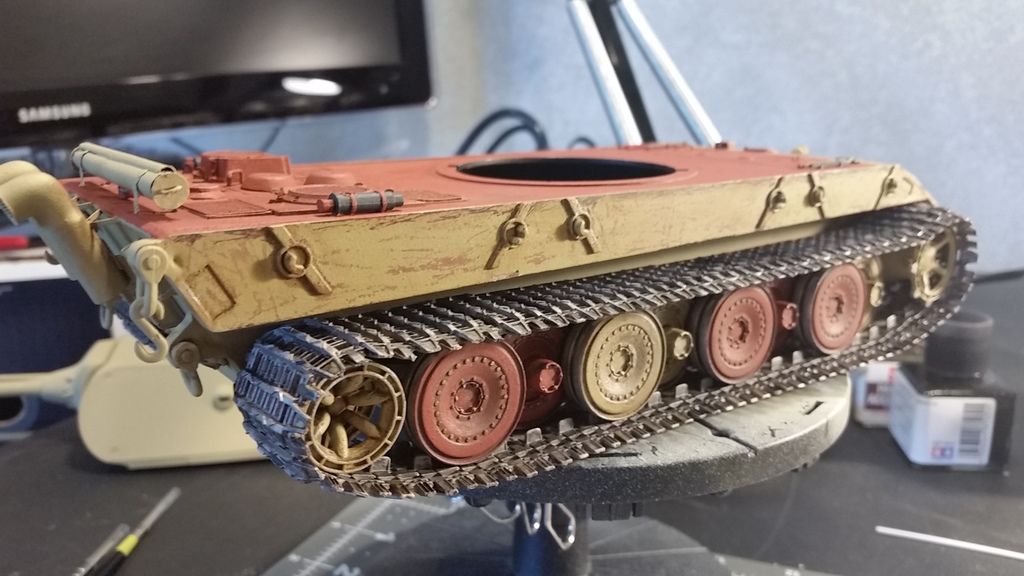
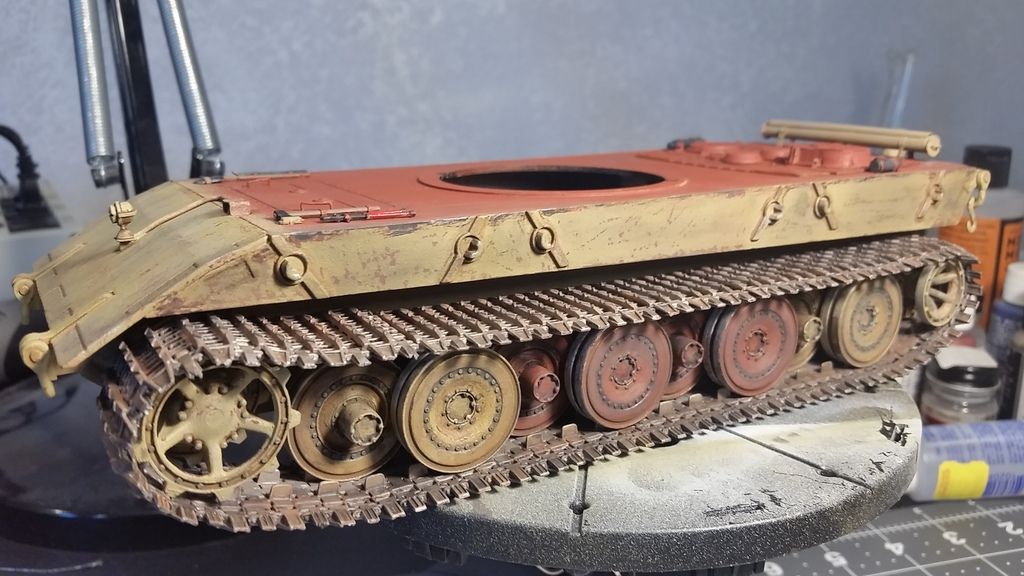
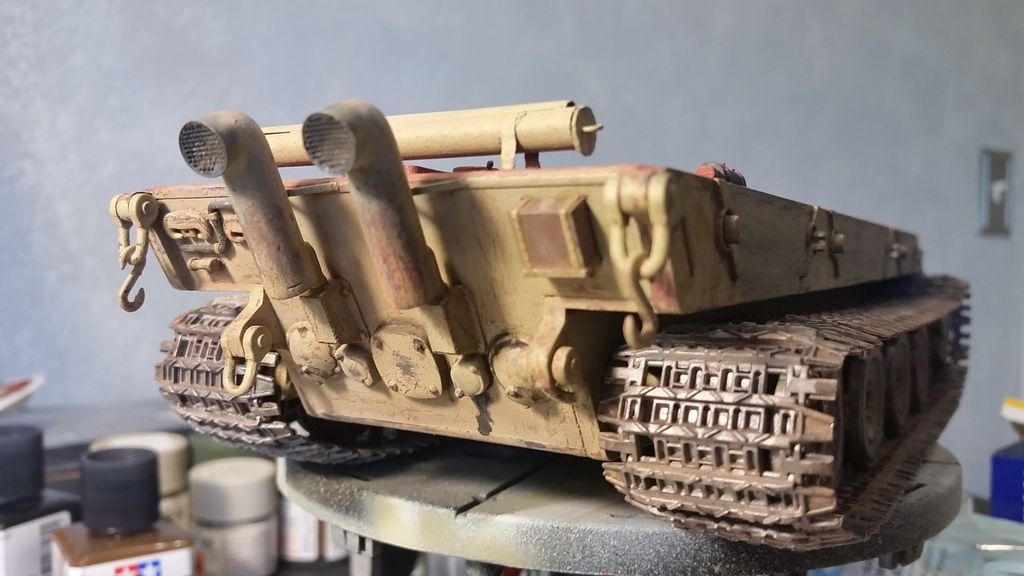
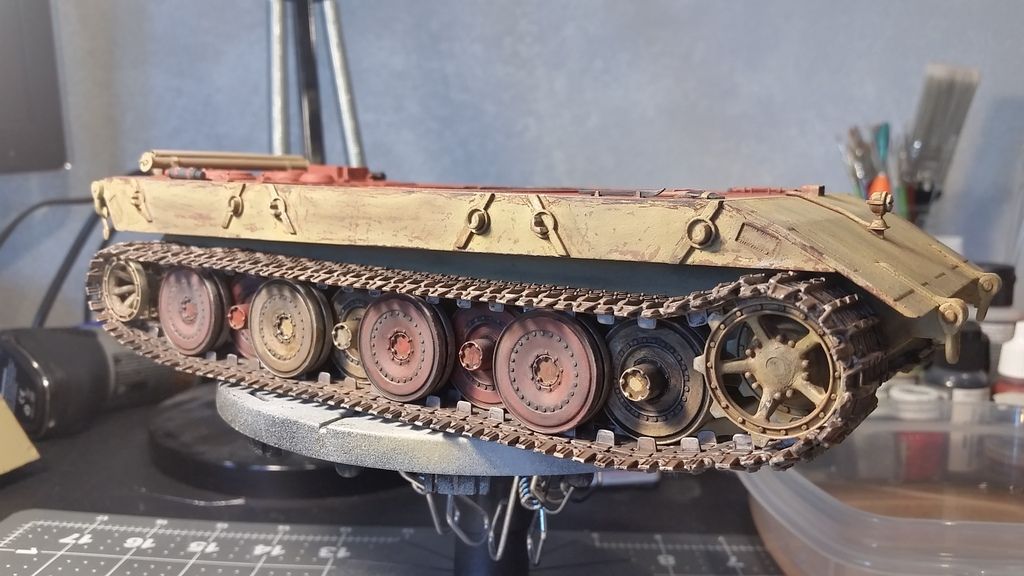
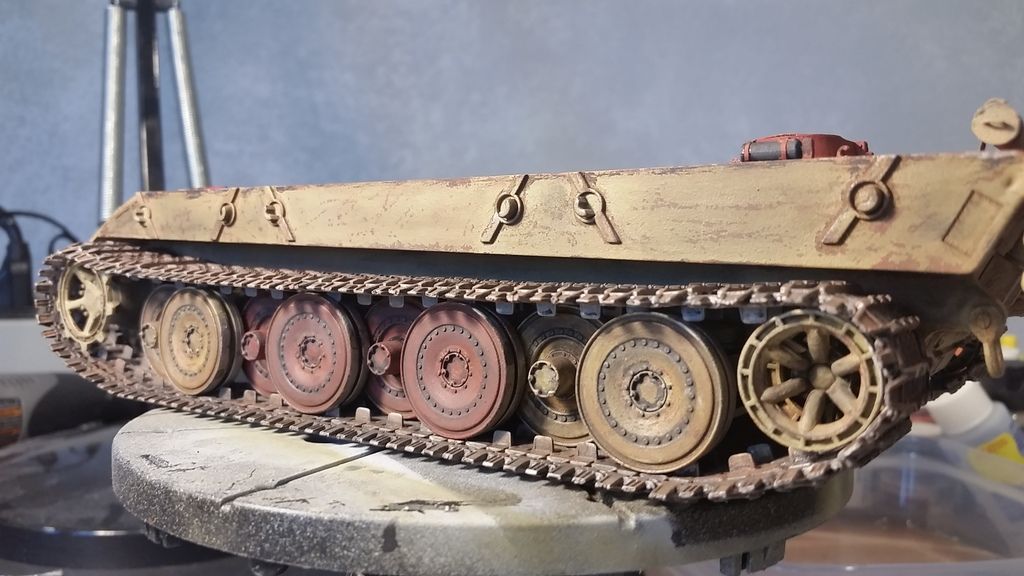
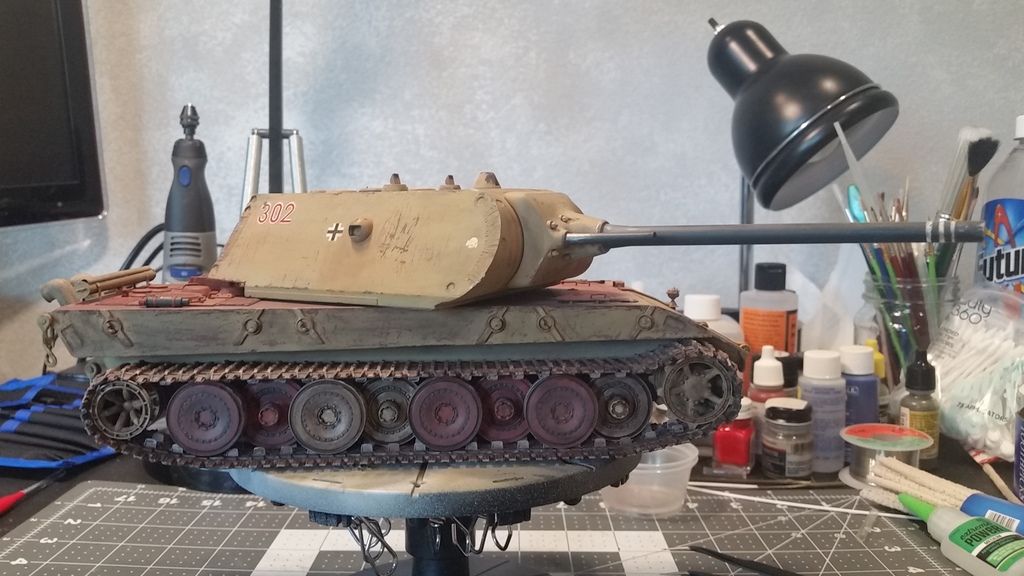
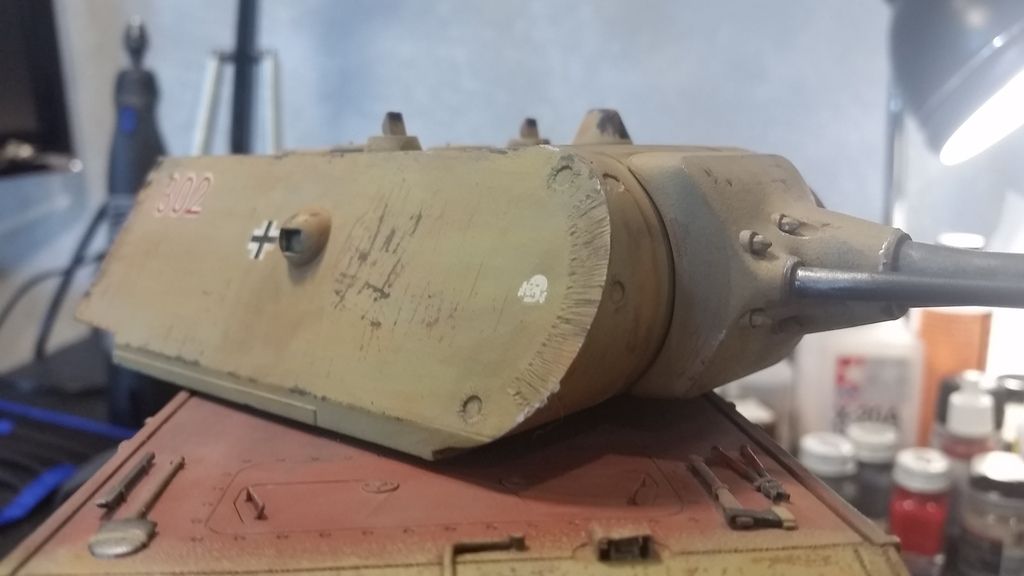
Getting around to another one, that being a DML? E100 that I also never finished before it sat collecting dust for a LONG time.
I tried that Mig chipping fluid stuff, seemed to work ok. Did some pin washes. Still need to work on the rear a little, dust it up with some chalk pastels and seal it. Not sure if I want to do some stuff with oil paints or not, like streaks of grime and all that.
Ok so far? What else needs work?
Constructive Feedback
For in-progress or completed build photos. Give and get contructive feedback!
Hosted by Darren Baker, Dave O'Meara
E100 hull
resistor
California, United States
Joined: March 24, 2005
KitMaker: 63 posts
Armorama: 39 posts
Joined: March 24, 2005
KitMaker: 63 posts
Armorama: 39 posts
Posted: Friday, August 11, 2017 - 04:32 AM UTC
Posted: Friday, August 11, 2017 - 08:13 AM UTC
Really nice work with chipping and wear. Your wheels look brand new, they should look more worn then the hull.
Is this the first time you used the MIG chipping solution? How did it go on? Any issues to look out for?
resistor
California, United States
Joined: March 24, 2005
KitMaker: 63 posts
Armorama: 39 posts
Joined: March 24, 2005
KitMaker: 63 posts
Armorama: 39 posts
Posted: Friday, August 11, 2017 - 10:06 AM UTC
Thanks for the critique. I thought the same thing when I saw the pictures. I'll wash them over again in the brown and black. I figure less is more, or better yet, err on the side of caution. I don't want to overdo it cause' its always hard to go backwards. Was also thinking the pastels would darken things up a bit too. Dark greys and blacks? Are there better colors to use?
The chipping fluid was sprayed through my airbrush, unthinned like the bottle said to. I was initially chipping with a toothpick, but switched to some sharp tweezers for the really fins scratches. Plus the toothpicks wore out pretty quick.
M4A3E8Easy8
Washington, United States
Joined: February 04, 2006
KitMaker: 302 posts
Armorama: 300 posts
Joined: February 04, 2006
KitMaker: 302 posts
Armorama: 300 posts
Posted: Sunday, August 13, 2017 - 07:00 AM UTC
I would say it needs streaks and grime, as well as some dust to tone down the chipping. I also might add that the front plate is wrong. But at this point I am not sure you want to mess with it.
resistor
California, United States
Joined: March 24, 2005
KitMaker: 63 posts
Armorama: 39 posts
Joined: March 24, 2005
KitMaker: 63 posts
Armorama: 39 posts
Posted: Sunday, August 13, 2017 - 07:47 AM UTC
I've been working on it some more over the last couple of days here and there. I added some more washes, chalk pastels, a little paint here and there. I think it's getting there.
Whats wrong with the front?
Invincible
United Kingdom
Joined: May 03, 2017
KitMaker: 148 posts
Armorama: 122 posts
Joined: May 03, 2017
KitMaker: 148 posts
Armorama: 122 posts
Posted: Sunday, August 13, 2017 - 05:03 PM UTC
I don't know what he's talking about either. It looks fine, great actually. Can't wait to see this completed.
j76lr
New Jersey, United States
Joined: September 22, 2006
KitMaker: 1,081 posts
Armorama: 1,066 posts
Joined: September 22, 2006
KitMaker: 1,081 posts
Armorama: 1,066 posts
Posted: Sunday, August 13, 2017 - 05:14 PM UTC
nice job !
resistor
California, United States
Joined: March 24, 2005
KitMaker: 63 posts
Armorama: 39 posts
Joined: March 24, 2005
KitMaker: 63 posts
Armorama: 39 posts
Posted: Monday, August 14, 2017 - 03:26 AM UTC
M4A3E8Easy8
Washington, United States
Joined: February 04, 2006
KitMaker: 302 posts
Armorama: 300 posts
Joined: February 04, 2006
KitMaker: 302 posts
Armorama: 300 posts
Posted: Tuesday, August 15, 2017 - 08:24 AM UTC
I think the work you have done has helped quite a lot. As for the issue with the front plate a picture is worth a thousand words.
(note: pictures are a pain now, thanks photobucket)
Here is a reference picture. I built an E 100 not to long ago and filled in the detail on the upper plate only to find out it was supposed to be there along with the attaching point.
(note: pictures are a pain now, thanks photobucket)
Here is a reference picture. I built an E 100 not to long ago and filled in the detail on the upper plate only to find out it was supposed to be there along with the attaching point.
resistor
California, United States
Joined: March 24, 2005
KitMaker: 63 posts
Armorama: 39 posts
Joined: March 24, 2005
KitMaker: 63 posts
Armorama: 39 posts
Posted: Tuesday, August 15, 2017 - 09:01 PM UTC
Gotcha. I guess that mounting tab for the front skirt wasn't molded on the dragon kit. It is apparently molded on the trumpeter kit. Oh well, I'm not really a "rivet counter", but if I was, it would be easy enough to correct. That said the front armor thickness isn't correct on either kit.
On to the turret! Hope to have this done in short order and will post some completed pics when it is.
resistor
California, United States
Joined: March 24, 2005
KitMaker: 63 posts
Armorama: 39 posts
Joined: March 24, 2005
KitMaker: 63 posts
Armorama: 39 posts
Posted: Thursday, August 24, 2017 - 03:17 AM UTC