Armor/AFV
For discussions on tanks, artillery, jeeps, etc.
For discussions on tanks, artillery, jeeps, etc.
Hosted by Darren Baker, Mario Matijasic
M1A2 Abrams SEP V2 TUSK II Blog

JSSVIII

Joined: March 28, 2007
KitMaker: 1,169 posts
Armorama: 1,067 posts

Posted: Sunday, March 11, 2018 - 04:16 PM UTC
Thanks for posting this Darren, I was thinking of building the Academy kit, and from what you have shown so far, it looks like its the right choice. Looking forward to the rest of your build!
Posted: Sunday, March 11, 2018 - 06:22 PM UTC
I will agree in saying that this is a very nice offering from Academy judging by my experience thus far, but there are also some issues I have to address ahead of me. I have fixed an issue with the front of the lower hull and will be covering that in an update soon. There is also the issue of the drive wheels problem, but as Epi pointed this out to me it was not the end of the world too fix as the correct parts are in the box and so this boils down to knowledge.
Scarred

Joined: March 11, 2016
KitMaker: 1,792 posts
Armorama: 1,186 posts

Posted: Sunday, March 11, 2018 - 07:51 PM UTC
The way they join the ends of the track together is ingenious, much better than the old melt the pins way of doing it.
Kharkov
Joined: April 09, 2011
KitMaker: 181 posts
Armorama: 175 posts
KitMaker: 181 posts
Armorama: 175 posts

Posted: Sunday, March 11, 2018 - 08:04 PM UTC
Quoted Text
The way they join the ends of the track together is ingenious, much better than the old melt the pins way of doing it.
I was just thinking exactly the same thing.
russamotto


Joined: December 14, 2007
KitMaker: 3,389 posts
Armorama: 2,054 posts

Posted: Monday, March 12, 2018 - 01:34 AM UTC
Looks very good. I wonder if there is a change on the tracks as on my kit they were much too long. I do like how they connect. This is a very nice kit to build.
Posted: Monday, March 12, 2018 - 06:22 PM UTC
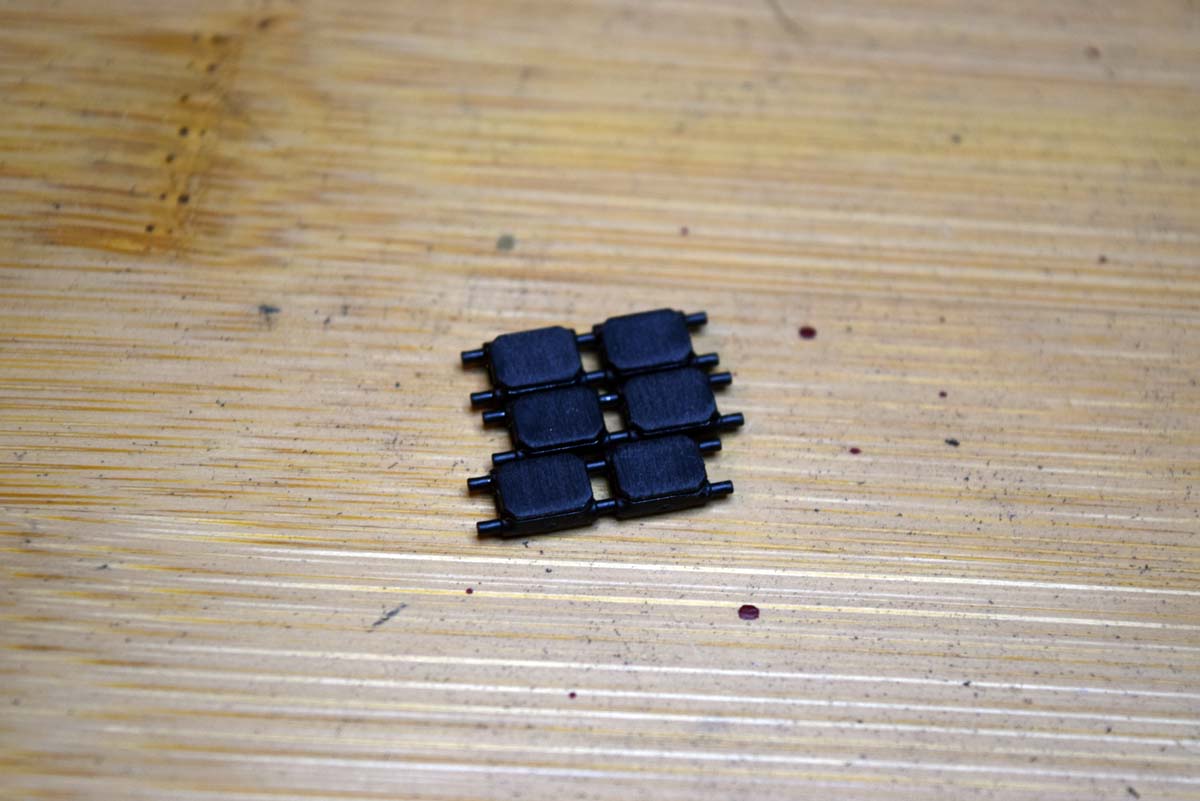
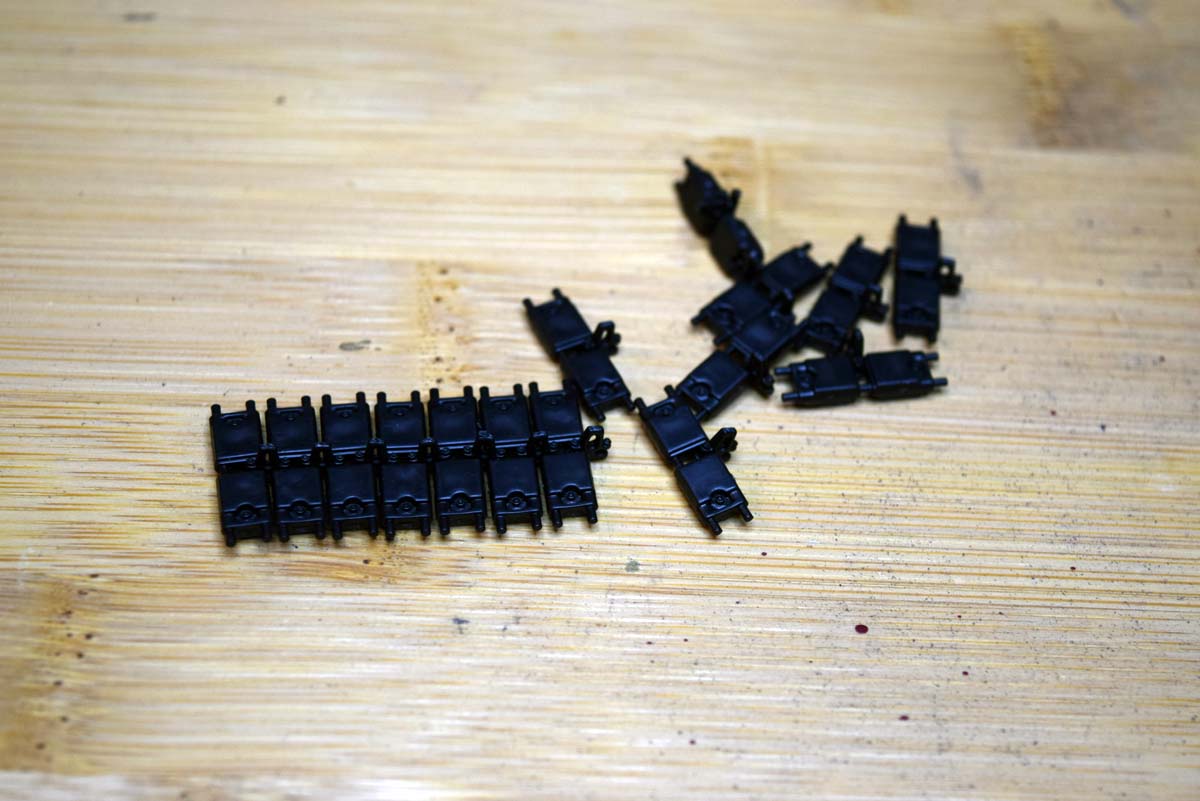
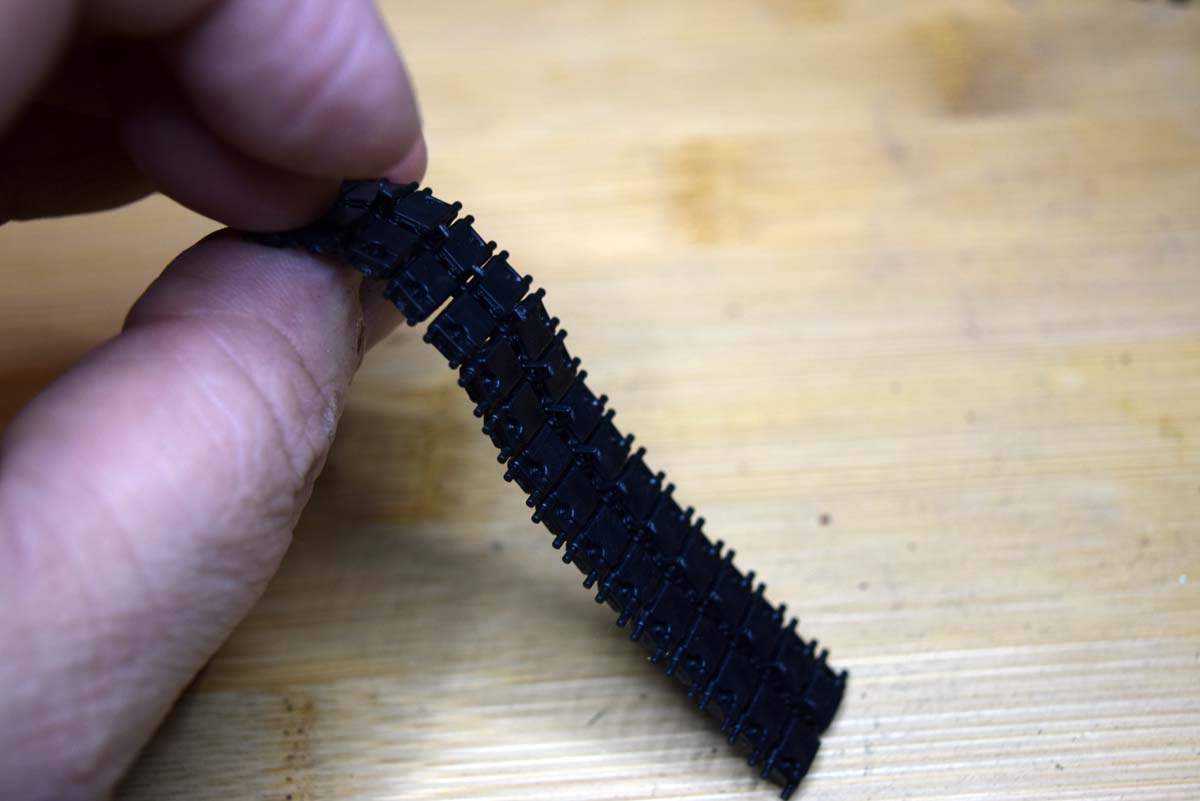
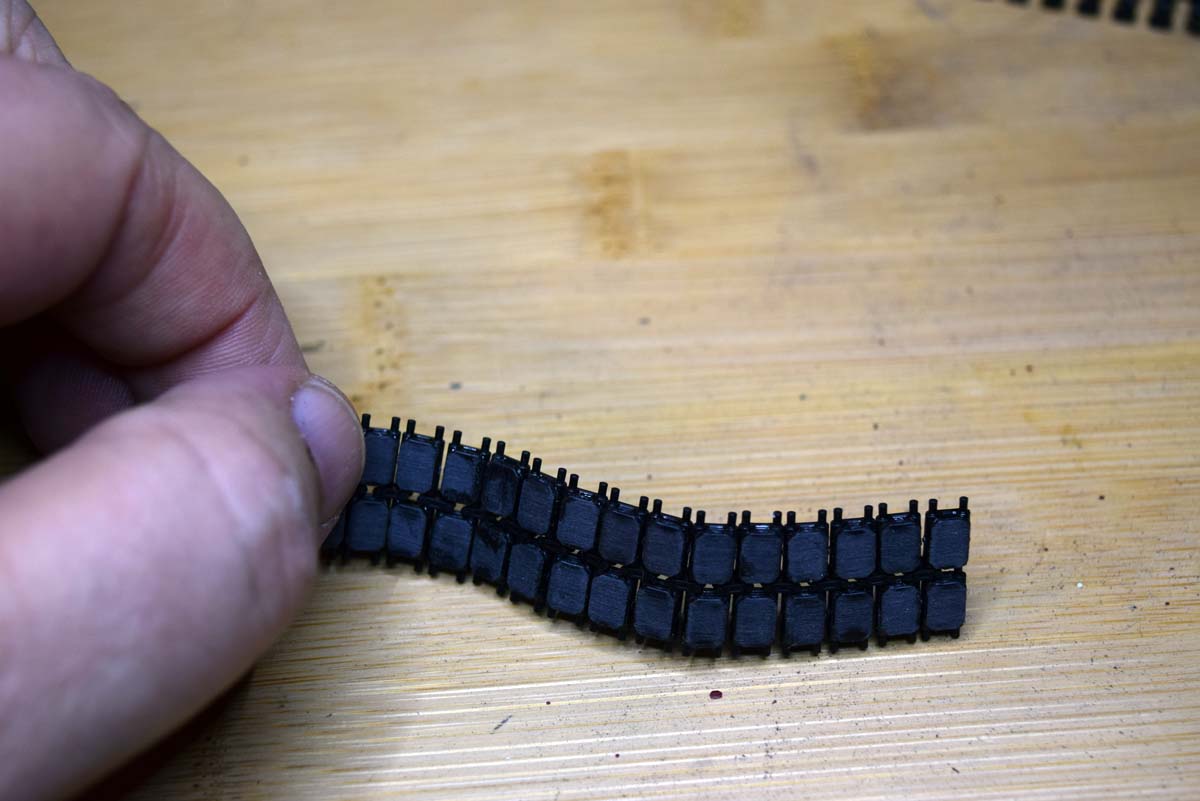
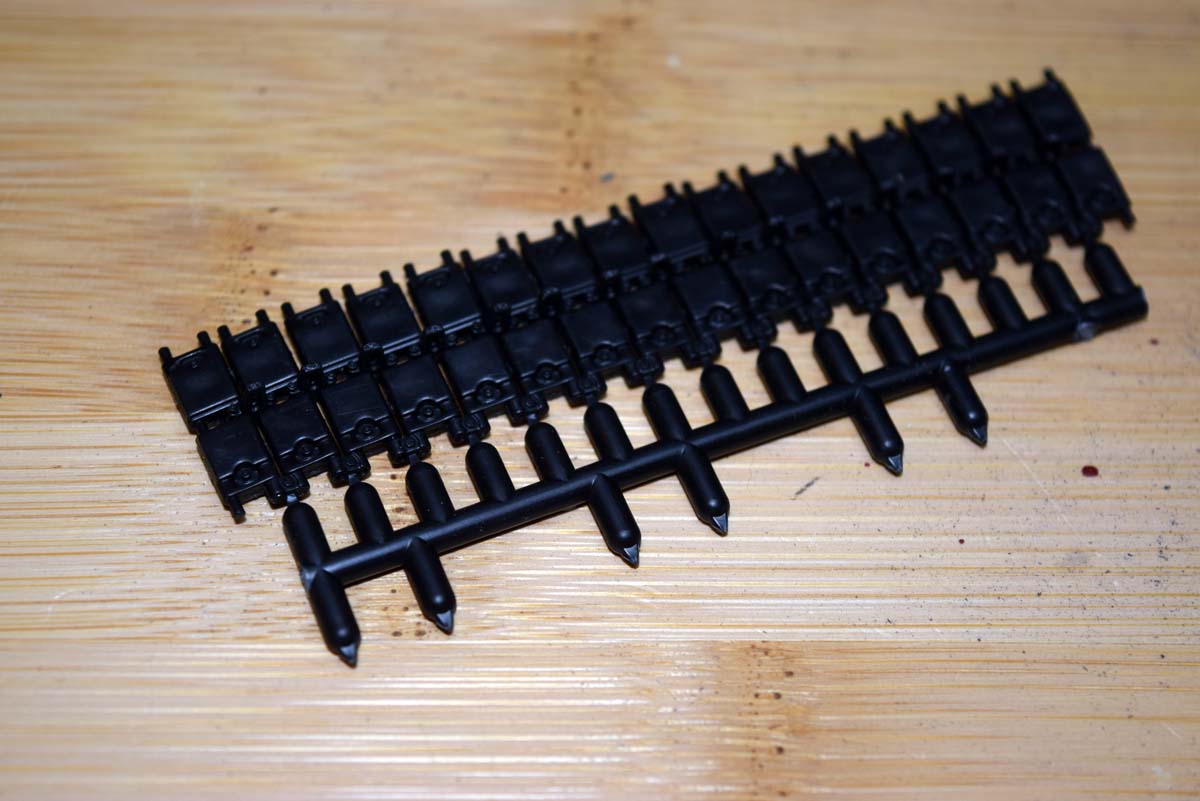
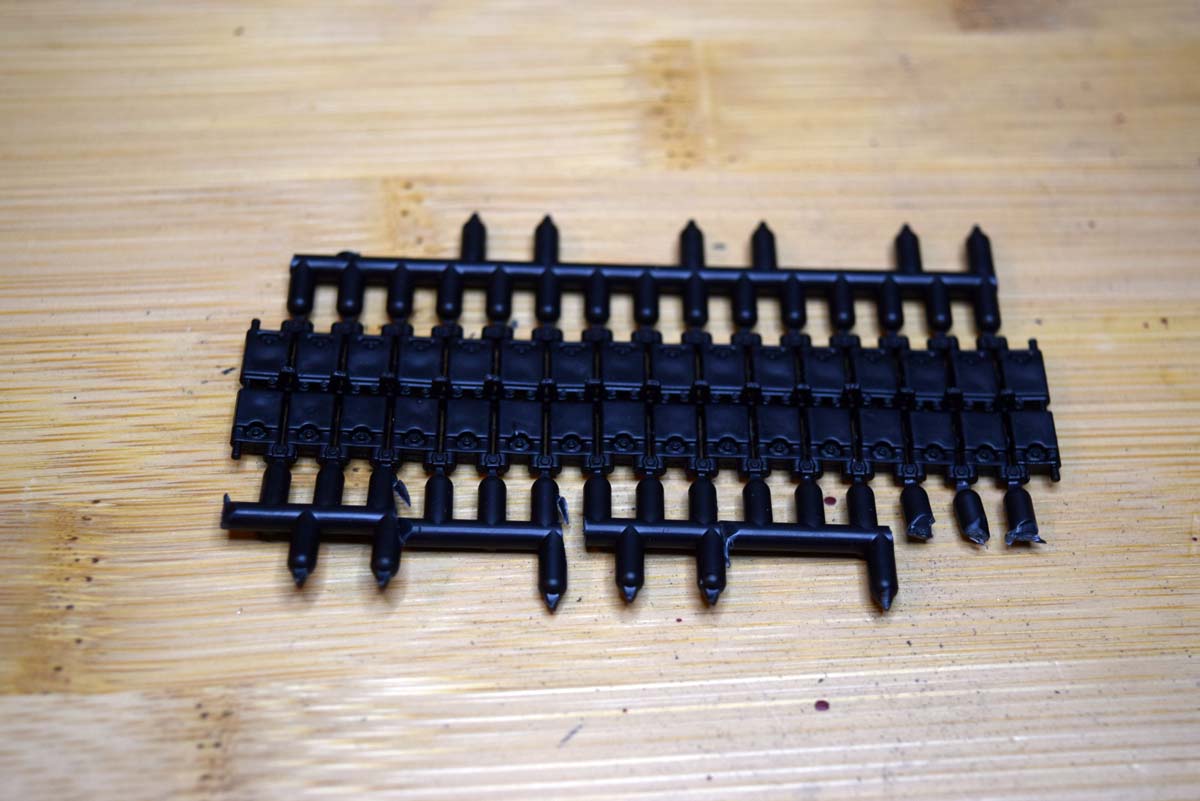
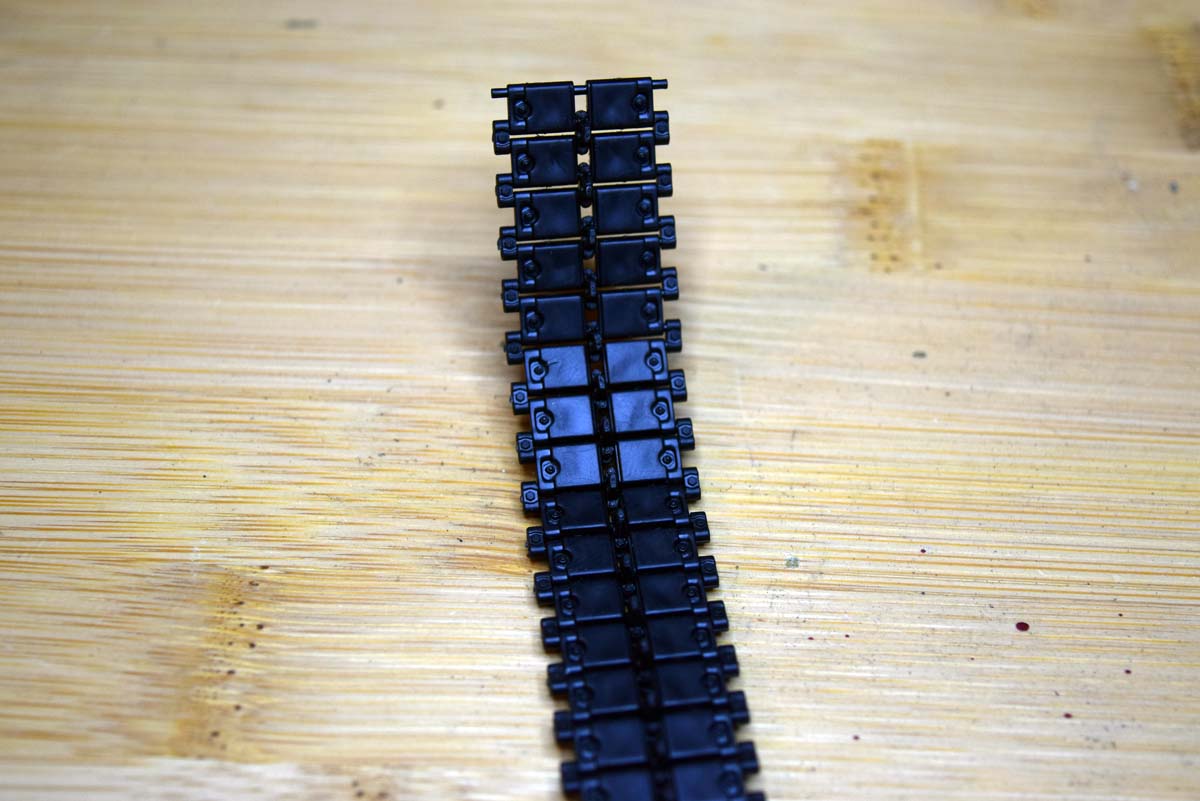
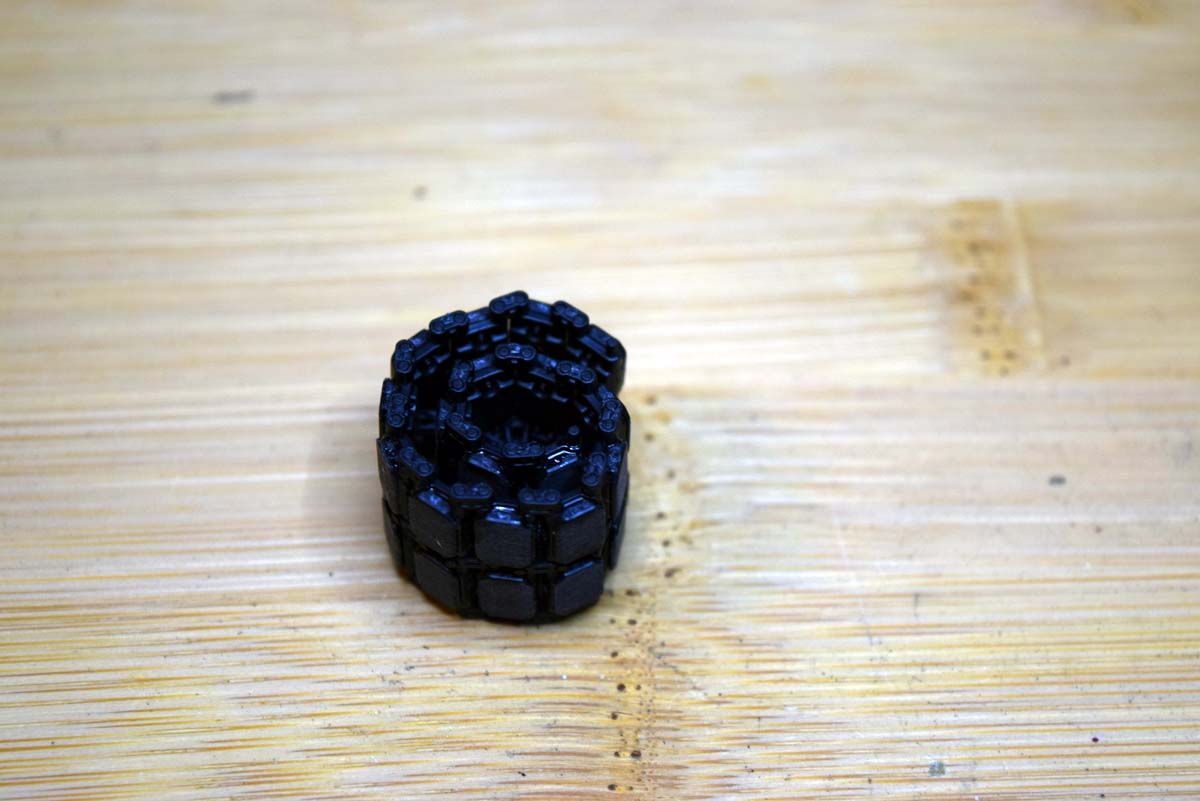
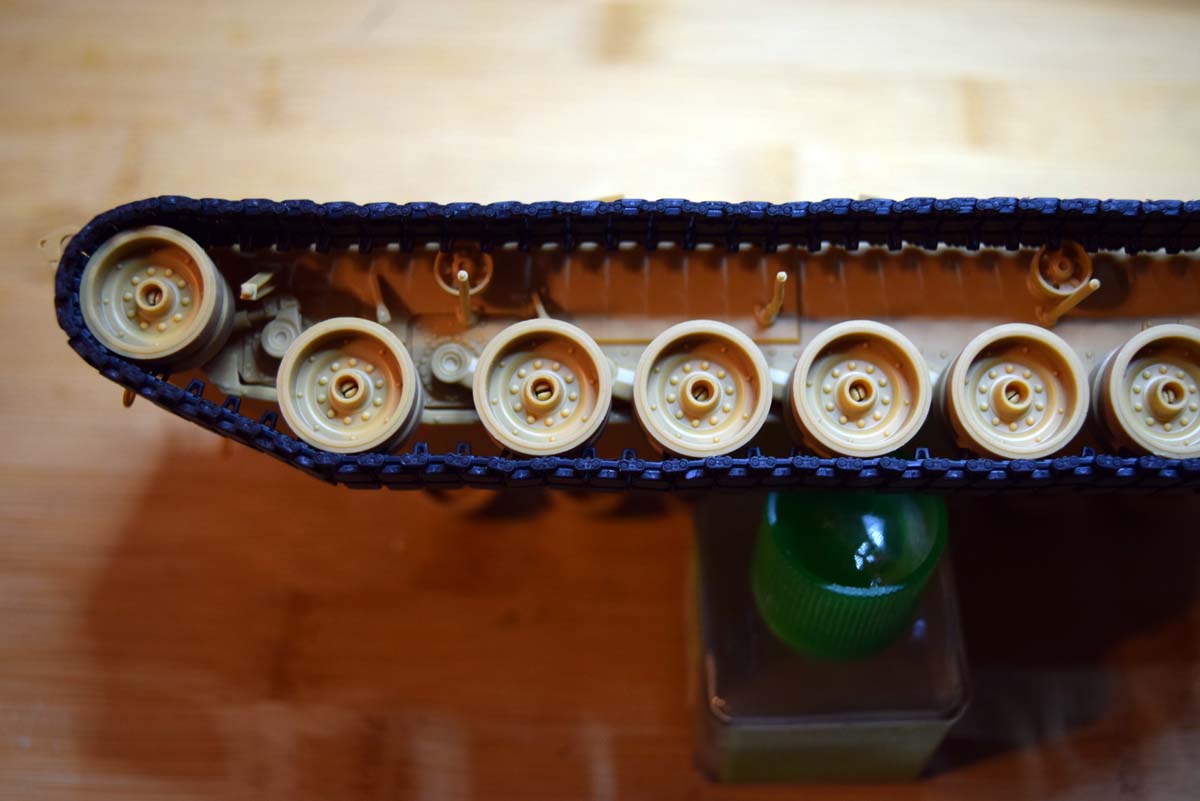
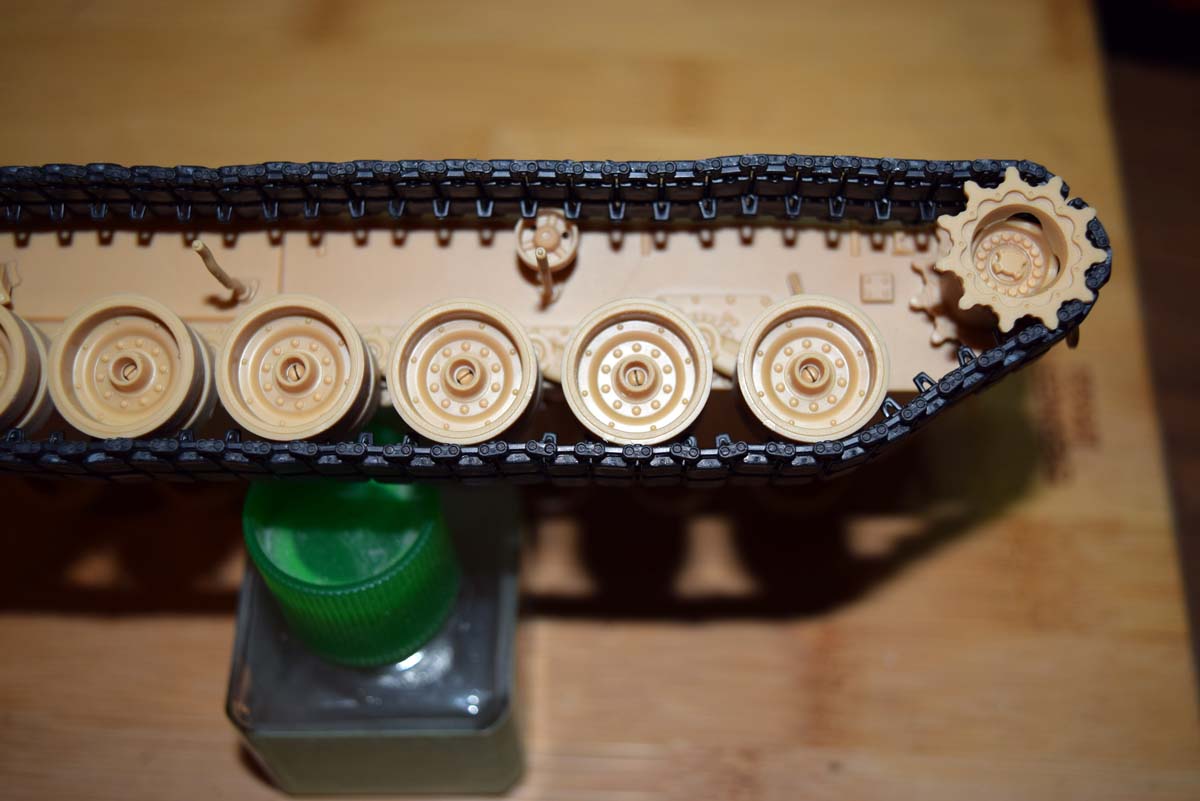
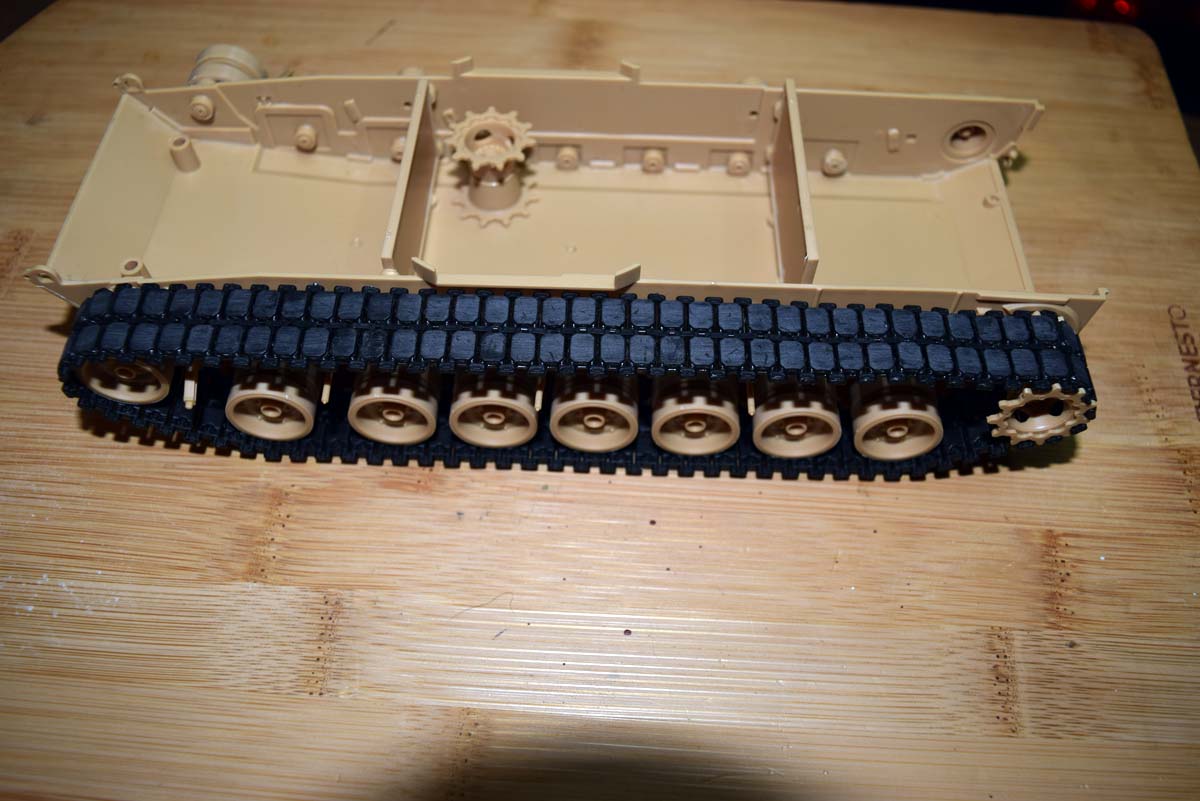
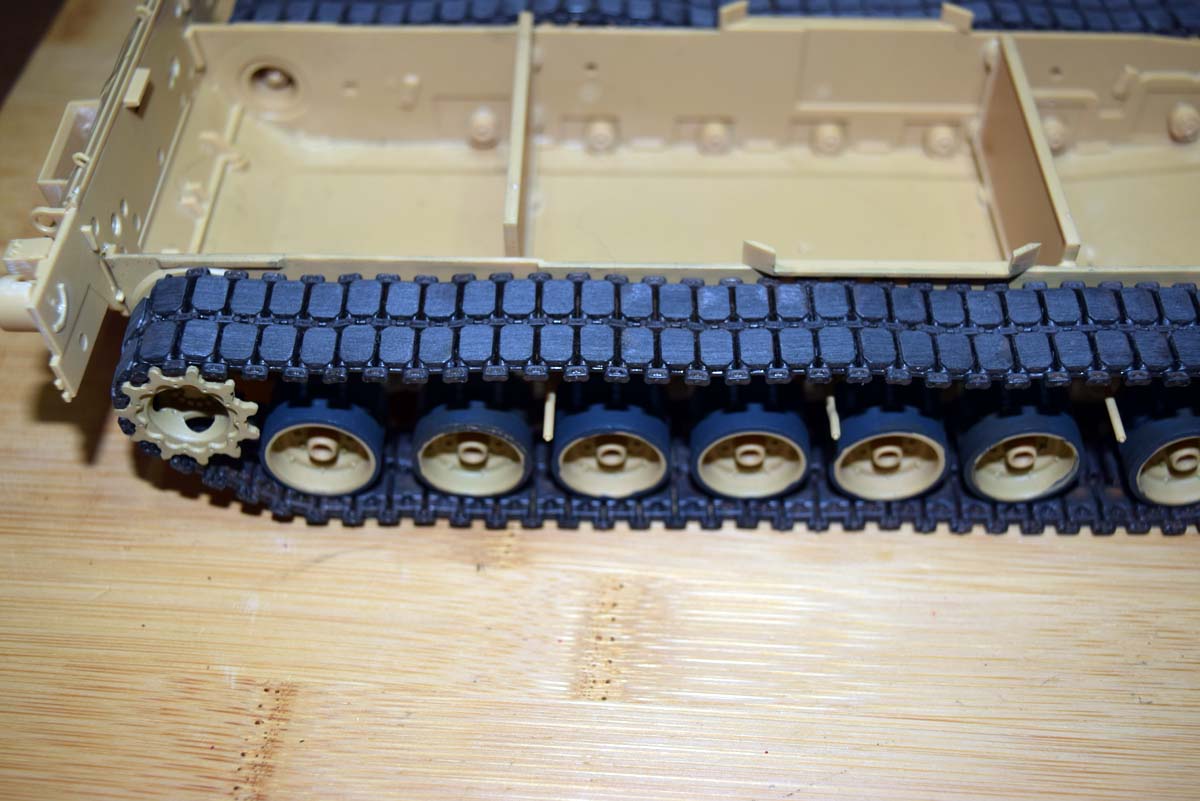
Individual Workable Track Links
These tracks are excellent and if you have never dared tackle this sort of link before these will be a great introduction to them. The links have separate links, pads, guide horns and end caps; my first thoughts were that these were going to be a pain to clean up, but I was incorrect in that thought. I removed the track links with a good set of snips that left no clean up in most cases being required. I then sanded the track pads in one direction quite vigorously while still on the sprue in order to add a used look to them and this was then followed with removal from the sprue, again little or no clean up was required. The guide horns were next and with care no clean up is again required. I was a little irritated about the separate track pads at first, but then it occurred to me that it made leaving some off if wished easy, something that does happen and roughing up the pad surface meant that no damage was caused to the rest of the link detail.
I then attached the track pads to the links doing one side and then the other to allow the cement to dry. Then I attached a guide horn to all but one of the links followed by attaching the links to each other, the guide horns hold the links very well. Next I cut a length of 15 end caps from the sprue and attached these to one side of the links; I found this caused the other side to splay out a little. (Please note that after the first track portion you then need 16 end caps). Due to the splaying out I cut the end caps into smaller lengths for the other side and other than the last three that I had to add singularly the result was easily achieved. The result of all this is a very nice looking and realistic looking track run that is quite stiff but fits the drive wheel very well. These are a very nice addition and I hope it is a trait that Academy will continue.



GTDeath13

Joined: June 12, 2015
KitMaker: 921 posts
Armorama: 919 posts

Posted: Monday, March 12, 2018 - 06:35 PM UTC
Impressive.. Are those the Def Model tracks included in the kit? They look better than the AFV Club equivalent.
Tankrider

Joined: October 07, 2002
KitMaker: 1,280 posts
Armorama: 1,208 posts

Posted: Monday, March 12, 2018 - 06:46 PM UTC
Yes, those tracks are the DEF Models T-158LL offering. They are slightly more fiddly than the AFV Club T-158 tracks as you have to if the center guide or to the run of the mill modeler, the guide horn, to the track block. They do snap in easily and as Darren said, once the track is fully assembled, it is stiff but conforms to the curves of the suspension. Outside of the Academy kit, the price point is close if not equal to the AFV Club T-158 track.
John
John

retiredyank

Joined: June 29, 2009
KitMaker: 11,610 posts
Armorama: 7,843 posts

Posted: Monday, March 12, 2018 - 06:52 PM UTC
Darren - The way the tracks go together, I believe would aid in painting them. You can spray the bare metal parts, with steel before adding the track pads. The, of course could be left as they are(black) or painted black(why you would paint black on black I do not know. I will have to buy one of these, when I finish my Dragon:Tamiya kit bash.
Posted: Monday, March 12, 2018 - 08:19 PM UTC
As John has indicated you are correct about the DEF Model aspect of the tracks.
Matt: I did consider what you suggest, but I was concerned about me gumming up the tracks with glue while adding the blocks. I feel I can assemble and then paint these tracks as is and then a light rub with an abrasive will bring back the blocks.
Matt: I did consider what you suggest, but I was concerned about me gumming up the tracks with glue while adding the blocks. I feel I can assemble and then paint these tracks as is and then a light rub with an abrasive will bring back the blocks.
Posted: Saturday, March 17, 2018 - 12:57 AM UTC
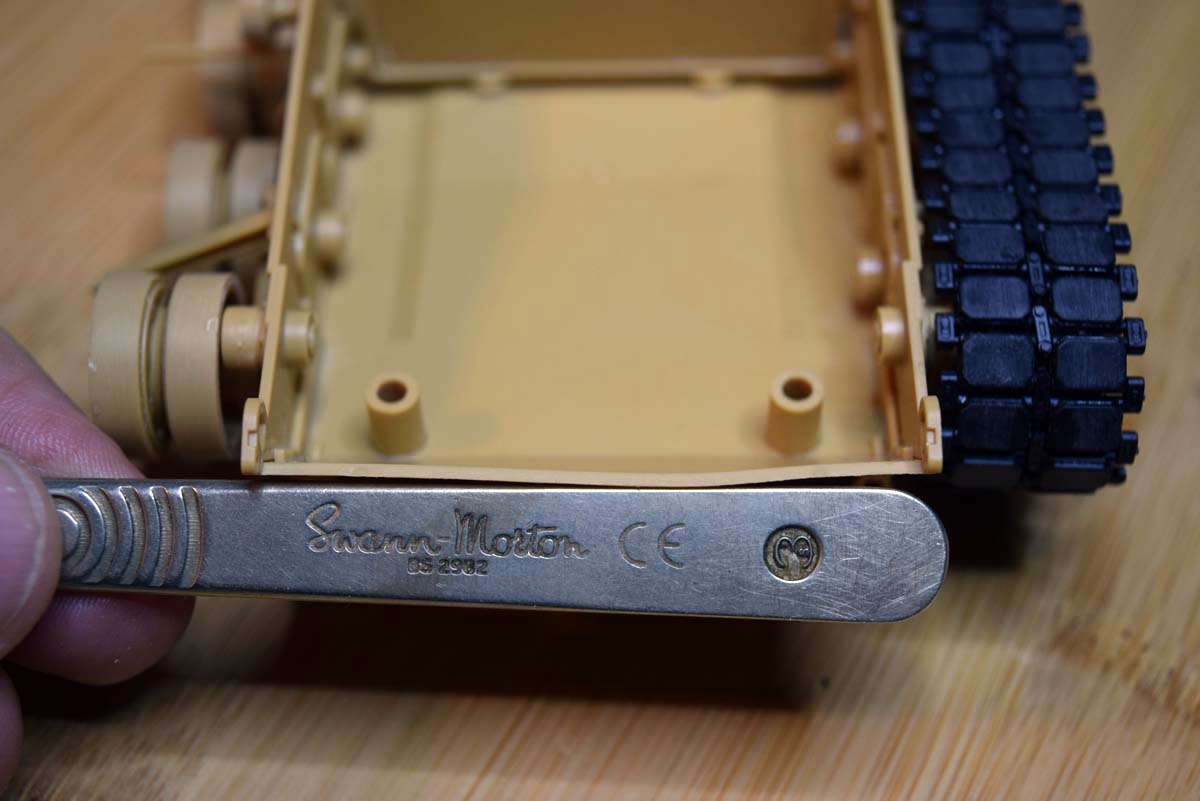
Fixing an Issue No1
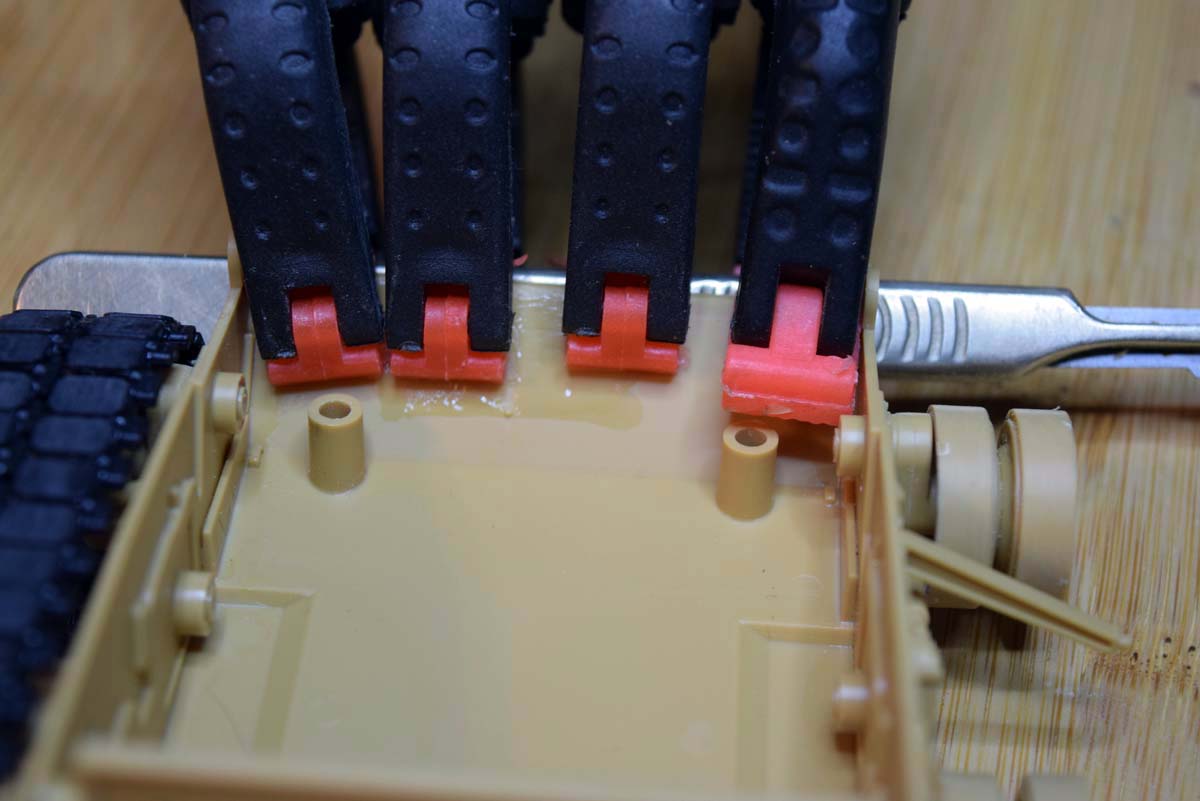
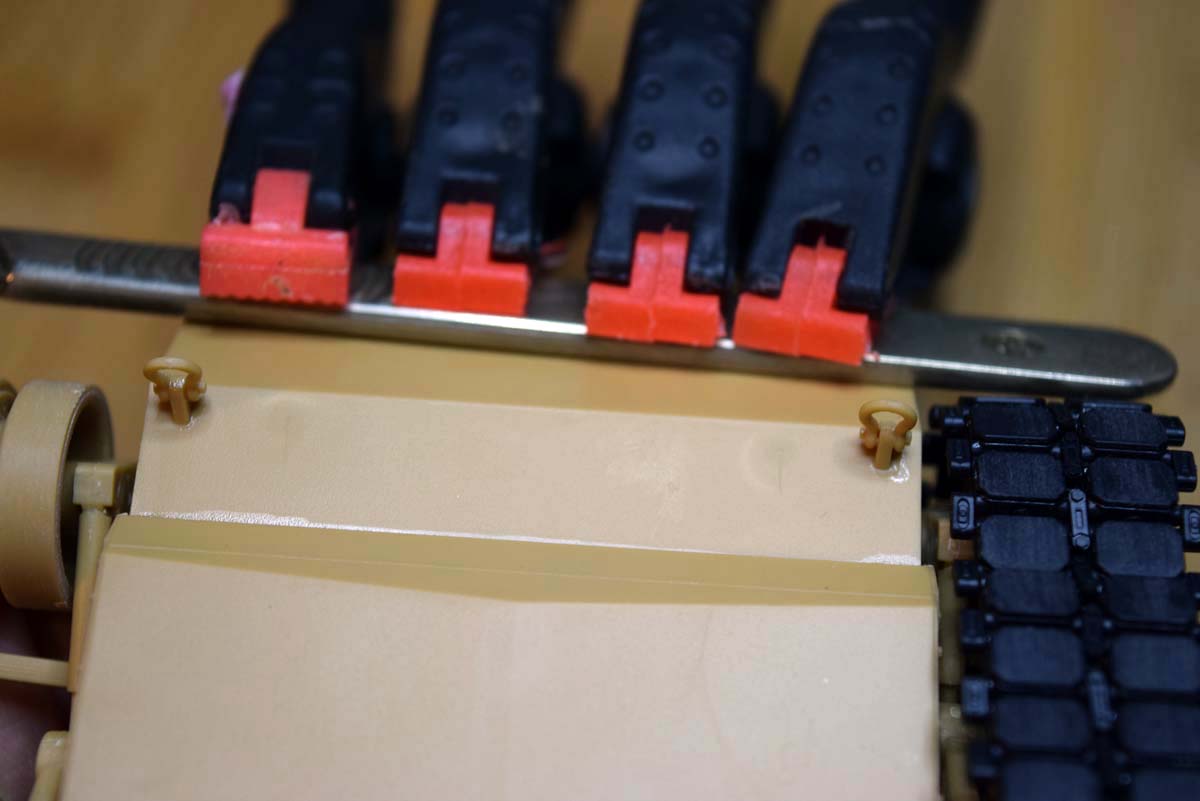
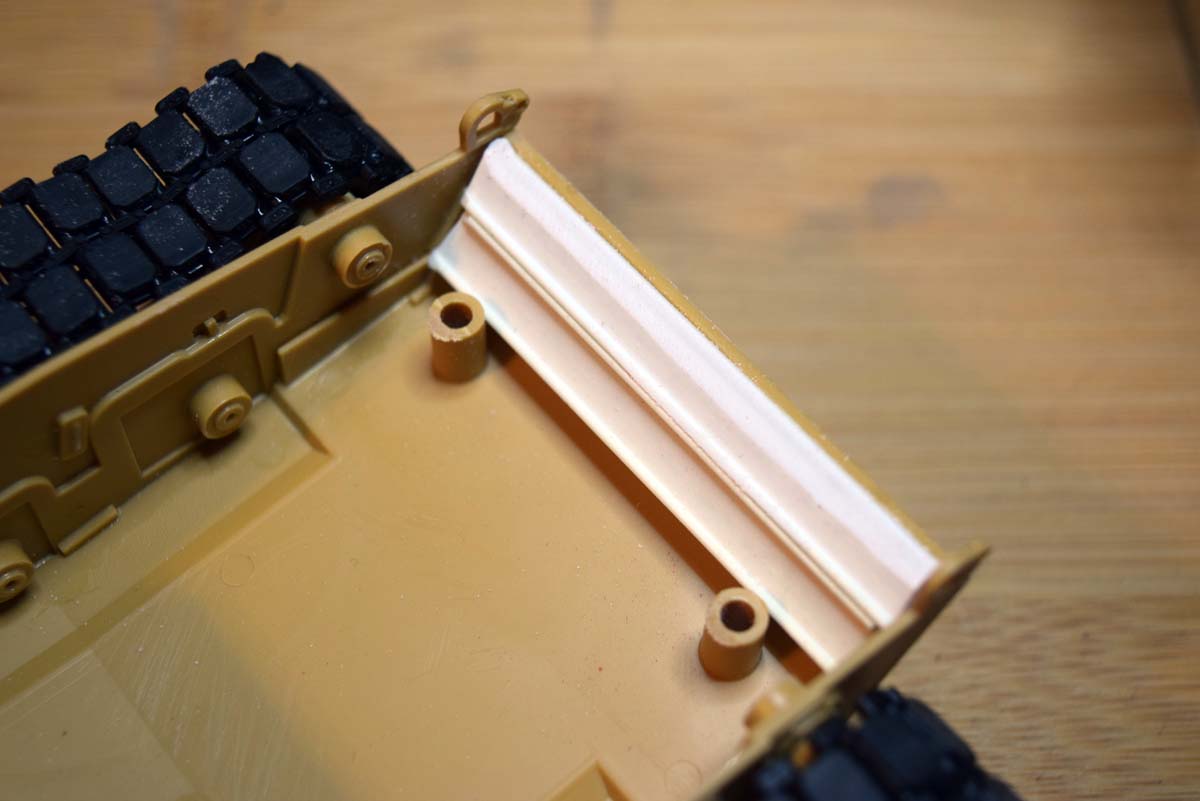
On this offering the front plate of the lower hull had a nasty bow to it that needed to be fixed. I tackled this issue in three different ways, each being a little more involved with the third approach working a treat.
Attempt 1 Heat
I attached a straight edge to the hull via clamps and then used the directed heat from a hair dryer. I left the part over night but the bow came straight back when I released the clamps.
Attempt 2 Softening
My next attempt again involved clamping the part against a metal straight edge and softening the area affected. I used a liberal application of Tamiya extra thin to the rear face of the affected area and again waited over night. No joy the bow refused to go away.
Attempt 3 Bracing
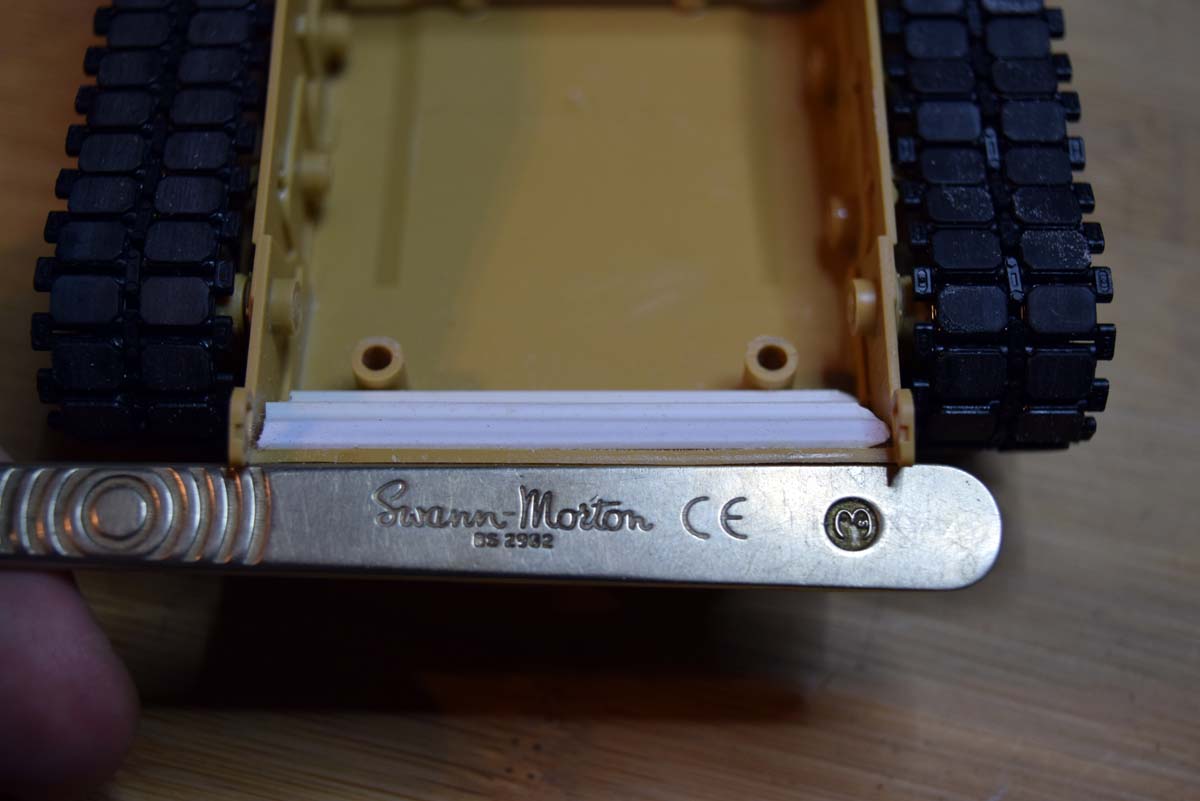
By now I was getting a little annoyed with this issue and decided to brace the area permanently, enter the spares and plastic rods. I found some I shaped rod and cut two pieces to the required length. A liberal application of Tamiya extra thin again and the plastic was applied again with the metal straight edge on the outer face and held in place with four clamps. This has fixed the issue as you can see but it did require some sanding as the top of one of the I braces which was slightly high.


U-mark

Joined: January 04, 2017
KitMaker: 128 posts
Armorama: 89 posts

Posted: Saturday, March 17, 2018 - 01:36 AM UTC
Daren, I picked up this kit and started building it a couple of days ago. The front of the hull on my kit is straight, but I seem to remember a little warping, when i built the first offering. It wasn't as bad as your kit though. Everything looks good.Thanks for the tips on track construction, It looks easier than Meng or RyeField tracks. Good Luck, Mark.
Kharkov
Joined: April 09, 2011
KitMaker: 181 posts
Armorama: 175 posts
KitMaker: 181 posts
Armorama: 175 posts

Posted: Saturday, March 17, 2018 - 08:50 AM UTC
Nice save on the curvy plastic lower hull, when I read: Attempt 1 - Heat, my eyes went wide and my head went Noooooooooo, lol, and nice to see a good old Swann Morton being used as a straight edge 
Matt

Matt
laikneth

Joined: September 24, 2013
KitMaker: 75 posts
Armorama: 63 posts
Posted: Saturday, March 17, 2018 - 08:57 AM UTC
Quoted Text
Yes, those tracks are the DEF Models T-158LL offering. They are slightly more fiddly than the AFV Club T-158 tracks as you have to if the center guide or to the run of the mill modeler, the guide horn, to the track block. They do snap in easily and as Darren said, once the track is fully assembled, it is stiff but conforms to the curves of the suspension. Outside of the Academy kit, the price point is close if not equal to the AFV Club T-158 track.
John
Hi John
How many links did you use per side?
Ken
M4A3E8Easy8

Joined: February 04, 2006
KitMaker: 302 posts
Armorama: 300 posts

Posted: Saturday, March 17, 2018 - 11:02 AM UTC
I think after attemp 2 I would have broken out the white plastic card and replaced it. I know my luck and it involves the glue letting lose after I seal up the hull and the front plate buckling yet again... and me tossing the thing in the bin...
Looks nice, My vote is the three tone in Poland. Everybody does tan these days.. be enviromentaly friendly and go GREEN
Looks nice, My vote is the three tone in Poland. Everybody does tan these days.. be enviromentaly friendly and go GREEN

Posted: Saturday, March 17, 2018 - 01:47 PM UTC
Quoted Text
Daren, I picked up this kit and started building it a couple of days ago. The front of the hull on my kit is straight, but I seem to remember a little warping, when i built the first offering. It wasn't as bad as your kit though. Everything looks good.Thanks for the tips on track construction, It looks easier than Meng or RyeField tracks. Good Luck, Mark.
Thank you for the positive feedback and letting me know that the bow is a matter of luck rather than design.
Quoted Text
Nice save on the curvy plastic lower hull, when I read: Attempt 1 - Heat, my eyes went wide and my head went Noooooooooo, lol, and nice to see a good old Swann Morton being used as a straight edge
Matt
Don't let heat worry you as it is only excessive heat that is an issue. I find a hairdryer is usually sufficient.
Quoted Text
How many links did you use per side?
Ken
I used 79 links which are a little bit of a tight fit. I have been informed that 79 to 80 links per side is the accurate number on the right tank.
Quoted Text
I think after attemp 2 I would have broken out the white plastic card and replaced it. I know my luck and it involves the glue letting lose after I seal up the hull and the front plate buckling yet again... and me tossing the thing in the bin...
Looks nice, My vote is the three tone in Poland. Everybody does tan these days.. be environmentally friendly and go GREEN
I have done that in the past and will likely do it again in the future. My preferred method is to pack the model away and come back to it later, usually years later.
Thank you all for taking the time to add a reply and watching my progress.
Posted: Tuesday, March 20, 2018 - 07:19 PM UTC
Time for another instalment.
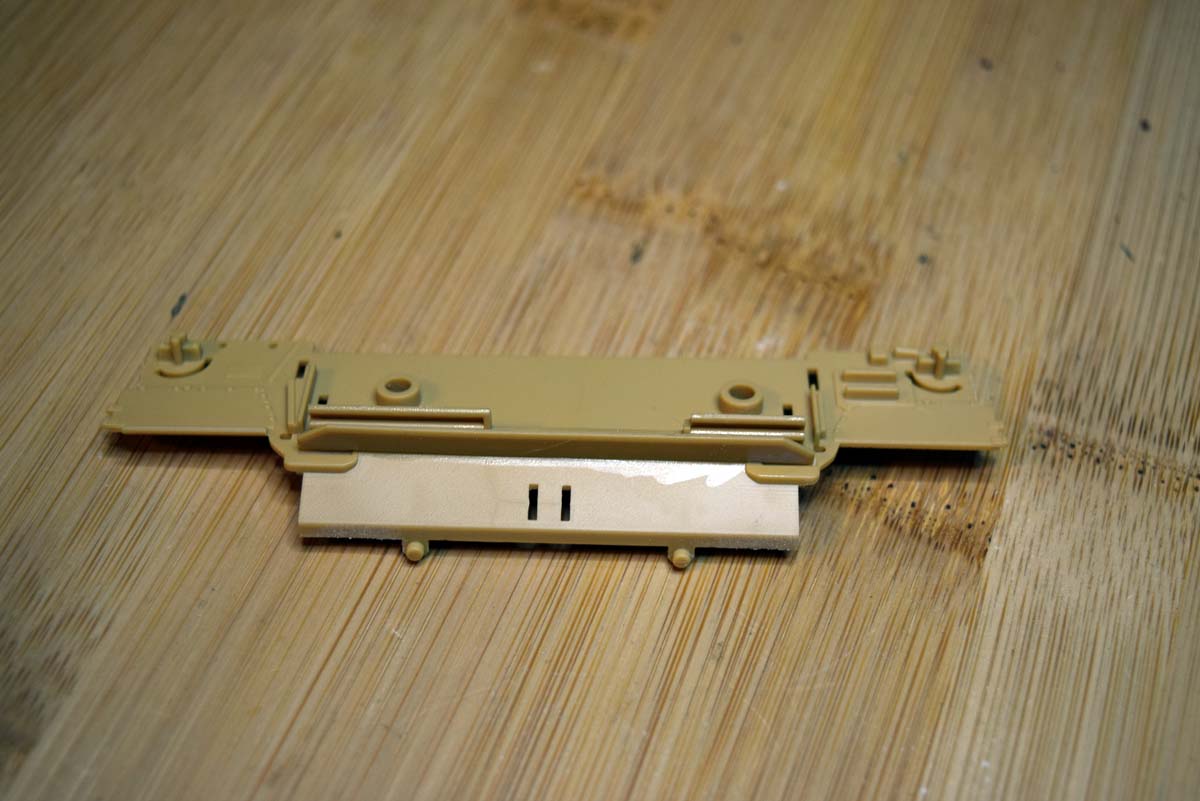
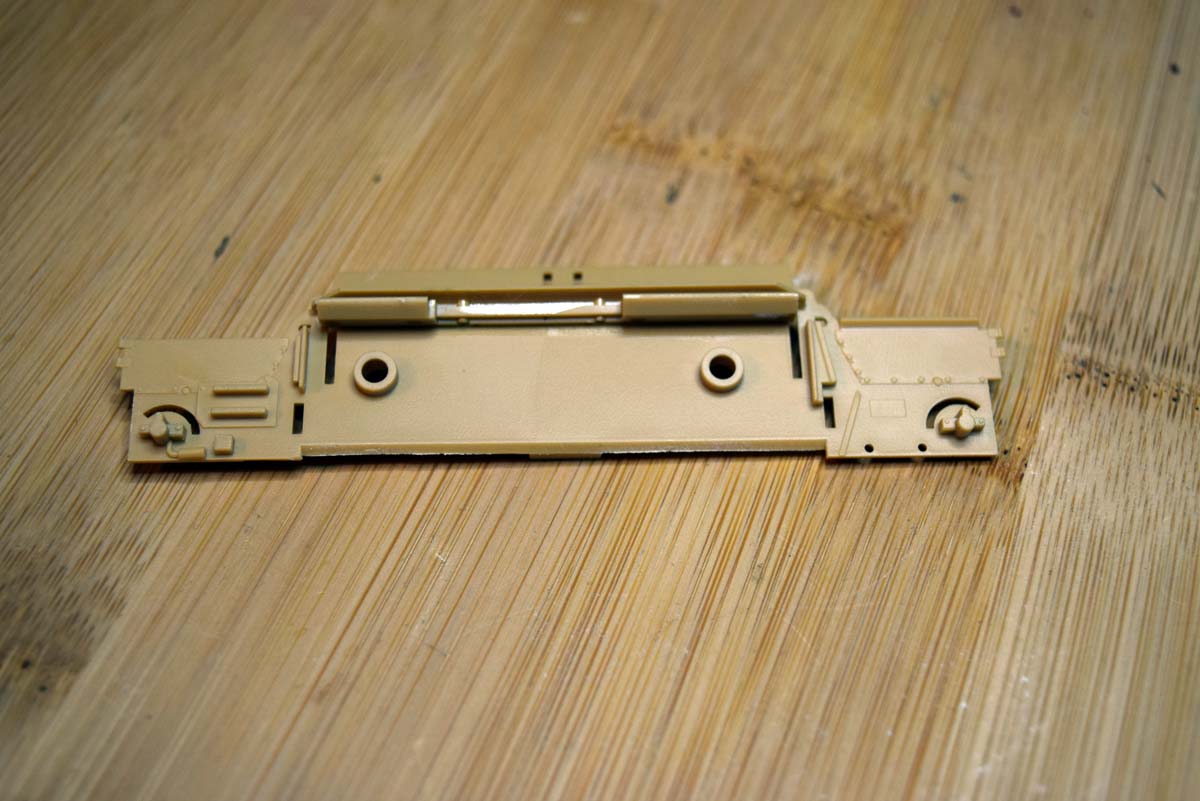
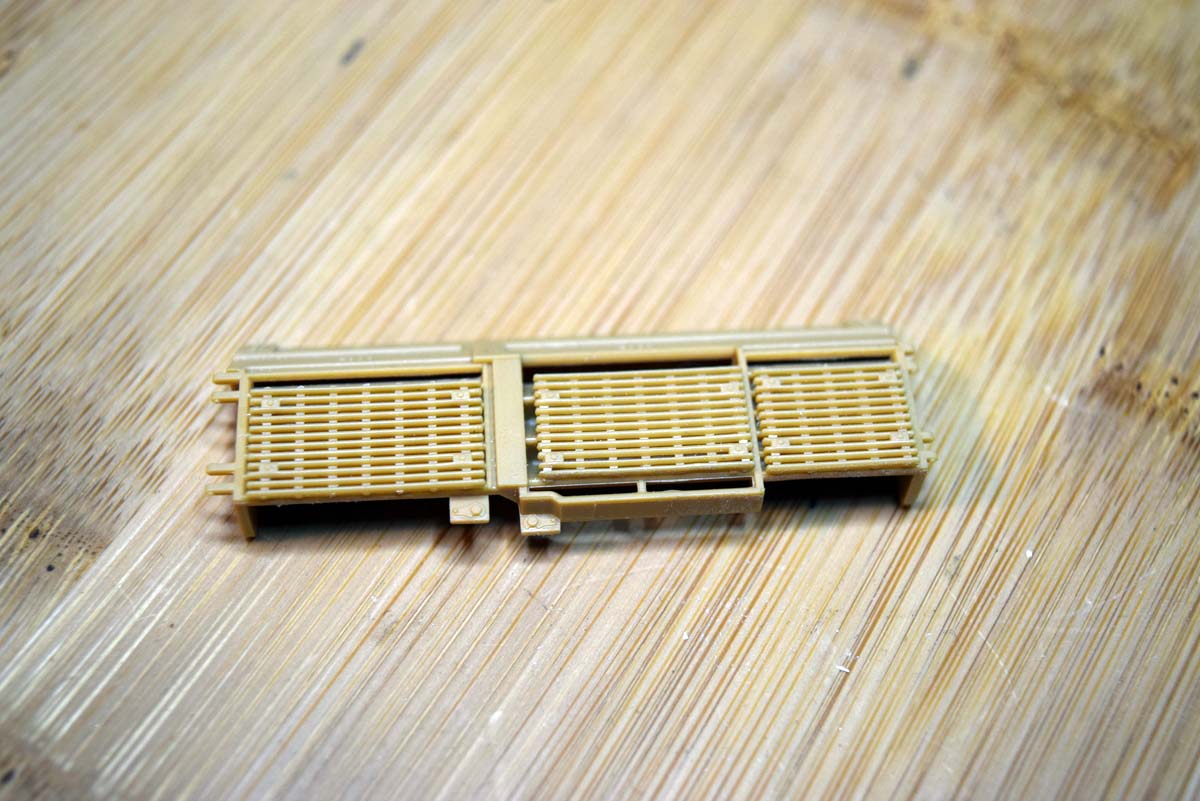
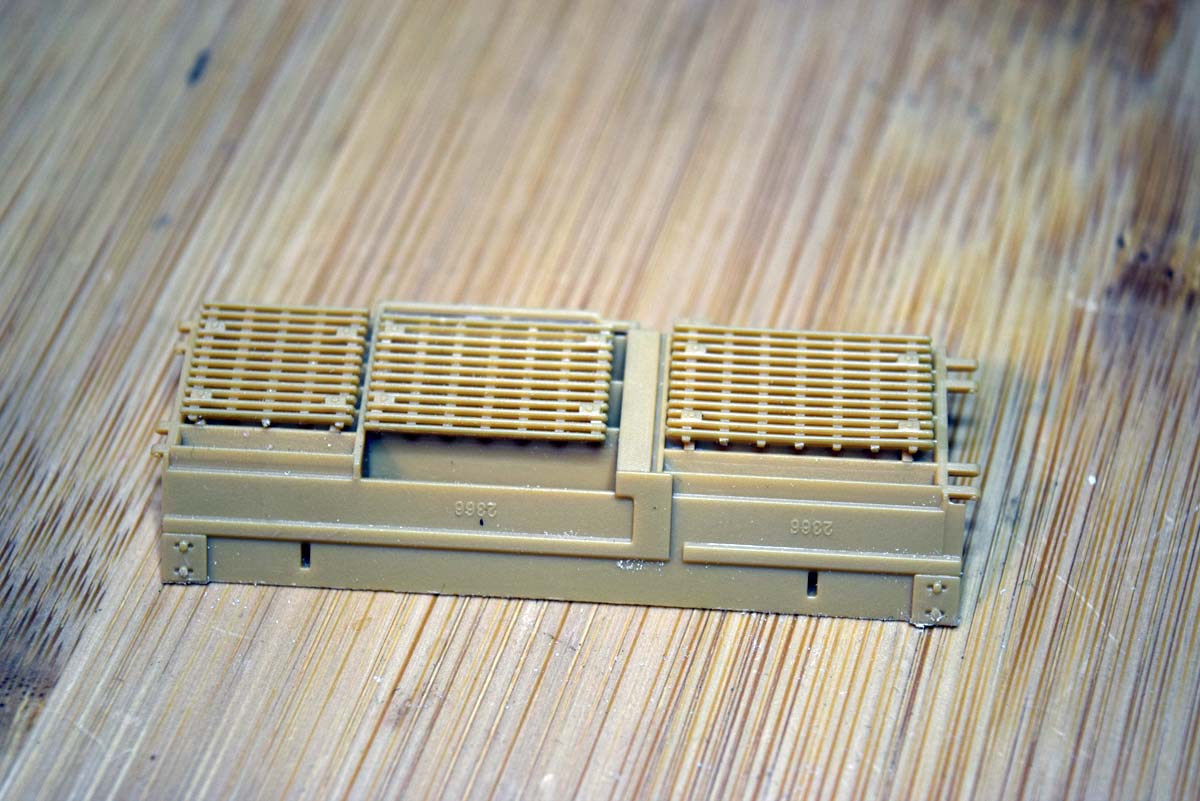
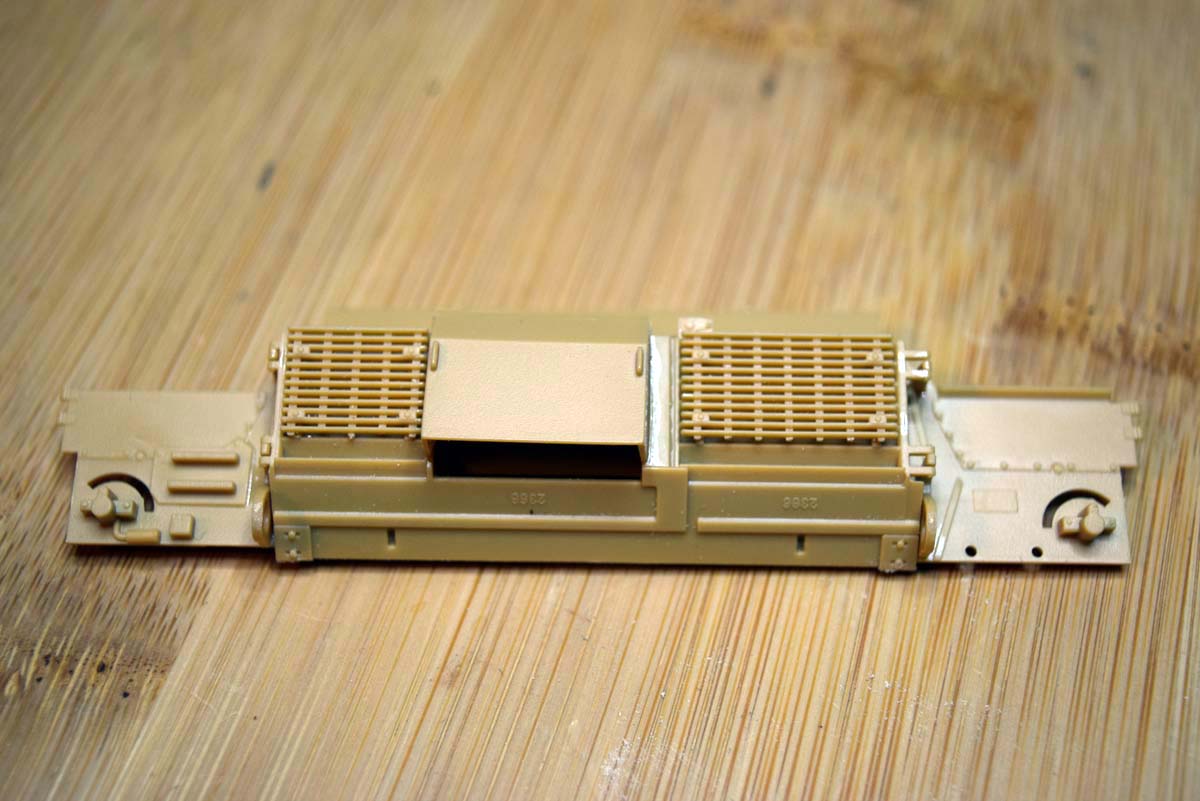
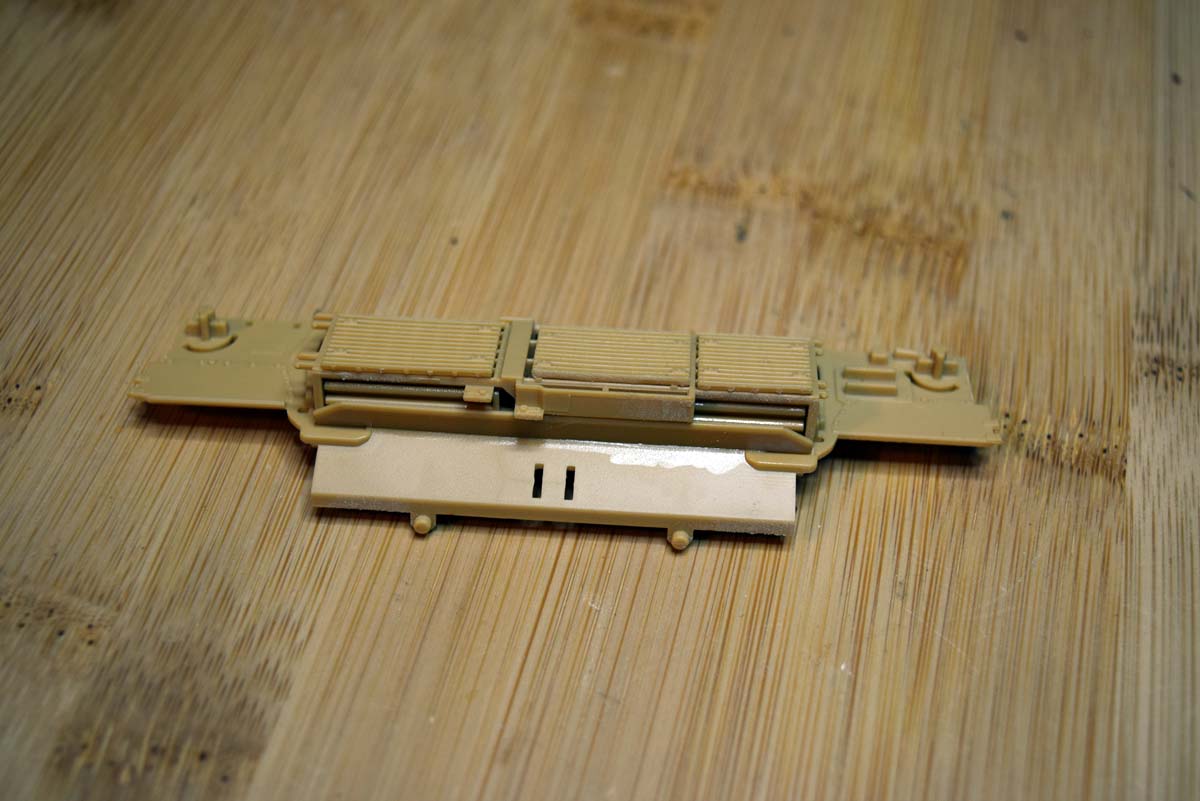
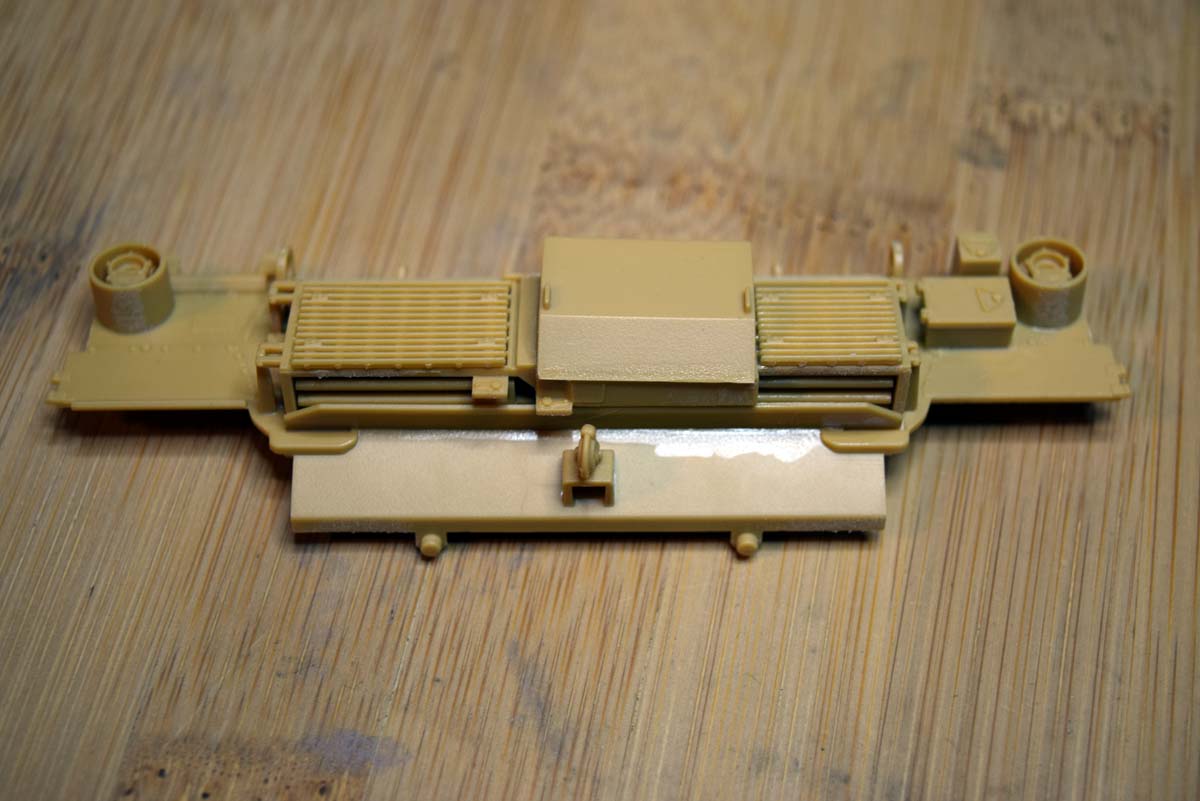
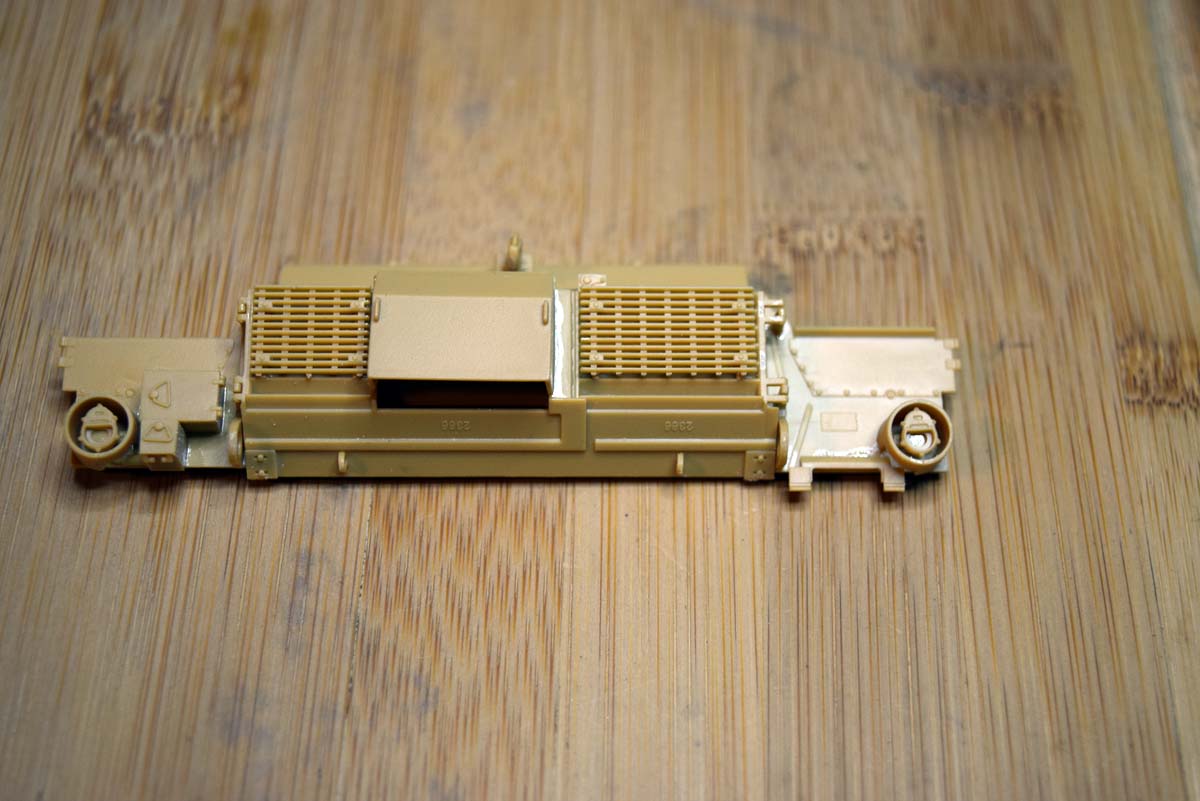
Stage 10 to 11 Rear of the Hull
The rear panel of this model is quite complicated in so much as you have to pay close attention to what you are doing to get it right. The panel itself is an easy start to the build process but when you move onto the vents you need to make sure that the three gratings are the correct way up; Note they are not all up the same way; the centre one or exhaust is the opposite way up to the ones either side. The hinge brackets for these panels are next and provided you know that is what they are positioning in easy. The deflector shown added here over the exhaust is an option rather than a must do, I have seen images of tanks where this part looks all but rusted out. The rear lights have a photo etched option as well as a plastic one which I like to see in terms of opening the model up to modellers of all skill levels. Clear lenses are provided for the rear light clusters, I have skipped this detail at the moment. When it comes to attaching the rear panel to the hull I hit the one aspect I really didnt like; Academy has gone for two large receivers for pins extending from the panel and two slots. I have found that the pins do not fit the holes and so these need reshaping/sizing to make it work and I would have preferred an alternate approach. With the pins thinned down a little the part fits into its home very well, but holes that are not big enough to accept the pins seems a common issue with this model.


bill_c

Joined: January 09, 2008
KitMaker: 10,553 posts
Armorama: 8,109 posts

Posted: Tuesday, March 20, 2018 - 07:34 PM UTC
Good build log, thanks, Squire!
russamotto


Joined: December 14, 2007
KitMaker: 3,389 posts
Armorama: 2,054 posts

Posted: Tuesday, March 20, 2018 - 10:18 PM UTC
Darren, I like your progress. Makes me want to get this kit even more.

GTDeath13

Joined: June 12, 2015
KitMaker: 921 posts
Armorama: 919 posts

Posted: Wednesday, March 21, 2018 - 12:04 AM UTC
Looking sharp!!
P.S. You could bother changing the handles of the exhaust deflector

P.S. You could bother changing the handles of the exhaust deflector


Tankrider

Joined: October 07, 2002
KitMaker: 1,280 posts
Armorama: 1,208 posts

Posted: Thursday, March 22, 2018 - 01:31 AM UTC
Quoted Text
Quoted TextYes, those tracks are the DEF Models T-158LL offering. They are slightly more fiddly than the AFV Club T-158 tracks as you have to if the center guide or to the run of the mill modeler, the guide horn, to the track block. They do snap in easily and as Darren said, once the track is fully assembled, it is stiff but conforms to the curves of the suspension. Outside of the Academy kit, the price point is close if not equal to the AFV Club T-158 track.
John
Hi John
How many links did you use per side?
Ken
Ken,
I am not sure at this time. I don't usually count the links, I look more at what fits the model. If you want, I can count later tonight and reply.
John
Posted: Saturday, March 24, 2018 - 04:29 PM UTC
The CIP panels seen on vehicles in Iraq and Afghanistan, are the used all of the time now?

GTDeath13

Joined: June 12, 2015
KitMaker: 921 posts
Armorama: 919 posts

Posted: Saturday, March 24, 2018 - 04:43 PM UTC
Quoted Text
The CIP panels seen on vehicles in Iraq and Afghanistan, are the used all of the time now?
I have seen photos of vehicles from exercises in Korea, Germany or Poland with the panels, but they did not have the TUSK kit on.
Posted: Thursday, March 29, 2018 - 09:38 PM UTC
Stage 23 to 24 - Upper Hull
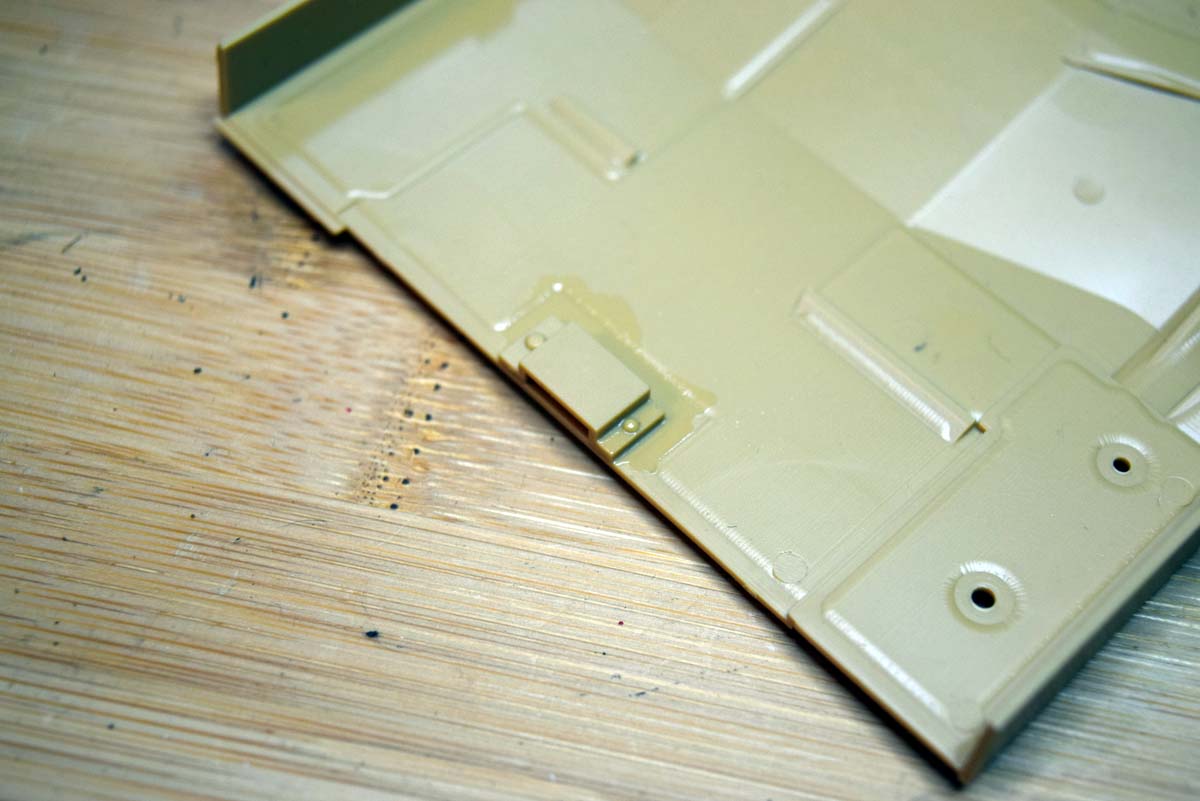
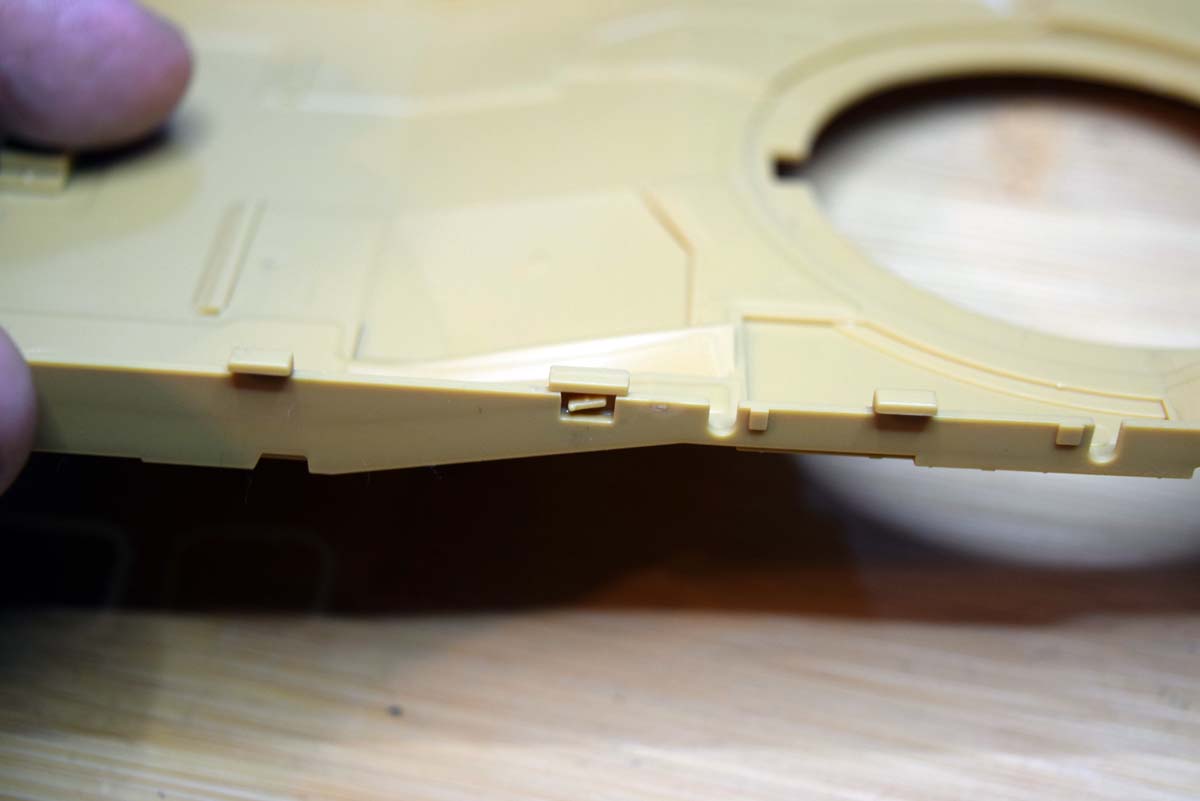
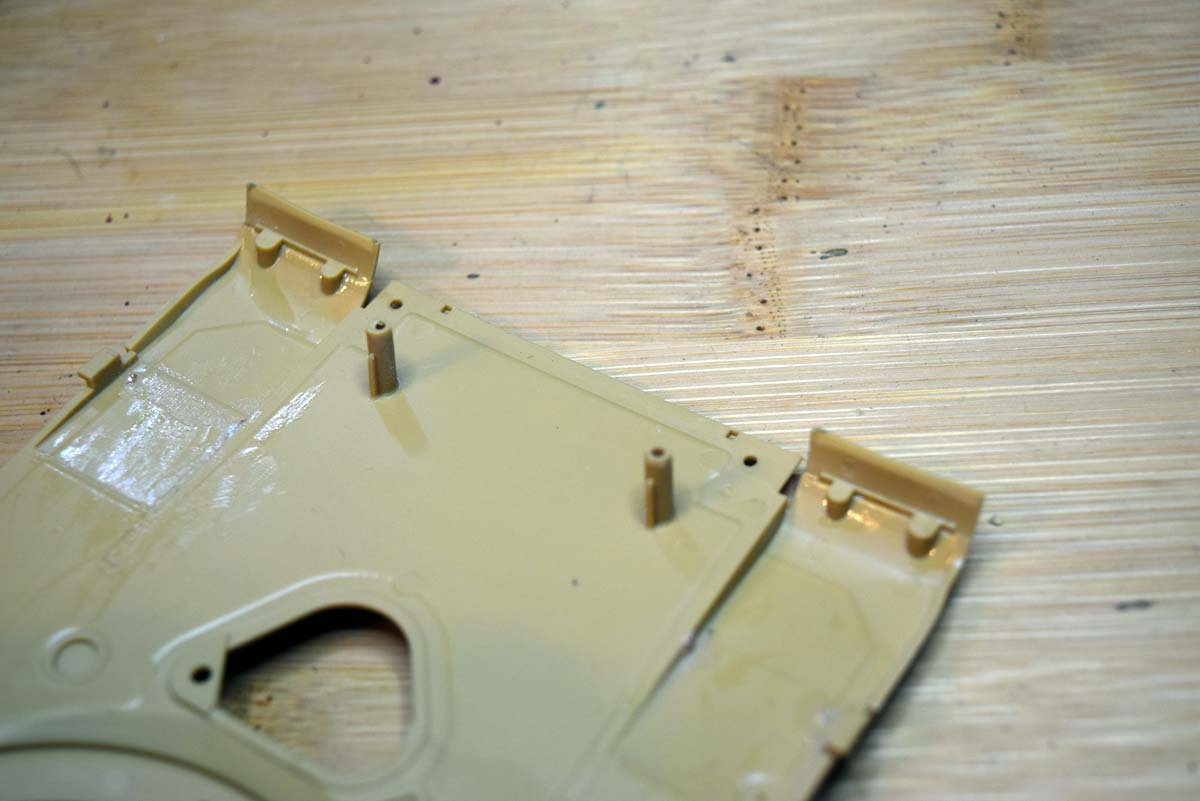
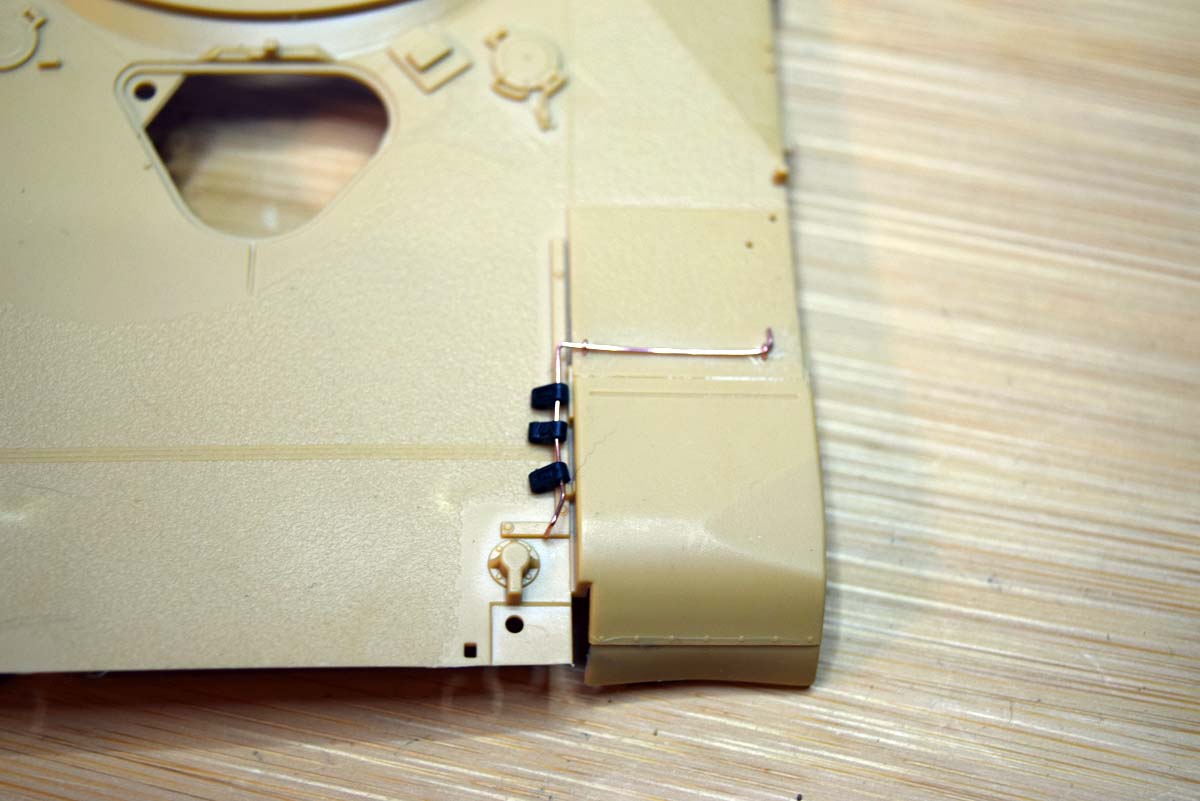
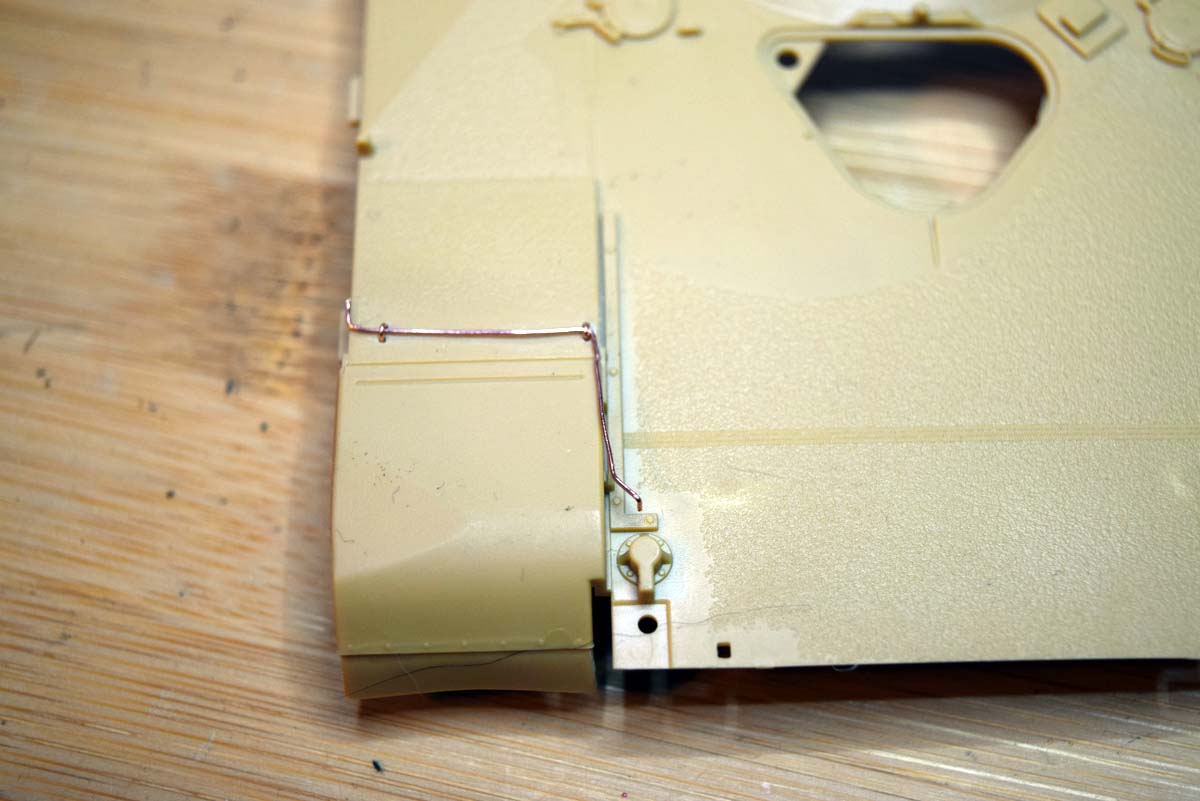
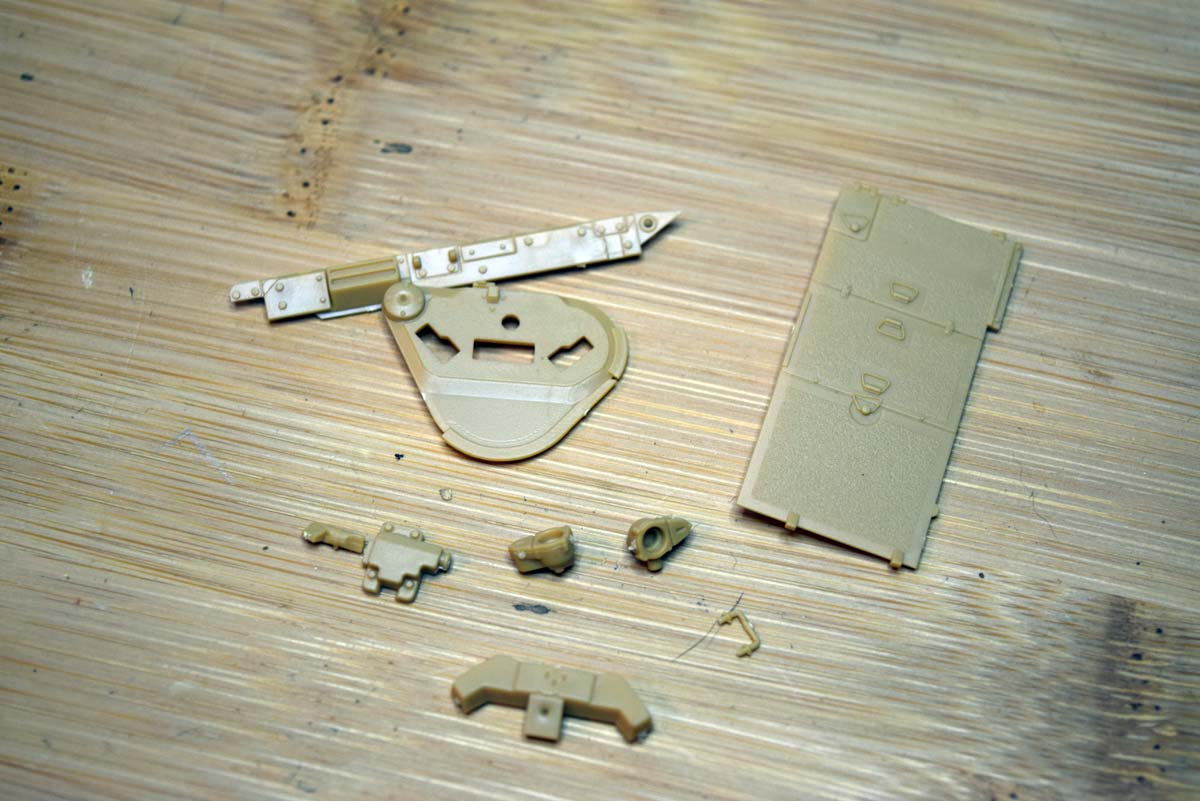
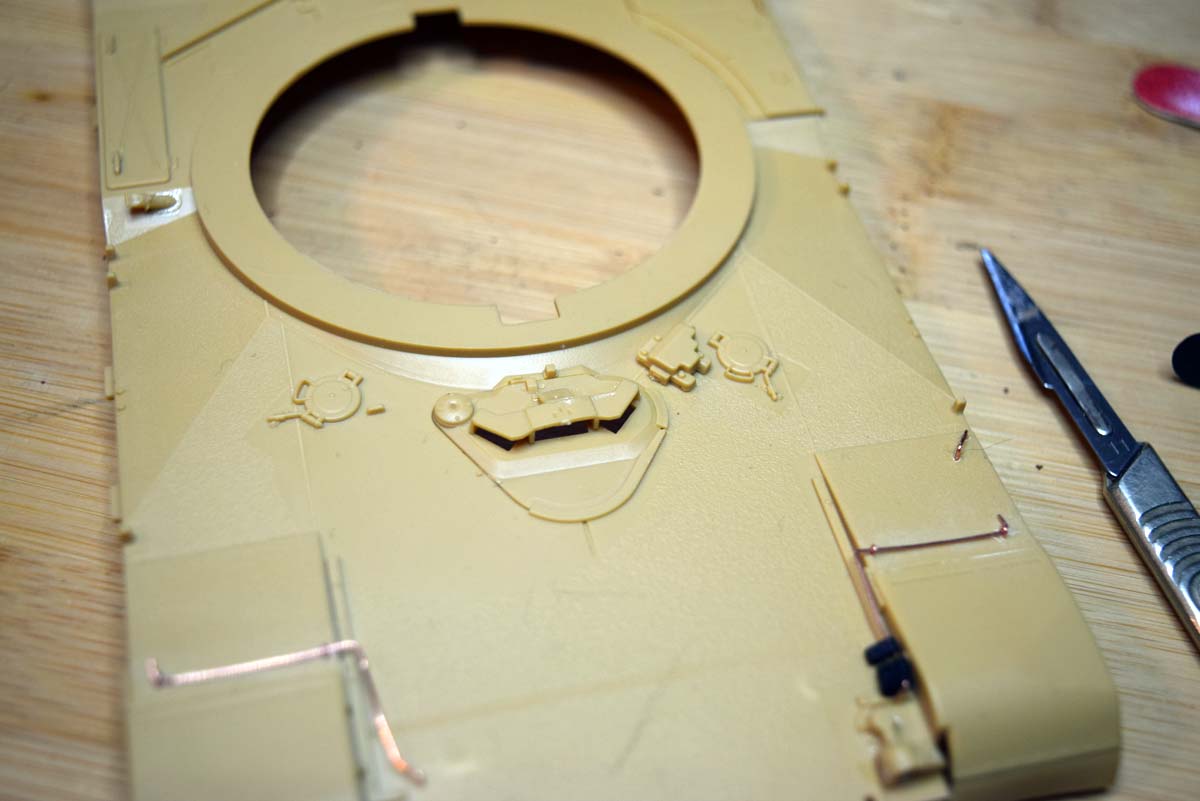
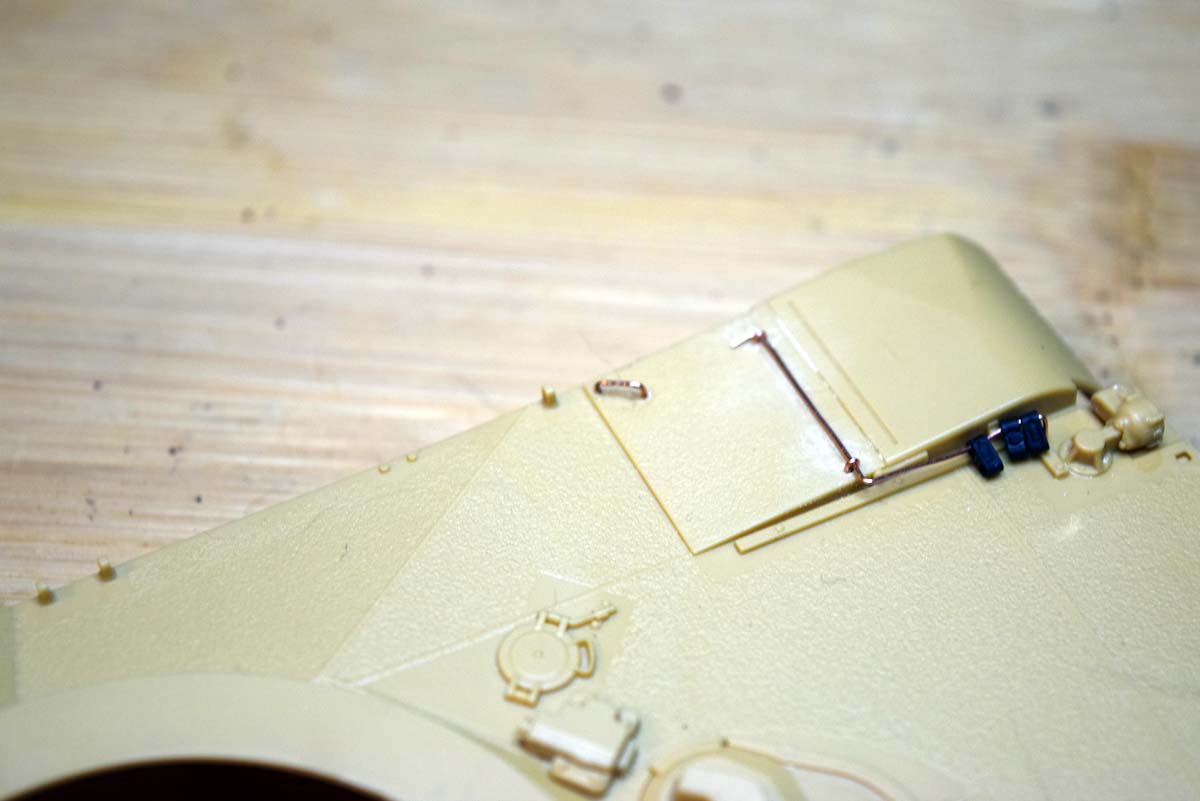
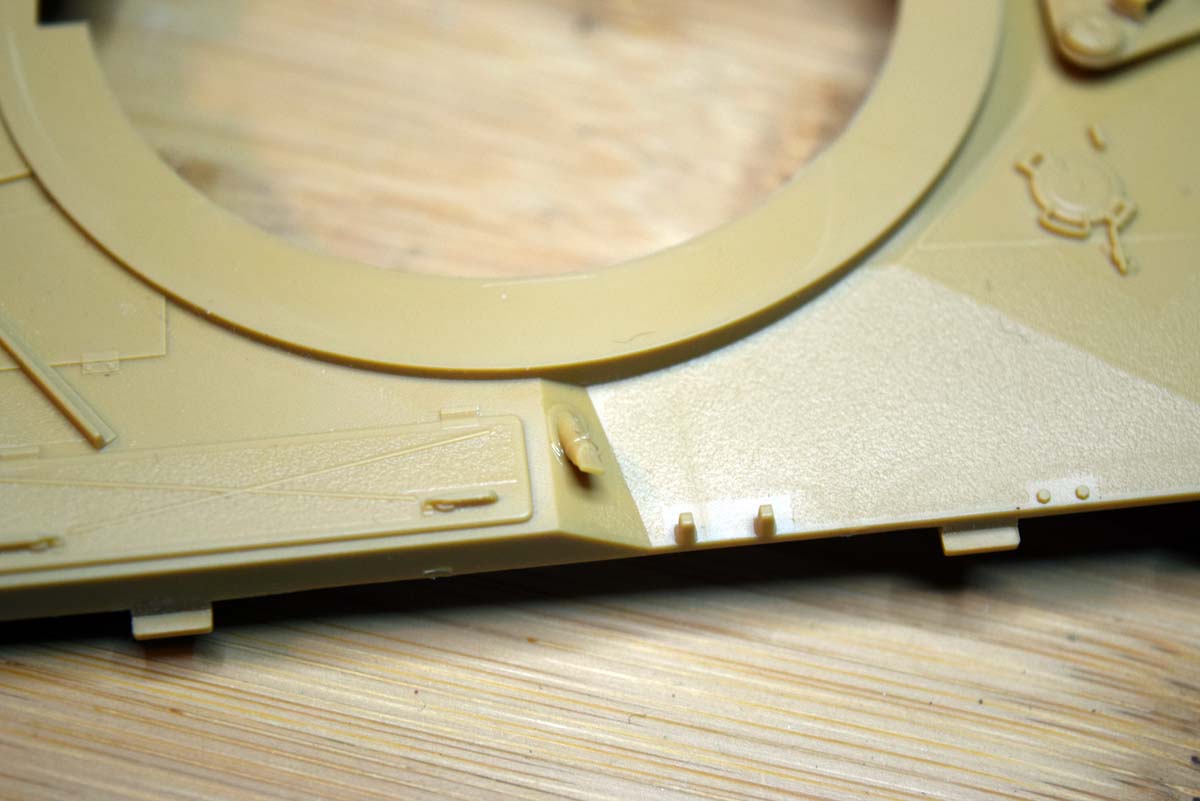
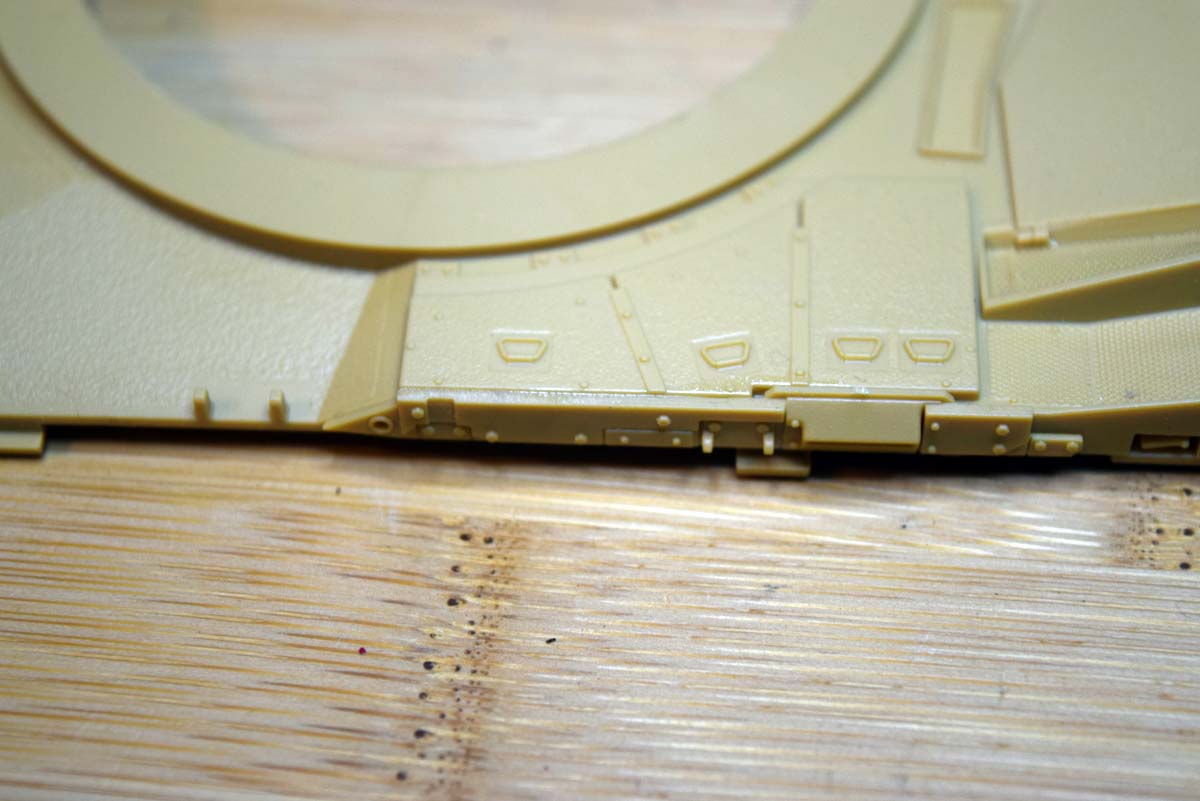
The underside of the upper hull is tackled first, and it has an unusual aspect usually reserved for rug runners. There are two pins at the front of the hull and a catch to attach at the rear, surprise the pins need to be thinned to obtain a fit you can get home. The rubber flaps on the front of the mudguards are solid plastic, but they have a nice look to them of which I approve. The drivers hatch does not have to be assembled closed and I left the periscopes out until after painting because I could. I replaced the grab handle on the left mudguard with a metal one I made due to being unhappy with the kit offering. The lights also have clear lenses and I again left them out until after painting.
The upper and lower hull are then put together, I chose to glue them together as I was not happy with the join the clip system gave me. Another aspect I was not happy with is the lack of sponsons on the hull, something I consider poor in a modern kit offering. The springs for holding the front portion of the upper track guard down is a mix of moulded on detail and photo etch; I was really unhappy with this and so I scrapped off the moulded on detail and made complete springs with 0.5mm wire and secured them with loops made of the same wire. I drilled eight holes in the body and pulled the loops through and secured underneath, I am quite please with myself despite them not being perfect. A towing arm device and light guards are fitted here as well. The textured surface where needed is one of the best I have seen and should provide a good look in the finished model.


Kharkov
Joined: April 09, 2011
KitMaker: 181 posts
Armorama: 175 posts
KitMaker: 181 posts
Armorama: 175 posts

Posted: Friday, March 30, 2018 - 01:03 AM UTC
No Sponsons!! Check the box, you might of accidentally picked up a Tamiya kit by mistake...

Matt
 |


