Campaigns
Where Armorama group builds can be discussed, organized, and updates posted.
40 Years of the Leopard 2 - ACTIVE
BlackWidow
Visit this Community
European Union
Joined: August 09, 2009
KitMaker: 1,732 posts
Armorama: 326 posts
Posted: Friday, August 07, 2020 - 06:25 AM UTC
Thanks for all your updates, Tamas. That's very good news!
At home I have an offical RAL Colour Chart (the "Classic Line" one) which was an old left over from my work. It still does good work for me, though my collegues in the laboratory can't use this edition anymore. I had a look at the tones for the 2A4HU and though it misses RAL 6031, which is a military tone, I found the other 3 in my chart ....

This is how the tones look under cloudy daylight not under artificial light. But I'll try to make a better one this weekend.

Interesting news about the decals, Tamas. I might get one sheet as well. How is ordering from outside Hungary?

Another fine news I've got today for all the freaks of the Finnish Army (that includes me .... ). Perfect Scale Modellbau brings out a conversion set for the Leopard 2A6FIN, based on the Tamiya and Revell kit. This is very tempting for me ....
https://www.perfect-scale.de/de/leopard-2-a6-fi.html

ivanhoe6, I will have a look at my Revell 2A4 and count the track links. Will let you know, so you can check it out.

Have a nice weekend!
Torsten
LikesTanks
Visit this Community
Wales, United Kingdom
Joined: May 07, 2013
KitMaker: 242 posts
Armorama: 234 posts
Posted: Friday, August 07, 2020 - 10:03 AM UTC

Quoted Text

The campaign looks really good so far. Thanks to all who have posted!

I thought that this might be the spot to ask the Leo 2 question.
How many links per track run?
I've got the Border Models Leo2 A5/A6 kit and they forgot to tell you how many links. This is a nice kit though!
Thanks and keep up the inspiring work !


I counted the links of my Revell 2A6's rubber band tracks and came to 82. Hope it helps.
agriamodeling
Visit this Community
Budapest, Hungary
Joined: March 09, 2018
KitMaker: 206 posts
Armorama: 205 posts
Posted: Friday, August 07, 2020 - 06:27 PM UTC
Hi Torsten,

Those cards are great to have, surely! Having the official colors and a typical camo pattern announced, I am now less worried about the painting of a HUN Leo.

It just came to my mind that ONE MONTH after the official presentation the tanks, the Hungarian camo, color codes and a complete decal sheet is available on the market. I believe it is a Guiness World record fact.

About ordering the decals: the HAD models website has English language option. Just check out it. Payment is easy using bank transfer. You can order even as an unregistered “guest” too. In case of fail, just send me a PM and I will help you.
BlackWidow
Visit this Community
European Union
Joined: August 09, 2009
KitMaker: 1,732 posts
Armorama: 326 posts
Posted: Saturday, August 08, 2020 - 07:26 AM UTC
Thanks Tamas, your help will be much appreciated if needed. I'll give the online shop a try soon.

ivanhoe6, same as Richard, I counted 82 track links per side on my Revell 2A4. Meng says 84 track links per side for their 2A7+. I believe you have to test how many will fit not too tied and not too loose.

As mentioned yesterday, I made another photo of the RAL colours for the 2A4HU this morning in my kitchen under bright summer sunshine with 36°C in the shade here .... I think this photo shows the colours better than the other from yesterday.

ivanhoe6
Visit this Community
Wisconsin, United States
Joined: April 05, 2007
KitMaker: 2,023 posts
Armorama: 1,234 posts
Posted: Monday, August 10, 2020 - 05:20 AM UTC
Much thanks to you Richard & Torsten ! A round of virtual beers for you!
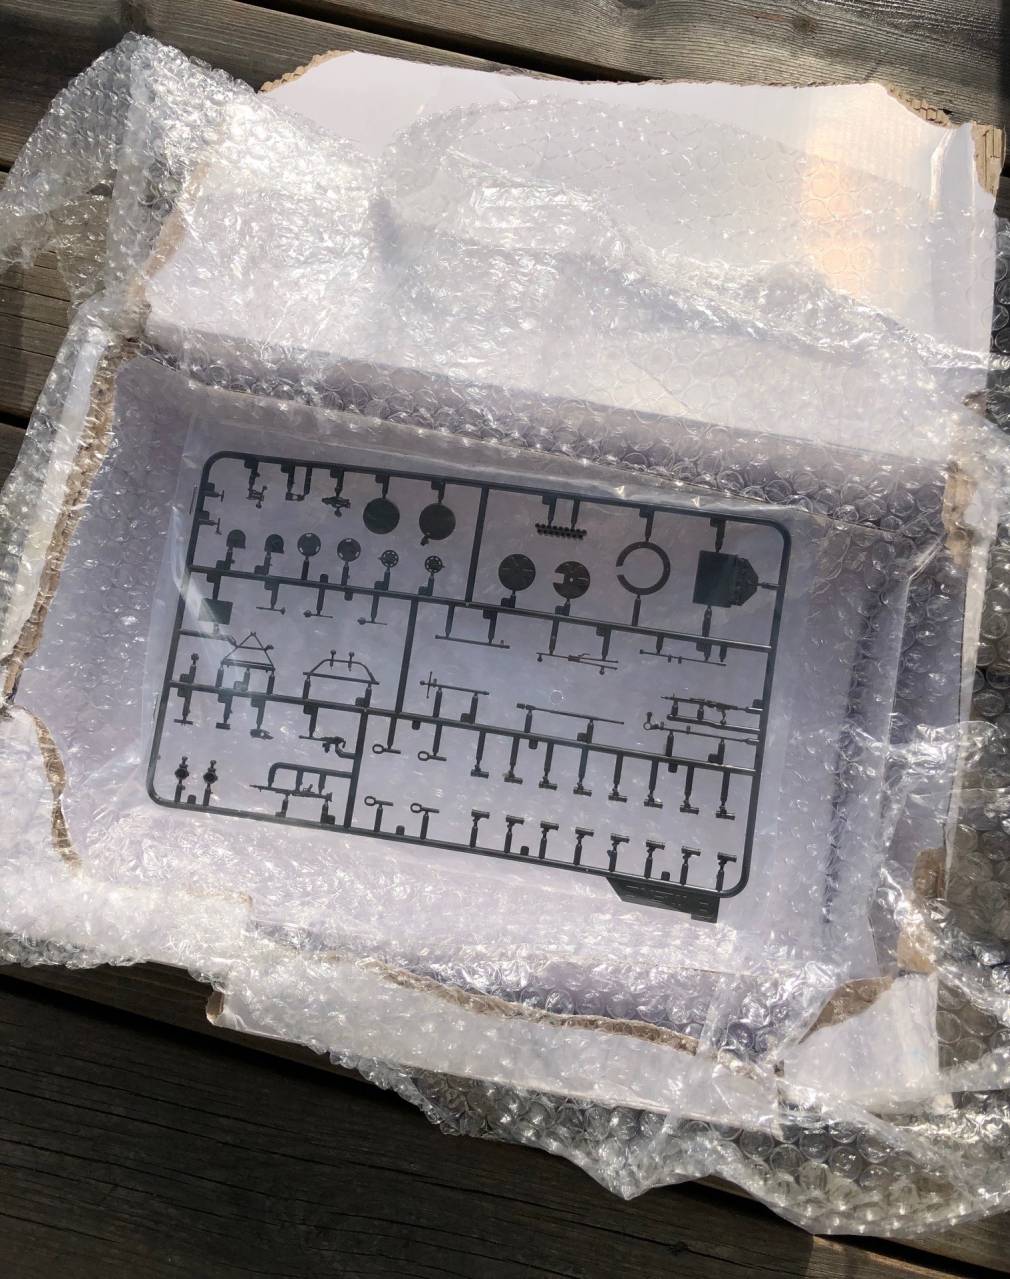
I was going to stop at 80 links and see where I was at. No sense cleaning & gluing too many extras.

Everybody's builds are looking great so far !
Keep posting and sharing !
Thanks again !
agriamodeling
Visit this Community
Budapest, Hungary
Joined: March 09, 2018
KitMaker: 206 posts
Armorama: 205 posts
Posted: Thursday, August 13, 2020 - 08:50 PM UTC

Quoted Text

Breaking news pt2.

The Hungarian "HAD models" Leo 2A4HU decals are on the market, I have also ordered mine.

https://www.hadmodels.com/035038-leopard-2a4hu-in-hungarian-service-from-2020---decal-sheet-135

Cheers,

Tamás


I have just received the 2A4HU decal sheet from HAD Models. Order placement was easy so as the payment. My impressions:
- neatly packed for transport, safe and no tear nor wear on the product
- there is a small decal sheet (link with picture is in my quoted post) that can be used for many different tanks with optional ID plates on the front and back
- there is an A/4 paper in Hungarian and English with some minimal background information: about the user brigade's name and official RAL codes of the camo
- no any decal placement information / drawing
- no camo scheme painting drawing
- no suggestion of any paint manufacturer code against the RAL codes
- only a weblink to official and non-official walkaround pictures for reference

As I checked all insignia, marks, ID plates etc... are present, compared to available photos of tank ID "H > 21912" so it is OK.

My personal judgement is about 6.5/10 due to multiple options but missing drawings because other decals from HAD Models were supplied with reference photos. The missing paint color codes (eg Tamiya, AK, Gunze etc...) is not negative point, it is always a personal judgement to identify the best matching one.

As I have the reference pics already I am satisfied so far.

Tamás
agriamodeling
Visit this Community
Budapest, Hungary
Joined: March 09, 2018
KitMaker: 206 posts
Armorama: 205 posts
Posted: Friday, August 14, 2020 - 02:02 AM UTC
By this time I could talk to the HAD Models owner and he confirmed that this decal is the early-bird release for the impatient modelers, in a limited qty. He is currently working on an extended instruction sheet with reference photos and expects to market it within 3-4 weeks.

Happy modeling!

Tamás
agriamodeling
Visit this Community
Budapest, Hungary
Joined: March 09, 2018
KitMaker: 206 posts
Armorama: 205 posts
Posted: Monday, August 17, 2020 - 06:05 PM UTC
Hi,

I could find lot of time at the weekend and finally had a significant progress on the Revell Leopard 2A5 kit.

It is still not the easiest kit to build (with the difficulties faced during the hull assy which I overcame with Tamiya putty finally), but this time I reached a good state to apply Voyager photo etch upgrade parts to the engine department on the hull. The Voyager set is designed for the Tamiya Leo 2A5 kit but thanks to the modern engineering in Japan and in Germany, the PE set 99% fits to the Revell kit, too.

As usual, it is very time consuming process with many tiny parts applied and by now the hull looks busy and nicely detailed. One of the interesting upgrades was - although it is not fully visible on the photos - the hull side openings have extreme small padlocks attached. Some PE parts were ignored (for example the pioneer tools's clamps) as I am not on that perfectionist but finally I am very happy so far with the result.


I also made a mistake on the right sided towing cable as I followed the Voyager instruction and that does not include one of the clamps so I did not use it and cut the cable shorter than needed. Actually it was partly my mistake because during the hull fixing the right sided molded-on mark was completely sanded off. So when this cable was finished and I turned to the left sided one, I have faced that the cable shall be attached to a second clamp. That is why the two cables are not equally long.

To have some break during the various hull PE parts until the glue cures, I applied some PE parts to the gunner's area. I also wanted to assemble the turret back side baskets when realised that the PE parts are provided but not even mentioned in the Voyager manual. I think the reason is that the guys at Voyager oversized these parts as they are at least 15% bigger than the plastic basket made by Revell. I do not think that the Tamiya basket would be that big, as in that case it would simply not fit to the turret. However, I might be wrong.

Next time I will finish the hull front part (way less PE to apply) and turn to the turret.

Happy modelling!

Tamás
BlackWidow
Visit this Community
European Union
Joined: August 09, 2009
KitMaker: 1,732 posts
Armorama: 326 posts
Posted: Friday, August 21, 2020 - 07:15 AM UTC
Good progress on your 2A5PL, Tamas! That are a lot of PE parts! As I mainly build aircraft I try to avoid PE parts where they are not necessary, too tiny or will not been seen later. But on your build they will all be seen in the end.

Torsten

Btw, I have already switched to the Land-Lease Campaign and build a soviet P-39 Airacobra. But of course I will have a look in here as often as I can ....
GazzaS
#424
Visit this Community
Queensland, Australia
Joined: April 23, 2015
KitMaker: 4,648 posts
Armorama: 2,248 posts
Posted: Friday, August 21, 2020 - 10:34 AM UTC
Very nice, Tamas!
agriamodeling
Visit this Community
Budapest, Hungary
Joined: March 09, 2018
KitMaker: 206 posts
Armorama: 205 posts
Posted: Friday, August 21, 2020 - 07:45 PM UTC
Hi Torsten and Gary,

Thank you very much!

Tamás
agriamodeling
Visit this Community
Budapest, Hungary
Joined: March 09, 2018
KitMaker: 206 posts
Armorama: 205 posts
Posted: Sunday, August 23, 2020 - 11:19 PM UTC
Hi everybody,

Last Thursday and Friday we had national bank holidays in Hungary so I could spend some good time on the model and applied many PE detail up parts. The most interesting ones were the MG3 machine gun and the half-round flat part assembly for the gunner's hatch. The original part in the Revell kit is acceptable but the PE parts are way nicer and look realistic.

The other interesting replacement was the 2+2 handle bars on the turrent front sides. The Voyager set provided 2-2 U shaped holders for each handle bars and I had to make the bars themselves. I dediced to use some Evergreen rounded platic rods (no info about diameter) and bent them on both ends. I like the current status, although there are still many more parts to replace / detail-up.


The next day my grandson arrived and to avoid lost parts, I turned to the Trumpeter tracks. The cut and cleaning was not very difficult but the assembly... well, I had to figure out to set up a process. The issue was to insert the small middle part linking together the tracks. As small it is, as difficult to handle and push into its placement. Inserting the very first took me more than 5 minutes. The next was a total damage for the small linking part. Finally I used a 0.042" diameter E6 guitar string to support the middle part and the tracks during insertion and it worked. After the insertion the both side links were easy to apply. By this process I "designed" and cut-off an about 5-6 cm long, 1.5 - 2 mm wide rod from an expired credit card and used it as the support tool. At the end of a 6 hours session I could assemble one side track using 78 indi tracks. The Trumpeter instruction counts 80 indies but I decided to try the track first and verify the proper length. The third, last day it took me only 3 hours to repeat the entire process and I had two tracks on the table.


One track was carefully inserted under the fender and I have realised that the sprocket is not wide enough to the Trumpeter track set. As I am unsure which is correct width (Revell sprocket vs Trumpeter working tracks) I will compare the indie tracks against the Meng 2A4 and 2A7 kits as well as to the Border Model 2A5 kit.
But that is for later this week.

Tamás

PS: the beer can in the background is "sponsorship" from a Polish friend of mine. I drunk it during the building of this Polish tank.
agriamodeling
Visit this Community
Budapest, Hungary
Joined: March 09, 2018
KitMaker: 206 posts
Armorama: 205 posts
Posted: Monday, August 24, 2020 - 06:49 PM UTC
Update on the track width issue: yesterday I have compared the widened sprocket to the original Revell track and for my biggest surprise it was perfectly matching in every size. Also tried to compare to Border Models track (unassembled) and it was also a good match. Than I suspected that I missed a part from the sprocket which should have widen it.
This morning I had a look to the Revell assy instructions and the sprocket was originally glued as per the instructions. As a conclusion: I think the sprocket was too narrow anyway.

Tamás
BlackWidow
Visit this Community
European Union
Joined: August 09, 2009
KitMaker: 1,732 posts
Armorama: 326 posts
Posted: Tuesday, August 25, 2020 - 06:25 AM UTC
Another fine update, Tamas! Your 2A5PL is coming together nicely. That sprocket wheel issue is really annoying, I guess. Have both sprockets that problem? Can you widen it a bit with some plastic profiles? Or order a replacement at Revell's Abteilung X? At least you can hide a bit of that issue under the skirts.

Still haven't tried polish beer. Keep that can for later when your build is finished and place it side by side! For my 2A4GR I don't have greek beer. Here I have only some czech and latvian beer. But both countries are no Leopard 2 users. Okay, Latvia has some spanish Leopard 2E from time to time ....
Spearhead01
Visit this Community
Norrbotten, Sweden
Joined: August 27, 2019
KitMaker: 79 posts
Armorama: 77 posts
Posted: Wednesday, August 26, 2020 - 04:22 AM UTC
Thank you MENG! Outstanding customer support!


So I´m back on track(s) with my swedish Strv 121

/Freddy
agriamodeling
Visit this Community
Budapest, Hungary
Joined: March 09, 2018
KitMaker: 206 posts
Armorama: 205 posts
Posted: Wednesday, August 26, 2020 - 05:38 PM UTC
Hi Torsten,

The sprocket issue is solved with some plastic inserted into them. Now they both fit to the tracks.
I will have some silence in the coming weeks as I will travel to Poland for some work. That beer is drunk already but surely will seek for other sources to get some in the evenings.

Tamás
agriamodeling
Visit this Community
Budapest, Hungary
Joined: March 09, 2018
KitMaker: 206 posts
Armorama: 205 posts
Posted: Wednesday, August 26, 2020 - 07:02 PM UTC

Quoted Text

Thank you MENG! Outstanding customer support!


So I´m back on track(s) with my swedish Strv 121

/Freddy


Hi Freddy,

That is really good service! I had similar experience with Heller, Takom and Revell in the past, it is good to know that others also take it seriously.

Good luck with the kit!

Tamás
kunjuro
Visit this Community
Philippines
Joined: October 27, 2013
KitMaker: 520 posts
Armorama: 488 posts
Posted: Wednesday, August 26, 2020 - 09:18 PM UTC
Hey folks. I've been out of the loops these past few weeks for the GB, my apologies. I already finished the build process for the Hobby Boss Leopard 2A4. However, I lost quite a bit of motivation after struggling with some fit issues and the multiple pin ejection marks and gaps with the turret bustle. Last night, I was painting a Marder 1A2 and decided to do the Leopard as well to make the most of my time with the painting session.

Here's a quick photo before and after she got a coat of paint. I'll take better photos once I actually get camo applied. I'm glad that there are plenty of builds here to draw inspiration from!

BlackWidow
Visit this Community
European Union
Joined: August 09, 2009
KitMaker: 1,732 posts
Armorama: 326 posts
Posted: Thursday, August 27, 2020 - 02:39 AM UTC
Lots of good news here, guys!

Welcome back, Freddy! So far I have made good experience with the customer service of Revell and Eduard.

Good to hear, that you could fix that sprocket issue, Tamas! Happy travels and a safe return! I'll be on holidays also soon but this year I changed my plans and travel in Germany instead of going to Lithuania. Hopefully better luck next year.

Also welcome back, Nigel! Good progress so far.

Torsten
agriamodeling
Visit this Community
Budapest, Hungary
Joined: March 09, 2018
KitMaker: 206 posts
Armorama: 205 posts
Posted: Thursday, August 27, 2020 - 06:09 AM UTC
Thank you Torsten, I will care of myself!

Nigel, your 2A4 build looks very clean and nicely assembled. Just continue, the bad stuff is behind already, camo painting is the last step to the real fun: weathering. I am sure you will enjoy that!

Tamás
Spearhead01
Visit this Community
Norrbotten, Sweden
Joined: August 27, 2019
KitMaker: 79 posts
Armorama: 77 posts
Posted: Friday, September 04, 2020 - 09:25 AM UTC
Baby steps but still some progress


/Freddy
Spearhead01
Visit this Community
Norrbotten, Sweden
Joined: August 27, 2019
KitMaker: 79 posts
Armorama: 77 posts
Posted: Sunday, September 06, 2020 - 03:22 AM UTC
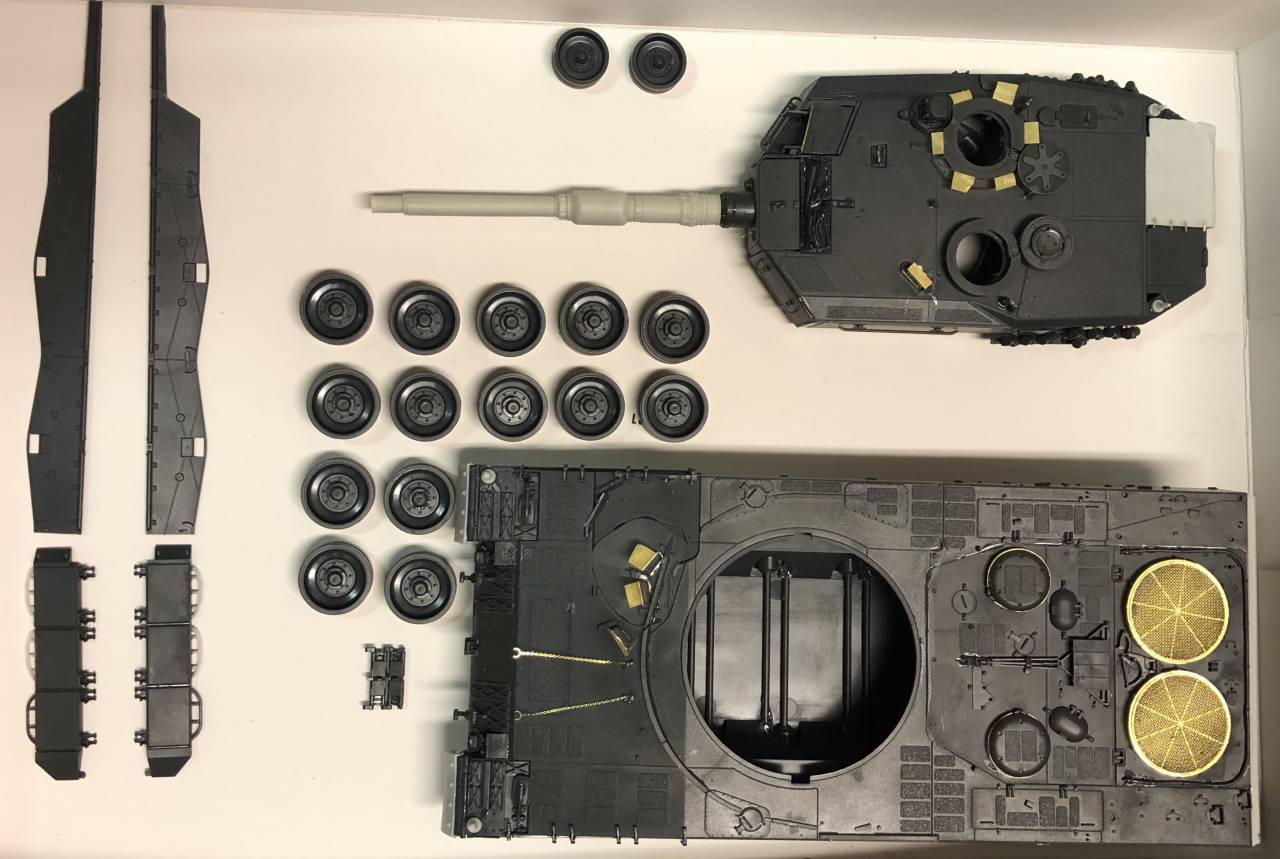
Time to prime!

I have regained the initiative so I will make the deadline!

Cheers!

/Freddy


BlackWidow
Visit this Community
European Union
Joined: August 09, 2009
KitMaker: 1,732 posts
Armorama: 326 posts
Posted: Sunday, September 06, 2020 - 03:45 AM UTC
The longest way starts with the first step, Laotse once said. And you're well on the way, Freddy! Good progress, so far. And don't worry about the deadline ....

Torsten

Btw., where in Norrbotten do you live? Last year I stayed one day in Haparanda, coming from Oulu and heading for Rovaniemi the other day.
Spearhead01
Visit this Community
Norrbotten, Sweden
Joined: August 27, 2019
KitMaker: 79 posts
Armorama: 77 posts
Posted: Thursday, September 10, 2020 - 07:27 AM UTC
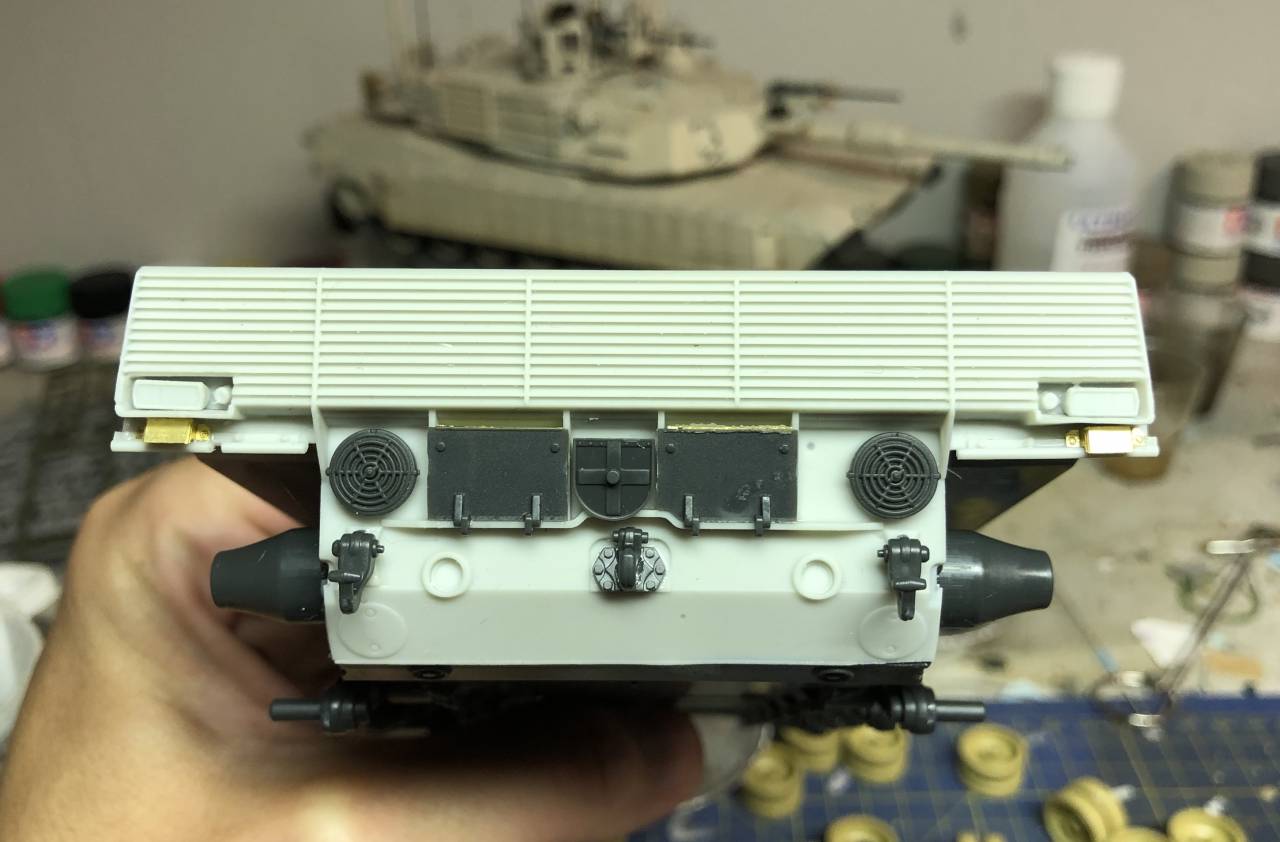
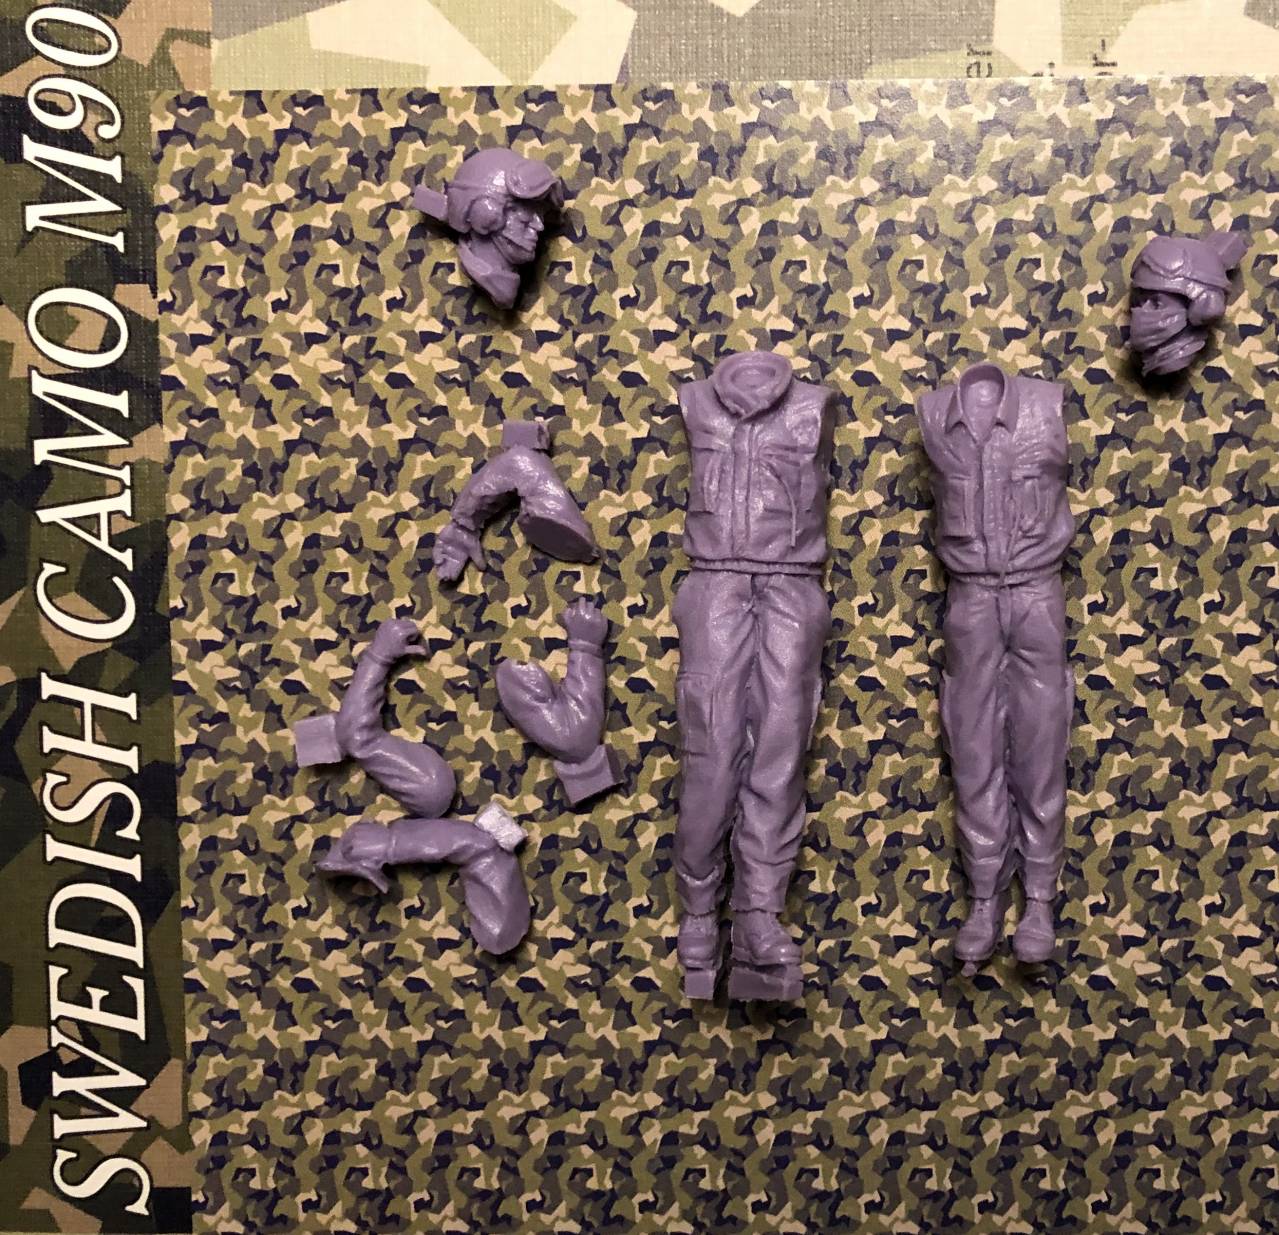
Figures for the Strv 121. Not sure I approve the cut of their uniforms though... Not very accurate for swedish AFV uniforms. Decals from Crossdelta. I often use Crossdelta, really nice quality.


/Freddy

PasiAhopelto
Visit this Community
Uusimaa, Finland
Joined: October 01, 2016
KitMaker: 514 posts
Armorama: 171 posts
Posted: Sunday, September 20, 2020 - 01:48 AM UTC
Turret's almost assembled:


I'll have to prepare anti slip pads. There's sticker sheet in conversion kit that needs to be covered with texture paint first.