_GOTOBOTTOM
Constructive Feedback
For in-progress or completed build photos. Give and get contructive feedback!
Tamiya Challenger 2 Op’ Telic, OOB
iwatajim
Visit this Community
United Kingdom
Joined: December 15, 2008
KitMaker: 246 posts
Armorama: 171 posts
Posted: Friday, September 25, 2020 - 02:13 AM UTC
Hello again,

Ok so onto a nice simple single colour paint job after the Berlin Brigade shenanigans.

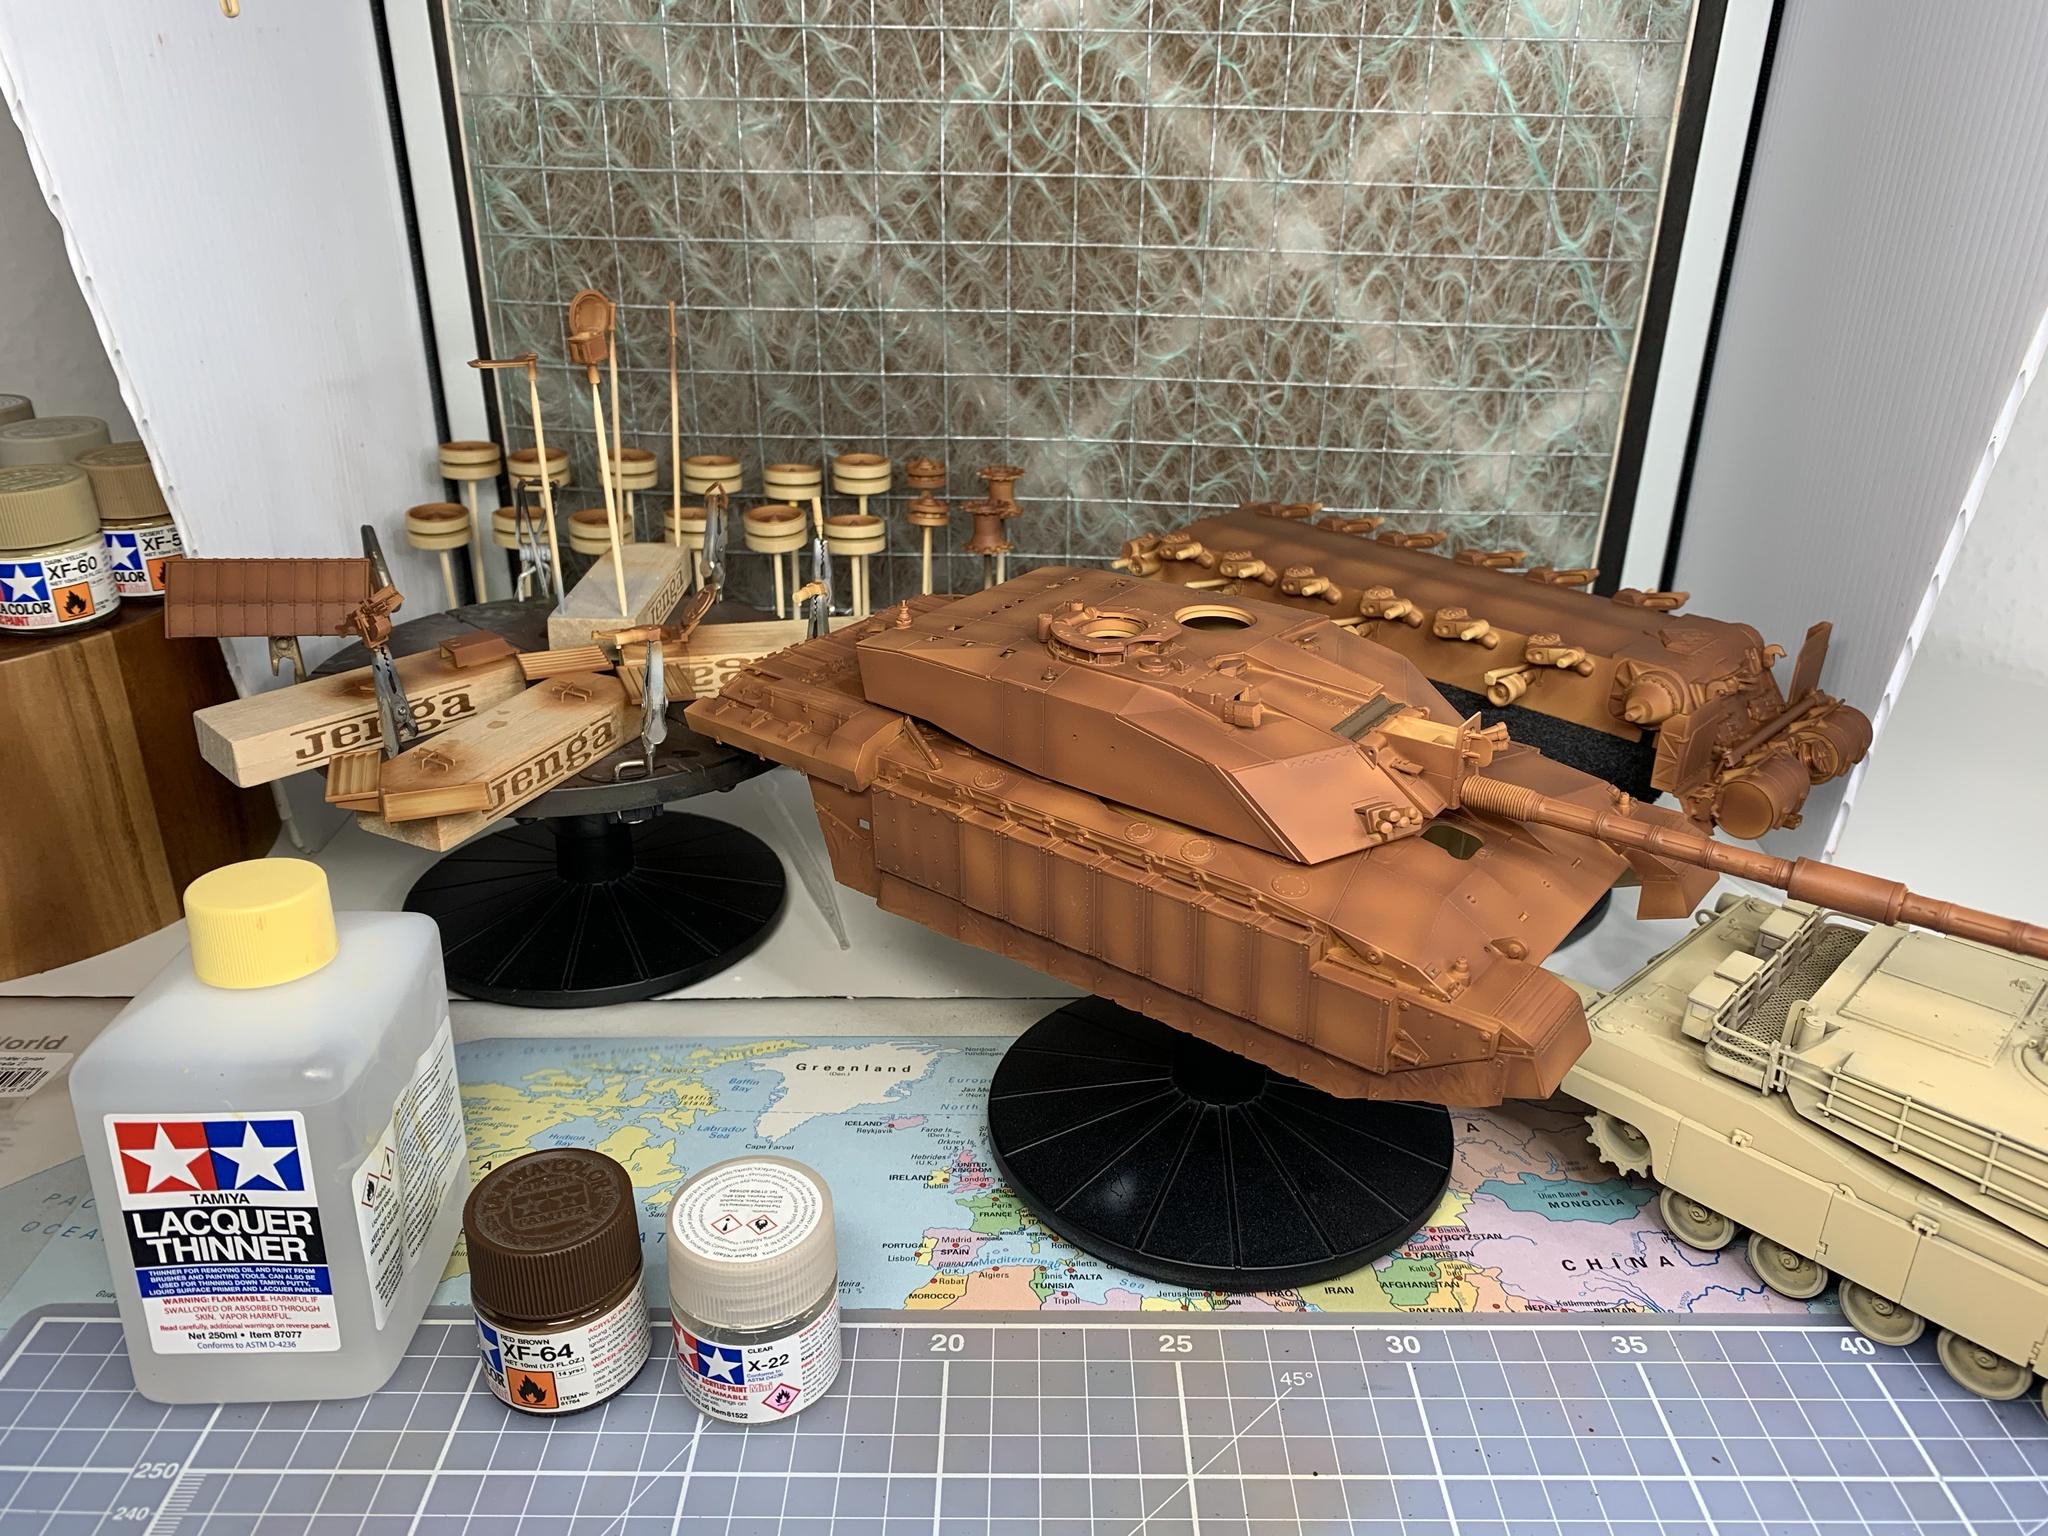
Tamiya Challenger 2, mostly built, rather badly, almost 15 years ago then boxed up before paint and forgotten. Fished out and resurrected as a test bed for various painting and weathering tequniques.

So, I have primed with Tamiya red brown, mixed 50:50 with Tamiya lacquer thinner. Then a highlight coat with Tamiya Buff, 70:30 thinner to paint. Both mixes had some x22 gloss clear added for a more satin finish. I’m working on the ratios for the clear, probably using 5 parts paint to 1 part clear at the moment. The reasoning being less gloss needed for clear coat later, as tamiya paint can be very matt.

The plan is 25 Tamiya Dark Yellow, 25 Tamiya Desert Yellow, 50 Tamiya White, with the above ratio of x22 gloss clear and thinned at least 70:30 thinner to paint and see if it comes out anything like it does in my head...

I know the “correct colour” is much debated, but this base colour will change significantly with the weathering, and the pics I have studied go from an almost orange hue through to a very light sand, so I’m not too worried about it.

I’m just playing around with these techniques and thought some of you may be interested in the process.

And the old abrams makes another appearance as the test bed for the test bed!

Thanks, Jim.


Panzer_Modeler
Visit this Community
New Mexico, United States
Joined: May 19, 2020
KitMaker: 419 posts
Armorama: 217 posts
Posted: Friday, September 25, 2020 - 07:16 AM UTC
This looks like its going to be a great build! Im definitely gonna follow along!
phil2015
Visit this Community
Illinois, United States
Joined: July 27, 2015
KitMaker: 502 posts
Armorama: 325 posts
Posted: Friday, September 25, 2020 - 12:06 PM UTC

Can't wait to see how the yellow + desert yellow comes out. I obsess over paint colors - not so much getting the right match when I'll probably never know what it really was, but getting something that is believable.

iwatajim
Visit this Community
United Kingdom
Joined: December 15, 2008
KitMaker: 246 posts
Armorama: 171 posts
Posted: Saturday, September 26, 2020 - 07:33 AM UTC
Thanks Ezra, great to have you on board again.

Yeah, me too Phil. I’m trying to get something that looks good on the shelf as well as photos under daylight leds.

So the abrams has been through the red brown, buff, yellow process once already. Have just started again but this time I have tried half with a further highlight using Tamiya Deck Tan, a lighter colour again. I’m hoping this means less coats of the sand mix.

I will lay down the sand evenly over the abrams and see what the difference is, maybe front half with the aforementioned mix, and the back half with a little yellow green added for another experiment, but for now here is the abrams in its half and half guise!

Thanks for looking, J.


Johnnych01
Visit this Community
England - South West, United Kingdom
Joined: June 29, 2019
KitMaker: 604 posts
Armorama: 506 posts
Posted: Saturday, September 26, 2020 - 08:43 AM UTC
Great start on the Chally 2 Jim. Impressive approach to the methodical way you get to the worn desert colour. I'm thinking of doing a Chally 2 also, but standard NATO UK cam. Will be watching with interest.
iwatajim
Visit this Community
United Kingdom
Joined: December 15, 2008
KitMaker: 246 posts
Armorama: 171 posts
Posted: Sunday, September 27, 2020 - 08:42 AM UTC
Hi John, thanks mate, the Chally 2 is my favourite modern tank for sure, and I really fancy a megatron like bosscat is doing just now.

I have decided to put the deck tan highlight on the Challenger after finding the yellow mix works much better over it than just the buff when painting the test abrams.

You can see the abrams in the background with its sand coat on. The mix ended up being around 1:1:3.5ml of dark yellow, desert yellow and white, with a few drops of yellow green added too, probably six or seven drops. I tried straight yellow before but found it too orange a finish.

Anyway, I quite like it as a base and I have enough mixed so it will be going on the challenger next.

Cheers, Jim.

iwatajim
Visit this Community
United Kingdom
Joined: December 15, 2008
KitMaker: 246 posts
Armorama: 171 posts
Posted: Monday, September 28, 2020 - 07:28 AM UTC
That’s the sand colour on, the one I mixed and posted above, just with some more x22 clear added. The pic is showing it lighter than it actually is but you get the idea.

I’ve added each progress pic to the first post in this thread to make it easier to follow the changes.

Clear coat for the decals next and some detail painting. And try to decide what colour to use for the canvas side skirts...

Thanks for checking in.

phil2015
Visit this Community
Illinois, United States
Joined: July 27, 2015
KitMaker: 502 posts
Armorama: 325 posts
Posted: Tuesday, September 29, 2020 - 09:33 AM UTC

I'm always amazed at how dark some of the colors I use to lighten up other colors are - deck tan and buff are both pretty dark and often need even more washing out.

I'm a little unclear on your ratio? Is it:
1 part yellow
1 part desert yellow
3.5 parts white?

the 3.5ml at the end has me a little confused.

The mix looks good and I like how the preshading shows through here.

iwatajim
Visit this Community
United Kingdom
Joined: December 15, 2008
KitMaker: 246 posts
Armorama: 171 posts
Posted: Tuesday, September 29, 2020 - 10:05 AM UTC
Hi Phil, thanks.

Yeah, I could have been clearer. I use pipettes to measure out hence the millilitres. So the mix is;

1ml dark yellow
1ml desert yellow
3.5ml white
6 or 7 drops of yellow green.

Which basically still means a ratio of 1:1:3.5, dark yellow:desert yellow:white, if you know what I mean. I added the drops of yellow green with a stainless steel manual paint stirrer. Hope that helps!

I’ve painted the canvas with a mix of buff and deck tan funnily enough. And have been making the recognition panels for the front of the turret and painting the white on all the panels, quite time consuming! Road wheel rubber next, and then the tracks...

Onwards!

Thanks again.
iwatajim
Visit this Community
United Kingdom
Joined: December 15, 2008
KitMaker: 246 posts
Armorama: 171 posts
Posted: Saturday, October 03, 2020 - 01:56 AM UTC
Hi all,

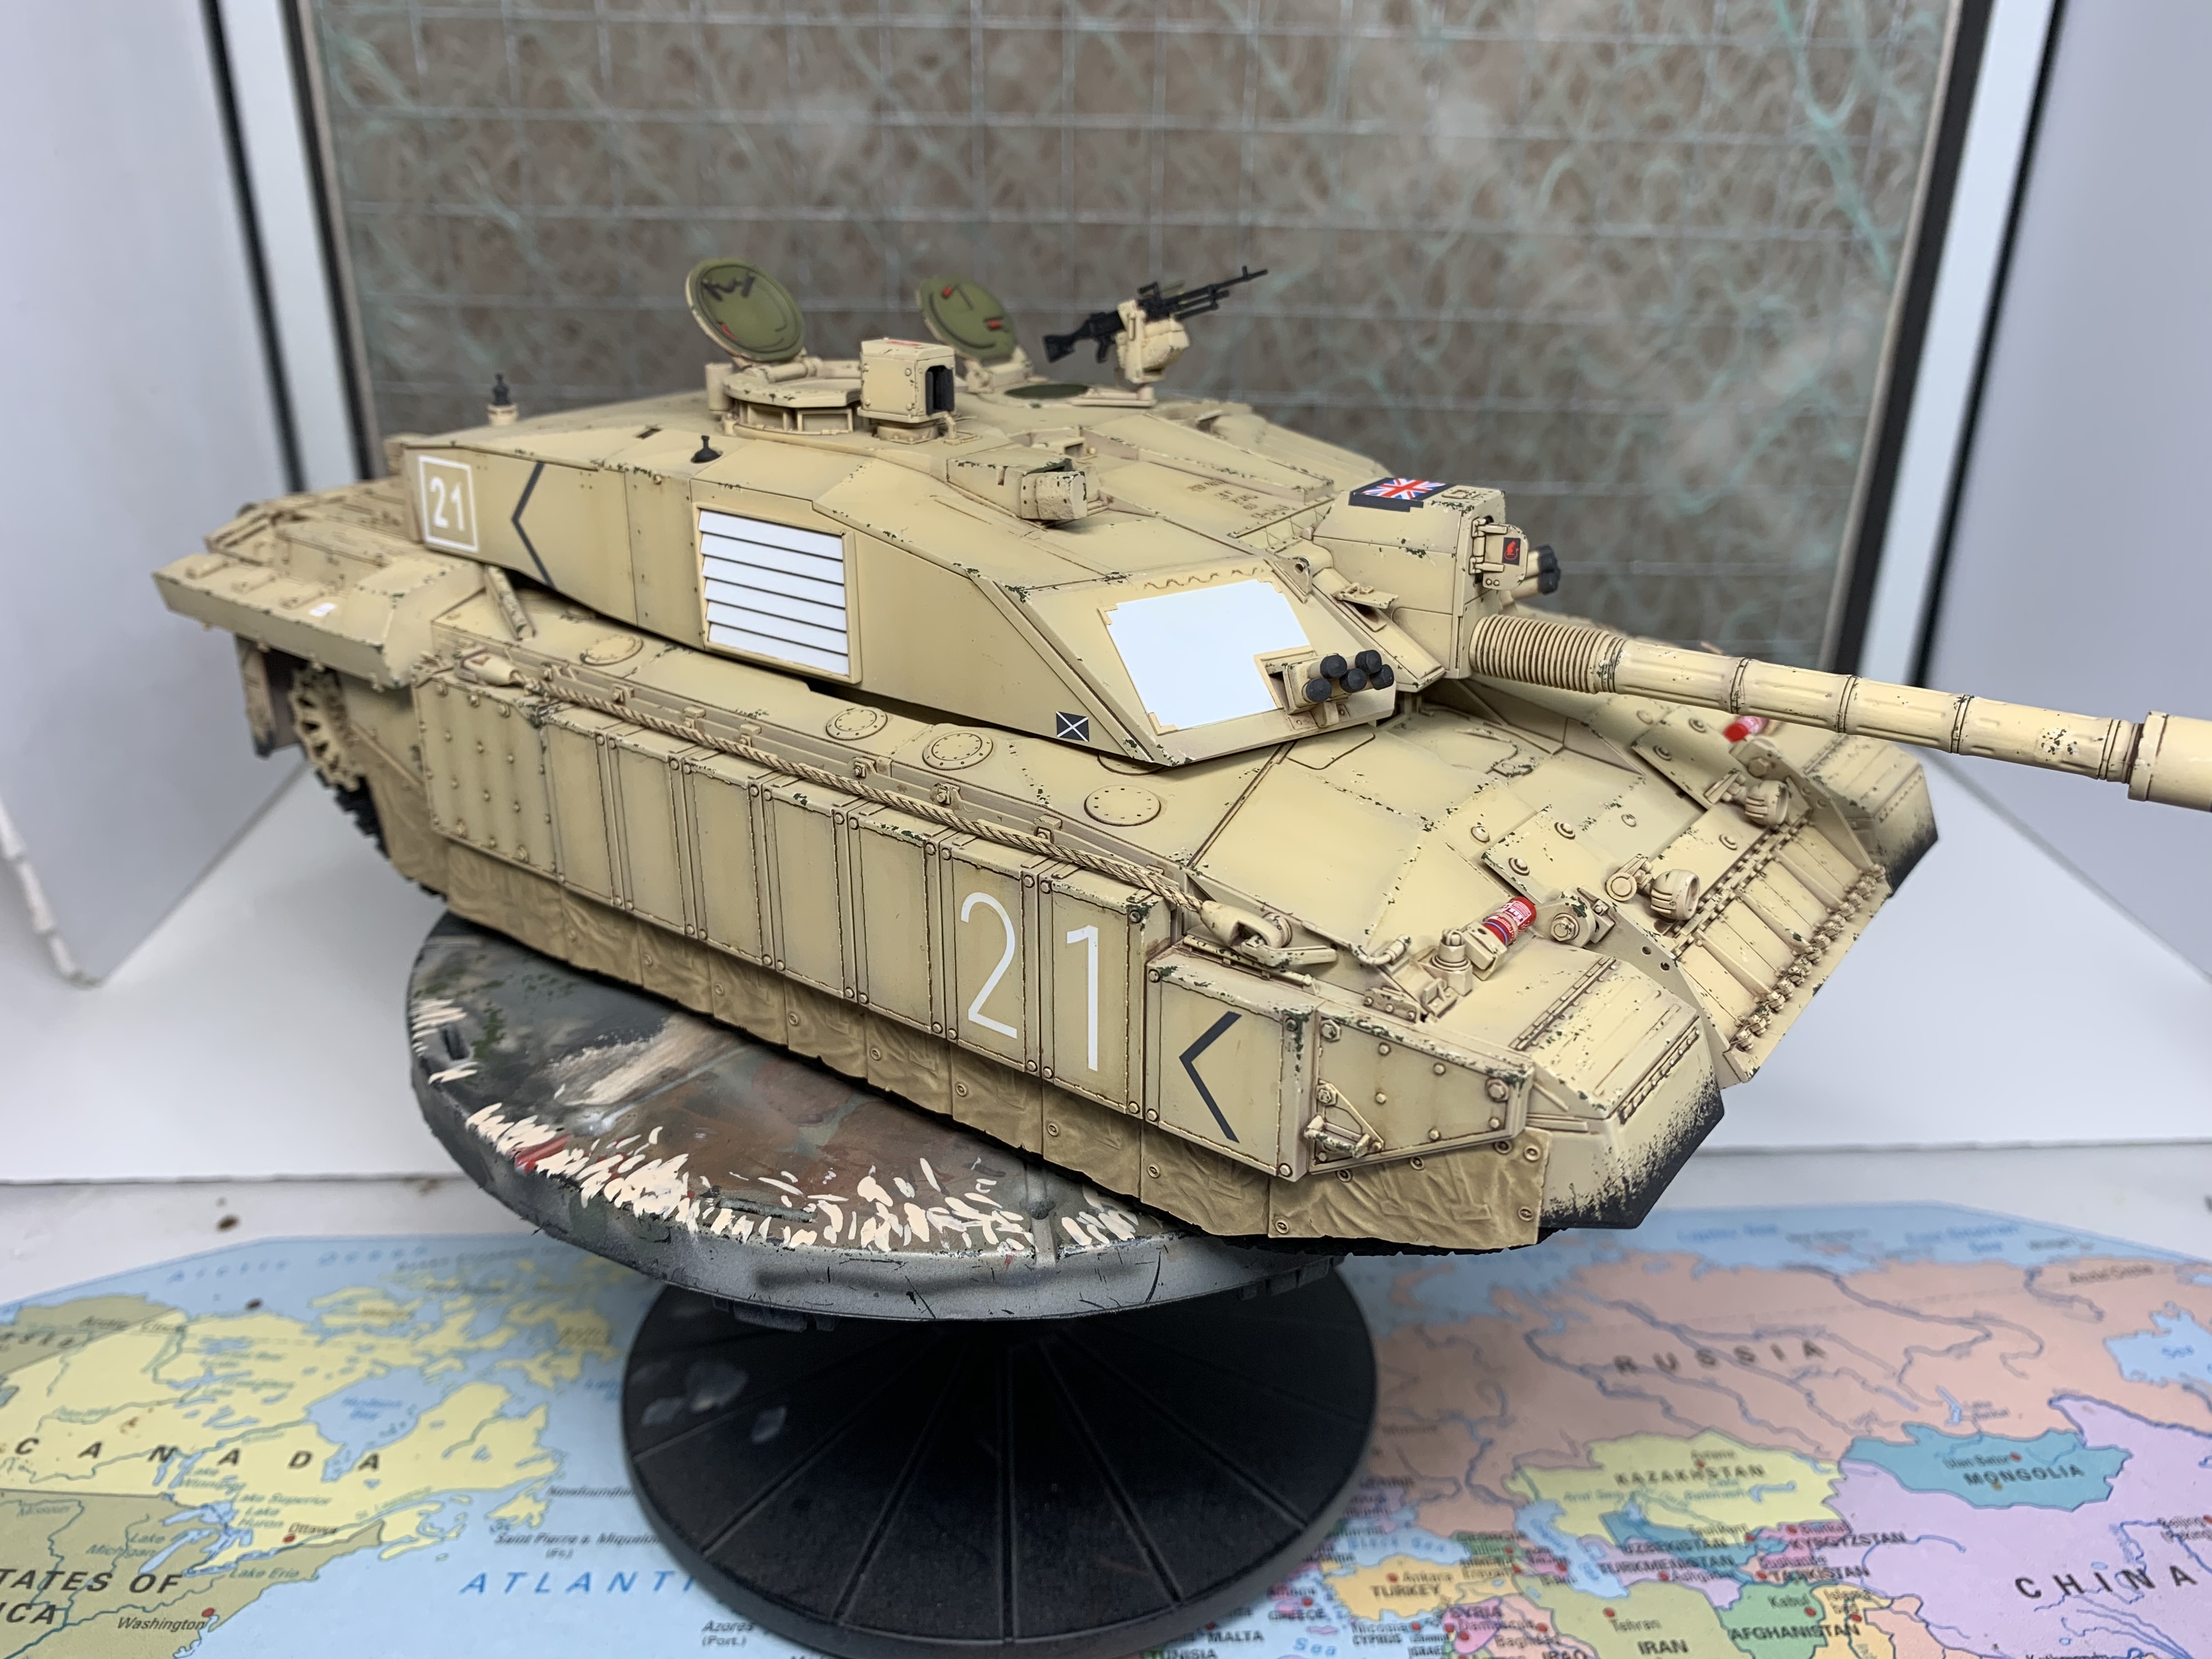
That’s the gloss coat on, Tamiya x22 sprayed 50:50 with Tamiya lacquer thinner retarder type, at 15psi, and most of the decals on. The decals were a bit temperamental and didn’t enjoy being manipulated and some broke bits off so have tried to make the best of them. Just got the decals for the fire extinguishers and the loaders mg ammo box to go.

Also spayed the canvas skirts with a mix of buff and deck tan, they look the same as the main colour but they don’t have the yellow tone to them in the flesh.

I added the recognition panels temporarily for the pic. The front one was made using the sheet of plastic card supplied in the kit, with the template in the instructions, and the brackets were made with bits of masking tape.

My favourite decal is the desert rat on the gun sight door!

Cheers, J.

Pic added to first post again for continuity.

metalhead85
#519
Visit this Community
New York, United States
Joined: March 24, 2006
KitMaker: 219 posts
Armorama: 169 posts
Posted: Saturday, October 03, 2020 - 02:56 AM UTC
Excellent job so far Jim. I love the preshading technique, it really adds depth to the model when done properly. Keep up the good work !


Rich
iwatajim
Visit this Community
United Kingdom
Joined: December 15, 2008
KitMaker: 246 posts
Armorama: 171 posts
Posted: Saturday, October 03, 2020 - 07:28 AM UTC
Thanks Rich.

Some of the technique I’ve used on this is a first for me. I usually only highlight the middle of panels but I have used pieces of card to mask one side of a panel and spray light to dark. Sort of modulation, mostly on upper surfaces, mixed with normal panel highlighting on the sides of the hull. Seems to work on the nice angular Chally!

Thanks again, Jim.
Johnnych01
Visit this Community
England - South West, United Kingdom
Joined: June 29, 2019
KitMaker: 604 posts
Armorama: 506 posts
Posted: Saturday, October 03, 2020 - 09:06 AM UTC
Great progress Jim, and alot quicker than that mind boggling Berlin Chieftain. I think the colour you have settled on looks first rate. Looking forward to more.

Can't help out as much on this one, as I have only ever been in one to fire it...but they are impressive beasts...not the best that money can buy.... But it's intimidating when your stood in front of one lol. Keep up the great work mate.
iwatajim
Visit this Community
United Kingdom
Joined: December 15, 2008
KitMaker: 246 posts
Armorama: 171 posts
Posted: Saturday, October 03, 2020 - 10:19 PM UTC
Thanks John,

Yeah this is very different from the Berlin scheme contortions! Once again lucky you for getting up close and personal with one of these.

Happy with the colour so far, will see what subsequent weathering does to it...

Thanks again, J.
Panzer_Modeler
Visit this Community
New Mexico, United States
Joined: May 19, 2020
KitMaker: 419 posts
Armorama: 217 posts
Posted: Tuesday, October 06, 2020 - 04:10 PM UTC
Looks great so far! The color looks really good as well!
iwatajim
Visit this Community
United Kingdom
Joined: December 15, 2008
KitMaker: 246 posts
Armorama: 171 posts
Posted: Wednesday, October 07, 2020 - 04:50 AM UTC
Thanks Ezra!

Just finished the detail painting. Smoke discharged caps black, aerial bases black, mg ammo box khaki drab, mg black initial coat, commander and loaders hatch insides dark green with handles red, inside of open optic doors dark green, fire extinguishers red and decals on, etc...

Now I can gloss coat the decals and newly painted parts and start the weathering.

Cheers, J.

Johnnych01
Visit this Community
England - South West, United Kingdom
Joined: June 29, 2019
KitMaker: 604 posts
Armorama: 506 posts
Posted: Wednesday, October 07, 2020 - 06:14 AM UTC
Very nice Jim. All the little attention on detail on those small little forgotten bits will make it stand out
iwatajim
Visit this Community
United Kingdom
Joined: December 15, 2008
KitMaker: 246 posts
Armorama: 171 posts
Posted: Sunday, October 11, 2020 - 07:15 AM UTC
Thanks John! All the small things take the time but I think it will look better than being all buttoned up.

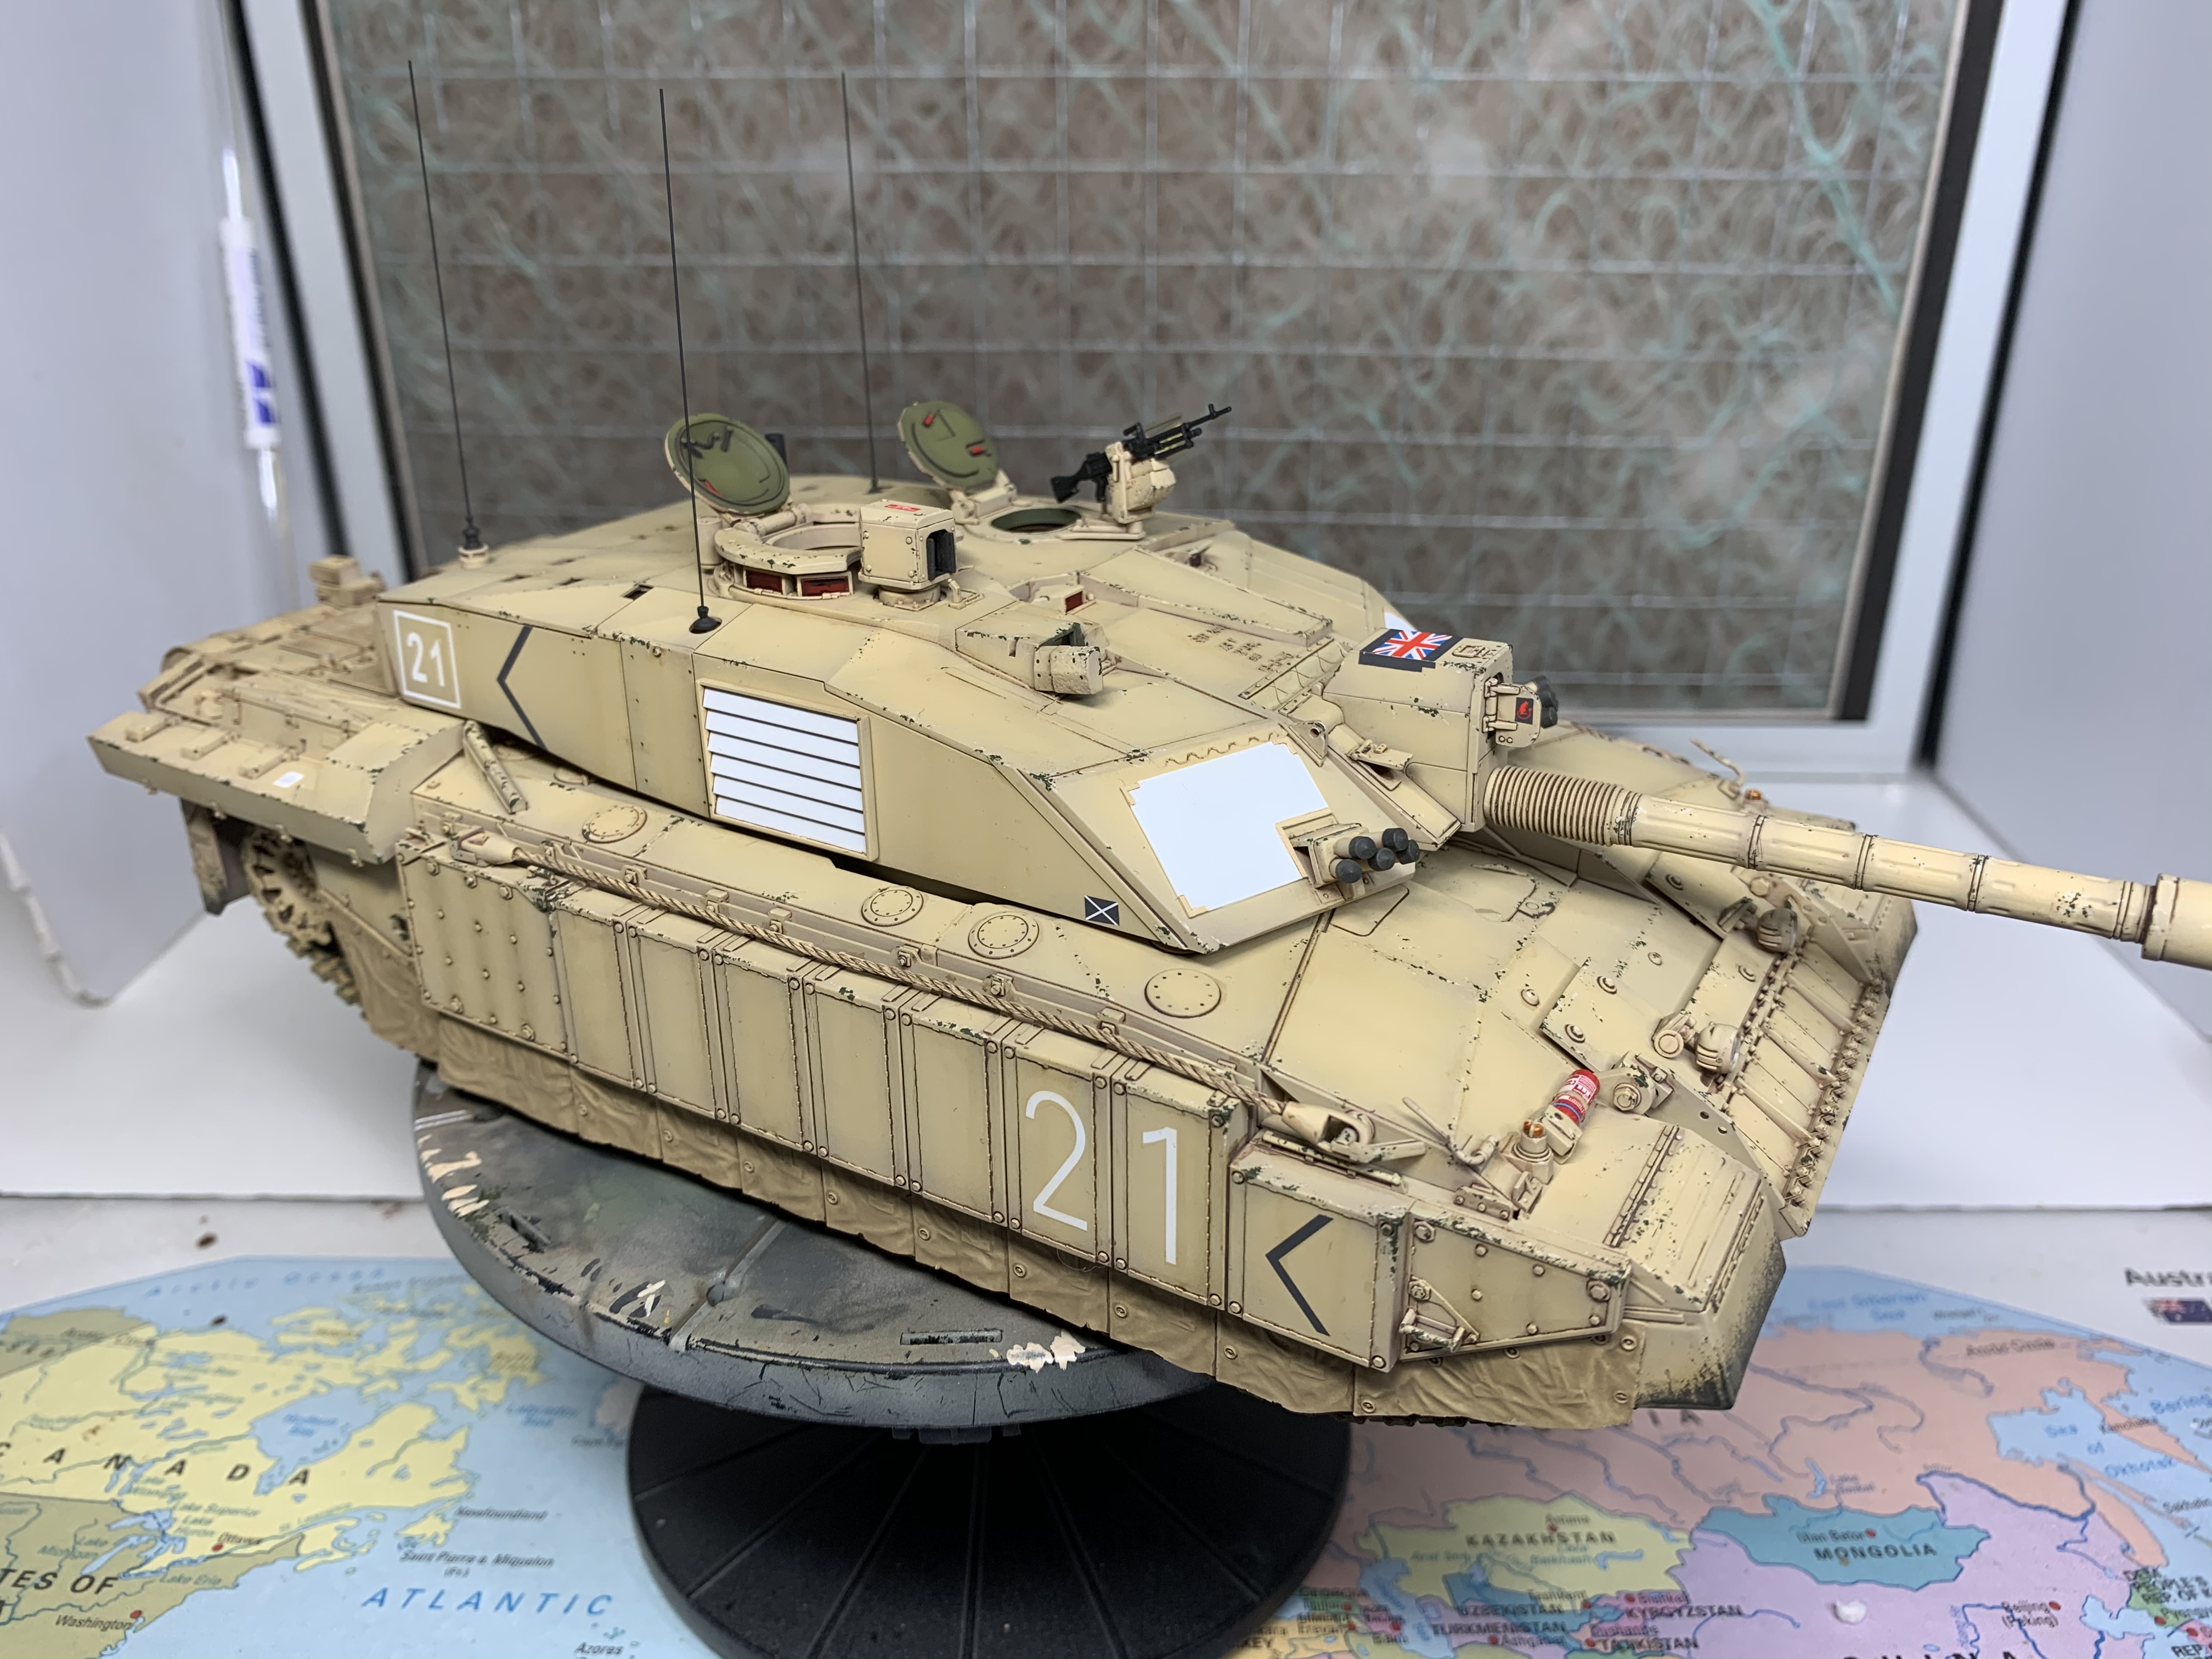
That’s the wash on. AK OIF&OEF. First I’ve used this and I quite like it. As always I like to use the wash as a slight filter too and it has changed the tone of the yellow slightly, which I am fairly happy with. Still in gloss.

Everything is just dry fitted just now, only a couple of pieces left off for the pics.

Another pic in the first post for continuity too...

Here we go,


iwatajim
Visit this Community
United Kingdom
Joined: December 15, 2008
KitMaker: 246 posts
Armorama: 171 posts
Posted: Tuesday, October 13, 2020 - 08:54 AM UTC
And here we go again.

I have further weathered with streaking using AK Streaking Grime, and added chipping using Vallejo Russian Green to represent the original green under the sand paint, my first go at chipping using sponge. I tried not to go too heavy with each process.

I have also started further enhancing the side skirts but have only done the rear section on the left side. Going to sleep on it and see if I still like it in the morning...

Also sponged on rubber black on the rear mud flaps, which will tone down with the addition of pigments on the running gear, which is the next job. Will also decide in the morning if I want to do this on the front mudguards too.

And still in gloss, need to spray matt.

Thanks for looking, J.


Johnnych01
Visit this Community
England - South West, United Kingdom
Joined: June 29, 2019
KitMaker: 604 posts
Armorama: 506 posts
Posted: Tuesday, October 13, 2020 - 09:23 AM UTC
It's looking nice and mean Jim. Well done.
dylans
Visit this Community
British Columbia, Canada
Joined: March 05, 2009
KitMaker: 394 posts
Armorama: 380 posts
Posted: Tuesday, October 13, 2020 - 03:32 PM UTC
that looks fantastic Jim
iwatajim
Visit this Community
United Kingdom
Joined: December 15, 2008
KitMaker: 246 posts
Armorama: 171 posts
Posted: Friday, October 16, 2020 - 07:52 AM UTC
Thanks John, Thanks Dylan, as always your kind words are very much appreciated!

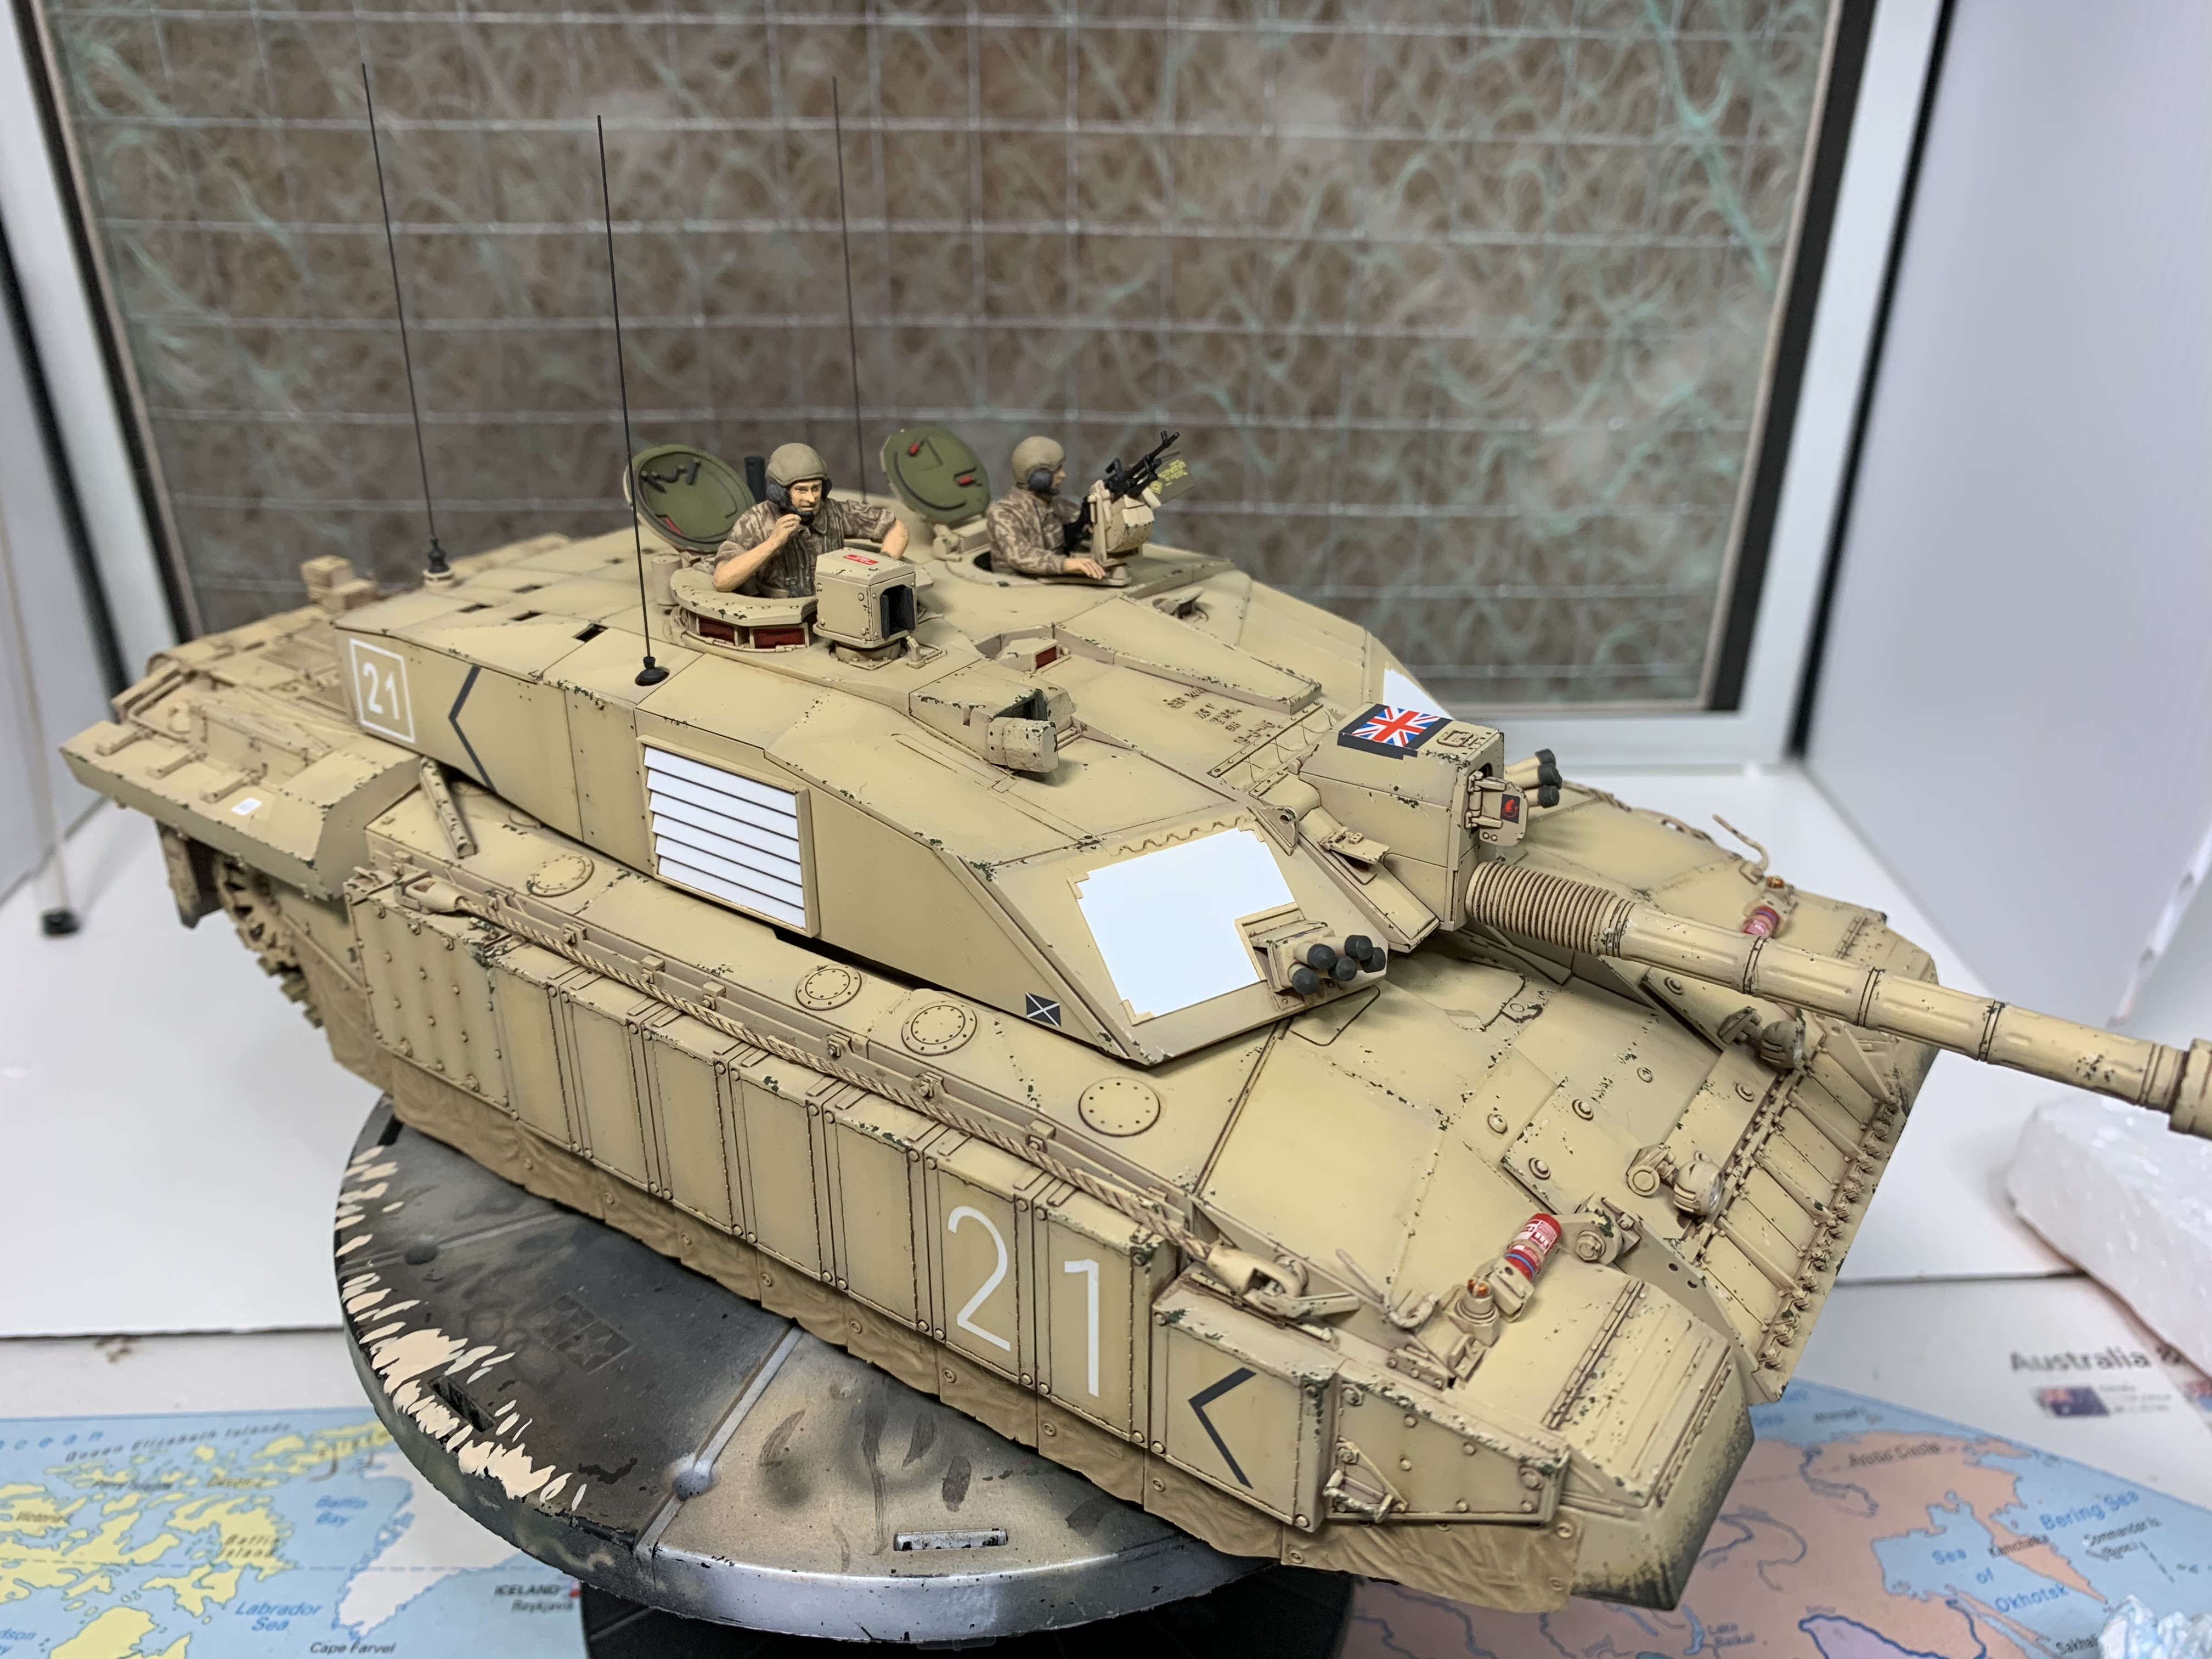
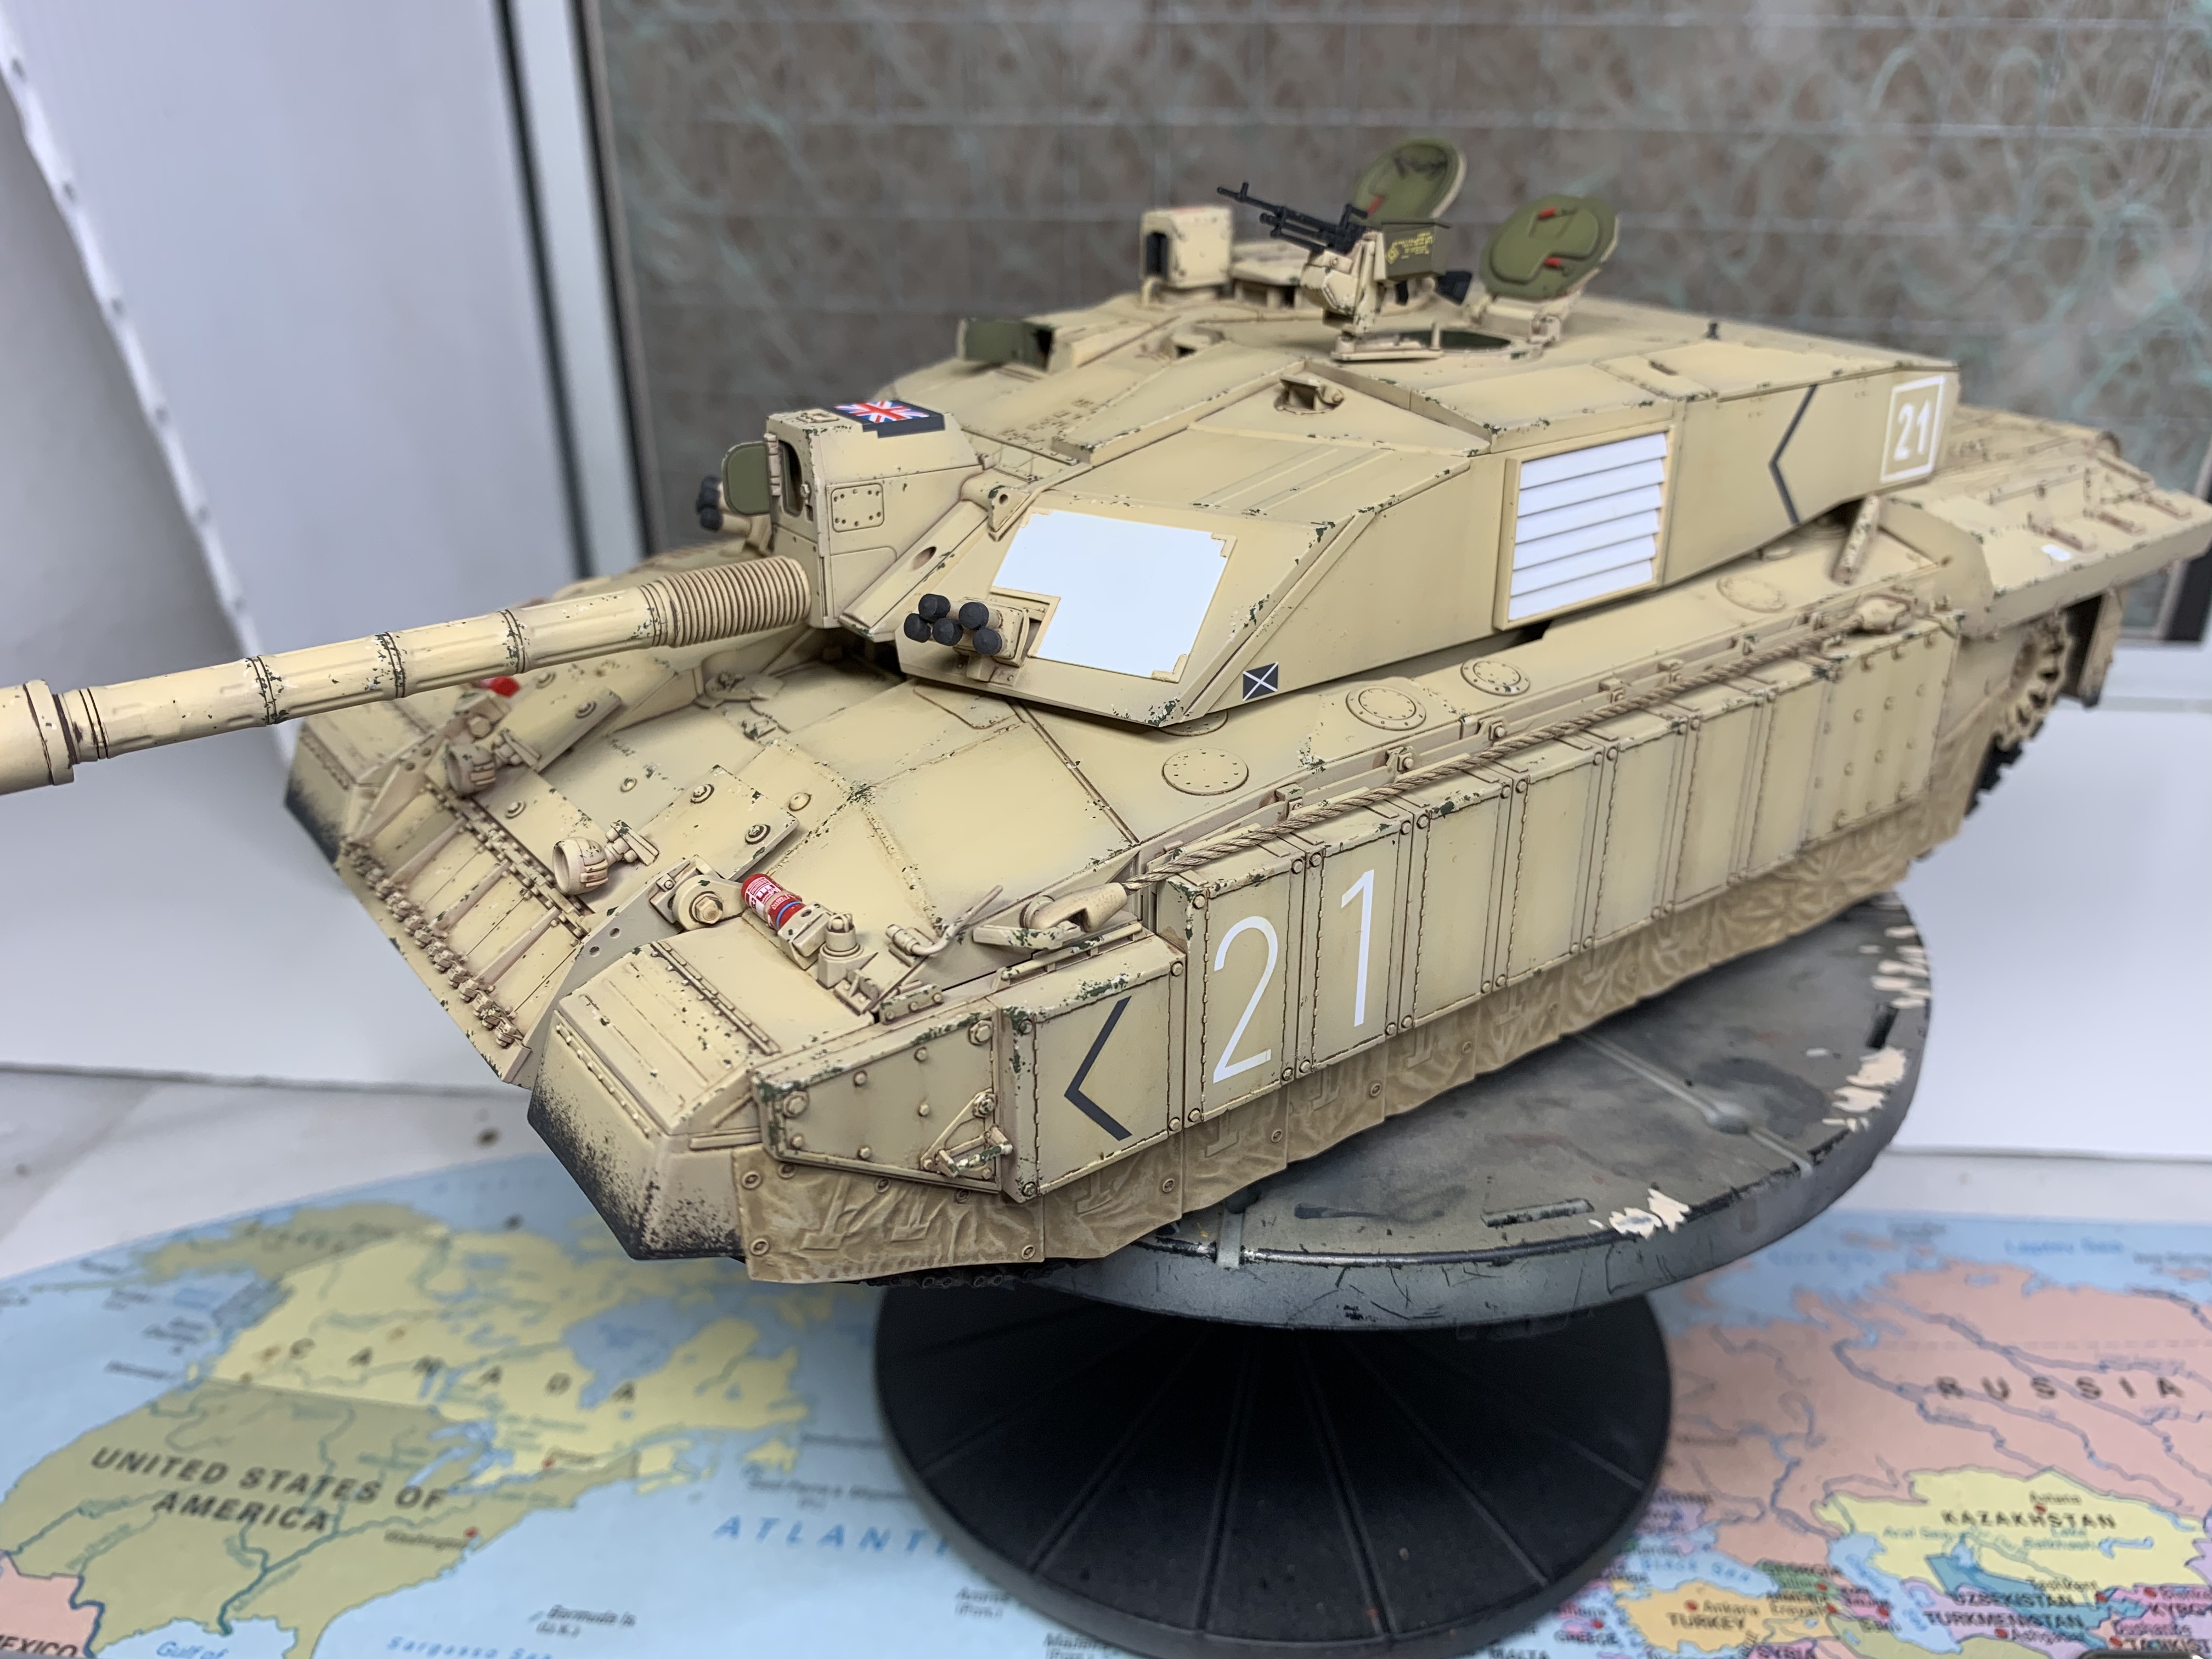
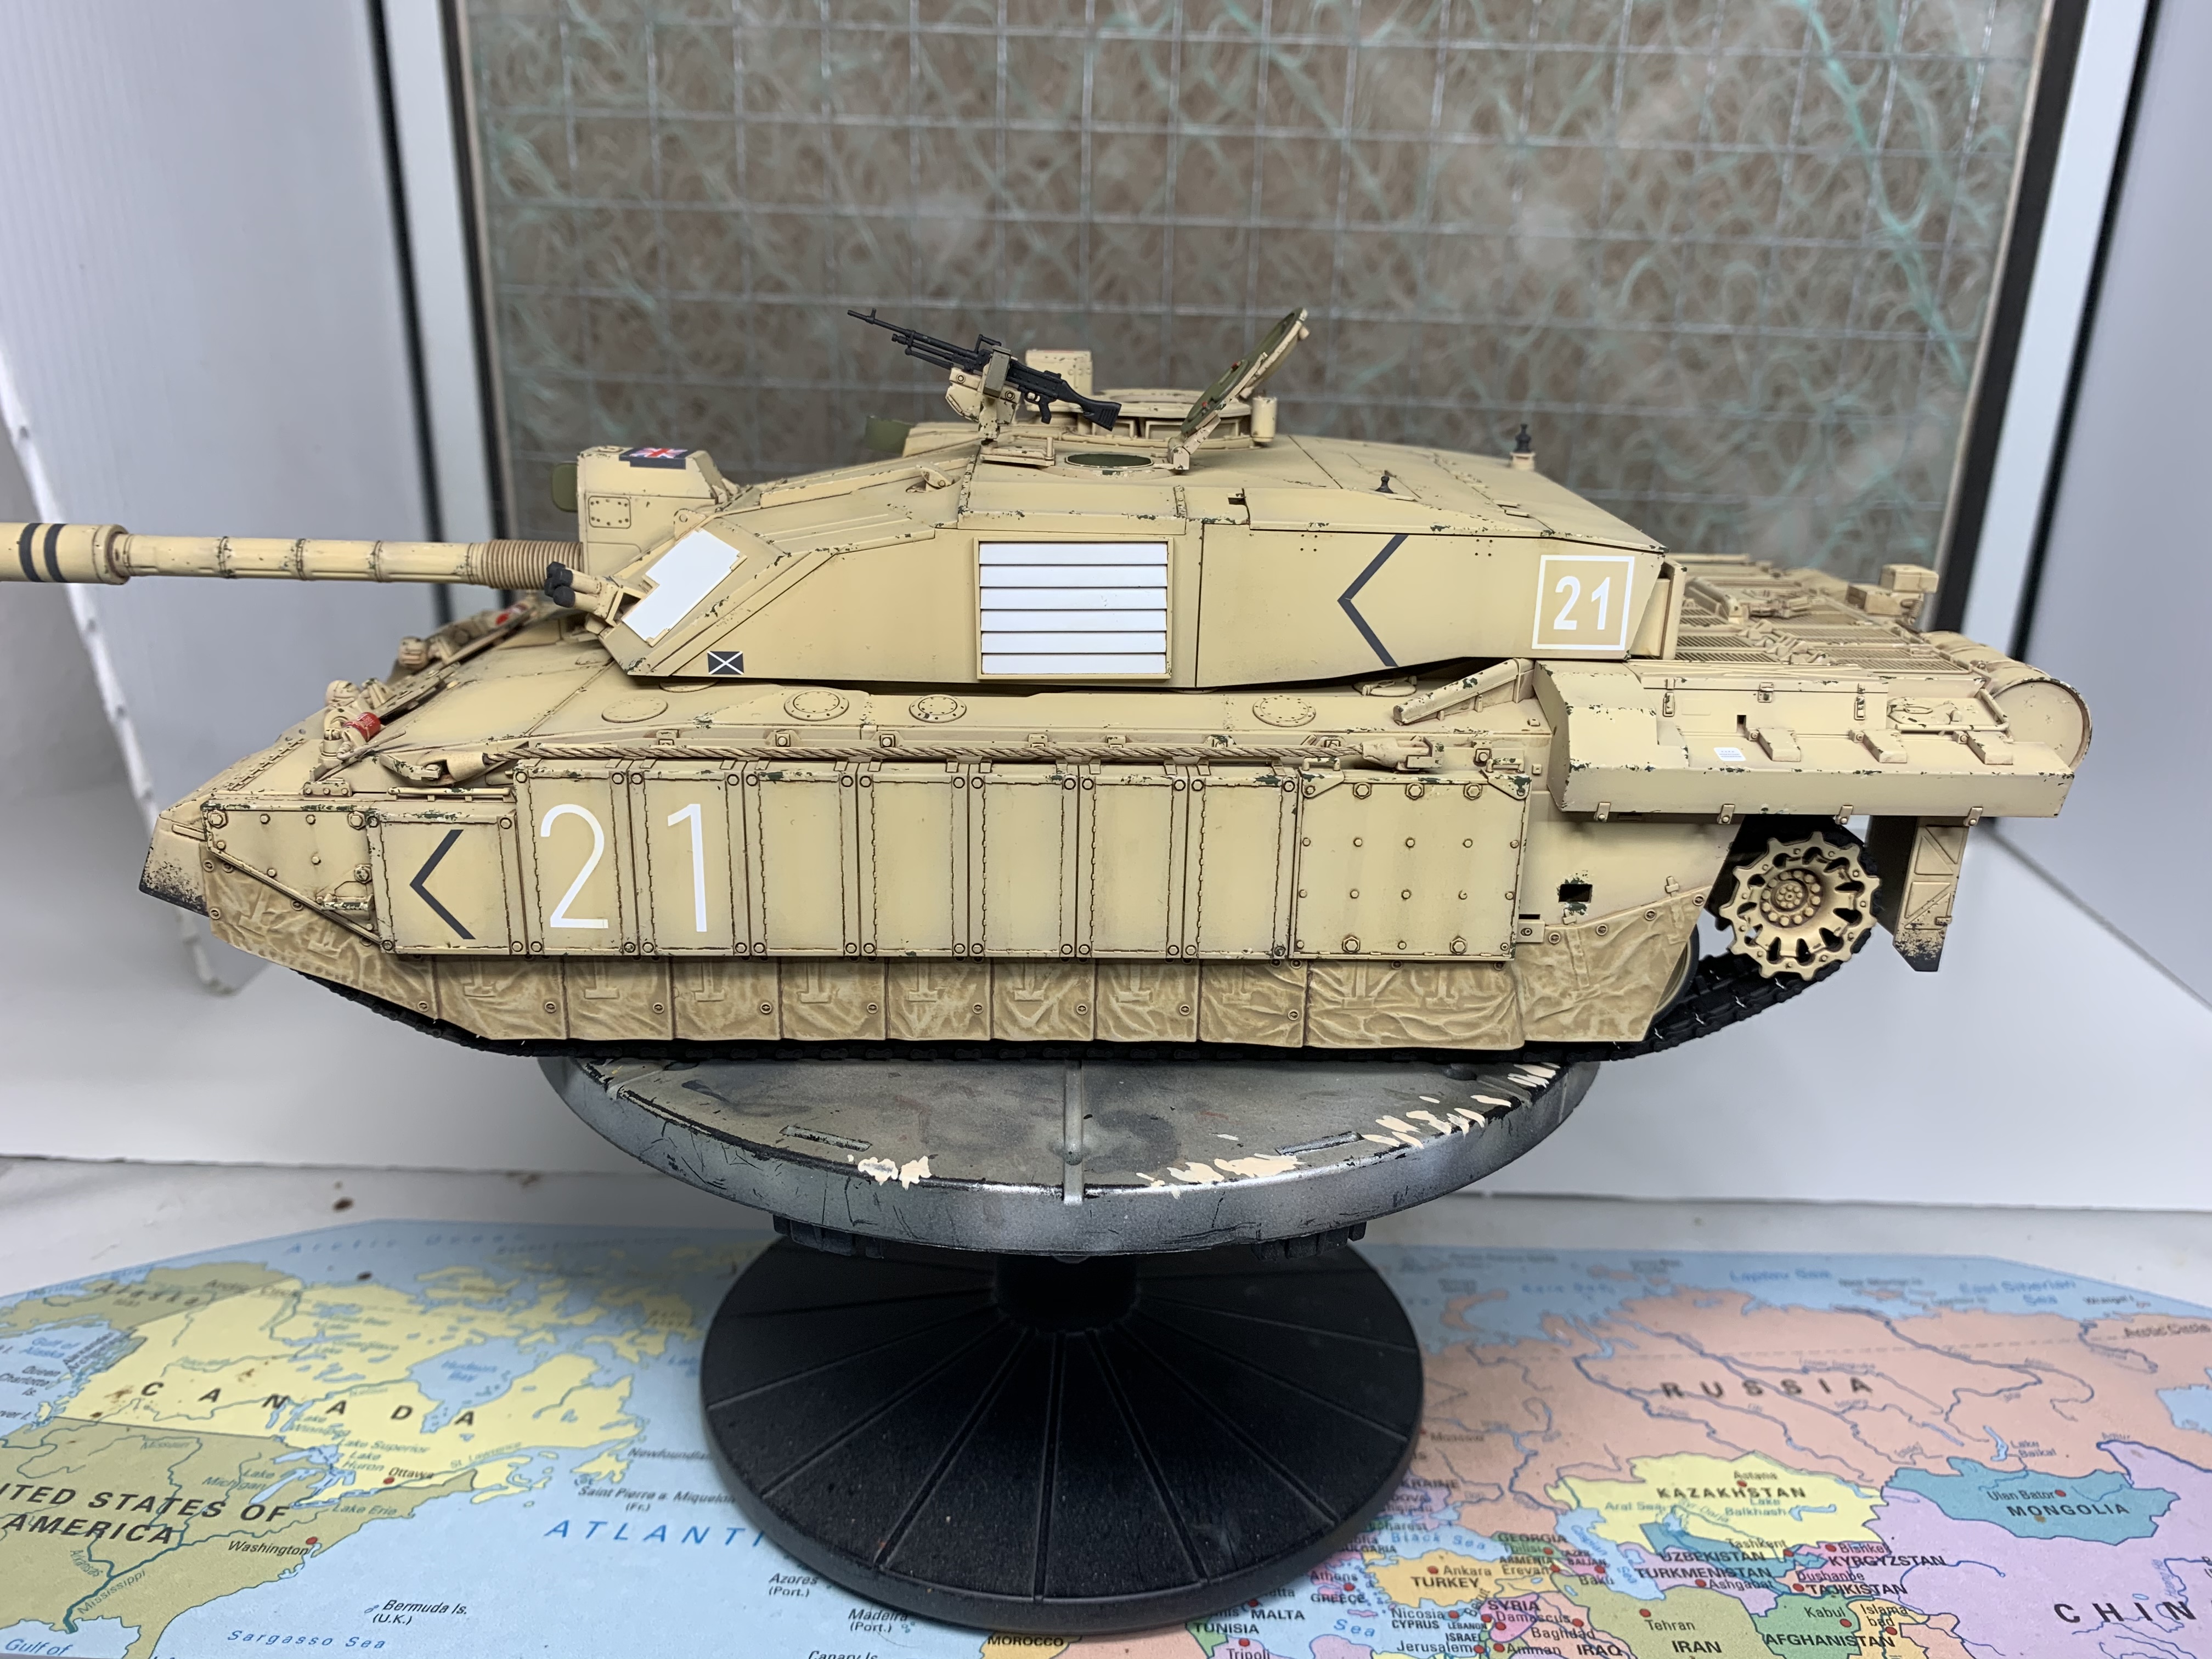
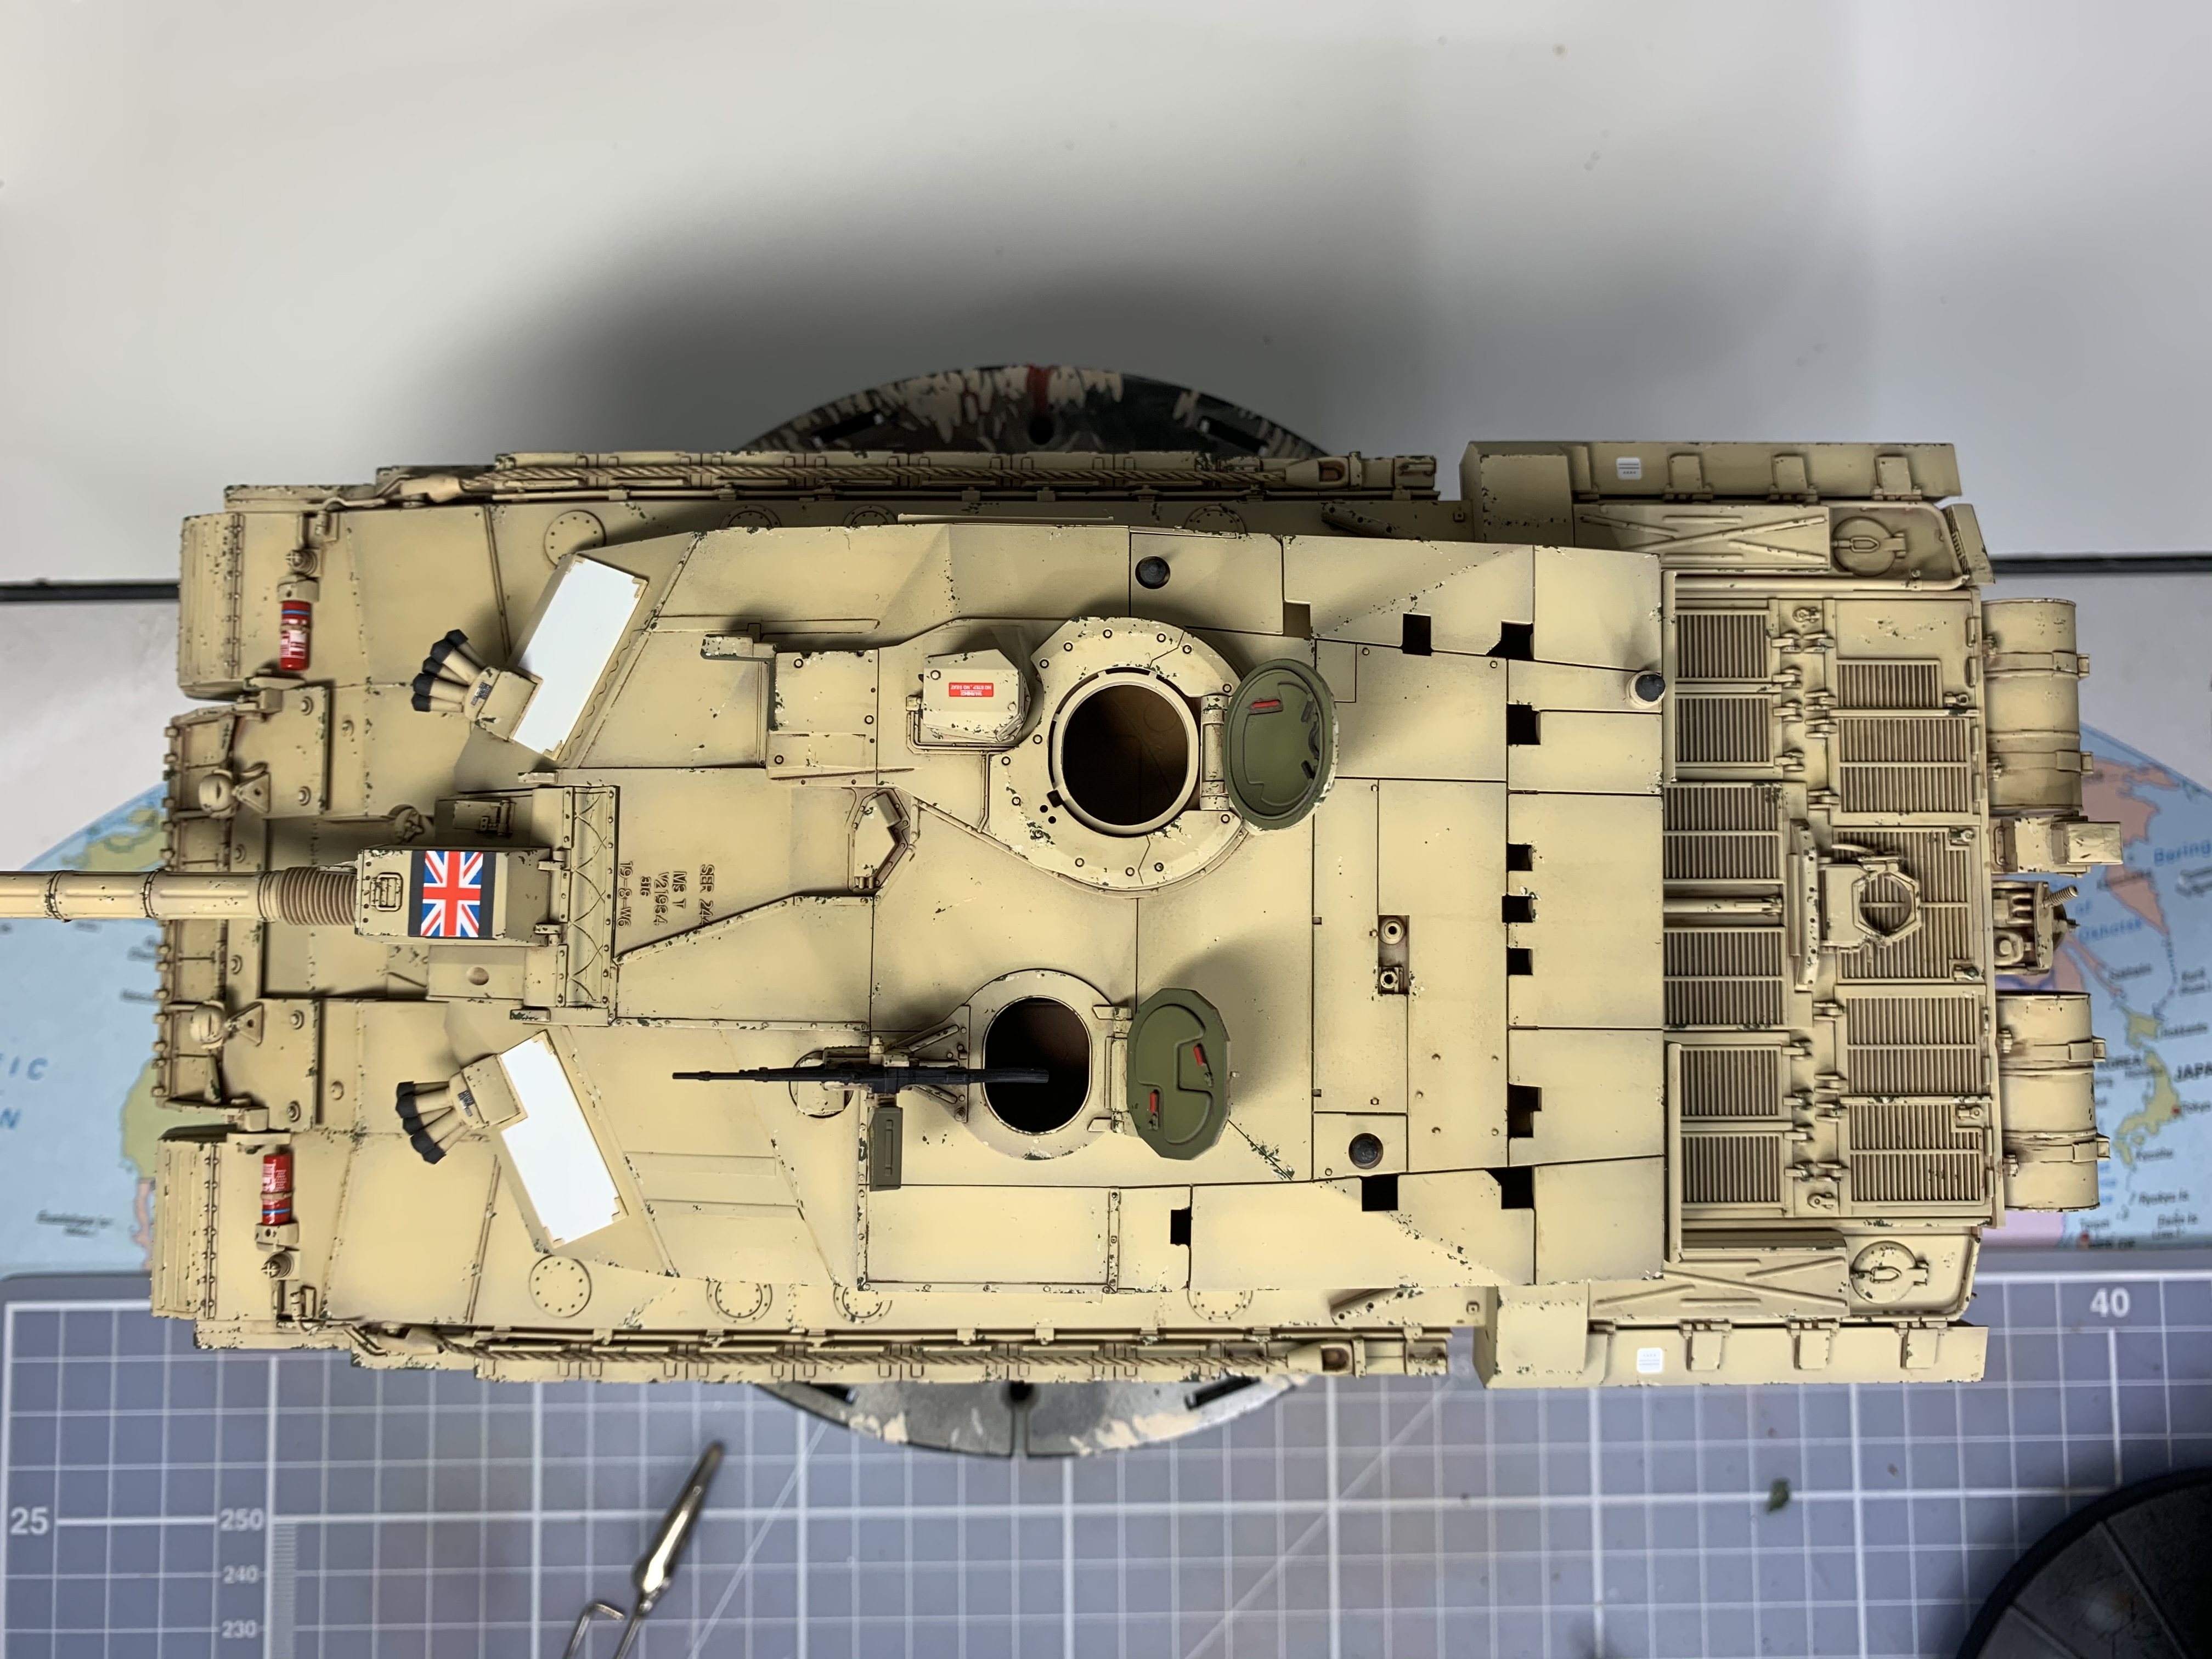
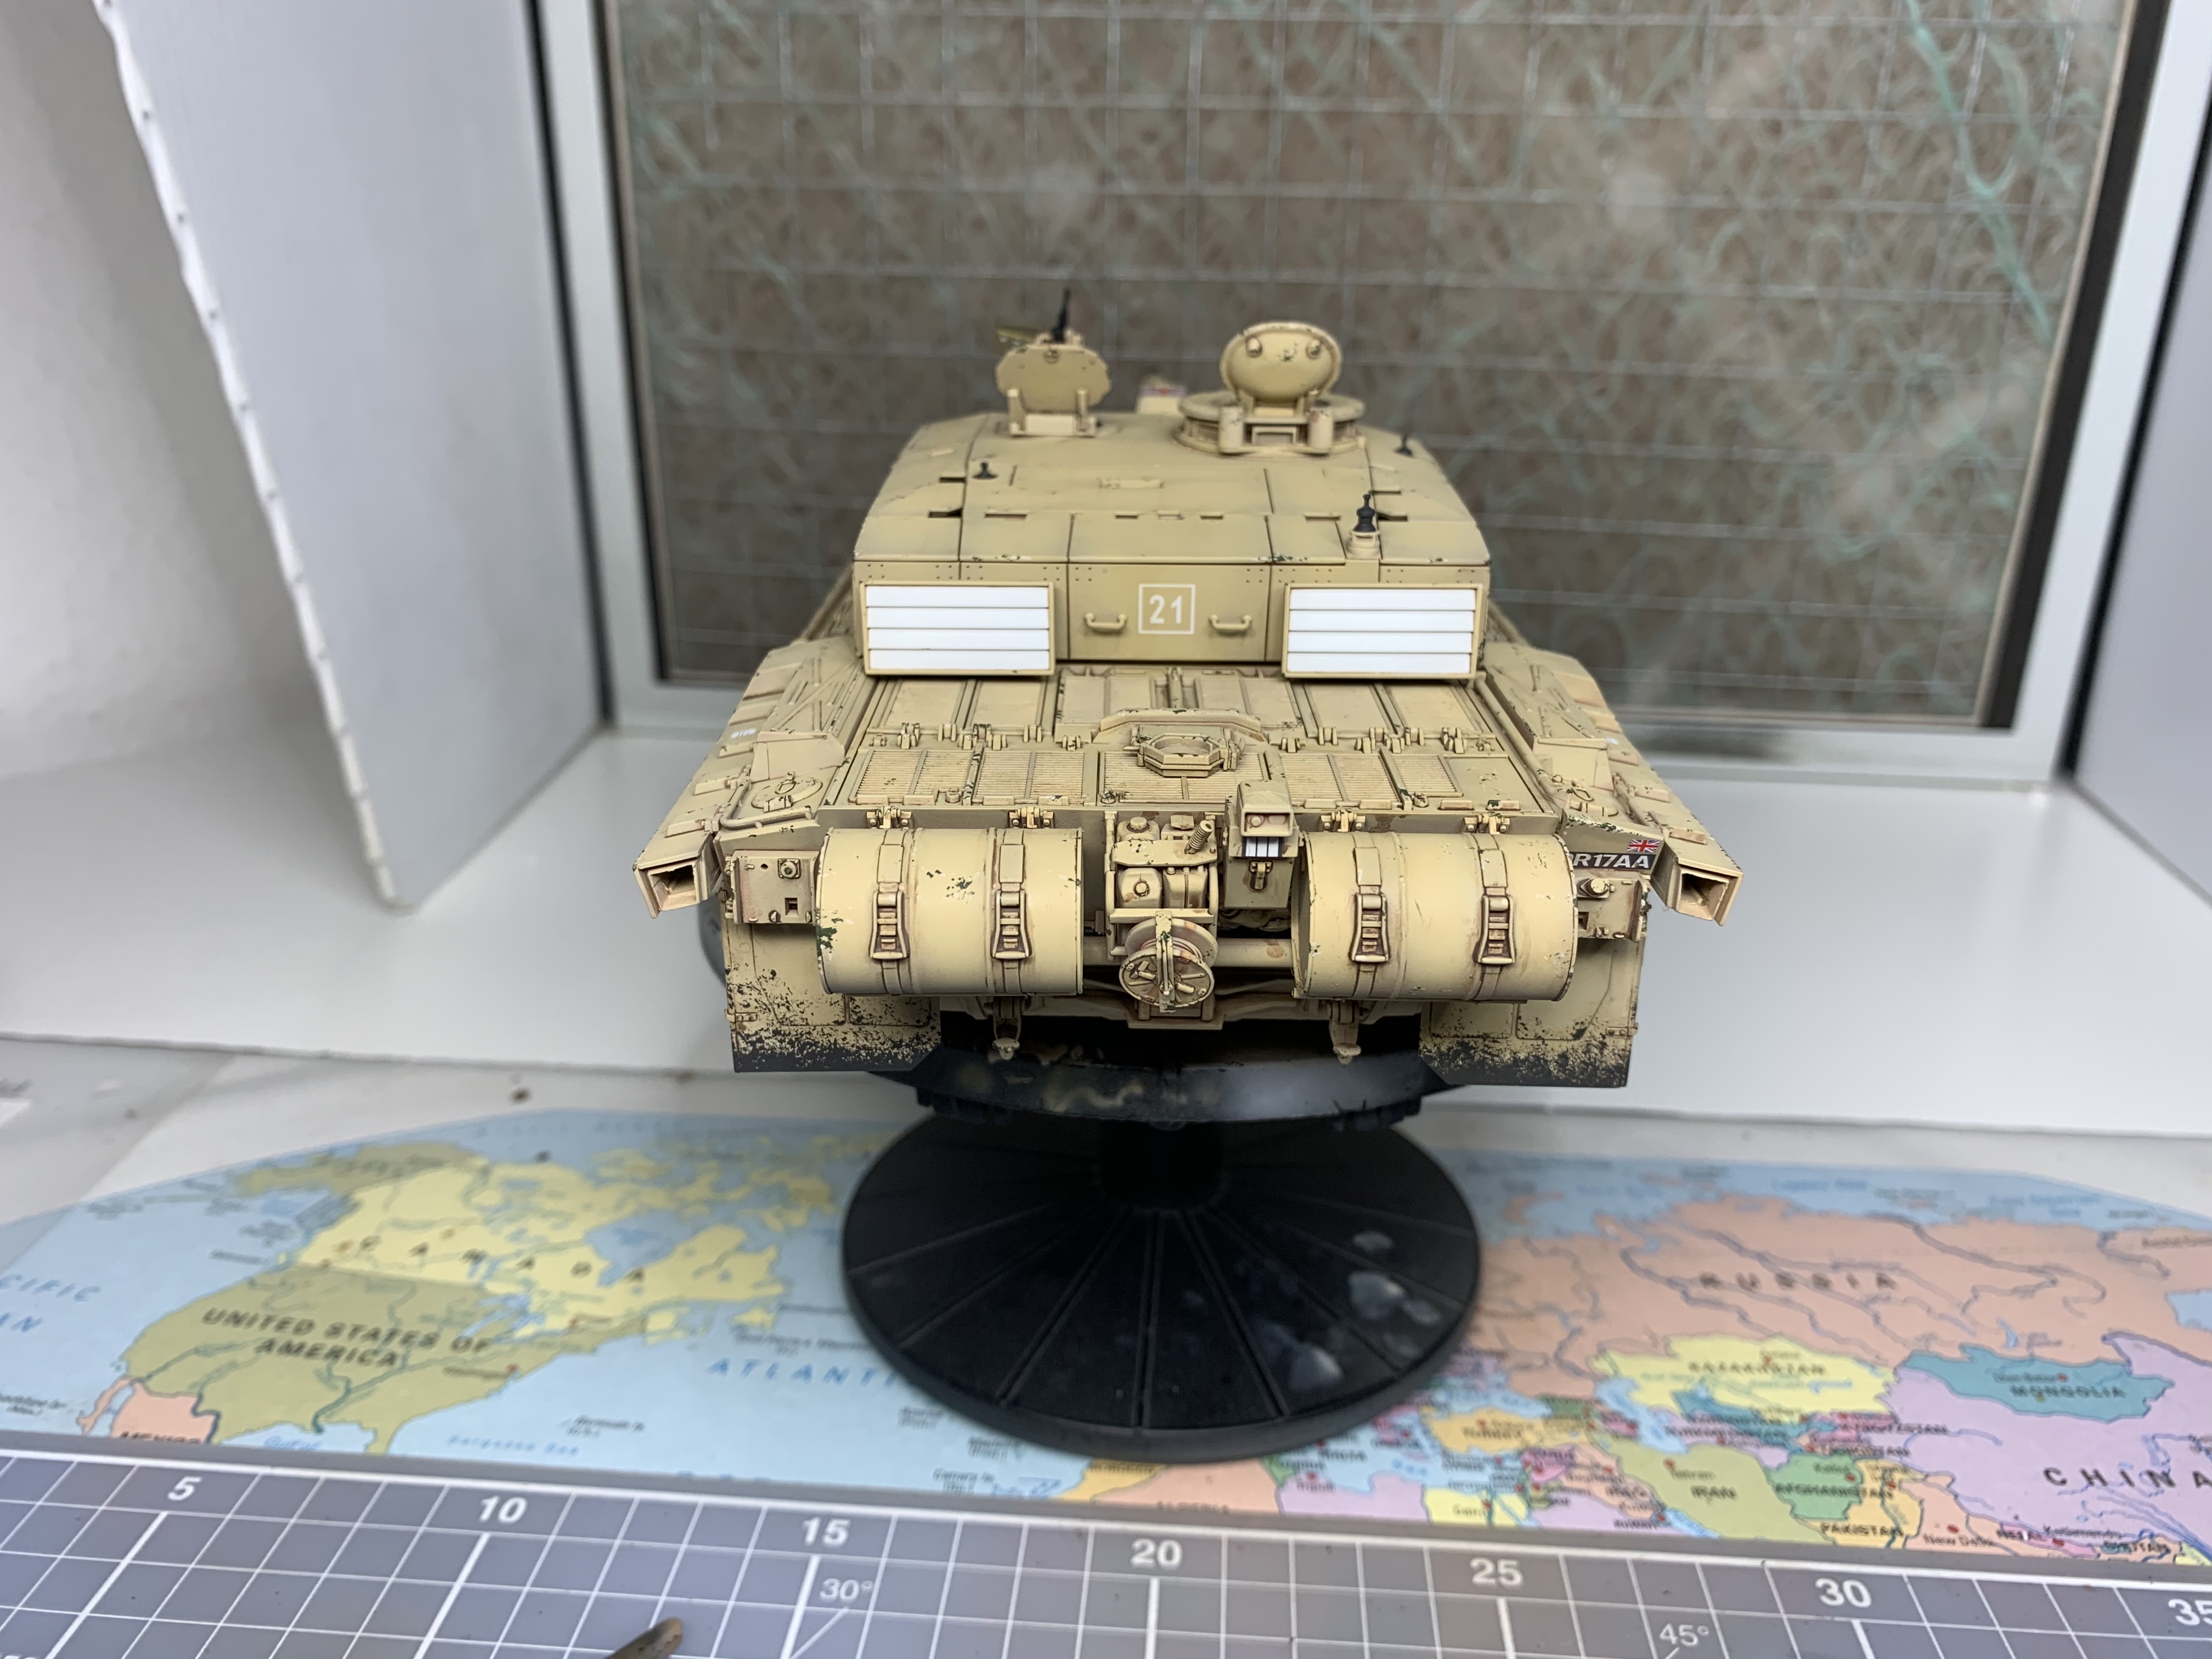
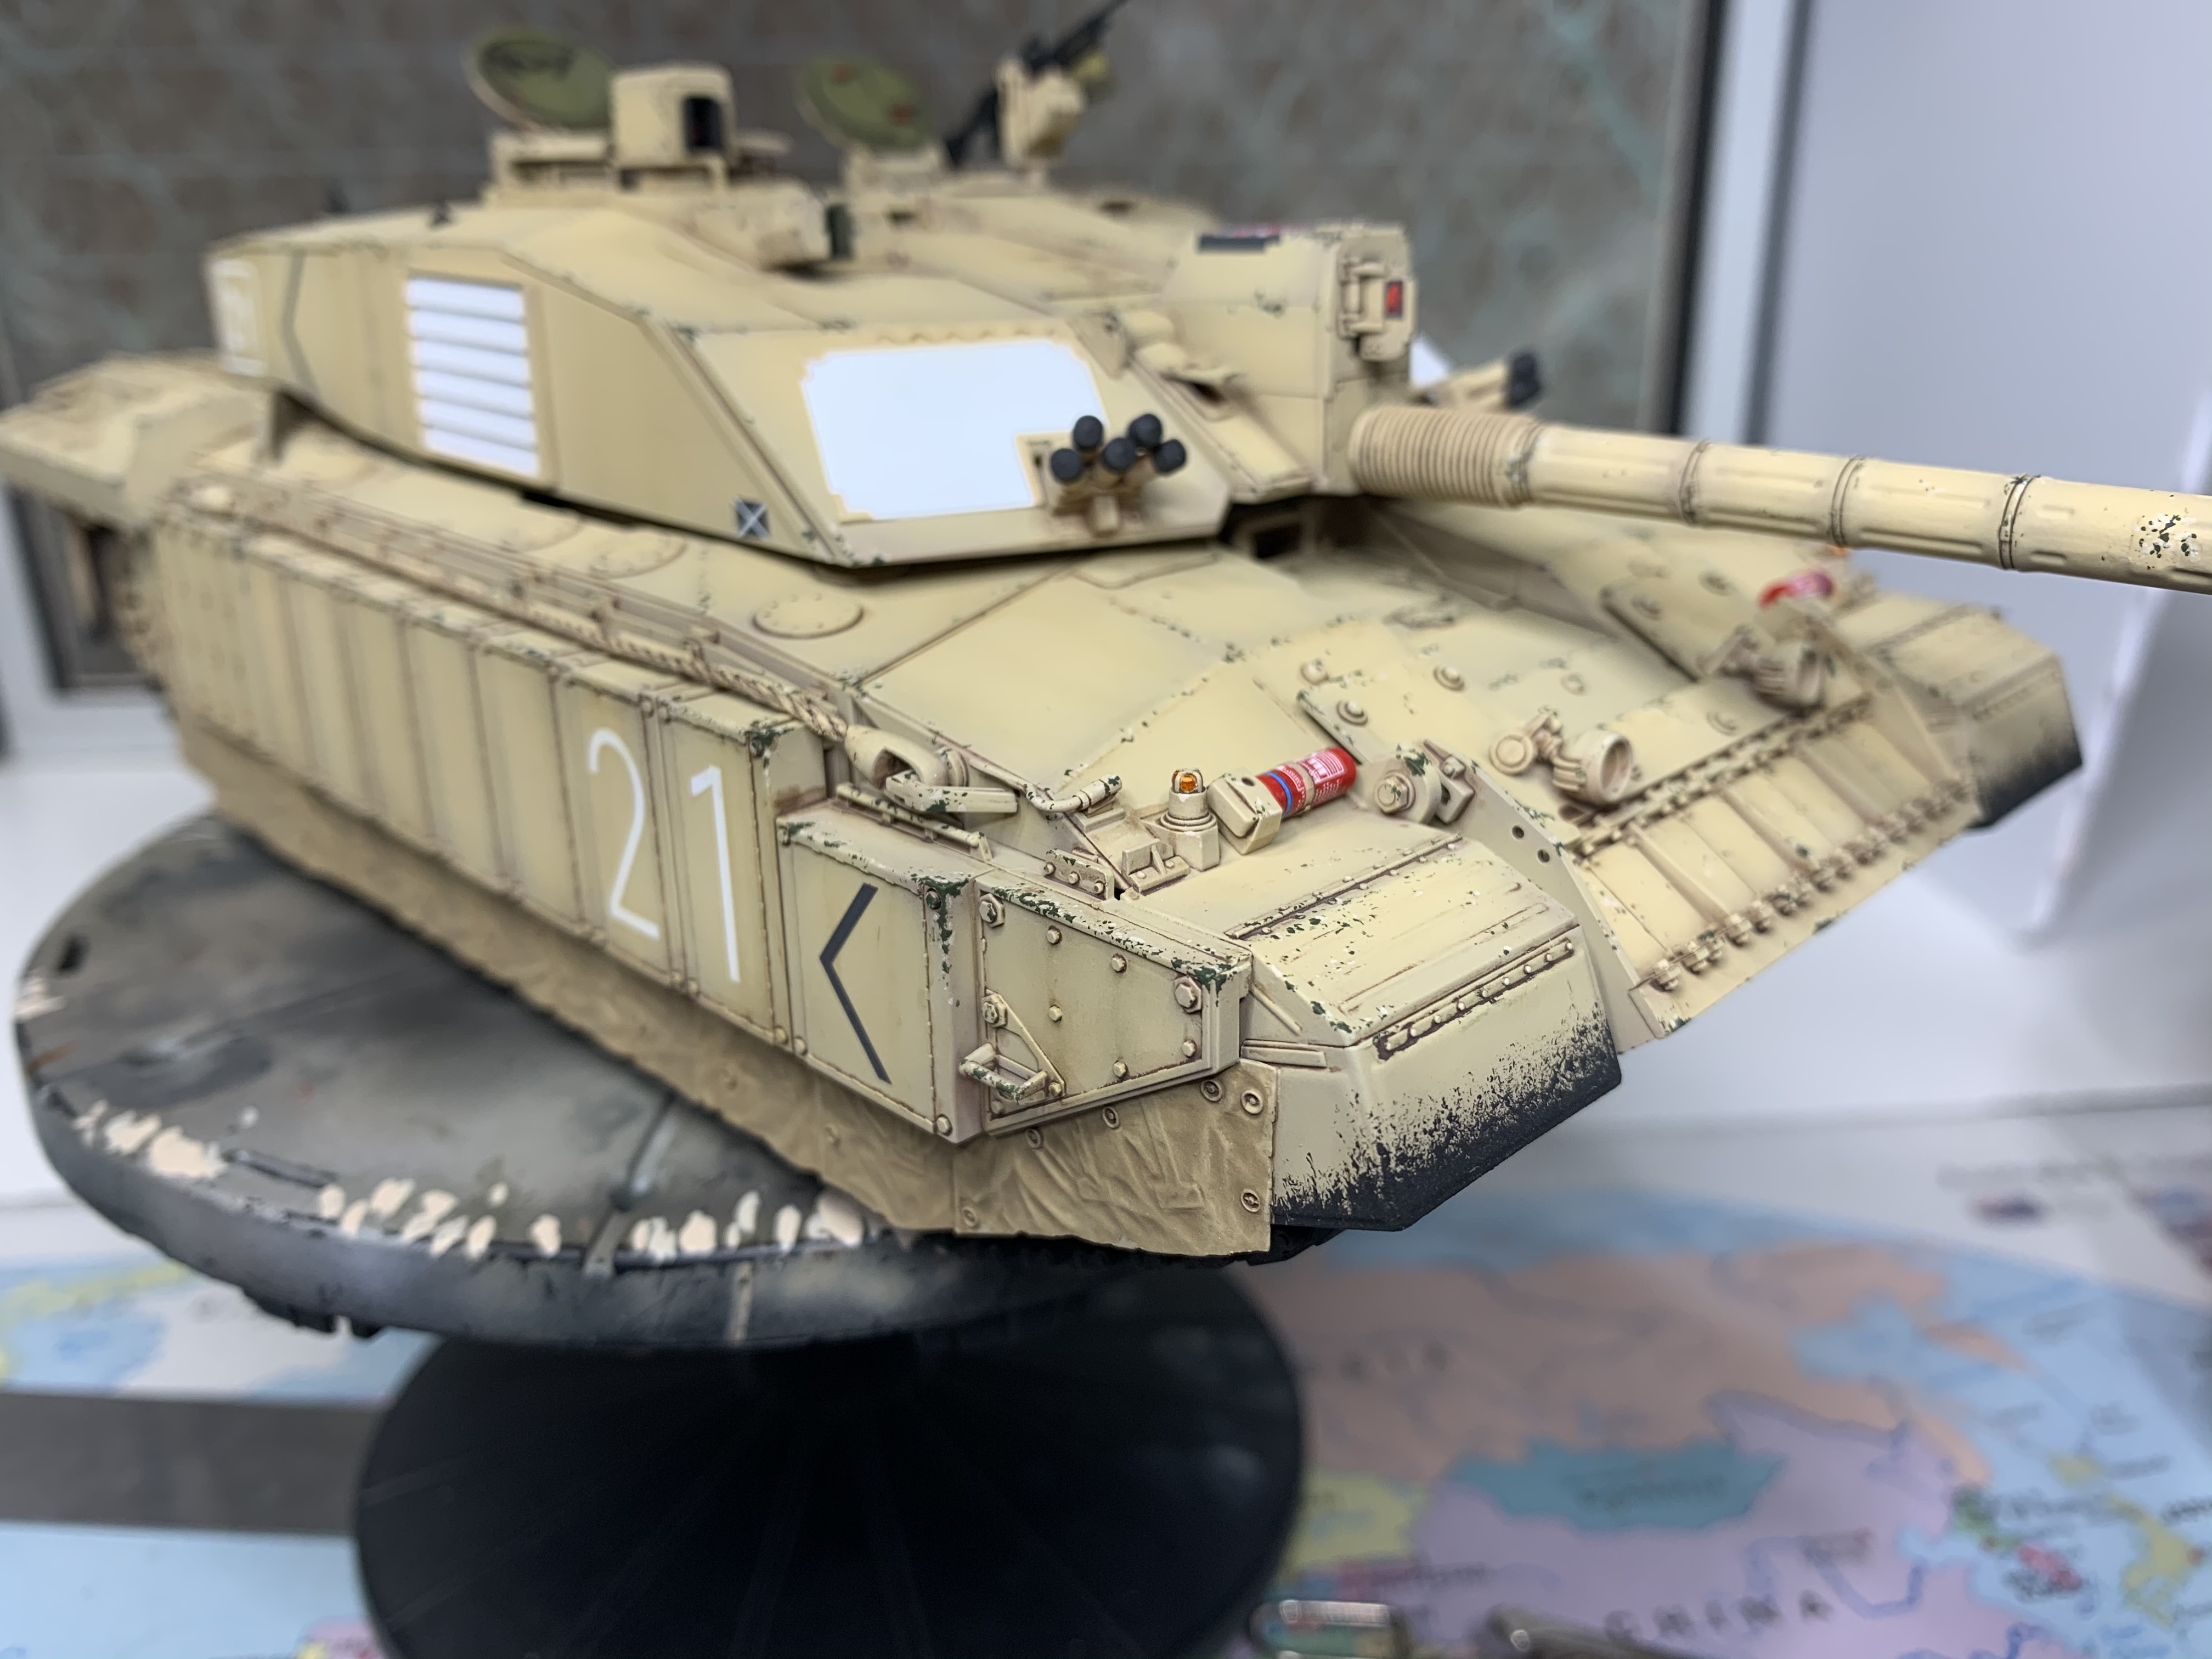
I have highlighted the green chips with humbrol 121 Portland stone to give them some depth. I have given the skirts a wash with AK4062 light dust deposits. The front mudguards have the paint worn through to the rubber treatment. Still experimenting with the tracks weathering. The lights still need fitting too.

And the matt coat is on! As usual for me it is Winsor and Newton galleria acrylic medium matt varnish mixed 50:50 with tamiya x20a thinner.

I have the optics sorted for the gun sight, the commanders little turret and the open box in front of that, just not fitted yet. The commanders cuppola vision blocks are going to be an issue as access is restricted, but I shall prevail!

Thanks for checking in.

More pics;


Johnnych01
Visit this Community
England - South West, United Kingdom
Joined: June 29, 2019
KitMaker: 604 posts
Armorama: 506 posts
Posted: Friday, October 16, 2020 - 09:03 AM UTC
That's a real top job Jim. The finer details are superb. Chipping is perfect and just the right amount in the correct places. The wear and tear weathering on the front mud flaps is brilliant. Overall weathering cannot be faulted. Don't forget the front side/ amber lights under the armoured cages.
Really really good job.
maximus8425
Visit this Community
England - North East, United Kingdom
Joined: May 12, 2006
KitMaker: 331 posts
Armorama: 320 posts
Posted: Friday, October 16, 2020 - 09:18 AM UTC
I like it a lot, exercised with Challys in Poland on Drawsko Pomorski and on Ops in Basra and it's looking really familiar. Dont forget the jerrycans on the rear. As a rule they aren't painted, left hand would be black as it's a water jerrycan and right hand green as it is likley being used for oil.
iwatajim
Visit this Community
United Kingdom
Joined: December 15, 2008
KitMaker: 246 posts
Armorama: 171 posts
Posted: Saturday, October 17, 2020 - 02:06 AM UTC
Thanks guys!

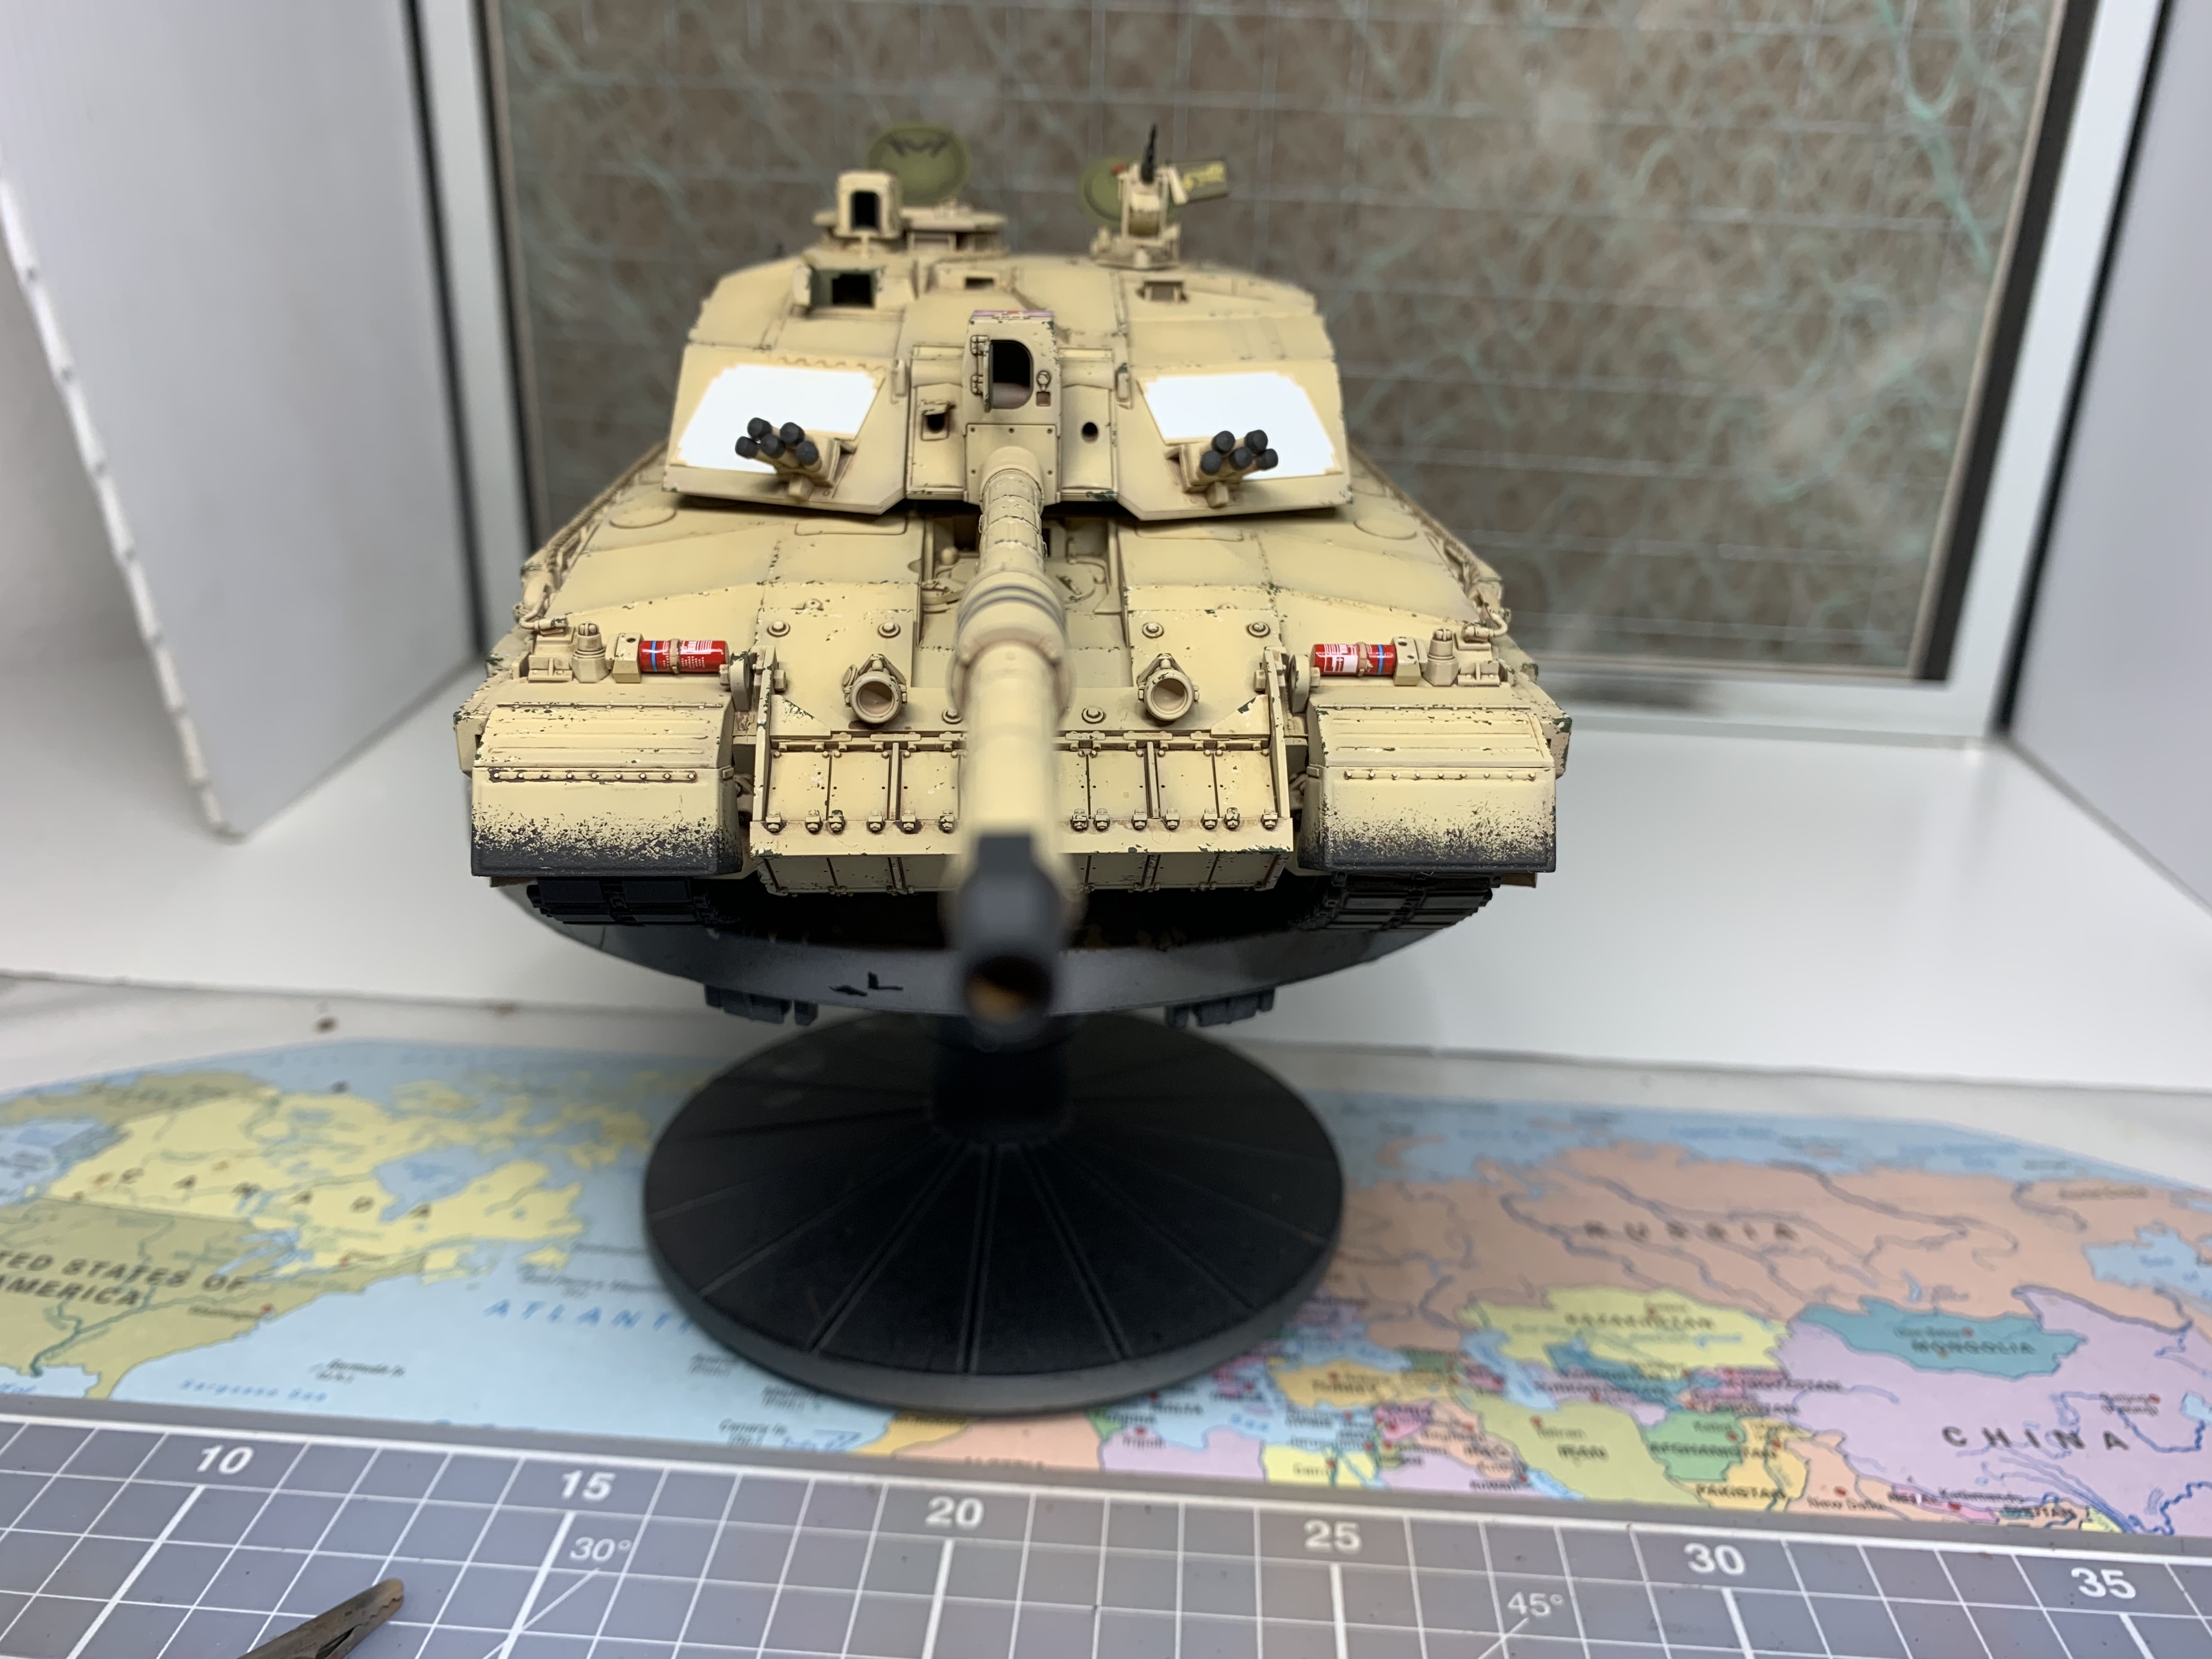
Thanks John, the chipping was a rather zen experience on this one, I really enjoyed doing it. I have painted the amber lights, tamiya chrome enamel followed by some tamiya clear orange. May add a light wash once properly dry.

Thanks Max, it’s great to hear it looks like the real thing from one who has been around them. I would love to paint the Jerry cans but they re just too awkward, so will put it down to a rushed paint job followed by a balling out! Ha!

Got some of the optics on now, difficult to figure out colours but have used some red tinsel behind the clear parts. I painted the back of the clear parts on the gun sight and little turret black leaving the lens part clear. And I drilled out a piece of black plastic for the lens in the box in front of the little turret. The small square on the gun sight got some green tinsel, which I think adds a bit of interest. The bright lights for the pics make them shine a lot more than natural light.

Couple of pics and thanks again.


 _GOTOTOP