_GOTOBOTTOM
Campaigns
Where Armorama group builds can be discussed, organized, and updates posted.
Angela's Puma Entry for Spahwagen Campaign
Angela
Visit this Community
Visayas, Philippines
Joined: September 01, 2004
KitMaker: 853 posts
Armorama: 514 posts
Posted: Sunday, October 02, 2005 - 02:17 AM UTC
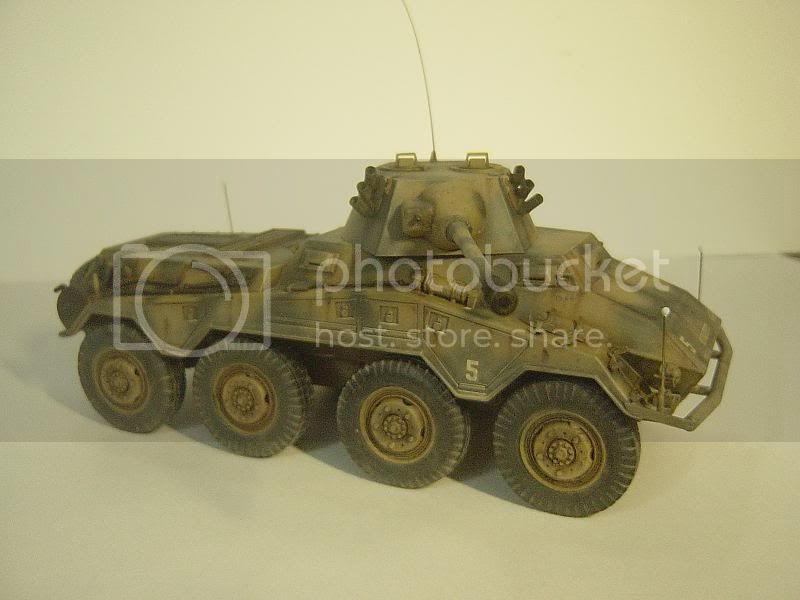
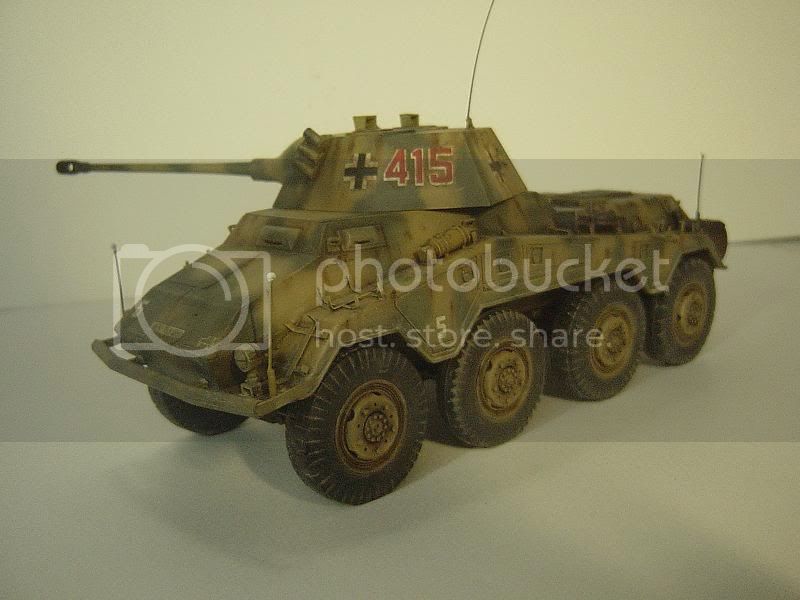
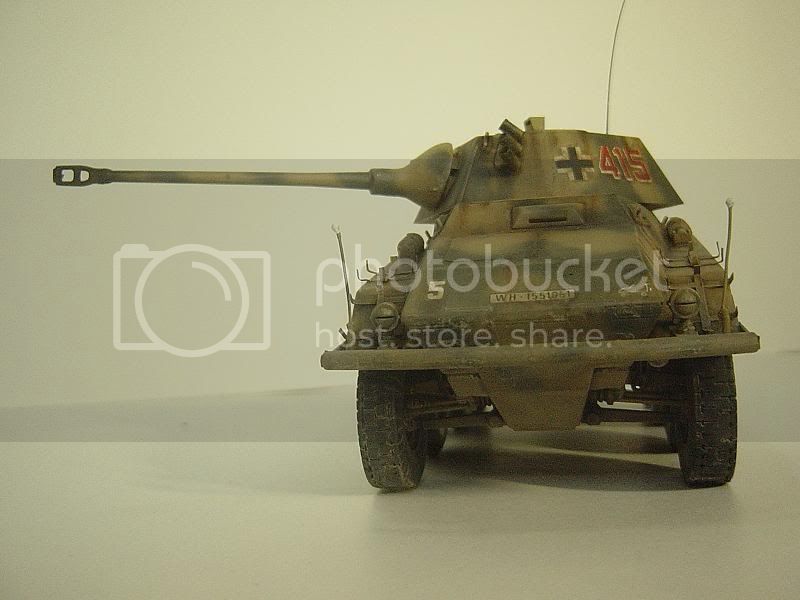
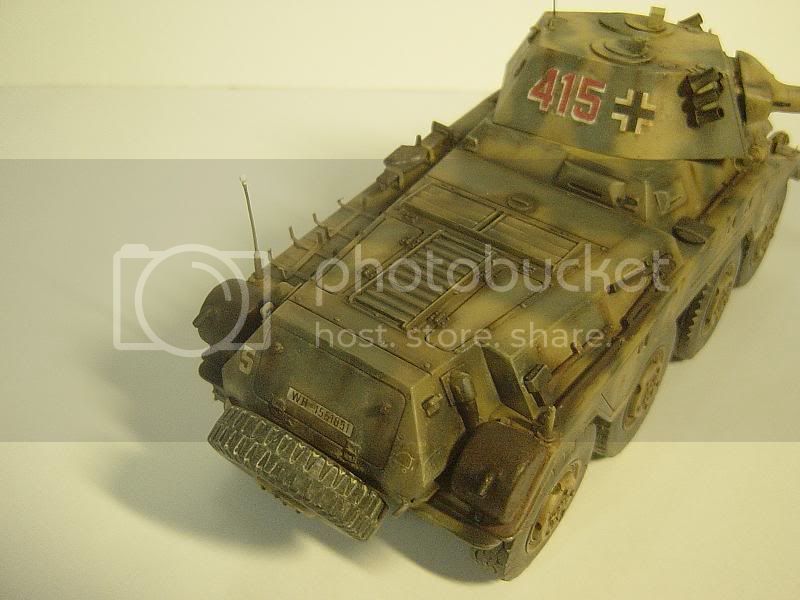
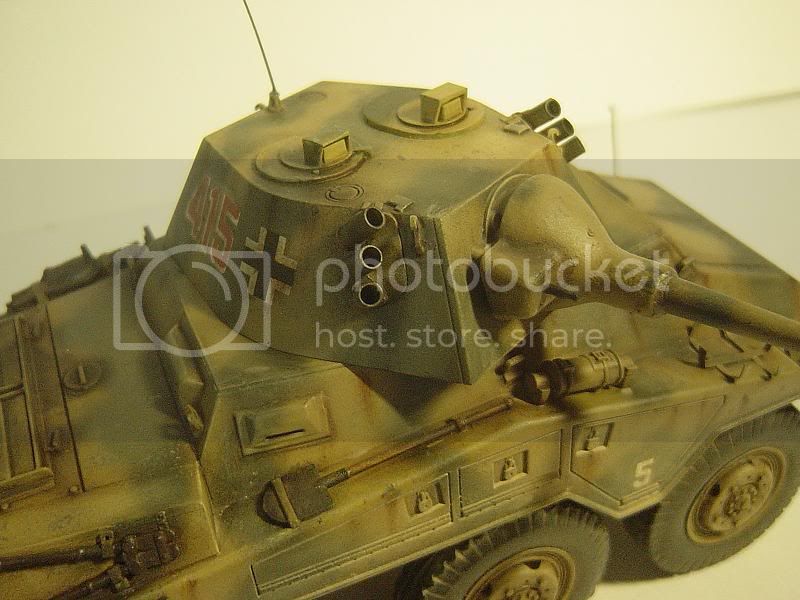
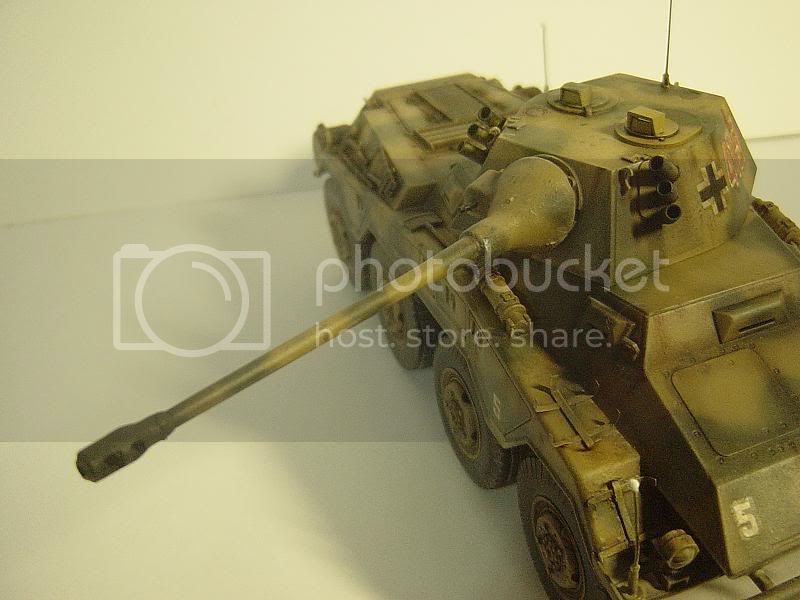
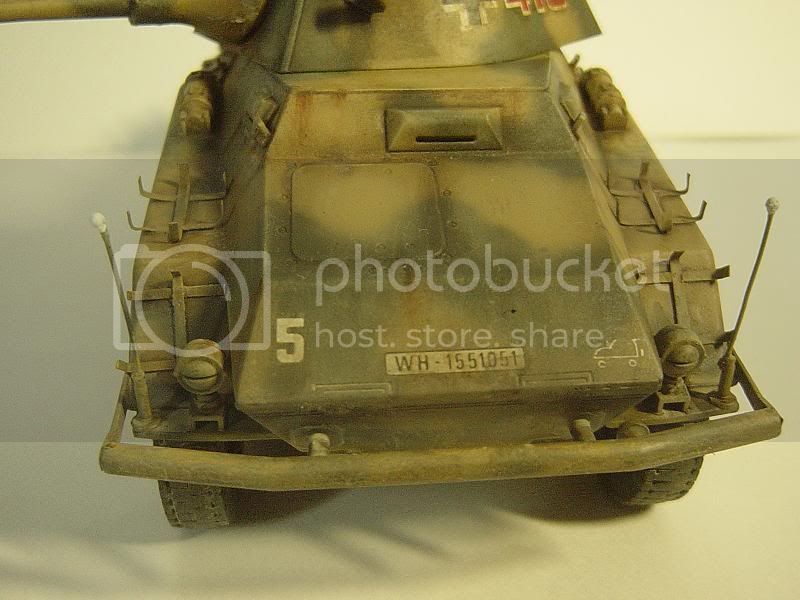
This is my entry for the Spahwagen Campaign.

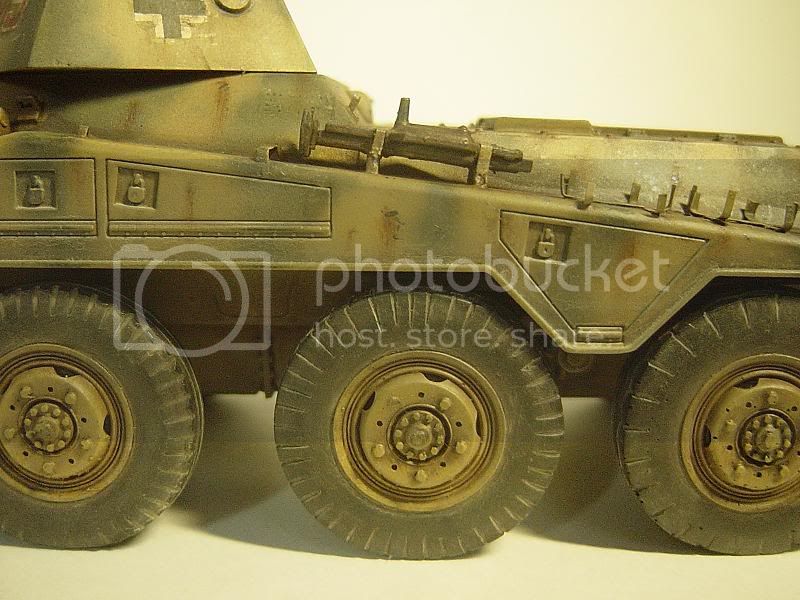
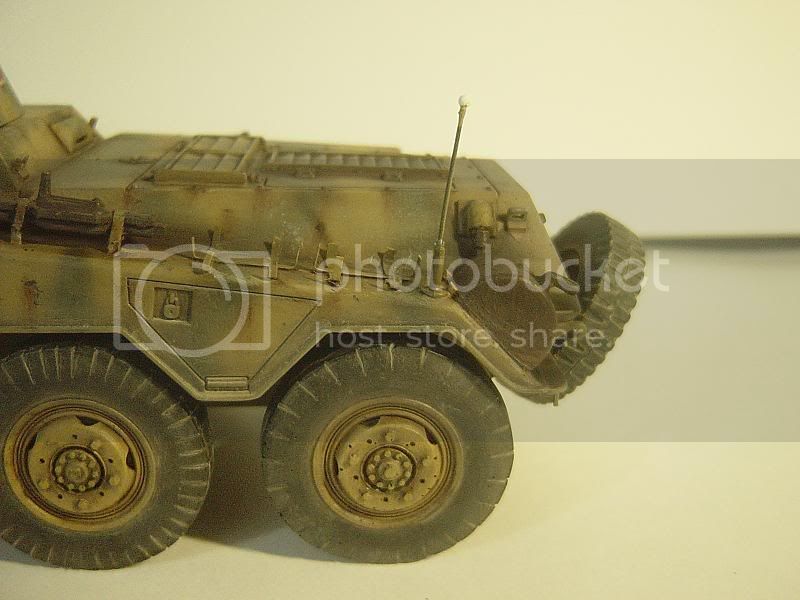
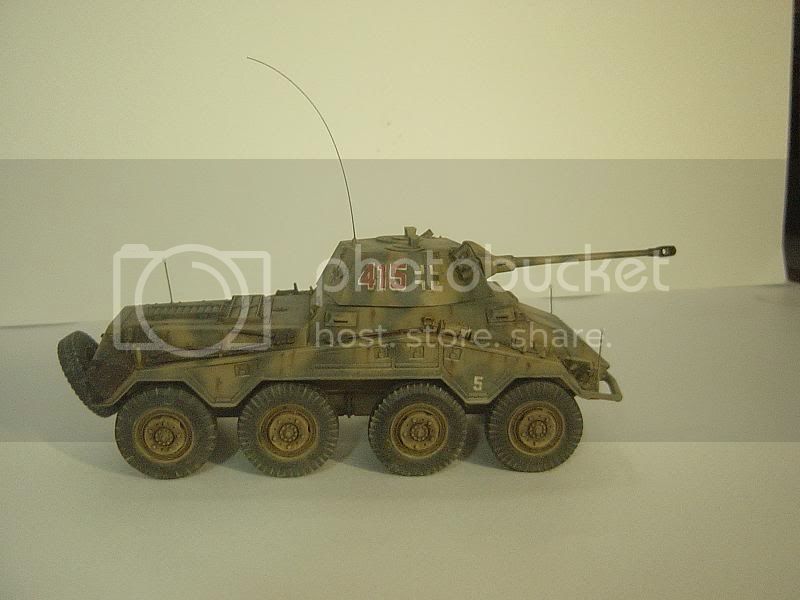
This is an Italeri Puma, with Royal Resin Wheels and Jurdi Rubio Aluminum barrel. The braces for the jerrycans are scratchbuilt from aluminum soda can. I didn't put jerrycans because I ran out of them. The kit jerrycans are too stout and too short.

Periscope guards are thinned from kit parts. The "stand" for the width indicators are made out of thin wire.

I didn't put a lot of stowage or anything on the Puma because I'll be putting this in a diorama. I'm still not sure what that dio will be.

The Puma and the aftermarket products are given to me by Blade48mrd. Thank you very much, Mike.

Here are some pics. Sorry for the bad quality but it is overcast outside.
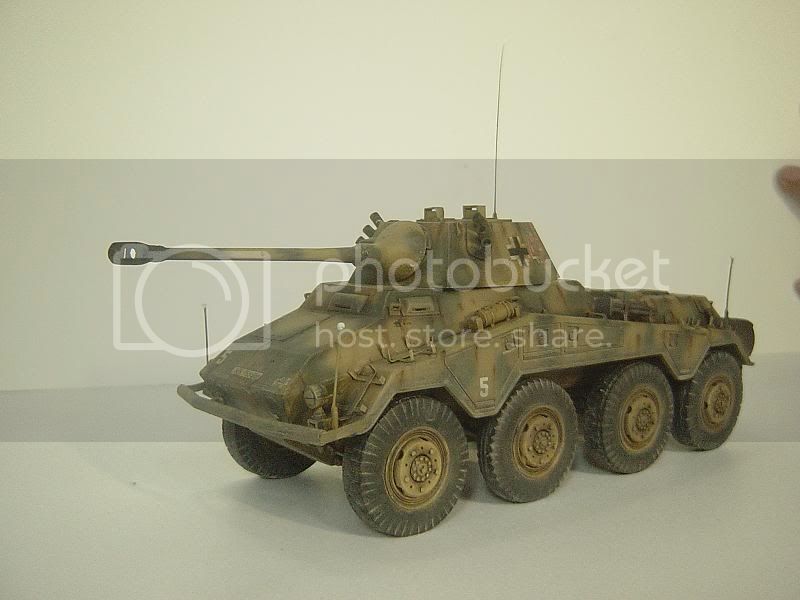


Comments and criticisms, as usual, are welcome.

Angela
Teacher
Visit this Community
England - North West, United Kingdom
Joined: April 05, 2003
KitMaker: 4,924 posts
Armorama: 3,679 posts
Posted: Sunday, October 02, 2005 - 02:25 AM UTC
No criticism here Angela! You've made a great job of it. Just paint them periscope glasses a darker colour and it will be great!

Vinnie
Henk
Visit this Community
England - South West, United Kingdom
Joined: August 07, 2004
KitMaker: 6,391 posts
Armorama: 4,258 posts
Posted: Sunday, October 02, 2005 - 02:26 AM UTC
Very nice Angela, I really like the way the camo has come out, and how your weathering has blended it together. The Jerrycan racks are a nice addition.
It looks to me as if the decals on the left side of the turret (third and fourth photo) are not flush with the turret, as if they are lifting off. But as you already said, that might be the pics. And there seems to be a seam on the fire extingisher on the right mudguard.
But those don't detract from the fine job you've done Angela, and I look forward to see this in another one of your dio's.

Cheers
Henk
Angela
Visit this Community
Visayas, Philippines
Joined: September 01, 2004
KitMaker: 853 posts
Armorama: 514 posts
Posted: Sunday, October 02, 2005 - 02:37 AM UTC
Hello,


Quoted Text

Just paint them periscope glasses a darker colour and it will be great!


Oh yeah. I forgot that one. Thanks Vinnie


Quoted Text

It looks to me as if the decals on the left side of the turret (third and fourth photo) are not flush with the turret, as if they are lifting off. But as you already said, that might be the pics. And there seems to be a seam on the fire extingisher on the right mudguard.


Thanks for the observations Henk. Hmmm....I checked the model and the decals were fine. I think it is from the buff acrylic wash I made to depict rain marks. It must have pooled up or something. Don't worry, I'll correct it.

Yeah, I think there's a seam there. I'll correct it, too.

I'm not sure about what dio to put this baby up. But I'm sure it will be something in dusty France.

Thanks a lot guys.

Angela
Blade48mrd
Visit this Community
Washington, United States
Joined: September 03, 2004
KitMaker: 1,185 posts
Armorama: 810 posts
Posted: Sunday, October 02, 2005 - 04:59 AM UTC
Angela -

As always top quality and outstanding attention to detail. You've done yourself proud again and can't wait to see the diorama. Keep that great stuff coming,

Blade48mrd
thebear
Visit this Community
Quebec, Canada
Joined: November 15, 2002
KitMaker: 3,960 posts
Armorama: 3,579 posts
Posted: Monday, October 03, 2005 - 06:23 AM UTC
Nice work as always Angela...

Rick
jackhammer81
Visit this Community
Nebraska, United States
Joined: August 12, 2003
KitMaker: 2,394 posts
Armorama: 1,695 posts
Posted: Monday, October 03, 2005 - 06:49 AM UTC
Angela, Once again you have shown your talents here!!! Amazing work. You have done a wonderful job all the way down to the scratch jerry can holders I have no criticisms, just praise. Excellent job. Also Mike sure is a great guy. A couple times now he has sent me some things to complete a project. Looking forward to seeing the dio you make for the setting for this beastie. Cheers Kevin
slodder
Visit this Community
North Carolina, United States
Joined: February 22, 2002
KitMaker: 11,718 posts
Armorama: 7,138 posts
Posted: Monday, October 03, 2005 - 06:59 AM UTC
Very nice job - it's what I was expecting when I saw your name in the thread title.

If you want to add even more detail you can add smoke discharge cables that actually ignite the smoke grenades. A bit of fine wire would do the trick.
warthog
Visit this Community
Metro Manila, Philippines
Joined: July 29, 2002
KitMaker: 1,460 posts
Armorama: 1,080 posts
Posted: Monday, October 03, 2005 - 11:14 AM UTC
I like the way you blended the camo and the base color. BTW, maybe you add a few scratches on the front and rear bumper. The wheel rims are well weathered, but I guess some scratches would give it more character.

Overall it looks very very beautiful as it is.

Cheers
Delbert
#073
Visit this Community
Pennsylvania, United States
Joined: October 05, 2002
KitMaker: 2,659 posts
Armorama: 1,512 posts
Posted: Monday, October 03, 2005 - 11:58 AM UTC
Very nice work there. I esp love the way you bring out the details.. :-)
Angela
Visit this Community
Visayas, Philippines
Joined: September 01, 2004
KitMaker: 853 posts
Armorama: 514 posts
Posted: Monday, October 03, 2005 - 02:35 PM UTC
Thank you for your comments guys.

Yep, this project might have never been done without the help of Mike (Blade48mrd). He was the one who sent me the Puma and the AMs. Thank you very much Mike.

When I have enough money, I'm going to buy jerrycans and place a couple on the holders.

I'm also going to scratchbuild a bush-style antenna with its housing. None is included in the kit.

I'm also going to add some gun cleaning rods, tarps and other odds-and-ends.

The blending was made using a technique called "dry-filtering." I mixed Yellow Ochere and Titanium White until I got a lighter version of the main color. I drybrushed the color lightly on the vehicle INCLUDING the green pattern.

It's easy to overdo the technique so, you have to be careful. Also, you should not touch the vehicle for a little while. If you do, you will leave big beautiful fingerprints on the vehicle.

More comments and criticisms?

Angela
eerie
Visit this Community
United Kingdom
Joined: September 26, 2004
KitMaker: 1,008 posts
Armorama: 242 posts
Posted: Monday, October 03, 2005 - 02:48 PM UTC
The tires look very very good. The weathering is superb
 _GOTOTOP