_GOTOBOTTOM
Constructive Feedback
For in-progress or completed build photos. Give and get contructive feedback!
W.I.P. Achtung Jabo Mobelwagen
mark197205
Visit this Community
England - East Midlands, United Kingdom
Joined: November 10, 2003
KitMaker: 1,593 posts
Armorama: 1,465 posts
Posted: Thursday, January 25, 2007 - 04:22 AM UTC
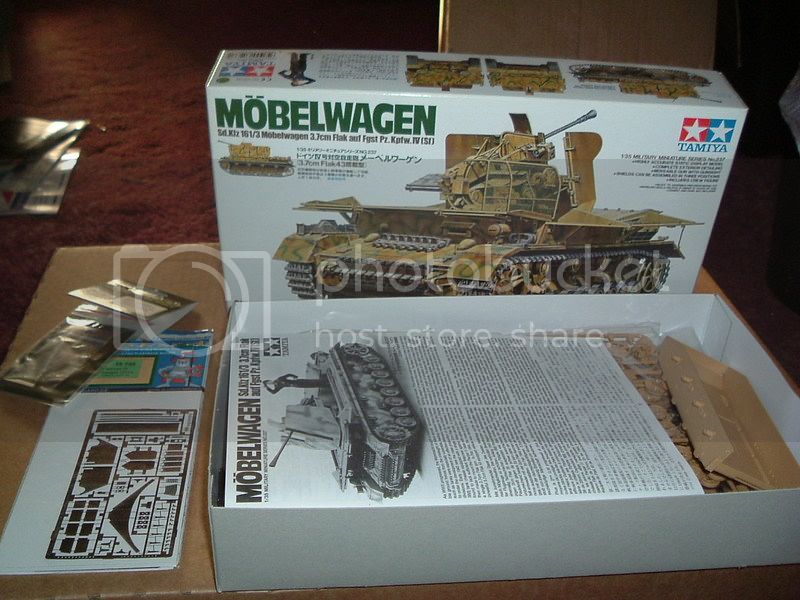
Ok folks, finally got around to sorting my work space out and actually got onto building something, its been so long since I have I can barely remember it! Anyway, to get myself motivated I signed up for this campaign and decided to build the Tamiya Mobelwagen 3.7cm- kit # 35237, not being one to do things by halfs rather than doing a straight OOB build I went for a fair dollop of AM too in the Eduard etched set and a replacement barrel from Armorscale.
Now as some of you who have seen my posts in the ebay selling section my step father passed away during October after a long battle with Leukemia and in between listing and parcelling up some of his huge collection of kits and diecast I have been absorbing a large quantity into my own stash and this particular kit is is one of those, when I signed up to the campaign I though it would be a fitting tribute to build it in his memory, so David Paul King, this is for you, thank you for all your support and love during your life.

And now, the bit you all are wanting to see, some pics.
First up, the bare bones of the build the sprues and add-ons.
and now spread out..
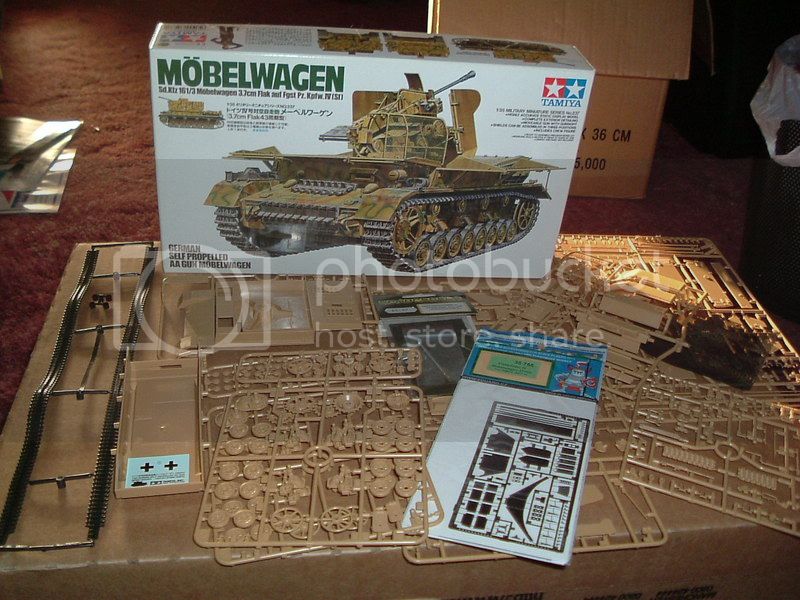
Rather than sticking to the steps in the instructions I decided to go with the best order so I could get the PE on in a logical manner hence I jumped back and forth around from stage to stage.
Heres the two largest parts, the upper and lower hull, as you can see the front plate of the upper hull has been glued into place.
mark197205
Visit this Community
England - East Midlands, United Kingdom
Joined: November 10, 2003
KitMaker: 1,593 posts
Armorama: 1,465 posts
Posted: Thursday, January 25, 2007 - 04:33 AM UTC
Onto the next nights work now, attaching the bumpstops for the main suspension the final drive and assembling all the wheels, return rollers, sprockets and the idlers.

A close up of the hull front, showing the fixed in place driver and radio operators hatches.

And now the first bit of PE gets added, the skinning for the ammo bins that fill one side of the superstructure, once I had scribed in the ridges with a ball point pen the three sections were glued in place as were the small rack that replaces a moulded on part.
mark197205
Visit this Community
England - East Midlands, United Kingdom
Joined: November 10, 2003
KitMaker: 1,593 posts
Armorama: 1,465 posts
Posted: Thursday, January 25, 2007 - 04:46 AM UTC
The next nights work was pretty short and involved attaching the upper portion of the rear panel to the upper hull, fixing the etched detail pieces to the lip portion top and bottom and removing a couple of moulded on bits that dont apply to this version which you can just make out the remains of in this close up, it may only be a 2MP camera but it delivers pretty decent macro shots.
mark197205
Visit this Community
England - East Midlands, United Kingdom
Joined: November 10, 2003
KitMaker: 1,593 posts
Armorama: 1,465 posts
Posted: Thursday, January 25, 2007 - 05:03 AM UTC
Next up was the fenders, as the vehicle i intended to replicate had the rear fenders removed so out came one of my ultra-fine saws and five minutes later the rear fenders were off, as seen here.

The next job was to thin down the rear-most sections of the fenders to a more scale appearance, cue much scraping, sanding, more scraping and even more sanding!
Oh and as well as having no rear mudguards the vehicle also appears to have no rear convoy light fitted, so using the base of the defunct kit part I filled the hole then sanded and scraped the underside to the right thickness.

The next evening I went to work on removing the front mudguards, out came the same fine saw and ten minutes later they were consigned to the rubbish bin.

Also at this point I had fixed a couple of more pieces from the etched set that appear to be some kind of mounting bracket into place.
mark197205
Visit this Community
England - East Midlands, United Kingdom
Joined: November 10, 2003
KitMaker: 1,593 posts
Armorama: 1,465 posts
Posted: Thursday, January 25, 2007 - 05:35 AM UTC
The next session saw the remaining rear fender sections get attached to the upper hull as seen in this shot.

Also affixed was the bracket that the missing rear convoy light would have been attached to.

Moving onto the front end again a couple more tiny brackets were folded and glued in place as was the part with the hole in that I believe to be a support of some description just to the far side of the drivers vision slot.

I also drilled a small hole next to the mount for the front headlight for the cable that isnt represented in anyway, so I used a piece of copper wire.
mark197205
Visit this Community
England - East Midlands, United Kingdom
Joined: November 10, 2003
KitMaker: 1,593 posts
Armorama: 1,465 posts
Posted: Thursday, January 25, 2007 - 06:19 AM UTC
Seeing as I was getting on ok with the PE set I revisited the inside of the fighting compartment to add some more details that arent supplied in plastic at all, namely hinges for the access panels along the back wall and some handles just above them.

A different view.


While I was on a roll I decided to finish up the back plate, assembling the exhausts and fixing them in place, also the small PE brackets were attached along with the radiator drain pipe with its plug replaced with a etched part and its retaining chain. The idler adjustment handles were also replaced with PE parts and fixed into place.
SSJugend
Visit this Community
California, United States
Joined: April 02, 2006
KitMaker: 123 posts
Armorama: 111 posts
Posted: Thursday, January 25, 2007 - 08:25 AM UTC
Lookin good keep it up!!
Pave-Hawk
Visit this Community
Western Australia, Australia
Joined: May 05, 2006
KitMaker: 900 posts
Armorama: 510 posts
Posted: Thursday, January 25, 2007 - 08:34 AM UTC
I have this kit also, and now I'm seriously tempted myself to get some AM parts to go with it having seen how they look.

Keep it up.
trahe
Visit this Community
Virginia, United States
Joined: April 03, 2006
KitMaker: 1,158 posts
Armorama: 950 posts
Posted: Thursday, January 25, 2007 - 11:35 PM UTC
Looks good so far. Keep us posted on your progress.
mark197205
Visit this Community
England - East Midlands, United Kingdom
Joined: November 10, 2003
KitMaker: 1,593 posts
Armorama: 1,465 posts
Posted: Sunday, January 28, 2007 - 03:54 AM UTC
Thanks guys, been away for the weekend so have not been able to get any more pics up, but will have more coming the next couple of days.
FingersEddie
Visit this Community
England - South East, United Kingdom
Joined: April 22, 2006
KitMaker: 745 posts
Armorama: 225 posts
Posted: Sunday, January 28, 2007 - 11:40 PM UTC
Real nice progress, Mark! Its lookin' great.
mark197205
Visit this Community
England - East Midlands, United Kingdom
Joined: November 10, 2003
KitMaker: 1,593 posts
Armorama: 1,465 posts
Posted: Monday, January 29, 2007 - 04:18 AM UTC

Quoted Text

Real nice progress, Mark! Its lookin' great.


Cheers Paul.
mark197205
Visit this Community
England - East Midlands, United Kingdom
Joined: November 10, 2003
KitMaker: 1,593 posts
Armorama: 1,465 posts
Posted: Monday, January 29, 2007 - 04:58 AM UTC
Moving swiftly along, a few more kit parts got added, the grab handles on the engine deck and the raised cover for the radiator top-up, also at this point I started to add a few more of the PE bits and pieces, namely the engine vent cover flaps, their clips for stowed and in use positions. Also added was the 4 curved bits that are towards the left of this picture.


I also decided I had left putting on some of the smaller PE details, namely the clasps for the storage lockers inside the superstructure, all 10 of them, fortunately they was as big a pain in the butt as I had expected and within 15 minutes they were all in place, not quite all perfectly lined up but that was just as likely in the real thing after a bit of use.
mark197205
Visit this Community
England - East Midlands, United Kingdom
Joined: November 10, 2003
KitMaker: 1,593 posts
Armorama: 1,465 posts
Posted: Monday, January 29, 2007 - 06:02 AM UTC
More details added to the glacis plate, this time the brackets for the spare tracks, looking at this shot I think I might have to pull the lower left and right ones off and re-attach them, I dont think they are on straight...


Also this session I decided to have a go at folding up the front fenders which actually weren't that bad either, I must be getting the hang of this PE lark after all.... :-)

Heres a pic of one done, the other waiting to be folded. As you can see they are sat on my latest purchase, the Etchmate 3C which I got from www.Military-Precision.com, I ordered it at almost 11pm on the Saturday night and it was through my letterbox on Tuesday morning, excellent service indeed!


And here they are installed, I've left them pristine for now, will bash them about a bit later on...


A more overall shot now, showing the amount of bits that have been added, also visible here is something thats not mentioned in Eduards instructions at all is the replacement of the handles on the top of the front crew hatches, they supply four of these pieces, two of which are used on the panels in the floor at the back of the fighting compartment but the other two arent mentioned anywhere so once I'd carved off the moulded blob I popped them on in place.

mark197205
Visit this Community
England - East Midlands, United Kingdom
Joined: November 10, 2003
KitMaker: 1,593 posts
Armorama: 1,465 posts
Posted: Monday, January 29, 2007 - 06:33 AM UTC
With the upper hull now mated to the chassis it was time to start to finish off adding the last small details around it before working on the gun itself, the handles on the sides of the rear hull and getting to grips with the tools, of course this means trimming off al the moulded on strap and bracket details from each one before adding the brass replacement...

First, the fire extinguisher inside its bracket...once all the moulded bits were crimmed and sanded away the pe parts were added, this alone has two parts plus the bracket...


And now the towing clevices with their bracket, I'll be gluing the actual clevices into place once the mount is fixed to the hull...


And here we are with them mounted up, getting the bracket to stay glued on the raised treadplate was a cause to break out the gel superglue as the normal stuff just wasnt holding...


And the extinguisher and bracket in its final position...

RichardM
Visit this Community
Quebec, Canada
Joined: August 13, 2006
KitMaker: 383 posts
Armorama: 358 posts
Posted: Monday, January 29, 2007 - 08:23 AM UTC
Very nice progress. All that PE work do add a lot to the kit.
mark197205
Visit this Community
England - East Midlands, United Kingdom
Joined: November 10, 2003
KitMaker: 1,593 posts
Armorama: 1,465 posts
Posted: Monday, January 29, 2007 - 11:25 PM UTC

Quoted Text

Very nice progress. All that PE work do add a lot to the kit.


Thanks Richard, I have to agree it adds quite a bit.
mark197205
Visit this Community
England - East Midlands, United Kingdom
Joined: November 10, 2003
KitMaker: 1,593 posts
Armorama: 1,465 posts
Posted: Monday, January 29, 2007 - 11:47 PM UTC
Continuing on with the tools, up next was the pair of large spanners and the long wrench mounted on the right rear fender...


I had already assembled the jack previously and now I built the retaining brackets, these consist of a single large piece with what must have been over a dozen folds, they certainly taxed my concentration! once they were folded and the jack slipped into place the top retainer was folded down and then the tiny butterfly wing-nuts were added into place, if the folding of the brackets taxed me, these almost sent me totally insane, talk about tiny!
Once these were in place I offered up the complete assembly to the front fender i noteice that the locating points for the kit parts were still visible so using a small sextion of thin plasticard I chopped out some bits about 2mm square and filled the offending spots.
After the glue had dried the complete jack and bracket assembly was fixed into place as seen here.


And heres a more overall view of this side..

mark197205
Visit this Community
England - East Midlands, United Kingdom
Joined: November 10, 2003
KitMaker: 1,593 posts
Armorama: 1,465 posts
Posted: Tuesday, January 30, 2007 - 12:20 AM UTC
And now with this update I am caught up to what I did last night, I didnt have a lot of time so only managed to get one more tool sorted, refering back to my references the vehicle I am building only had one shovel mounted on the right hand side not the two as supplied in the kit, fortunately sprue D has a full set of the norman Panzer IV tools so the single shovel was taken from there, once the moulded on strap was removed and cleaned up I cut off the head as it is replaced in the Eduard set with a more scale thickness one.
I used the handle of my xacto knife to create the rounded shape of the blade and then attached it to the kit handle as seen here.


Then I set to work on the retaining bracket and clasp, the bracket was another test of my patience as it involved several folds some back against themselves and giving it a slight curve to match the shovel, once this was done it was glued to the superstructure side as seen here.


The clasp is the first of about 8 that I will need to assemble and based on this one I may just end up tearing all my hair out before this build is finished! more multiple folds, and multiple chances to totally balls it up lead to sweaty palm symdrome.
Finally after much cursing and the use of two pairs of pointed tipped tweezers here is the clasp with what it will hold.


And finally the last action of the night was mounting the shovel into the clasp and then glueing them both to the hull, making sure the blade was seated squarely into the bracket...


More updates to come as soon as I get more work done....
sarge
Visit this Community
England - North West, United Kingdom
Joined: April 20, 2003
KitMaker: 130 posts
Armorama: 80 posts
Posted: Tuesday, January 30, 2007 - 03:03 AM UTC
love the pe work looking forward to seeing more
mark197205
Visit this Community
England - East Midlands, United Kingdom
Joined: November 10, 2003
KitMaker: 1,593 posts
Armorama: 1,465 posts
Posted: Tuesday, January 30, 2007 - 06:12 PM UTC

Quoted Text

love the pe work looking forward to seeing more


Thanks Sarge, should get some more done today.
mark197205
Visit this Community
England - East Midlands, United Kingdom
Joined: November 10, 2003
KitMaker: 1,593 posts
Armorama: 1,465 posts
Posted: Wednesday, February 07, 2007 - 04:46 AM UTC
Well time for another update on the past few nights of work, which have mainly centred around the superstructure plates, trimming away the unwanted plastic bits and replacing them with nice new shiny PE bits and bobs as seen in these two pics.


I'll get some pics taken of the outside surfaces later, only just realised that I didnt take any so far...
mark197205
Visit this Community
England - East Midlands, United Kingdom
Joined: November 10, 2003
KitMaker: 1,593 posts
Armorama: 1,465 posts
Posted: Wednesday, February 07, 2007 - 04:48 AM UTC
At this point I also assembled the figure from the kit just for fun as I had intended obtaining an AM one anyway but looking at him he doesnt seem so bad after all..

mark197205
Visit this Community
England - East Midlands, United Kingdom
Joined: November 10, 2003
KitMaker: 1,593 posts
Armorama: 1,465 posts
Posted: Wednesday, February 07, 2007 - 05:06 AM UTC
With the completion of the superstructure plates I am coming up to the home straight of the assembly, the gun and its mount.
First up I assembled the main body of the gun itself which is comprised of three main parts, once these were dry I snipped off the plastic barrel close to the point where it meets the main body then trimmed back the remaining stub before drilling the hole to accept the Armorscale metal barrel.
Here are the two barrels side by side for comparison.


As this image shows there is no contest between the two in terms of detail.

And here is a more overall shot of the two.


Once the metal barrel is fitted I moved on to the mount itself, this is a kit in tiself, the level of detail is outstanding and almost falls together, why Tamiya didnt release it as a stand alone kit I dont know, it would be a perfect companion to the already available 3.7flak kit.

And here is the mount, it is made up of about a dozen parts even at this early stage to allow a high level of detail to be incorperated.


And yes, I know ther are two mould release marks visible on the lower part of the flat panel, but the gun barrel mounts along there so it will be invisible.
And here is the other side, apologies for the soft focus in this shot, for some reason my cam focused on the bottle of glue behind and not the mount itself...


More updates to follow as things move along....
RichardM
Visit this Community
Quebec, Canada
Joined: August 13, 2006
KitMaker: 383 posts
Armorama: 358 posts
Posted: Wednesday, February 07, 2007 - 06:05 AM UTC
Nice update. This kit is really something it seems. Make we want to start mine

That AM barrel is indeed way ahead of the original one and will add tremendously to the overall look of the beast. Speaking of barrel, aren't the two tube on the side panels replacement barrels? If so I would suggest to drill them at both end.

 _GOTOTOP