1⁄35Stalingrad Dio - 1942
19
Comments
background
I got the idea for a Panzer mk3j in a recovery area from a photo that I found in the Concord Publication, The Panzerkampfwagen 3 at War. I wanted to add a J to my collection as I have an L as well that will be started soon. I also wanted the earlier J style engine deck rather than the late one which makes it look more like an L.Kits used
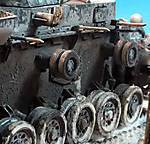
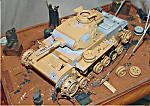
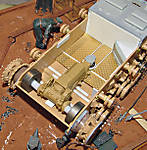
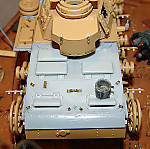
The two kits used were a Tamiya Mk3L and a Dragon Mk3 Stug F. I "borrowed" the rear deck from the stug kit which then had to be married onto the Tamiya one. This fit then required a reshaping with modeling clay and putty on the rear end to backdate and match the engine deck. Aber brass was then added and i took the guards off as in the photo. I had to also drilled out the brake cooling air intake vent as I had removed the cover. The model Kasten final drive housings where used as these had better deatil than the kit offerings [brown in photo].I also added some scratch stuff like the scalloping under the guards and interior stuff that wasn't Aber but needed to be there to fill in when you looked through the open hatch. The interior detail isn't all exact but I wanted an interior that would fill in the areas seen through the open hatch's.Painting
The tank was always going to be in a winter camo scheme but I did like it in German grey which made it hard to cover up. The tank was first coated in Tamiya German grey and sealed, then it got a light white coat over maskol chips, then a more intense coat in patch's. I then did some hand chipping as well as adding some nice half frozen mud from Mother Russia. The mud was a mix of Hudson and Allen mud with some Mig pigments Russian earth all mixed together in white glue.Finally
After completeing the build of the tank, I then went about creating the ground work and tracklink positioning etc. and positioned the tank on the base to test fit. At this point everything has been glued down except the tank itself. The figure is a Hornet white metal one and the accessories are varied from Italieri to Verlinden.Comments
Ian ,
Hats off to you , this is a fine example of the Modellers craft beautifully executed. Your diorama reminds me of a section in Antony Beevor’s book "Stalingrad" where the Russians advancing during operation Uranus came across what appeared to be a "town" on the Steppe out side Stalingrad. It was not marked on any map. It transpired the "town" they saw was a junk yard of deserted and frozen vehicles of all descriptions abandoned by the Sixth Army.
Lovely work thanks for posting the pictures. I will do all my modelling from the top of a step ladder , since the Bar keeps getting raised!
Jerry
OCT 03, 2006 - 08:19 PM
Excellent job. Like the others, going through the photos was an experience. Detail, detail, detail. This kind of work is what keeps me coming to Armorama.
Cheers
OCT 04, 2006 - 02:30 AM
Thank you all for the great response to my diorama. I am glad you have enjoyed the detail.
Jesper,
whitewash is achieved through multi -layering with maskol and hand painting as described in the write-up. Just make sure that you apply a good dark basecoat first ,then slowly detail each layer with a varying shade of the whitewash, going lighter as you get to the top.
Mig,
thanks, much appreciated.
love the pigments, fantastic product.
OCT 05, 2006 - 07:54 AM
Jerry,
thank you. I have read Bevors book on Stalingrad, as well as the Berlin one and found them very inspirational so maybe that had an effect
very good read- i couldn't put either one down.
OCT 05, 2006 - 07:58 AM
Gday Ian
That looks a treat mate
The snow is the clincher for me... It does really feel cold to look at it, and everything is tied in well Great job!
Cheers
Brad
OCT 05, 2006 - 01:55 PM
Really the diorama looks...anything superfluous,hopelessness of the german tankman is well transferred.Thanks.
OCT 06, 2006 - 01:33 AM
Hi Ian,
Great work on this dio! I do have one question for you. Can the tank's interior be viewed?
OCT 06, 2006 - 05:05 PM
Sean,
the interior can be viewed through the open hatch's. The only photo's I have are the ones included in the feature set.
Actually, on that point I accidentally sent in a photo that was not from this tank. The shot is the one of the rear exhaust underside, that shows the towbar and the wire cover under the rear plate. Row 3, last on the right. This is from my late model Stug 3 I have in progress - details definately don't match a 3J - sorry about that.
OCT 07, 2006 - 09:54 AM
Copyright ©2021 by Ian Hill. Images and/or videos also by copyright holder unless otherwise noted. The views and opinions expressed herein are solely the views and opinions of the authors and/or contributors to this Web site and do not necessarily represent the views and/or opinions of Armorama, KitMaker Network, or Silver Star Enterrpises. All rights reserved. Originally published on: 2006-10-02 00:00:00. Unique Reads: 36148


