

1⁄35Building the Sd.Kfz. 234/2 Puma
13
Comments
the interior
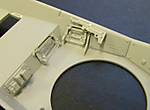
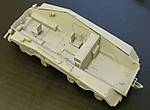
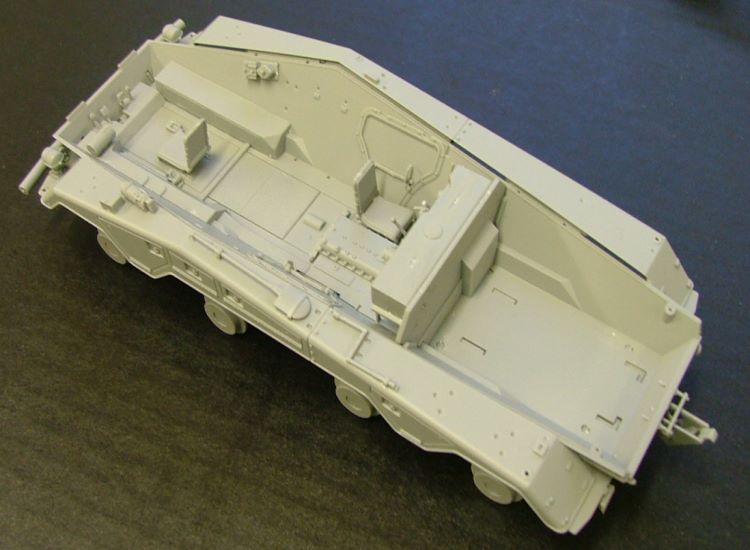
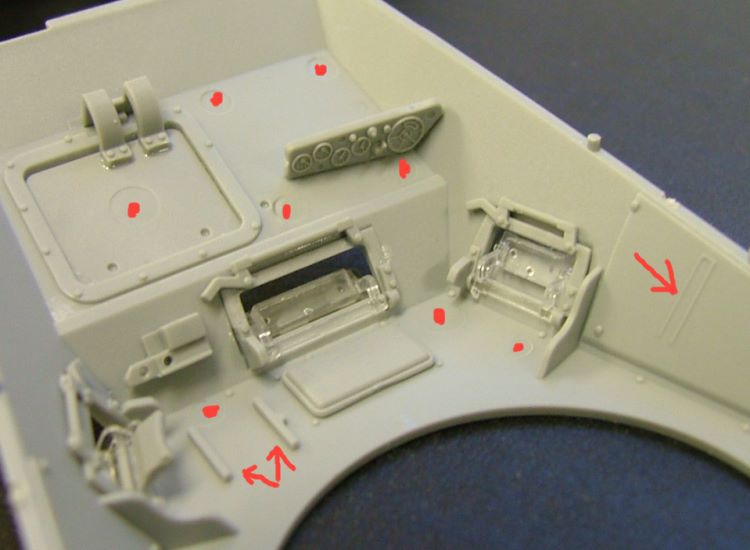
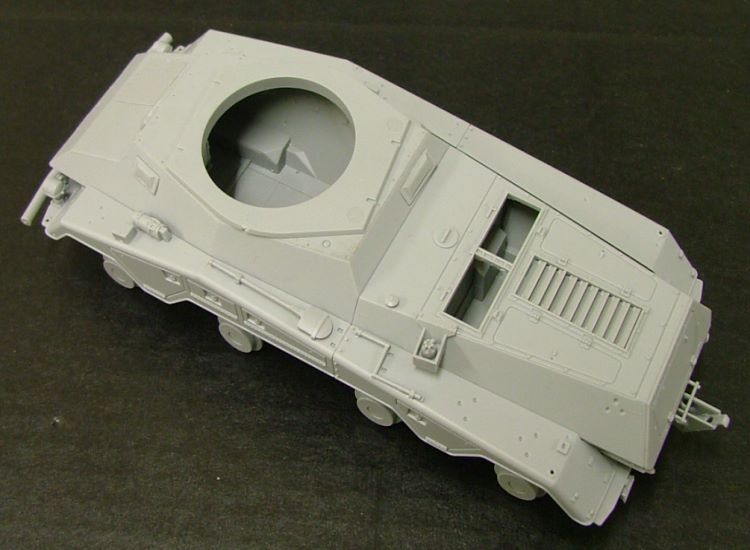
For some inexplicable reason the instructions start with the suspension, interrupt this with the lower hull interior, to go back to the suspension before moving on to the upper hull interior detail. The interior is quite nice, rather well detailed and appointed, but I do wonder why Dragon makes such an effort with an interior of which hardly anything can be seen after the model is finished, but does not include ammunition racks which are clearly visible through the turret hatches. There are a number of position points and key-holes which are not utilized, including where the ammo racks should be, so why no racks? The interior goes together fine, there are no fit issues, and the instructions are clear. Step 6/7 provides a handy overhead view to aid in the correct orientation of the various gear levers. A nice touch indeed. The vision blocks are provided in clear plastic and with some care can be made workable. They are however quite fragile and I would suggest gluing them either open or closed. In stark contrast with the hull interior the turret has no detail whatsoever, apart from the nice breech assembly. So unless you plan on adding a crew I would leave the hatches closed. The interior parts that have been provided are very good. I am particularly impressed with the internal welds, a detail often overlooked in vehicle interiors. If you want to super detail the interior, this is an excellent starting point.the exterior
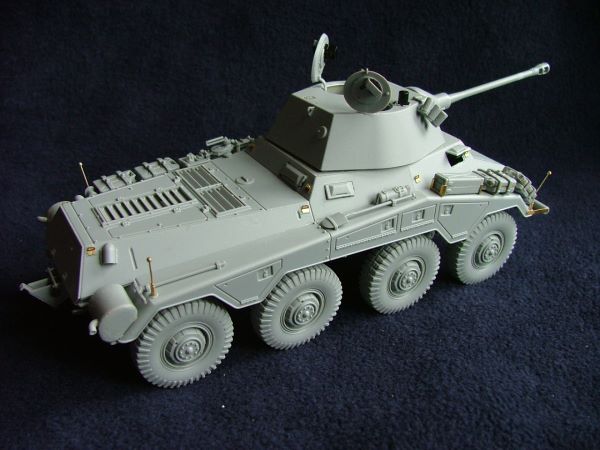
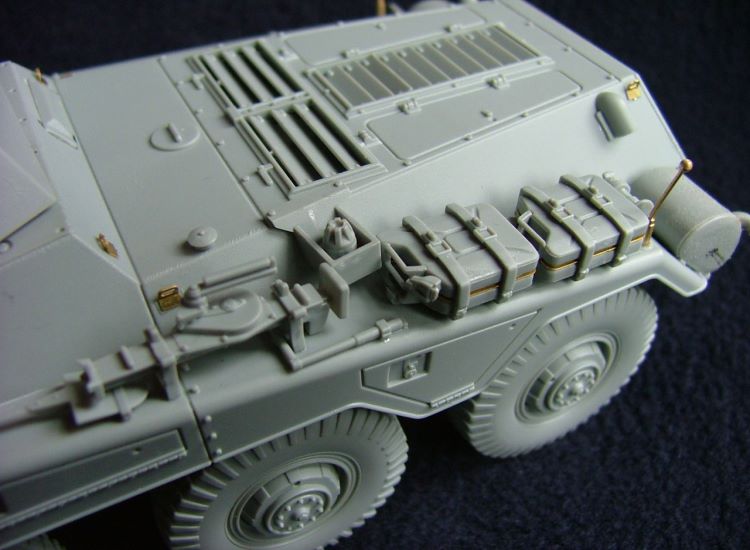
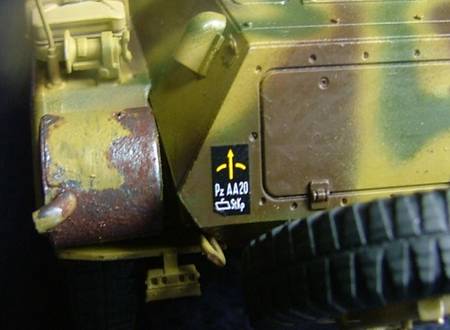
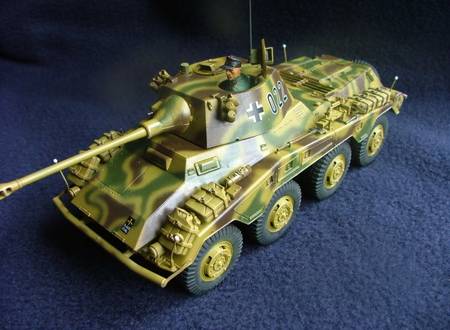
The suspension and interior may be as good and detailed as they are, but the most prominent feature of the model is of course the hull and stowage. And the high quality of the kit continues here, with some superb surface texturing, subtle weld detail and decent tool stowage. The instructions are clear enough again, but get a bit busy in step 19 and 20 so care is needed to assure correct placement of the tools and jerry cans. The instructions indicate that the jack can be constructed with the leg either retracted or extended, but you must retract the leg, as it will foul the aerial mount if extended. The jerry cans are very nice, they have the Photo-etch insert to depict the central seam, very nice handles and caps, but no stamped markings. The exterior is where the small amount of provided Photo-etch is used. The tie-down loops along the hull can be added either in plastic (B1) or etch, and there are two etched brackets for the mudguard mounted extra ammunition box. The corner indication poles are provided in plastic (TF7 and TF8) and in beautiful brass poles, but if you use the brass poles the instructions forget to show that you have to bend them, a little jig for which is provided on sprue TF, next to the plastic poles.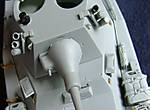

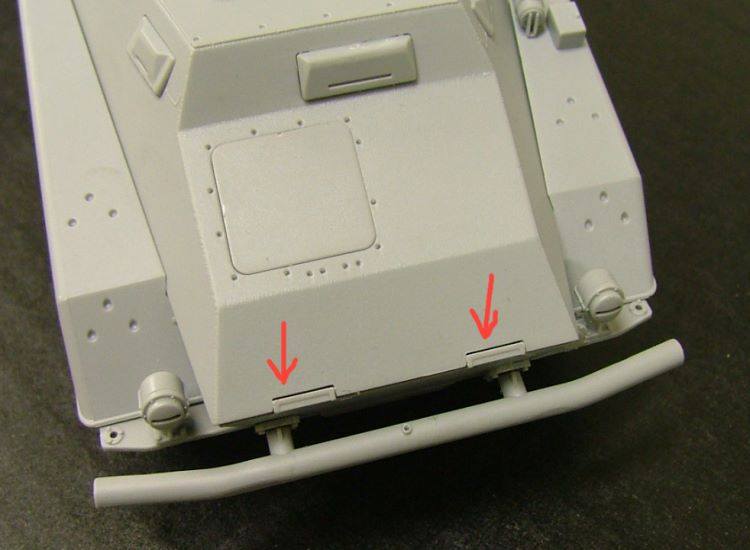
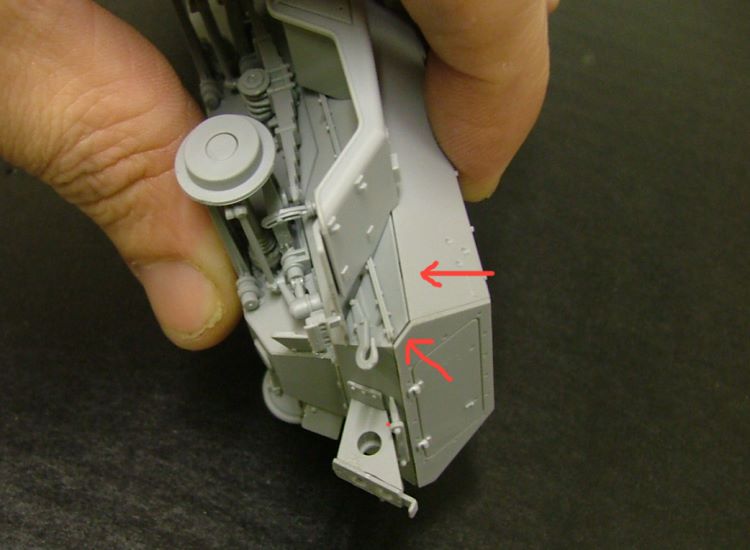
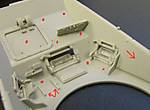 knoc-out marks (dots) and unused moulded position detail


About the Author


Comments

Nice review! Does anyone know if the Italeri kit has vinyl tires?
Jeff
OCT 13, 2006 - 02:20 AM

No it doesn't
Thanks for the review Henk. I built the Italeri kit last year and really want to try this now.
OCT 13, 2006 - 02:25 AM

Thanks guys, I'm glad you like it. Mind you, the pleasure was all mine..
It's a great kit, sure it has some issues, but then most kits have. Yep, the co-ax is one of them. But it does have some very nice surface textures.
The main thing is that it looks good, and builds well. It scores on both counts.
Cheer
OCT 13, 2006 - 08:46 AM
The spray booth (office) has been running overtime, i have not slept, the paperwork is behind, I have lost all concept of days and weeks (been working nightshifts 7 nights a week... ), but progress is been made.
Camo is done, coat of klear, decals are on (absolutely wonderfull, not a drop of setting solution needed ) now let the weatheringbegin.
And that's where my dilema starts.. how much? I don't want to over weather it, as it is a good looking machine as is. But than again, you just know how good it looks with a winter camo....
 Cheers
Henk
Cheers
Henk
Cheers
HenkOCT 27, 2006 - 08:48 PM

Beautiful work Henk! I love the way you have the paint flaking on the exhaust.....brilliant!
Vinnie
OCT 27, 2006 - 09:18 PM

Sharp work with the camo Henk! In terms of weathering, I'd recommend you run with whatever setting/environment you think it would belong in (in terms of a base since you've already got the figure!) and apply accordingly. :-) How's that for a non-answer?
OCT 27, 2006 - 09:39 PM
Cheers Vinnie, a compliment from the master is a compliment indeed . I'm not yet finished with the exhausts, but the 'flaking paint effect is working well. I'm going for a 'fairly new vehicle' look, so the exhaust would not have completely deteriorated (or replaced) yet.
Thanks Bill, I've not yet decided on a base, or setting, other than that it will have to go on a base. The vehicle on it's own just doesn't do itself justice, if you know what I mean. The figure is just for try-out, the loaders hatch is also still loose, as I may go for two figures. One with binoculairs scanning the distance, and one checking the map. I somehow feel a very cold and miserable Autumn morning, with loads of dead leaves and a rutted track with muddy puddels would really show this vehicle at it's best...
Cheers
Henk
OCT 27, 2006 - 09:59 PM
Nice build Henk, I like the way the paints coming along too. sad to hear about the ammo racks though. anyone have a photo of them for scratch building purposes?
OCT 28, 2006 - 01:36 AM


Dear Sergeant Major sir!
I am in process of finishing my Puma and I am about to close the top and the bottom hull then it occurred to me that there is no radio in the instruction but there are two antennas to fit to it. A radio set is in the sprue but the parts plan says it is not for use. Why the antennas and no radio set in the interior?
Thanks,
Noli
FEB 23, 2007 - 05:43 AM
Copyright ©2021 by Henk Meerdink. Images and/or videos also by copyright holder unless otherwise noted. The views and opinions expressed herein are solely the views and opinions of the authors and/or contributors to this Web site and do not necessarily represent the views and/or opinions of Armorama, KitMaker Network, or Silver Star Enterrpises. All rights reserved. Originally published on: 2006-10-11 00:00:00. Unique Reads: 47869

WEB HOSTING BY


Copyright ©2021 Armorama and Kitmaker Network, a subsidiary of Silver Star Enterprises
All Rights Reserved. Please read our Conditions of Use and Privacy Policy.
All Rights Reserved. Please read our Conditions of Use and Privacy Policy.