1⁄35Updating the StuG III G

Introduction
This build-up follows on the heels of the In Box review of the Stug III G "Smart Kit" and Cyber Hobby update sets here on Armorama. Cyber Hobby produces 2 update sets for Dragon's Stug III G Smart kit and are the focus of this update.
Construction: Set #1
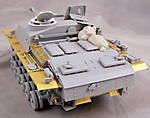
This set includes photo etch fender replacements and brass and photo etch smoke grenade launchers as well as a p/e replacement for the muffler guard plate, which is a nice welcome compared to the thick Dragon part. The assembly of the fenders went without issues at all although it would have been a wonderful thing had Cyber Hobby included
photo etch tool clasps in this set, since the Dragon kit does not. You end up with this nice brass fender, with plastic parts attached, unless you have some spares or buy another p/e set! The main fender is all one long part, with the small details coming as seperate parts.
The smoke grenade launchers are a nice addition and look exactly like the ones provided in Dragons Tiger I Initial #6252. These ended up being unused since the unit I modeled did not have these mounted.
The only drawback I would point out is that the parts are very thick for p/e and even with my
EtchMate it was still rather difficult to get the folds made.
Construction: Set #2
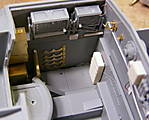
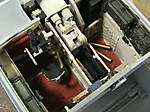
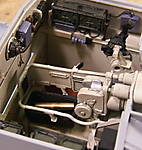
This set includes 1 aluminum barrel, 2 brass shells, two MG sprues which inlcudes the needed MP44s, and 1 more sprue with the ammo pouches. It also includes the spent shell basket which you would think should have come with the Dragon kit? You also get a small decal sheet which allows you to choose from 3 different units, none of which however are specifically identified. There is also 1 photo etch fret which provides the ammo racks,gas mask canister mounts,front interior wall, and the mounts for the 2 MP44s.
All the details in the set were excellent. The only difficulty I had was on the ammo racks due to the absence of fold lines to go by. You can only guess where to make the folds. It does give you an idea of where, but the line is about 3-4 mm wide. I decided to make the fold right down the middle, and while not exactly right, it was pretty close. Once installed it wouldnt be noticable anyway.
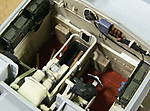
The rack assemblies A & D are supposed to be foldable for the crew to access the forward ammo rack however the instructions dont show this exactly, so I checked the Squadron Walk Around as a reference since it shows this. Since I was adding the ammo racks and MP44s, I decided to take it a step further and add more interior details which would be seen from the open hatches. Lastly, I also added the wiring for the radio sets and the updates were complete.


