

1⁄35Varnish Weathering
15
Comments

Introduction
One of the major tasks for armor modelers today is differentiating details from one another on the scale vehicles we construct and paint. Having a good understanding of the techniques available to add contrast to visually break up a model is a major factor towards achieving a self-rewarding finish. Some of the more obvious techniques that we can use to help us perform this task are different tones of washes, filters, different colors of oils used for fading, various amounts of dust, and even chipping as well. There are also some more restrained techniques we can use that are also quite effective in regards to helping differentiate details. One of those subtle techniques is the use of matte, satin, and glossy finishes which will be the focus of this article.Adding Contrast
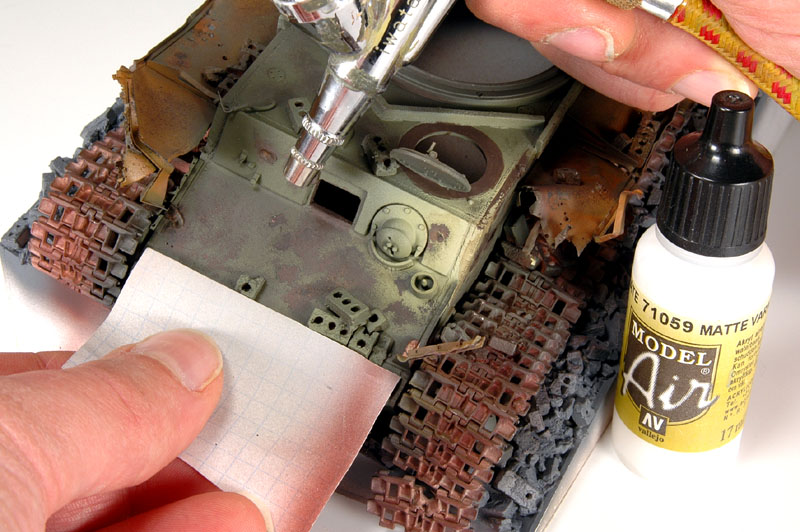
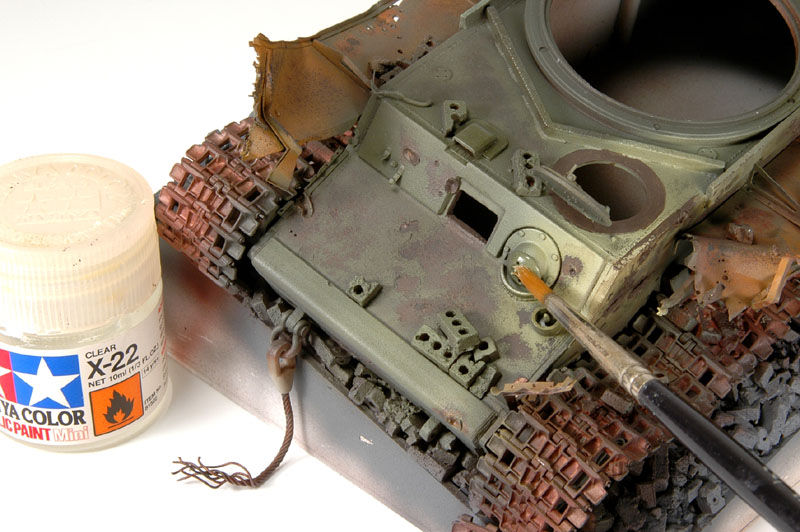
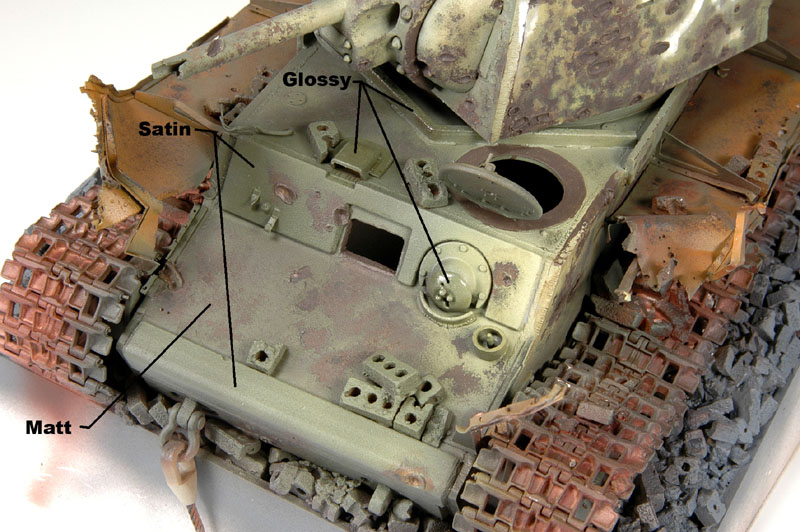
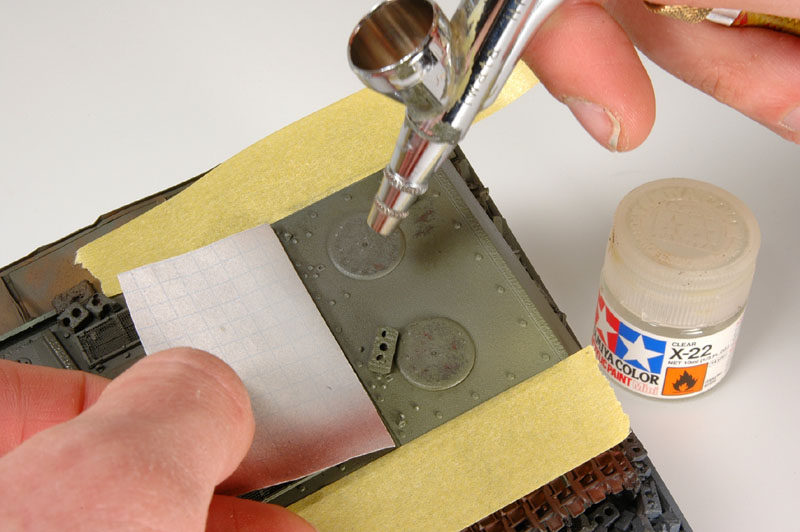
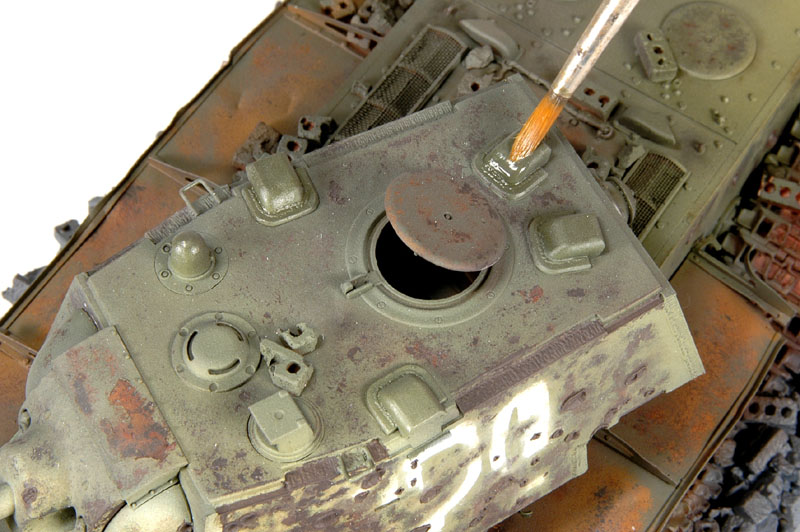
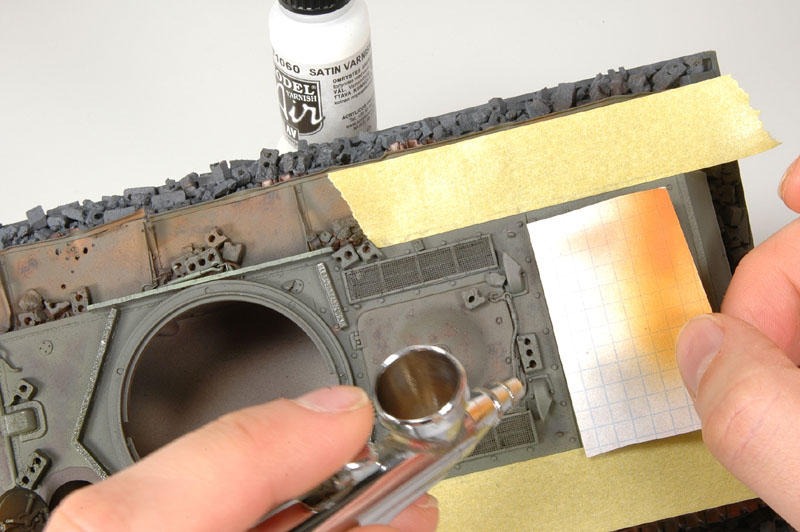
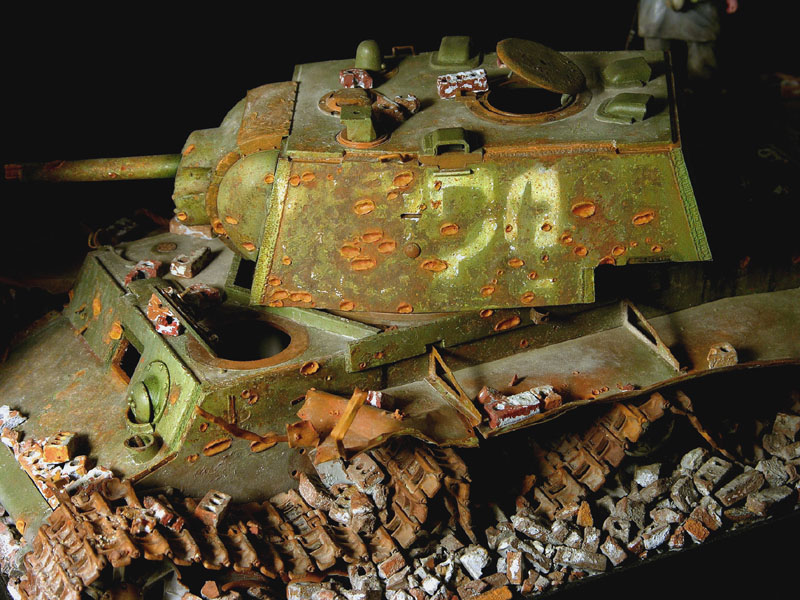
To start, lets take a look at the 1st photo of a Krupp Steyr Waffenträger. One of the key factors for me in choosing it to construct and paint was the finish it would require. In the black and white photos it was pointed out to me that the prototype featured a matte primer red finish with a rather large satin yellow gun with a faded three-tone camouflage. The small red turret and chassis of the vehicle contrasted very nicely with the large bright dusty used appearance of the 8.8cm L/71, most likely taken from a King Tiger tank. What also drew my attention was the matte appearance of the primer red chassis in contrast with the satin-used appearance of the large gun. This difference actually sparked my interest much more than that of the actual subject. Along the same lines, I recently finished another subject, a knocked out KV-1 M42, which required some different painting techniques. I used different tones in combination with lighting to draw the attention to one area of the model. I also used a number of different effects such as various toned washes, oils, rust colors and dust to subtly bring attention to the impacts concentrated on the turret and hull sides. Another technique I used involved different varnishes to help subtly add contrast between different details as I will now explain. It was pointed out to me about a year ago that, when viewing a photo, items that are closer to the point where the picture was taken will display a glossy or satin appearance if they contain them. On the other hand, items that are further away will always take on more of a matte appearance regardless if they are satin or glossy. You will see in the 2nd, 3rd, and 4th photos that I applied a matte varnish to the lower parts of the upper hull while adding satin varnish to the details closer to the camera such as the armor cladding. A gloss finish was applied to the MG armor to help differentiate that detail from the satin steel cladding. As the 5th photo demonstrates, using different varnishes with other techniques such as diverse shades of the base color can also add depth to a model. In this case I am using a satin varnish combined with a lighter shade of green, adding a bit of contrast to the darker opposite side of the model. At this point the effects on this detail look rather excessive but will be less evident after the washes, chips and earth-tones are applied. Adding matte dust around satin and glossy details is also extremely effective in producing contrast. In the 6th-9th photos are some examples of how you can apply the different varnishes, adding contrast between the various parts of the model. On the rear plate, a coat of gloss was applied first. After the gloss had time to set, I simply brushed a matte varnish onto the details such as the rear access covers.Summary
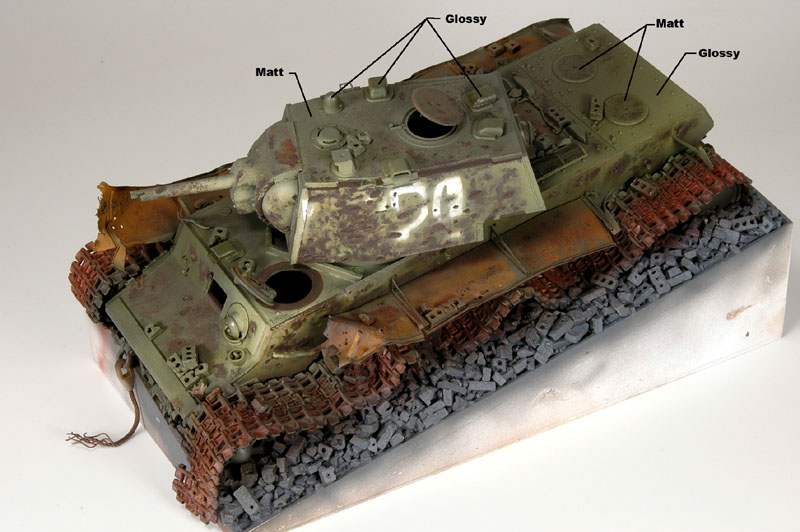
In the final photo of the knocked out KV-1 we see a number of different effects along with the lighting that adds contrast to the finished model. Although very subtle, the different matte, satin and glossy varnishes are contributing to the contrast between various parts. I strongly recommend that you at least apply these different varnishes to a few various details on your next piece. It is both easy and a lot of fun.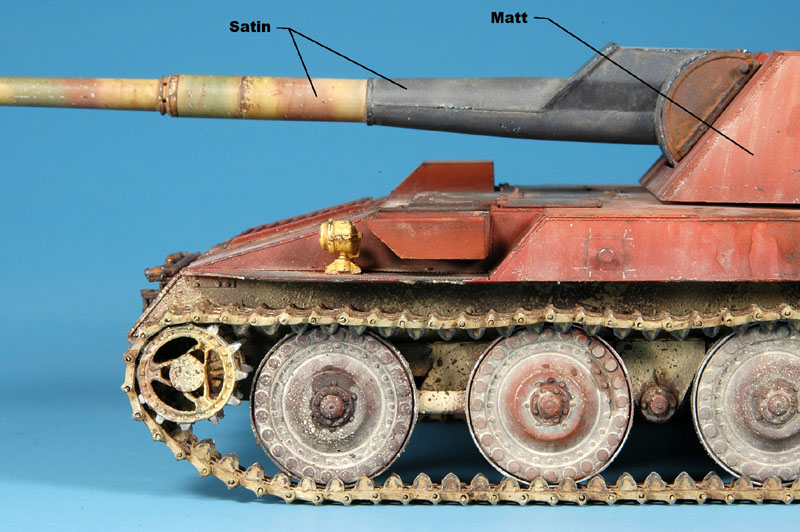

About the Author


Comments

You know, I've been using that technique on the under-chassis of car and truck models for some time and it never occured to me to try it on my armor kits!
Thanks for sharing!!!
MAY 02, 2007 - 02:09 AM

It really is a great feature - too often we get sidetracked by using this layer or other without considering the use of varnish as a weathering medium - Thanks Adam!
MAY 02, 2007 - 05:06 PM

Interesting indeed. I will definitely have to think and consider this type of thing more often.
MAY 02, 2007 - 05:42 PM

This is a very intriging article. I love how the different textures/finishes give depth to the overall presentation of the model, and that knocked out KV 1 is inspiring. Very well done, Adam, and thanks for sharing.
MAY 02, 2007 - 06:54 PM

Hello again guys and thanks for your time.
Konstantin, sorry about the confusion. Let me try to be clearer. First I airbrushed a coat of red-brown acrylic paints onto the fenders and let them dry. I think they were Tamiya paints. Then I airbrushed some more light rust colored acrylic paints randomly over the fenders and let them dry.
Then I airbrushed some random areas of green acrylic paints over some of the rust (on the fenders) and let that coat dry as well. Finally I blended everything using a mix of rust colored oils, pigments and Humbrol enamels over the acrylics. I thinned and further blended the enamels, oils and pigments with thinner.
Does this help you a bit more? Please let me know otherwise and thanks again.
Plasticat, Jim, Scott and of cource Armorama, thanks again for your support.
Sincerely
ANPW
MAY 03, 2007 - 12:17 AM
Sorry Jim
I did not see you down here.
Thanks for the posting. I am glad that you like it.
Sincerely
ANPW
MAY 03, 2007 - 12:19 AM

Yep. It's clear as "Absolute" now Can't wait till I try some of these techniques on my new build. Thanks for sharing Adam!
MAY 03, 2007 - 12:51 AM
one h*ll of a model there, I'm sooo full of envy
And most of all, the bricks with hole!! you make'm urself?
It's brilliant, didn't know they had them back then.
Greetz Pit
MAY 03, 2007 - 01:29 AM

Adam
Congratulations on a well executed piece. The interplay of the rust against the green really did a lot for the whole scene. There is so much going on!
The idea of using various glossiness is interesting. i have not personally tried it in this manner but definitely warrants an attempt methinks. Great article.
CK
MAY 04, 2007 - 04:42 PM

Copyright ©2021 by Adam Wilder. Images and/or videos also by copyright holder unless otherwise noted. The views and opinions expressed herein are solely the views and opinions of the authors and/or contributors to this Web site and do not necessarily represent the views and/or opinions of Armorama, KitMaker Network, or Silver Star Enterrpises. All rights reserved. Originally published on: 2007-05-01 00:00:00. Unique Reads: 38737

WEB HOSTING BY


Copyright ©2021 Armorama and Kitmaker Network, a subsidiary of Silver Star Enterprises
All Rights Reserved. Please read our Conditions of Use and Privacy Policy.
All Rights Reserved. Please read our Conditions of Use and Privacy Policy.